To avoid these ads, REGISTER NOW!

New project

cwh

Well-known member
Joined
Dec 10, 2012
Messages
48
Location
Anchorage, AK
As usual, cool project. And nice boat :)

Glad to see someone got some of those vises... was out of town for the end of the auction or I would have grabbed at least one.
 
To avoid these ads, REGISTER NOW!
OP
R

royce

Well-known member
Joined
Jun 22, 2014
Messages
3,102
Location
fairbanks ak
I think your cast table may be from an old metal planner. I can certainly relate to the project drift syndrome. Mike

Thanks,
And I'm blaming this latest drift on my darling bride, a couple planters and a privacy fence on her deck.
Royce
 

Attachments

  • IMG_0193.jpg
    IMG_0193.jpg
    153 KB · Views: 258
  • IMG_0191.jpg
    IMG_0191.jpg
    151.6 KB · Views: 271
OP
R

royce

Well-known member
Joined
Jun 22, 2014
Messages
3,102
Location
fairbanks ak
This thread keeps getting better! Royce you have awesome equipment from what I can see so far, amazing shop. keep up the good work, I'm looking forward to seeing more

Thanks jake,
The shop is coming along slower than I would like,but I'll just keep nibbling away at it, between other projects.
Royce
 
OP
R

royce

Well-known member
Joined
Jun 22, 2014
Messages
3,102
Location
fairbanks ak
As usual, cool project. And nice boat :)

Glad to see someone got some of those vises... was out of town for the end of the auction or I would have grabbed at least one.

Thanks cwh,
The boat was good fun for the kids and grandkids.
It was made with 1"pvc stringers and willow ribs lashed together with tywraps and skun with tarps and duct tape.
It lasted 3 seasons before the willow rotted.

I was glad to be able to get the vises and they were all in surprisingly good shape.
Royce
 

drivesitfar

Well-known member
Joined
Oct 23, 2013
Messages
35,991
Location
Pacific Northwest
Royce: interesting use of an old tool's box and guessing you aren't the first person to do that.

I really like your iron railing and it must have taken you a lot of work to make it. if you want to make another one let me know the pipe size and I might have some fittings to ship you that I have sitting on a shelf.

I have to ask because I looked at your wood fencing and couldn't tell how you attached it. can you take a few pictures and show us? also looks like MAMA was wanting you to maybe move or clean up your stuff so she wouldn't have to look at it from the deck and you found a better options. WELL DONE SIR because you dodged that bullet nicely.

cheers
 

turbowoodworker

Well-known member
Joined
Mar 18, 2012
Messages
3,519
Location
Apex NC
Royce,
I'm seeing a lot of cool woodworking stuff in the background. If your wood skills are any where close to your metal skills, I can't wait for some more pictures.

Rick
 
OP
R

royce

Well-known member
Joined
Jun 22, 2014
Messages
3,102
Location
fairbanks ak
Royce: interesting use of an old tool's box and guessing you aren't the first person to do that.

I really like your iron railing and it must have taken you a lot of work to make it. if you want to make another one let me know the pipe size and I might have some fittings to ship you that I have sitting on a shelf.

I have to ask because I looked at your wood fencing and couldn't tell how you attached it. can you take a few pictures and show us? also looks like MAMA was wanting you to maybe move or clean up your stuff so she wouldn't have to look at it from the deck and you found a better options. WELL DONE SIR because you dodged that bullet nicely.

cheers
Thanks Drives,
That is mighty kind of you to offer some fittings up.
The fence boards are fastened with self drilling tec screws.
I am blessed to be married to someone who tolerates my junky ways.
The fence is truly for blocking the view to the neighbors place.
Royce
 
OP
R

royce

Well-known member
Joined
Jun 22, 2014
Messages
3,102
Location
fairbanks ak
Royce,
I'm seeing a lot of cool woodworking stuff in the background. If your wood skills are any where close to your metal skills, I can't wait for some more pictures.

Rick

Rick,
I'm a hack with wood, but that doesn't dampen my desire to create things and sharpen my skills,whenever I can.
My next big wood project is a 18' sailboat, but I don't know when I''ll have time to get it off the ground, hopefully this fall.
Thank you
Royce
 
OP
R

royce

Well-known member
Joined
Jun 22, 2014
Messages
3,102
Location
fairbanks ak
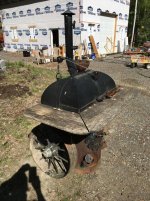
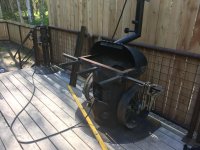
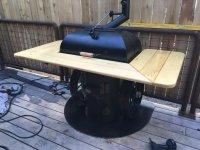
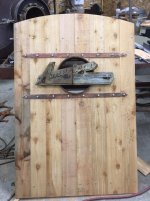
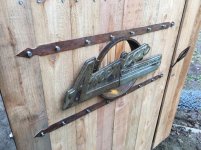
Honey, would you make a new handle for the BBQ, to replace the rotted and broken one?

You bet, dear.

You know the other woodwork on it is also getting pretty poor, do you think you could replace that too?

Heck yea.

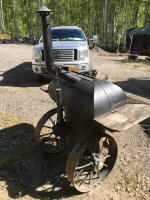
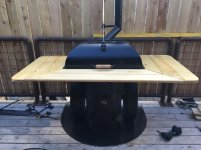
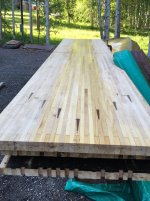
You know, I've always thought that wood around it should wider, could you put wider boards on it?

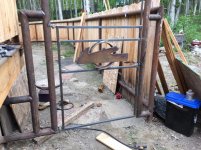
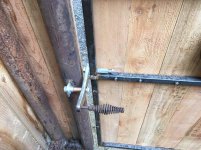
To do that, I would need to cut the angle iron supports off and weld longer ones on.

Yea, but that's not that hard, is it?

No, consider it done.

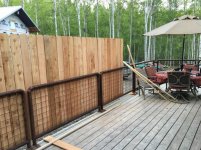
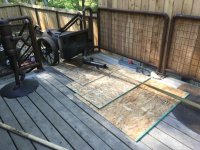
Boy, it sure would be nice if we could put it up on the deck, so we don't have to go up and down the stairs to cook, wouldn't it?

Yes, but it probably weighs 800 pounds and I don't think the deck could support it.

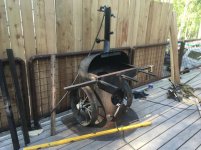
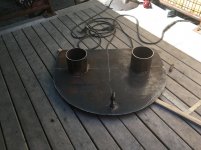
Oh, that's too bad, you are so smart and a great builder, couldn't you just beef it up enough to support it?

Well, when she put it that way, how could I say no?

Again, she led me right down the path she needed me to go.
She's magical and I'm her biggest fan.
Royce


.
 

Attachments

  • IMG_0198.jpg
    IMG_0198.jpg
    148.5 KB · Views: 324
  • IMG_0197.jpg
    IMG_0197.jpg
    148.7 KB · Views: 316

drivesitfar

Well-known member
Joined
Oct 23, 2013
Messages
35,991
Location
Pacific Northwest
Royce: WOW that BBQ is an interesting looking guy. with all the cool upgrades you are planning I bet it will look even better. i'm guessing re supporting or adding a few beams to the deck might not be as big of an issue as getting that big BBQ up on the deck. or can you roll it in the front door and out onto the deck?

Did you make the original changes to it to make it a BBQ or is that all original because it looks like an old pot belly stove?

so I guess this is how some of us get so many projects started and some left unfinished. you had great intentions to start a stairway but had to do a few projects to get that going then you bride says she'd like the BBQ on the deck and a whole new TO DO list starts.

best of luck and i'm sure you'll GET R DONE as you have time.
 
OP
R

royce

Well-known member
Joined
Jun 22, 2014
Messages
3,102
Location
fairbanks ak
Royce: WOW that BBQ is an interesting looking guy. with all the cool upgrades you are planning I bet it will look even better. i'm guessing re supporting or adding a few beams to the deck might not be as big of an issue as getting that big BBQ up on the deck. or can you roll it in the front door and out onto the deck?

Did you make the original changes to it to make it a BBQ or is that all original because it looks like an old pot belly stove?

so I guess this is how some of us get so many projects started and some left unfinished. you had great intentions to start a stairway but had to do a few projects to get that going then you bride says she'd like the BBQ on the deck and a whole new TO DO list starts.

best of luck and i'm sure you'll GET R DONE as you have time.

drives,
I won't be adding any beams, but will be adding a couple columns onto a existing beam and capping that with a plate for the cooker to sit on.

You are right, getting it up on the deck is the tricky part, there is no way to do it without going up stairs.

It is not a converted stove, it is built from scratch out of 24" pipe and a bunch of other junk.

As to all the other projects, I say "endeavor to persevere "
Anybody remember that quote?
Thanks
Royce
 
OP
R

royce

Well-known member
Joined
Jun 22, 2014
Messages
3,102
Location
fairbanks ak
Worked on the BBQ today and made good progress.
 

Attachments

  • IMG_0213.jpg
    IMG_0213.jpg
    145.4 KB · Views: 306
  • IMG_0211.jpg
    IMG_0211.jpg
    143.1 KB · Views: 248
  • IMG_0205.jpg
    IMG_0205.jpg
    145.8 KB · Views: 227
  • IMG_0203.jpg
    IMG_0203.jpg
    140.9 KB · Views: 232
  • IMG_0202.jpg
    IMG_0202.jpg
    146.3 KB · Views: 228

drivesitfar

Well-known member
Joined
Oct 23, 2013
Messages
35,991
Location
Pacific Northwest
Royce: that BBQ looks so much better with that new base on it. congrats on getting it up on the deck too.

I really like how the BBQ is set up now and that other old steel piece with the round base looks pretty cool too.

great work and whatever project you seem to do they are all turning out nicely.

WELL DONE SIR!!
 
OP
R

royce

Well-known member
Joined
Jun 22, 2014
Messages
3,102
Location
fairbanks ak
Whoops the pics did not attach.
 

Attachments

  • IMG_0228.jpg
    IMG_0228.jpg
    139.1 KB · Views: 259
  • IMG_0223.jpg
    IMG_0223.jpg
    139.8 KB · Views: 266
  • IMG_0215.jpg
    IMG_0215.jpg
    142 KB · Views: 264
  • IMG_0222.jpg
    IMG_0222.jpg
    142.1 KB · Views: 282
  • IMG_0217.jpg
    IMG_0217.jpg
    143.5 KB · Views: 270
  • IMG_0225.jpg
    IMG_0225.jpg
    144 KB · Views: 247
OP
R

royce

Well-known member
Joined
Jun 22, 2014
Messages
3,102
Location
fairbanks ak
So, I built a fence last year and cobbed together a temporary gate to keep the pups corralled through the winter.
I have not forgot about the stair and boom projects, but the attraction to building a gate could be resisted no longer.
Anyhow here is a before pic and couple of the framing, gate to follow.
 

Attachments

  • IMG_0230.jpg
    IMG_0230.jpg
    149.7 KB · Views: 178
  • IMG_0231.jpg
    IMG_0231.jpg
    152 KB · Views: 189
  • IMG_0232.jpg
    IMG_0232.jpg
    150 KB · Views: 194

drivesitfar

Well-known member
Joined
Oct 23, 2013
Messages
35,991
Location
Pacific Northwest
Royce: i'm still here watching you do your magic. WELL DONE and looks like a few boards and another TO DO will be scratched off the list.

thanks for the pics of the BBQ because you did an AMAZING JOB spiffing it up and also man handling it up to the deck.

keep up the great work and try to take as many pictures as you can and post them when you have time.

cheers
 

LXCam

ALLIANCE MEMBER
Joined
Apr 23, 2013
Messages
19,075
Location
AZ
That BBQ is badass. Excellent job on all your projects. Btw, what paint did you go with on that baby.
 

manwithtools

ALLIANCE MEMBER
Joined
Aug 24, 2015
Messages
13,639
Location
Lebanon, TN
Hey Royce loooooook.................a bunny!!


That should keep ya occupied for a couple months


:D

Not a rabbit, but it's a "Squrriel"

I love the movie "Up" with that line....
squirrel.jpg


Nice work on those projects by the way Royce.
 
OP
R

royce

Well-known member
Joined
Jun 22, 2014
Messages
3,102
Location
fairbanks ak
Thanks,drives and manwithtools

LX,
I've painted it quite a few times over the years and nothing seems to hold up so well.
This time, I just smeared linseed oil over the rust and what was left of the paint.
It looks pretty crude, so it fits right in!
Thanks
Royce
 
To avoid these ads, REGISTER NOW!
OP
R

royce

Well-known member
Joined
Jun 22, 2014
Messages
3,102
Location
fairbanks ak
The tubing that this gate frame and fence are made of, came from a boiler I demolished years ago.
This sign also came off that boiler and I feel it is fitting to be on this gate.
Should look pretty snazzy
Royce
 

Attachments

  • IMG_0235.jpg
    IMG_0235.jpg
    145.6 KB · Views: 191
OP
R

royce

Well-known member
Joined
Jun 22, 2014
Messages
3,102
Location
fairbanks ak
Got the gate frame, hinges, latch, counterweight fabricated and hung today.
Also got a couple copper accent strips pecked out of some tubing.
Good day
 

Attachments

  • IMG_0246.jpg
    IMG_0246.jpg
    152.7 KB · Views: 257
  • IMG_0254.jpg
    IMG_0254.jpg
    150.5 KB · Views: 236
  • IMG_0253.jpg
    IMG_0253.jpg
    148.3 KB · Views: 245
  • IMG_0250.jpg
    IMG_0250.jpg
    151.7 KB · Views: 234
  • IMG_0259.jpg
    IMG_0259.jpg
    152.5 KB · Views: 212
OP
R

royce

Well-known member
Joined
Jun 22, 2014
Messages
3,102
Location
fairbanks ak
Got the gate planked today,
Art deco meets medieval.
I think I might like it.
 

Attachments

  • IMG_0263.jpg
    IMG_0263.jpg
    145.2 KB · Views: 260
OP
R

royce

Well-known member
Joined
Jun 22, 2014
Messages
3,102
Location
fairbanks ak
Got the gate hung and various counterweights tested.
Seems as the antenna spring was just the right weight and the style aint bad either.
 

Attachments

  • IMG_0285.jpg
    IMG_0285.jpg
    151.1 KB · Views: 217
OP
R

royce

Well-known member
Joined
Jun 22, 2014
Messages
3,102
Location
fairbanks ak
The latch worked out well.
One handed operation in and out, as well as self latching.
 

Attachments

  • IMG_0286.jpg
    IMG_0286.jpg
    148.5 KB · Views: 191
OP
R

royce

Well-known member
Joined
Jun 22, 2014
Messages
3,102
Location
fairbanks ak
Got the filler boards installed around the opening, so I guess this project is complete.
On to the next one.
Royce
 

Attachments

  • IMG_0289.jpg
    IMG_0289.jpg
    150.2 KB · Views: 194
  • IMG_0281.jpg
    IMG_0281.jpg
    150.6 KB · Views: 200
  • IMG_0280.jpg
    IMG_0280.jpg
    150 KB · Views: 207

drivesitfar

Well-known member
Joined
Oct 23, 2013
Messages
35,991
Location
Pacific Northwest
Royce: I agree your work is creative and stout and has a cool look to it too. I looked under the stairs on your deck and it looks like it maybe was a bridge. pretty stout frame for a deck, but then again you were moving 1000 pound BBQ up onto it.

cheers and have a great weekend
 
OP
R

royce

Well-known member
Joined
Jun 22, 2014
Messages
3,102
Location
fairbanks ak
Thanks much Drives,
I'm told, the beams came from a Alaska Railroad bridge, built in the 30's and demolished in the 60's.
They are really pretty, riveted, lattice beams.
I hope you have good memories this weekend also.
Royce
 

Attachments

  • IMG_0244.jpg
    IMG_0244.jpg
    149.1 KB · Views: 271
OP
R

royce

Well-known member
Joined
Jun 22, 2014
Messages
3,102
Location
fairbanks ak
Oh Boy, I done it again, got myself another chore.
I worked all day last sunday and a few hours tuesday evening tearing out these bowling lanes.
They are 2-1/2"T x 42" W x 16' L maple
My bride see's a dining table and I see some work benches.
I hope we are both right.
For now, I just need to get them bucked to length and out of the weather.
I may go broke buying saw blades, as they are choked full of screw nails.
Royce
 

Attachments

  • IMG_0309.jpg
    IMG_0309.jpg
    147.9 KB · Views: 213
  • IMG_0308.jpg
    IMG_0308.jpg
    151.2 KB · Views: 196

LXCam

ALLIANCE MEMBER
Joined
Apr 23, 2013
Messages
19,075
Location
AZ
Damn Royce, you sure do come across some very distinctive materials for your projects. The deck supports are flipping awesome.
 

drivesitfar

Well-known member
Joined
Oct 23, 2013
Messages
35,991
Location
Pacific Northwest
Royce: I agree your deck supports are over the top COOL and bet you could put a tank on your deck if you wanted to.

I've been looking for some good bowling alley lanes for a while now and most that I find are warped. if you don't want to be a victim of having that happen to you you'll need to build a nice frame and some supports even if only temporary to keep them flat. just piling them on top of each other won't keep them flat.

another option i'm looking for is old shuffleboards for a work bench or cart. one of these days i'll own it.

congrats on your quality find and best of luck on the projects you use them for.

have a great weekend.
 
OP
R

royce

Well-known member
Joined
Jun 22, 2014
Messages
3,102
Location
fairbanks ak
Damn Royce, you sure do come across some very distinctive materials for your projects. The deck supports are flipping awesome.

Thanks LX,
I don't know, but the consensus of my family is I have a nose for garbage!
What do they know,right?
Royce
 
OP
R

royce

Well-known member
Joined
Jun 22, 2014
Messages
3,102
Location
fairbanks ak
Royce: I agree your deck supports are over the top COOL and bet you could put a tank on your deck if you wanted to.

I've been looking for some good bowling alley lanes for a while now and most that I find are warped. if you don't want to be a victim of having that happen to you you'll need to build a nice frame and some supports even if only temporary to keep them flat. just piling them on top of each other won't keep them flat.

another option i'm looking for is old shuffleboards for a work bench or cart. one of these days i'll own it.

congrats on your quality find and best of luck on the projects you use them for.

have a great weekend.


Thanks Drives,
I cut them up today, now I have a 12', 10', 9',7', 6',4'.
The 12', 6''will have frames hilti'd to the floor with room to roll vidmar boxes under them.
The 4'will be set 4"lower, between the 12' and 6' to accommodate a miter saw.
The rest will be cut to fit rolling vidmar boxes, for mobile tables.
Oh, and let's not forget the 7' for momma's dining table.
I hope by cutting them shorter, storing them proper and the dry climate here they won't warp bad.
Time will tell.
Royce
 

Attachments

  • IMG_0314.jpg
    IMG_0314.jpg
    147.3 KB · Views: 187
OP
R

royce

Well-known member
Joined
Jun 22, 2014
Messages
3,102
Location
fairbanks ak
I went to bed last night thinking I would finish the welder boom today.
Woke up with good intentions,got the bracing done on the bar joists and the hoist winch mounted.
The sky is blue and it is no kind of day for work, so I think I'll load up a boat and gather some grandkids for a float.
Royce
 

Attachments

  • IMG_0318.jpg
    IMG_0318.jpg
    145.3 KB · Views: 265

drivesitfar

Well-known member
Joined
Oct 23, 2013
Messages
35,991
Location
Pacific Northwest
Royce: with the bowling alley benches just bolt them down to keep them from warping as best you can and keep them oiled either with BLO (boiled linseed oil) or some other method to keep them from drying out. not sure what kind of oil the bowling alley owners used to keep the lanes nice, but I know they oiled them 5 to 7 days a week. obviously you won't have balls pushing the oil off them, but just keep an eye on them and they will stay as nice as you want them to.

i'm not entirely sure what you are making with the welding boom and just sitting back and watching.

cheers
 
OP
R

royce

Well-known member
Joined
Jun 22, 2014
Messages
3,102
Location
fairbanks ak
Royce: with the bowling alley benches just bolt them down to keep them from warping as best you can and keep them oiled either with BLO (boiled linseed oil) or some other method to keep them from drying out. not sure what kind of oil the bowling alley owners used to keep the lanes nice, but I know they oiled them 5 to 7 days a week. obviously you won't have balls pushing the oil off them, but just keep an eye on them and they will stay as nice as you want them to.

i'm not entirely sure what you are making with the welding boom and just sitting back and watching.

cheers

Thanks for the tip,
I am going to mount a dual wire driver on the end of the boom, so I can have hardwire, push pull aluminum or dual shield,set up all the time.
The reasons being;

Does not chew up precious floor space,

No leads,shield gas hoses or control cables on the floor to get tangled, cut, burnt or tripped on,

Keeps a straighter conduit coming out of the driver for more consistent feeding and better liner life.

Gives another 8'+ of reach.

Royce
 

Strouty

Well-known member
Joined
Mar 21, 2010
Messages
38,208
Location
Southern Maine
I like the idea, problem I have is that I never seem to have a dedicated welding area. Maybe when I rework my shop I can do something like this as well. For my aluminum I currently use spool guns so the cord is not that big of a deal, but I hope to upgrade to a push pull gun sooner rather than later.

I love the gate, love the supports, love the bowling alley tops, all around your style is tops in my book!
 
OP
R

royce

Well-known member
Joined
Jun 22, 2014
Messages
3,102
Location
fairbanks ak
I like the idea, problem I have is that I never seem to have a dedicated welding area. Maybe when I rework my shop I can do something like this as well. For my aluminum I currently use spool guns so the cord is not that big of a deal, but I hope to upgrade to a push pull gun sooner rather than later.

I love the gate, love the supports, love the bowling alley tops, all around your style is tops in my book!

Thank you kindly Strouty,
I'm anxious to check out the new push-pull rig.
Not much progress, but did get the legs cut for the work benches.
Hope to get the angle frames whittled out tomorrow and maybe tacked up on sunday.
Royce
 

Attachments

  • IMG_0323.jpg
    IMG_0323.jpg
    143.2 KB · Views: 179
To avoid these ads, REGISTER NOW!
Top Bottom