To avoid these ads, REGISTER NOW!

Between 265 & 485 SQ/FT Nick's Two-Car Detached Vdub Garage

Workspaces sized between 265 and 485 squarefeet.
To avoid these ads, REGISTER NOW!
OP
N

nicholam77

Well-known member
Joined
Dec 18, 2016
Messages
2,673
Location
Minneapolis, MN
Adding in the wall remotes, like the Tradfri E1743, or the one I just ordered (Tradfir Rodret) really adds to the WAF when doing any automation. I also have one of the HUE remotes in the theatre mounted next to the old school manual switch. As with all things HUE, it's bulletproof, but expensive.

I thought about using the HUE remotes for the night stands. They integrate with Home Assistant well, and can be programmed to control anything (like the Kasa plugs). In the end I the Zooz were a bit cheaper and cleaner looking (don't have the on / off / dim etchings). I do use the HUE dimmers on the wall in any room that has HUE bulbs, though.

I've been hemming and hawing about picking up a few of the Tradfri Shortcut buttons that are on sale (wondering if these are being phased out?), or a few of the new Tradfri Rodrets. I like the size and form of the Shorcut button better, but I despise coin cell batteries and would far prefer AAA even though I think it's more conspicuous and if used to run a single routine is more complicated to have two buttons that look like an on-off switch. I see the Rodret is under development for the Hubitat driver you linked me.

Another dumb question for you Dennis that I could probably Google, but are you linking the Tradfri bulbs (GU10 or other) directly to Hubitat as well? And is there a driver for that or just generic zigbee bulb? I have some GU10's in my stove fan that I want to make smart, and I ordered some Shelly but they were too tall. If the IKEA's work with Hubitat directly I may have to check those out.

That flip clock is too cool! I had no idea people still made them. How loud is it? I'm off to do some youtubing.... haha.

It's silent! No, really. Unless you put your ear 3 ft a way and pay really close attention, you'd never notice it.
 
OP
N

nicholam77

Well-known member
Joined
Dec 18, 2016
Messages
2,673
Location
Minneapolis, MN
Home Automation — Laundry

One more significant project, and then I'll be on to other topics, I promise.

This one's been humming along nicely for months, but previous to setting it up, I would often forget to switch the clothes from the washer to the dryer. Or forget to get them from the dryer and fold them.

The first part of the puzzle is being able to tell when the cycles begin and end. My washer and dryer are both old, but they both employ variable time cycles, as in the wash time and dry time are not consistent, but rather dependent on the load.

IMG-2446.jpg
IMG-2445.jpg

I mean I guess the dryer does have a timed option, but we use the "AccuDry" sensor dryng. So a simple timer was out of the equation.

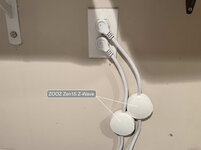
To handle this, I employed a couple of appliance-rated power-metering Zwave plugs from Zooz:

IMG-2441.jpg

These are a bit pricey ($40+ a piece), but I got them refurb/brown box for about half that, and they were like new. I chose Zwave because it's reliable, and these have lots of configurable options in Hubitat, like how often power is reported. They are also rated to handle appliances, which most smart plugs are not.

Basically, these measure the power draw and report it to Hubitat every so often. By making some assumptions about the washer or dryer's power draw during the cycle, I can accurately trigger when the cycle begins and ends (when it rises or drops below certain thresholds).

The second part of the puzzle is notifications, so I get alerted to take action. For this I have a 3-prong approach. First is I get push notifications on my phone when a cycle starts or ends:

IMG-2470.jpg


Second, when a cycle completes, the LED strips on my Innovelli Zwave switches (I have these in kitchen and living room) blink green. It's very effective, but not intrusive. They keep blinking until someone has taken action.

IMG-2197.jpg

The third prong is voice announcements. A chime and TTS message saying to switch the clothes, or get the clothes from the dryer, plays on all of the speakers around the house, which covers off on kitchen / living room / basement TV area / bedroom. This is super handy and feels futuristic.

The third piece of the automation puzzle is determining when the clothes have been switched or retrieved. For this I am using some contact sensors on the doors:

IMG-2442.jpg
IMG-2444.jpg

To get it all to work, I'm using a fairly complicated webCoRE piston (automation script). I did not write it from scratch — I found one someone else had done and tweaked it to my needs.

Ok, on to other stuff 😁
 

big_bake

Well-known member
Joined
Mar 19, 2014
Messages
119
Location
VA
I want to hop in to give you a little tip on your RJ-45 ends. Make sure the outer jacket slips into the end past the plastic crimp. That gives the end some strain relief and keeps the wires twisted as long a possible.
It should look like the one on the left:

the%20Correct%20RJ45%20Connector%20Before%20Buying.jpg

I'm a big networking/home automation/3D printing guy myself.
 

cccoltsicehockey

Well-known member
Joined
Apr 3, 2014
Messages
1,416
Location
Charlotte, NC
Home Automation — Bedroom Lamps

@cccoltsicehockey + others, I thought I would showcase a few more things I've set up. One trickier scenario for me was our bedroom lamps and accessories.

I have three lamps in the bedroom, two on the nightstands and one on the dresser.

IMG-2461.jpg
IMG-2463.jpg

There is one overhead light that is 3-way switched from the stairs (not smart), but it doesn't give much light and I prefer the lamps. I got tired of having to switch all three lamps on or off, especially if just running upstairs to get something for 2 minutes.

Additionally, my wife has a nightstand fan, and white noise machine under the bed, that need manual switching.

I did not want to use smart bulbs in the lamps, because I use these special Bedtime Bulbs. They are quite expensive, but they are my favorite bulb for evening that I've come across. I have them here and in the kids' bedroom lamps. They are high CRI, low blue, extra warm color temp, and give the closest approximation to a dimmed incandescent that I know of.

So I resorted to smart plugs. I wanted cheap and reliable, and ended up testing some Kasa WiFi plugs, and some ThirdReality ZigBee plugs.

IMG-2314.jpg

The Kasa won, because they were 100% reliable to fire, and when commanded as a group they all turned on at the same time. They also have a configurable setting to turn off the power indicator LED, whereas the ThirdReality and some other smart plugs do not. I find those little LED's really annoying at night so I was happy to turn them off with the Kasa.

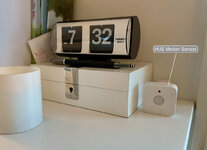
For the bulk of the lighting automation, I'm using a HUE motion sensor. These things are the best motion sensors I know of. Fast, reliable, and use AAA batteries that last forever.
IMG-2466.jpg

Getting the HUE sensors into Hubitat (and thus webCoRE) is a bit of a challenge. First I configured it in the HUE app, but set all the triggers to "Do Nothing". Then it gets brought into Home Assistant via the LAN Hue Bridge integration. Then it gets passed to Hubitat through the Home Assistant Device Bridge integration. Surprisingly, this is all fine, and Hubitat sees all the sensors, and motion detection is immediate.


MOTION LIGHTING

The obvious automation rule is: When motion is detected, turn lamps on. When motion is no longer detected, turn lamps off after 10 minutes.

Instantly, this poses issues. For one — the motion sensor is not pointed at the bed, so if you are watching TV in bed at night for example, the lights will turn off on you. Secondly, it doesn't account for night time, so if someone gets up in the middle of the night, it will turn on all the lights.

Time restricting it would help (only turn on during X hours, etc), but our go-to-bed and wake up times are variable, and there are two people's schedules to account for. With time restriction only, someone would inevitably get blasted with light at the wrong time and get annoyed.

I solved it with two boolean (True/False) variables. One is called @everyoneUp, and the other is called @bedroomLampsTriggeredEvening. Each of these has their own True/False state.

If the motion sensor detects motion, and the time is after 7:00 PM, then @bedroomLampsTriggeredEvening changes to True. It resets to False at midnight.

I use this state as a restriction for the motion lighting — if it's False, the motion lighting will occur, if it's True, the motion lighting will stop.

The end effect is the first time someone enters the bedroom after 7:00 PM, the lights will still turn on. But after that, they won't auto-turn-off. That way they won't go out if someone is up there in the evening reading or watching TV.

Ok, the 2nd variable — @everyoneUp. This is set to True when both of our phones come off the charger in the morning. That's the best method I've found to ensure both people are out of bed, or ready to be out of bed (don't mind if the lights come on). It resets to False at midnight.

The end effect is motion lighting won't resume in the morning until both phones are off the charger.


NIGHT STAND REMOTES

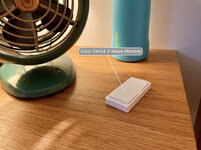
Ok, but what if we do want to control the lamps manually? Reaching under the bed for one of 4x smart plugs is way worse than just flipping the lamp switch. So I ended up getting these Zwave remotes that live on the night stands:
IMG-2465.jpg

They look like a Decora toggle, and support push, hold, double-tap, triple-tap, and more.

I configured my wife's single-push options to toggle her bedside lamp, and toggle her nightside fan. Using a toggle action eliminates buttons and things to remember. One side of the switch operates the lamp, the other side operates the fan. For advanced control, holding the top button turns all three lamps. And holding the bottom button turns off all three lamps, and additionally, if it's after 9:00 PM, turns on her fan and white noise machine (making the assumption she's going to bed).

Mine is set up similarly with toggles for the lamps and fans, except my 'hold bottom button after 9:00 PM' runs my Goodnight Routine, which turns off all the lights in the house, pauses Sonos, and sets the thermostat.


ADDITIONAL AUTOMATIONS

That's right, I'm not done yet!

We have a bedroom Roku TV, that catches some glare from my bedside lamp at night. I set up an automation in Home Assistant so when the TV starts playing content, it turns my lamp off, automatically.

On top of that, I don't like the fan, so I have it set up to automatically turn off when my wife gets up for the day. That way if I'm still in bed I don't need to have it on. And I'm using the @everyoneUp variable to turn off the white noise machine when the last person gets up for the morning.


Long post, I know. Hopefully a few of you enjoyed that or got some ideas. It's super granular, but that's what I love about this stuff. I no longer have to touch any of the switches or devices, they just do and predict what I want, in pretty much every scenario.

And if I do need to hard bypass the motion lighting temporarily, I have virtual toggles that let me do that.

motion-lighting-toggles.png
I need to start doing more true automation like that. That is cool that all that happens automatically for you guys.

Those Zooz remotes I love. I recently used one to replace an actual switch that controlled an outlet that I wanted to have on all the time. I was then able to use it to control a plug adapter off the same outlet as well as use a long press to control all our backyard lights at one time since they are on 2 different switches and the string lights on a smart plug. I am thinking of actually installing one in the house garage just screwed onto the wall as there is no actual switch for the garage lights except in the house which is a really poor design.
 

cccoltsicehockey

Well-known member
Joined
Apr 3, 2014
Messages
1,416
Location
Charlotte, NC
Home Automation — Laundry

One more significant project, and then I'll be on to other topics, I promise.

This one's been humming along nicely for months, but previous to setting it up, I would often forget to switch the clothes from the washer to the dryer. Or forget to get them from the dryer and fold them.

The first part of the puzzle is being able to tell when the cycles begin and end. My washer and dryer are both old, but they both employ variable time cycles, as in the wash time and dry time are not consistent, but rather dependent on the load.

IMG-2446.jpg
IMG-2445.jpg

I mean I guess the dryer does have a timed option, but we use the "AccuDry" sensor dryng. So a simple timer was out of the equation.

To handle this, I employed a couple of appliance-rated power-metering Zwave plugs from Zooz:

IMG-2441.jpg

These are a bit pricey ($40+ a piece), but I got them refurb/brown box for about half that, and they were like new. I chose Zwave because it's reliable, and these have lots of configurable options in Hubitat, like how often power is reported. They are also rated to handle appliances, which most smart plugs are not.

Basically, these measure the power draw and report it to Hubitat every so often. By making some assumptions about the washer or dryer's power draw during the cycle, I can accurately trigger when the cycle begins and ends (when it rises or drops below certain thresholds).

The second part of the puzzle is notifications, so I get alerted to take action. For this I have a 3-prong approach. First is I get push notifications on my phone when a cycle starts or ends:

IMG-2470.jpg


Second, when a cycle completes, the LED strips on my Innovelli Zwave switches (I have these in kitchen and living room) blink green. It's very effective, but not intrusive. They keep blinking until someone has taken action.

IMG-2197.jpg

The third prong is voice announcements. A chime and TTS message saying to switch the clothes, or get the clothes from the dryer, plays on all of the speakers around the house, which covers off on kitchen / living room / basement TV area / bedroom. This is super handy and feels futuristic.

The third piece of the automation puzzle is determining when the clothes have been switched or retrieved. For this I am using some contact sensors on the doors:

IMG-2442.jpg
IMG-2444.jpg

To get it all to work, I'm using a fairly complicated webCoRE piston (automation script). I did not write it from scratch — I found one someone else had done and tweaked it to my needs.

Ok, on to other stuff 😁
This is a really good idea. I am terrible at this.
 
OP
N

nicholam77

Well-known member
Joined
Dec 18, 2016
Messages
2,673
Location
Minneapolis, MN
Having observed my Granddaughter complete a months worth of HER laundry in OUR laundry room over the last 4 days, I can tell you, your program is bonkers until you figure out how to determine what clothes are dirty, get them off of the floor, washed, dried, folded and put away :) Good Luck!

Yeah, can't help ya there! :ROFLMAO:

I want to hop in to give you a little tip on your RJ-45 ends. Make sure the outer jacket slips into the end past the plastic crimp. That gives the end some strain relief and keeps the wires twisted as long a possible.
It should look like the one on the left:

the%20Correct%20RJ45%20Connector%20Before%20Buying.jpg

I'm a big networking/home automation/3D printing guy myself.

Thanks. I am aware that's how it should be... I just **** at it. For some reason I find it easier to get the wires fanned out in the right order when there's more length to work with. I'll try and do better next time :)

Got a thread on here? Stay tuned, I have some 3d printing posts coming up.

I need to start doing more true automation like that. That is cool that all that happens automatically for you guys.

Those Zooz remotes I love. I recently used one to replace an actual switch that controlled an outlet that I wanted to have on all the time. I was then able to use it to control a plug adapter off the same outlet as well as use a long press to control all our backyard lights at one time since they are on 2 different switches and the string lights on a smart plug. I am thinking of actually installing one in the house garage just screwed onto the wall as there is no actual switch for the garage lights except in the house which is a really poor design.

The best kinds of automations require no intervention, in my opinion, but they can be tricky to set up! I got my Zooz on sale, but I wish they were a bit cheaper. If they were I'd probably pick up a few more.

Nice use cases. I can remember what they do, but the tricky part for with double tap or held actions for me is anyone else actually using them, because my wife usually forgets what they do or that the option is there.

I have similar remotes and auxiliary buttons to control outdoor plugs, tie lamps together in a group, add a switch where there's not wiring, etc. Makes 'electrical' work way more flexible!

And I feel like I'm in the 22nd century with my 3 smart outlets and a timer app on my phone.

Ha, still counts!
 
OP
N

nicholam77

Well-known member
Joined
Dec 18, 2016
Messages
2,673
Location
Minneapolis, MN
New Years Resolutions

I started a new GJ photo album for 2024. A quick stat from 2023... I posted 803 photos here! Let's see if I can beat that this year.

I have a lot of resolutions this year. A bit cliche, but now is a good a time as any to set some goals I guess.

One goal is to do more projects this year. I need to get back to some woodworking and do at least one bigger project. And hopefully some cabinets.

Another goal is to clean house. Literally. Big picture item is to remodel the basement. To make that happen, I've been donating, throwing away, and organizing, to try and start from a blank slate. Most of our closet storage is in the basement, and it's become overwhelming.

So with that, I'm going to start with a quick little project to tidy up the laundry room before moving on to some 3D printing adventures.

Over the years of collecting DIY accoutrements, the laundry room has been the catch-all storage for supplies and consumables. I started by disposing of anything dried up or expired or no longer needed.

IMG-4336.jpg

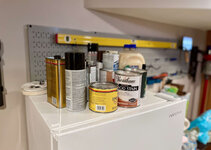
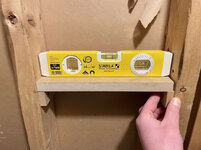
Even so, I was out of shelving, so I'm expanding into the mechanicals closet. I thought this stud cavity would be a good spot to put some cans and such.

IMG-4337.jpg
IMG-4330.jpg
IMG-4331.jpg
IMG-4332.jpg
IMG-4334.jpg
IMG-4338.jpg

And the end result:

IMG-4340.jpg

I knew I kept those MDF scraps for something! :ROFLMAO:

Very down and dirty, but satisfying nonetheless.

🍻
 
OP
N

nicholam77

Well-known member
Joined
Dec 18, 2016
Messages
2,673
Location
Minneapolis, MN
3D Printer Refresh

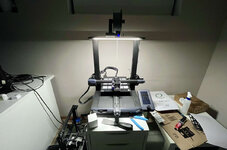
So lately I'd been having some under extrusion issues, and thought I would replace the nozzle since I'd never replaced the nozzle on my Ender 3 S1 yet!

I watched a YouTube video beforehand to make sure I would turn it the correct way.

Despite that, I still managed to immediately break the nozzle off in the hot end :rolleyes:

IMG-4056.jpg

Fortunately a hot end replacement is about $20 on Amazon.

IMG-4057.jpg
IMG-4060.jpg

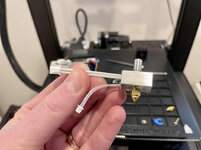
While I had the extruder motor off, I added this 3d printed strain relief for the extruder cable:

IMG-4061.jpg

It looks janky because of supports.

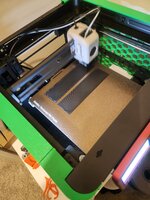
After getting back up and running, I made an amazing improvement. I installed the MSRICOC Professional Firmware. This is a 3rd party Marlin firmware that is pretty popular on Enders. It adds a TON of features right on the printer, including wizards for bed tramming, live readout of auto bed leveling mesh, PID autotune, Z probe offset wizard, and many, many, many additional settings. Some of this stuff you could do in Octoprint, but I don't have that hooked up to this printer at the moment, and it's sooo nice to have it right on the screen with readouts.

But the best part is... ABL / UBL actually works now. It should have worked out of the box, but no matter what I did (tram, add appropriate start Gcode in cura, set Z offset, save the mesh), it never seemed to actually use a mesh. I almost always had to tune Z offset on the fly, and had first layer issues on anything but a small-ish print. The end prints came out ok, but it was super fiddly and annoying to babysit the whole first layer of larger prints.

This new firmware has a tramming wizard that uses the CR Touch bed probe to index the four corners and tell you to raise or lower. It's not super obvious by how much, since it's relative, but with a few passes it's easy to get it within tolerance (no more fussing with a sheet of paper!).

tramming.jpg

The new firmware uses Marlin UBL instead of ABL, which you can go in and edit individual mesh points after the fact. The printer outputs the values as it probes, and I can finally alter the grid size to 5x5 (or whatever!).

IMG-4373.jpg

Lastly, the Z offset seems to stick. With the stock firmware, I'd set it, but then after the next Home Axes it would be off just a bit.

My bed is definitely not perfectly flat, and I think it warps with the temp so it's a little different each time. I've resorted to doing an auto level before every print — but this firmware does it at 2x speed compared to stock, so it goes much faster. And it's worth it to get consistent 1st layers.

IMG-4067.jpg
IMG-4071.jpg

This is how it should work from Creality!

/rant

I also moved my Cura install to a different computer and went back to the base S1 profile. Lot's of variables I've changed. Getting a *little* bit of stringing, but overall prints are turning out well and consistent.

First larger model off the press was this SD card / USB stick organizer:

IMG-4085.jpg

More to come.
 
OP
N

nicholam77

Well-known member
Joined
Dec 18, 2016
Messages
2,673
Location
Minneapolis, MN
3D printing looks so useful to have around. It has always interested me but seems like another rabbit hole to go down trying to get a good functioning setup. Lord knows right now I don't need to add another one of those but it is tempting.

You're correct on both counts. It's useful. But it's also a rabbit hole that requires maintenance / time investment. Unless you've shelled out for a Bambu.*

*Allegedly. I wouldn't know, because for some reason I choose to continue to suffer with my Creality.


Next up, a little whiteboard note station for my desk. It uses blank RFID cards as reusable Post-it™️ notes of sorts. Sharpie to demo the pen holder... still need to get a dry erase marker on hand.

IMG-4411.jpg
 

jonshonda

Well-known member
Joined
Jul 17, 2017
Messages
4,747
Location
Wisconsin
New Years Resolutions

I started a new GJ photo album for 2024. A quick stat from 2023... I posted 803 photos here! Let's see if I can beat that this year.

I have a lot of resolutions this year. A bit cliche, but now is a good a time as any to set some goals I guess.

One goal is to do more projects this year. I need to get back to some woodworking and do at least one bigger project. And hopefully some cabinets.

Another goal is to clean house. Literally. Big picture item is to remodel the basement. To make that happen, I've been donating, throwing away, and organizing, to try and start from a blank slate. Most of our closet storage is in the basement, and it's become overwhelming.

So with that, I'm going to start with a quick little project to tidy up the laundry room before moving on to some 3D printing adventures.

Over the years of collecting DIY accoutrements, the laundry room has been the catch-all storage for supplies and consumables. I started by disposing of anything dried up or expired or no longer needed.

IMG-4336.jpg

Even so, I was out of shelving, so I'm expanding into the mechanicals closet. I thought this stud cavity would be a good spot to put some cans and such.

IMG-4337.jpg
IMG-4330.jpg
IMG-4331.jpg
IMG-4332.jpg
IMG-4334.jpg
IMG-4338.jpg

And the end result:

IMG-4340.jpg

I knew I kept those MDF scraps for something! :ROFLMAO:

Very down and dirty, but satisfying nonetheless.

🍻

Amazing how many of the exact same products we have in our basements, on shelves made between 2x4 studs, with sheetrock on one side. My only suggestion to pack a bit more into the area is make the shelves 7" wide to protrude from the studs another 3.5" to get double depth storage.
 

Bob Heine

ALLIANCE MEMBER
Joined
Oct 24, 2009
Messages
10,707
Location
Boca Raton, Florida
Very down and dirty, but satisfying nonetheless.
Nick, I would call it thoughtfully elegant. When I removed a closet in the entry hallway in our first Florida home, I put up blueboard and attempted to plaster the walls and ceilings. The renovation left a small section of wall in the kitchen. I carefully cut a 16"x84" hole in the plaster/blueboard to expose a stud bay, trimmed it with 3/4"x3/4" pine and installed a door. Attached a number of trimmed-to-depth 1"x6" shelves just like yours and it became a canned goods storage cabinet. When I re-covered the mica cabinets in the kitchen, the door got matching Almond Formica, Hey, Almond and Oak European cabinets and appliances were trendy in 1978. Well, trendier than Avocado.
Pantry Removal 2.jpg Pantry Removal 4.jpg Kitchen.jpg
The young lady in the photos is our daughter and she's now a couple of years from Medicare-eligible. Enjoy your kids when they're growing up, before they become old people visiting their parents (aka Floridians).
 
To avoid these ads, REGISTER NOW!
OP
N

nicholam77

Well-known member
Joined
Dec 18, 2016
Messages
2,673
Location
Minneapolis, MN
Great pics @Bob Heine , and I LOVE the lounge chair in the living room


Continuing on the 3D printing train, here's two more projects I've churned out.

Treadmill Cup Holder

I picked up a small treadmill over Black Friday with the intention of keeping my exercise up.

IMG-4361.jpg

I used it heavy for two weeks, and then my back relapse got bad. I'm really happy with it for the low price, but one thing I wished it had was a water bottle holder. And, of course, someone has made a model for this exact treadmill on Printables. :ROFLMAO:

IMG-4150.jpg

It's a great design, but involved some assembly of the clamp, the brace, and the two halves of the cup holder with some retaining pins and epoxy.

IMG-4358.jpg

It took a few tries on the pins to get them to fit well.

Breaking out some of the new tools for the install. :cool:

IMG-4364.jpg
IMG-4366.jpg

This was a larger model, and it turned out great! It's very sturdy and secure.

Magsafe Standby Stand + Zooz Remote Holder

This ties in to the bedroom lamp automation I posted about a few posts back. I 3D printed some Magsafe charger stands, and modified them to secure my little Zooz Zwave nightstand scene remotes.

Modifying STLs in Fusion 360 is a huge PITA, because converting the mesh to a solid results in a bajillion little geometry facets that slow the program down and make the model harder to manipulate.

mesh.jpg

Fortunately I wasn't doing anything complex.

tool.jpg
magnets.jpg

I added some recesses for magnets since the Zooz remote is magnetic.

IMG-4454.jpg

And with the remote in place:

IMG-4452.jpg
IMG-4453.jpg

I'm really happy with how this turned out. In fact my wife liked it so much she asked me to make one for her, too.

For one, it keeps the Zooz remote in the same orientation, so it's easier to remember what side of the switch toggles what (light, fan, etc). And it's easier to find in the dark. Plus... it's designed to take advantage of the iOS 17 "StandBy Mode", which I've come to really love as a night clock. And the whole thing just looks elegant and minimal.

I know probably not many of you happen to have these Zooz remotes and a 3d printer, but if anyone wants the modified STL file just let me know.

And lastly, a little teaser of what's next on the docket:

IMG-4379.jpg

🍻
 
OP
N

nicholam77

Well-known member
Joined
Dec 18, 2016
Messages
2,673
Location
Minneapolis, MN
Gridfinity + Wrench Holder

I can blame this one on @jake28 :ROFLMAO:

In a recent post he was exploring the open source Gridfinity project, and some 3D printed toolbox organizers.

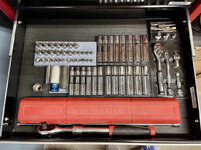
To refresh your memory, I've made my own handful of 3D printed organizers:

IMG-2367.jpg

Which work great, but have two problems:

1/ They Tetris together in non-standard shapes, leaving odd gaps, and this bothers my OCS
2/ They slide around in the drawer, despite a drawer liner mat

I could add magnets, but I figured as long as I'd have to reprint, and was planning on designing the new wrench organizers, I would take the Gridfinity plunge and see if it's a better solution for me.

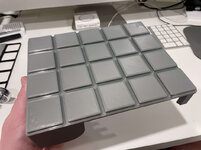
I started by printing a bunch of base grids to fit my Craftsman tool drawers.

IMG-4368.jpg

My drawers most closely approximate a 13x9 grid, so I printed variations of 4x4, 4x5, and 5x5 to achieve that. Fortunately my Ender bed can *just barely* accommodate a 5x5.

Below is a partial drawer's worth (13 squares wide). So I printed quite a bit more than this. Enough for two full drawers. Each grid took about ~4 hrs.

IMG-4369.jpg

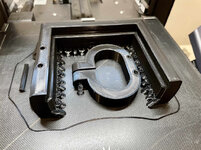
Ultimately, I plan to repurpose my old organizers to have Gridfinity dimensions, but for the first test I decided to go big: Make a custom Tekton Metric wrench set holder.

My limited Fusion 360 skills are dusty, so apologies to Austin (@MadeByMiller ) if I upload any unconstrained screenshots :ROFLMAO:

For those who don't do CAD, or are inexperienced dabblers like me, here is a little write up of how I went about it. I started measuring each wrench with a caliper to create these rudimentary outlines:

wrenches-sketch.jpg

Then extruded them. These represent the wrenches themselves.

wrenches-grid.jpg

Then I created the front and back holders by connecting the end sketch profiles with a 'Loft'. And then used the 'wrenches' to cut out the slots.

wrenches-cut.jpg
wrenches-model.jpg

Now before you think I'm a CAD wizard, at this point I had some tweaks to make, like I wanted to add a recessed label strip on one side, and I definitely ran into some difficulties manipulating what I had so far.

Lastly, I added the Gridfinity baseplate via the unofficial Fusion 360 plugin, and this is what I ended up with:

GF-Tekton-Wrenches-Metric-v8-empty.jpg
GF-Tekton-Wrenches-Metric-v8-wrenches.jpg

I built in tolerances for the wrench fit, but other than print the whole thing out I wasn't sure how to test it. So I printed the whole thing. A 30 hour print.

With the new printer firmware the 1st layer went down well.

IMG-4408.jpg

It completed successfully, but not without a few artifacts.

IMG-4418.jpg
IMG-4420.jpg
IMG-4432.jpg

The most bizarre was the lumpy sections on the top layer, seen above. I did cubic infill at 10%, 3 top layers. If anyone has any ideas on what would cause that, let me know!

The bottom turned out super clean.

IMG-4434.jpg

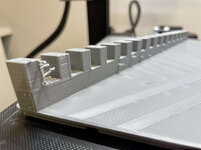
But of course I had some issues with the fit. A few of the wrench slots were too tight, and in one instance two of the wrenches overlapped.

Another issue I ran into is a few of the wrenches have a slight curve to them, and are not flat. I don't know if this is a manufacturing default with Tekton or what.

IMG-4424.jpg

So I went back to Fusion 360, made some adjustments (thanks to a partially parametric model!), and reprinted with a modified base. So only ~ 15 hrs.

That test worked, so then I printed the full thing again, another 30 hrs.

IMG-4430.jpg

END RESULT:

IMG-4435.jpg
IMG_4437.jpg
IMG-4425.jpg
IMG_4438.jpg

The plan with the label slot is to slide in a piece of white matte board and just write in the sizes with an ultrafine Sharpie. I figured that would be easier than trying to print the numbers.

The fit is tight to the point where they are held in place with friction. It's definitely a space-saving design.

Whether this Gridfinity base is better than a free floating organizer for me is yet to be determined.

The reason I mention all the print times is to show the waste, the iterative design process, and the time involved. Not trivial.

Now I have to do one for my Imperial set. :ROFLMAO:
 

MadeByMiller

Well-known member
Joined
Dec 29, 2018
Messages
1,230
Location
Rapid City, SD
1705608855327.png

Haha just kidding (but not really, shame on you for all of those blue lines...)

Looks cool man! I'm always amazed at just how massive the Gridfinity world has become. I think it's neat. Nice job bringing this to life! I would suggest that you need more top layers or more dense infill to avoid that top surface issue.
 

Xti04

Well-known member
Joined
Nov 11, 2016
Messages
2,340
Looks good Nick. I have been toying with the gridfinity idea for my tool box drawers, I have a setup that comprises whatever wrench holder the tools came in as well as hand buillt and commercial socket racks etc. Its worked for me for 20 years with minor revisions but would be nice to build a setup that was cleaner and more uniform. My fusion skills are beyond horrible. I have been working on a divider for my hospital cart I repurposed and after designing the shape I got lost on how to download it as an stl so I can slice and print it. I need to watch some videos and learn what I am doing. Keep up the good work!
Mark
 
OP
N

nicholam77

Well-known member
Joined
Dec 18, 2016
Messages
2,673
Location
Minneapolis, MN
Haha just kidding (but not really, shame on you for all of those blue lines...)

Lol, I forgot what the blue even meant when I posted that :ROFLMAO:

The trouble is when I only use it every 6 months or so, I forget what little I've figured out.

That being said, I'm pretty happy I was able to model this after a long time away.

Looks cool man! I'm always amazed at just how massive the Gridfinity world has become. I think it's neat. Nice job bringing this to life! I would suggest that you need more top layers or more dense infill to avoid that top surface issue.

Gridfinity is pretty neat as a project. I'm still unsure if it will give me much benefit over just designing my trays on a specific increment (like Gridfinity but without the fancy bases). I guess my hope is it will help with the sliding around in the drawer... but it means I have to print an organizer for everything in the drawer then. Otherwise loose items will be sitting on the base grid, which I don't like the idea of. Or another option would be to do the base grid in part of a drawer and leave the other half plain for odd items. Idk, I'll have to see how it's working for me once I get a little farther. I also feel like it works better for smaller items (like parts bins) vs large items (like a long torque wrench).

Thanks for the tips on the top layer. That was my inclination, but didn't want to reprint just for that. Usually I use gyroid @ 5-10% which seems to come out denser than other infill forms. And usually I do 4-5 top layers. I guess I was just trying to cut down on print time.

Looks good Nick. I have been toying with the gridfinity idea for my tool box drawers, I have a setup that comprises whatever wrench holder the tools came in as well as hand buillt and commercial socket racks etc. Its worked for me for 20 years with minor revisions but would be nice to build a setup that was cleaner and more uniform.

Thanks! The motivation for me has mainly been space efficiency. Even with my non-Gridfinity holders. Especially with the sockets and wrenches. I only have 4x shallow drawers, and the 3D printed organizers take up much less space than the originals. Is it worth it? It's definitely an endeavor, so not sure. It's a good winter project.

My fusion skills are beyond horrible. I have been working on a divider for my hospital cart I repurposed and after designing the shape I got lost on how to download it as an stl so I can slice and print it. I need to watch some videos and learn what I am doing. Keep up the good work!

Exporting an STL from Fusion is pretty straightforward. Just make sure your model is selected (highlighted blue), and choose File — Export. Then change the type to ".STL" in the dropdown and when you click save, it will do a conversion in the cloud and save it to the path you choose in the export dialogue.

I've had trouble finding good foundational knowledge on YouTube, but I've been meaning to watch these two tutorial series when I have time if you need a suggestion:

Paul McWhorter — longer lesson videos, slow-paced, well-explained, 3d printing oriented


Langmuir Systems — short tutorial series, videos ~5min, some good foundational tips, more CAM oriented but the basics still apply


I've previewed both, and watched a handful of Paul's old series on the same, and I like his videos because he focuses on the basic principles and the why, instead of just "follow a long while I show you how to model X-Y-Z".
 

bdbecker

ALLIANCE MEMBER
Joined
Nov 18, 2015
Messages
5,574
Location
Iowa
...I guess my hope is it will help with the sliding around in the drawer... but it means I have to print an organizer for everything in the drawer then. Otherwise loose items will be sitting on the base grid, which I don't like the idea of...

What about printing just a filler plate that could snap over and cover up the unused grids? Simple enough to design and wouldn't take too long to print. If you change things up, you could probably get away with cutting down the filler panel with a hacksaw instead of printing a whole new piece. The edges will be hidden anyway, so no one but you would know. If you wanted to get real fancy, you could cut out sections of non-slip drawer liner to fit over the filler panels and it'd look just like a regular tool box drawer.
 
OP
N

nicholam77

Well-known member
Joined
Dec 18, 2016
Messages
2,673
Location
Minneapolis, MN
@bdbecker yeah, that could be an option. PLA is too smooth and slippery so I think I'd want the drawer liner. The other issue is a drawer rarely divides out to exact 42mm increments (the base unit of Gridfinity). So I'm going to need some spacers around the edges of my base grid. Filling areas in with flat covers would mean needing to extend those to the actual drawer edges somehow, or adding some sort of lip so things don't roll off the edges. I think the cleanest and least time-intensive option would be to leave sections of the drawer without the base grid... but that requires planning, which sort of fights the modularity of the Gridfinity concept. In any case thanks for the ideas.
 

Xti04

Well-known member
Joined
Nov 11, 2016
Messages
2,340
It exported! I highlighted it and apparently that was the ticket. Uploaded to cloud and back to me complete in about 30 seconds. I spent hours on that earlier with no sucess. Already sent to Bambu studio sliced and printing as we speak!17057172623198775880232234689199.jpg
Thanks Nick
 

big_bake

Well-known member
Joined
Mar 19, 2014
Messages
119
Location
VA
Thanks. I am aware that's how it should be... I just **** at it. For some reason I find it easier to get the wires fanned out in the right order when there's more length to work with. I'll try and do better next time :)

Got a thread on here? Stay tuned, I have some 3d printing posts coming up.
My trick is to get them nice and straight and in order. Then pinch about 3/8" to 1/2" between my thumb and finger. Then use cutters to get rid of the excess right next to my thumb. Then those short wires should slight right in to the right depth. Recheck your order before crimping because sometimes one wants to hop over another. Practice a little on a scrap piece and you will get the hang of it.

I don't have a thread but should start one. I did finally build my garage after many years of planning.
I see all the nice work you are doing with the 3d printer. I'm ready to dive into gridfinity myself soon. I think you can print little half base pieces to keep them from sliding around in a drawer. Check this out to see what I'm talking about.

Also here is a nice playlist of videos to help with designing for 3d printing.
 
OP
N

nicholam77

Well-known member
Joined
Dec 18, 2016
Messages
2,673
Location
Minneapolis, MN
My trick is to get them nice and straight and in order. Then pinch about 3/8" to 1/2" between my thumb and finger. Then use cutters to get rid of the excess right next to my thumb. Then those short wires should slight right in to the right depth. Recheck your order before crimping because sometimes one wants to hop over another. Practice a little on a scrap piece and you will get the hang of it.

That pretty much sounds like what I do, minus getting the length right. I think I just need more practice.

I don't have a thread but should start one. I did finally build my garage after many years of planning.
I see all the nice work you are doing with the 3d printer. I'm ready to dive into gridfinity myself soon. I think you can print little half base pieces to keep them from sliding around in a drawer. Check this out to see what I'm talking about.

Start a thread! Yeah, I've watched Alexandre's kitchen video. That's an option, although to evenly fill the space you'd have to print boxes with a .5 dimension, too. Which could throw off the rearranging / modularity of it (not sure how often I'll really be switching things around, though). I know there are some parametric grid models where you can build in a 'spacer' on select edges, too. For the ones I've already printed I'm probably going to just print some loose spacers.

Also here is a nice playlist of videos to help with designing for 3d printing.

Thanks! Of course I've watched some Teaching Tech printer stuff and used his calibration website, but haven't watched this series. OnShape looks interesting, but I'm already down the path with Fusion. I'm going to watch this though, and hopefully the concepts will apply. Thanks for the reco.
 

big_bake

Well-known member
Joined
Mar 19, 2014
Messages
119
Location
VA
Thanks! Of course I've watched some Teaching Tech printer stuff and used his calibration website, but haven't watched this series. OnShape looks interesting, but I'm already down the path with Fusion. I'm going to watch this though, and hopefully the concepts will apply. Thanks for the reco.
The concepts do apply. I use Inventor myself which is pretty close to Fusion360. Picking up good design techniques for additive manufacturing is the key. I really liked that he put that series together for the community.
 

loganb

ALLIANCE MEMBER
Joined
Dec 29, 2011
Messages
5,579
Location
Omaha, NE
Playing catchup here...lot of cool things!

Love the automation....especially the laundry routine and remembering to swap things around is a big issue in our house. I've got half a dozen of new wifi enabled switches for christmas to help replace some dumb switches so I can group them to help trigger some routines. So far...they're still in the box...but soon....hopefully!

Awesome to see the printer working more reliable and like it should've from the start. All that learning and suffering is hopefully paying off :) And thanks for the wrench project...reminds me I need to get back and finish mine as well!

Hope the back is doing better and getting you closer to returning to your 3 miles a day goal!
 
OP
N

nicholam77

Well-known member
Joined
Dec 18, 2016
Messages
2,673
Location
Minneapolis, MN
Hope the back is doing better and getting you closer to returning to your 3 miles a day goal!

It's slowly improving. Been to quite a few PT appointments and doing lots of strength-building exercises for that. I've just gotten back to going on a 3 mile walk, although it still causes flare ups so not every day, but 4 weeks ago I never would have even been able to go that far. Back in the summer I was doing 8 miles a day sometimes, so I'm still far from out of the woods. But any improvement is the right direction.

Awesome to see the printer working more reliable and like it should've from the start. All that learning and suffering is hopefully paying off :) And thanks for the wrench project...reminds me I need to get back and finish mine as well!

Thanks! I remember you starting your wrench thingy and as I'm sure you can tell mine is lightly inspired from that. I think I overcomplicated mine with the two supports and the Gridfinity base.


Aside from the 3d prints, not a lot in the way of tangible projects to show for January, but I have stuff cooking in the background.
The biggest thing is we just signed an estimate for basement flooring, which is the first step to a full basement renovation. It's the last part of the house that hasn't been touched by me. The current flooring is lumpy carpet and click-together fake wood product (floating) that's basically made of compressed sawdust, over concrete slab. I searched high and low for an LVP product I liked, but in the end I just strongly prefer natural materials. And cost was a factor.

We've had a few plumbing leaks in the basement, so several areas have carpet cut out, and it's time to do something about it.

So we're doing polished concrete. That's the plan, anyways, if the slab is in good shape. Otherwise it will get a surface treatment called Aerokoat, which is sprayed on top of the concrete after it's been filled and patched and grinded, for a more homogeneous, predictable color. I'm hoping for the natural concrete, but happy to have the backup if there's too many defects uncovered.

Anyways, the reason I'm sharing is because this is going to open the floodgates to a significant amount of DIY work on the house. All baseboard, doors, closet doors will be replaced. Walls painted. I may make some of the closet doors. And I have custom cabinetry in mind for TV area and office. And when all that's done there will be a complete bathroom remodel.

This has been on the wish list for awhile, but I kept backing down due to kids (time) and cost (not wanting to pay contractors for everything). Now that my youngest is 2 1/2, I feel like I can put more energy towards it. I also don't want to put more money into this house than it's worth, but with the way the housing market has gone, I also don't see us moving soon and want to keep personalizing the space. At the same time, the basement is already finished, so spending too much doesn't make any sense because it won't add significant value.

So here we go! I agreed with my wife to proceed under the following conditions:

1/ I'm going to do as much work as I can myself. We'll need contractors for a few things, especially when it gets to the bathroom part, but I intend to do a lot of the work to keep costs down.

2/ It's going to take a long time. We need to be ok with it being in an unfinished state for awhile. Life happens, and I'm only one person with a full-time job and family. I wanted to get started earlier this winter, but family events, the holidays, and my back injury slowed us down. Summer is harder to get stuff done, so I easily see this taking 6 months - 1 year for the basement portion (not including bathroom).

3/ I want the design to be refined, but with economical materials.

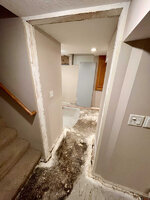
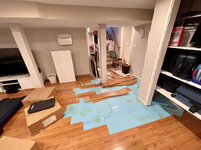
Here's an honest look at things as they stand today:

TV / ENTERTAINMENT AREA SIDE:

IMG-4549.jpg
IMG-4551.jpg
IMG-4552.jpg
IMG-4555.jpg

OFFICE / BATHROOM SIDE:

IMG-4558.jpg
IMG-4559.jpg
IMG-4562.jpg
IMG-4563.jpg
IMG-4565.jpg

I haven't done any major home improvement stuff for a number of years, so even though it will be a lot of work, I'm kind of excited to get into it.

I'm still developing a few design ideas, but when I have something more concrete and visual, I'll share my plans!

Now off to find my hammer and pry bar and tear this flooring out...

🍻
 
OP
N

nicholam77

Well-known member
Joined
Dec 18, 2016
Messages
2,673
Location
Minneapolis, MN
Other than the carpet that looks like a nice space! Excited to see what you can do with it.

For the type and size of house, yes it's a pretty nice basement compared to a lot of these post-war bungalows in my neighborhood. It was finished out about 20 yrs ago by the previous owners, so it's actually one of the newest parts of the house. Very nice to be starting from a drywalled state at least. If I had a blank slate I'd probably come up with something more creative, but the fact that it's already finished is restrictive in a good way... in that I'm not going to do any major restructuring (save maybe the bathroom), which should make it cost effective. Main goal is to scrape off the early '00's and beige material choices.

Looking forward to watching the progress Nick - Godspeed!

Thanks, Austin! I'm going to need it!


I'll post some Sketchups down the road as it pertains to cabinets and storage, but the basic formula in my head is the polished concrete, paint the walls white, and the forthcoming cabinets a combination of white and light wood (birch ply most likely). Something like these references:

concrete3.jpg
concrete5.jpg
concrete6.jpg
concrete7.jpg

So pretty basic / minimal.
 
OP
N

nicholam77

Well-known member
Joined
Dec 18, 2016
Messages
2,673
Location
Minneapolis, MN
And in case anyone thought I was bluffing, I've been swinging the mallet and pry bar all weekend. :ROFLMAO:

IMG-4571.jpg

Maybe this is standard practice, but annoyingly all the carpet tack strips were glued to the floor with what looks like construction adhesive in addition to the tacks.

IMG-4570.jpg

I did my best but this resulted in the occasional tear out.

IMG-4568.jpg
IMG-4569.jpg

In addition to removing the carpet, padding, tack strips, and fake wood flooring, I'm also removing all the baseboard, shoe, casings, doors and jambs, and closet doors.

To my delight I didn't have to leave the house to grab tools from the garage once, and the new Wera stuff is working a treat.

IMG-4596.jpg
IMG-4578.jpg
IMG-4580.jpg

I also got to try this cool little Husky LED worklight. 5000 lumens, 3 brightness settings, rechargeable USB C battery. $14 at Home Depot. Loving it so far.

IMG-4599.jpg
IMG-4600.jpg
IMG-4601.jpg
IMG-4592.jpg
IMG-4591.jpg
IMG-4588.jpg

On the TV room side, my new Wera even somehow easily removed a number of these quite-stripped screws:

IMG-4604.jpg
IMG-4606.jpg

I finished the weekend starting to pull the fake wood on the TV side.

IMG-4608.jpg

Two things so far:

1/ it's super annoying shuffling all our stuff around, but the flooring contractor is 3 weeks out, so I'm not ready to move it all into our living room yet

2/ there is quite a bit of either paint, or black staining (almost looks like dried black mold??) on the slab. I sent a pic to the contractor and they didn't seem bothered, but I guess I won't really know what it looks like until they grind it. I'm also feeling like the amount of hole-filling / patching is going to be off-putting. Will wait to make the final judgement, but I could see this ending in the "Aerokoat" coating instead of the natural slab.

And... my kids gave us the treat of getting Covid as of Saturday morning, so I've been trying to stay away from them and keep myself in working shape!

🍻
 

Xti04

Well-known member
Joined
Nov 11, 2016
Messages
2,340
With your home being in the great white north wont that concrete floor be cold and.ake the space colder? When I tiled my basement in my old house it stayed so cold in there that we never used the space.
 
OP
N

nicholam77

Well-known member
Joined
Dec 18, 2016
Messages
2,673
Location
Minneapolis, MN
Progress looks great! Good luck with the kids...they seem to handle the illness well but the part of them assumingly being at home...with ya'll and no escape...yeah thats less fun.

Thanks! Yeah the kids are fine, lol. Just as much energy as usual, despite my daughter having a 105° fever this weekend. She always burns hot, though. Doesn't seem to bother them much. Like you said, I'm more worried about... me :ROFLMAO:

With your home being in the great white north wont that concrete floor be cold and.ake the space colder? When I tiled my basement in my old house it stayed so cold in there that we never used the space.

That's a definite possibility that I will be honest I did not think about at all, haha. I've never had an issue with the basement being cold, so hopefully that's a good sign. Not sure if the foundation walls are insulated or not.

That is a good point though and I'm sure some heat will be lost. Hopefully not an appreciable amount, but I guess I'll find out. If it turns out a disaster, the price to polish or coat the concrete was not astronomical so I suppose I could always go a different route in the future.
 
To avoid these ads, REGISTER NOW!
Top Bottom