To avoid these ads, REGISTER NOW!

Between 265 & 485 SQ/FT Nick's Two-Car Detached Vdub Garage

Workspaces sized between 265 and 485 squarefeet.
OP
N

nicholam77

Well-known member
Joined
Dec 18, 2016
Messages
2,671
Location
Minneapolis, MN
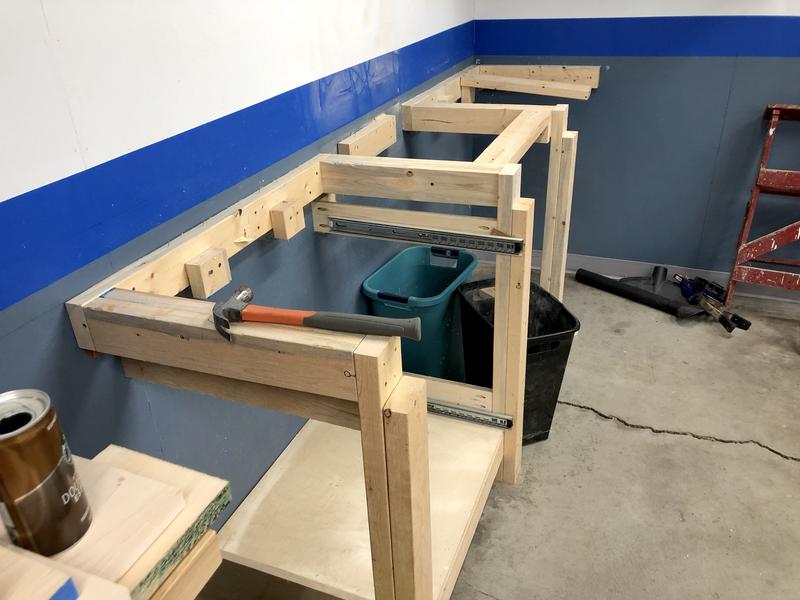
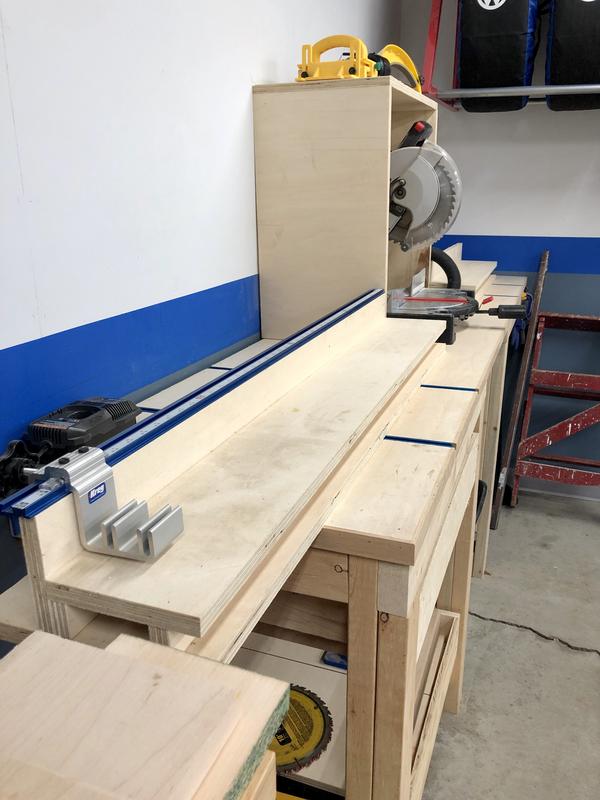
Goodbye, Miter Station, old friend. You've helped me miter LOTS of door casings and baseboards over the last few years.
EFFEB856-C309-4021-8C7D-4416B4DEC8C6.jpg


But your time has come.

4ADA3835-4C2B-4B0B-9831-816EF9E88FD8.jpg


E7273094-C58C-4E1C-8191-C74930EF3D5B.jpg


I went the "careful demolition" route, using pry bar and hammer. Pulled all the brads and screws out of the lumber.
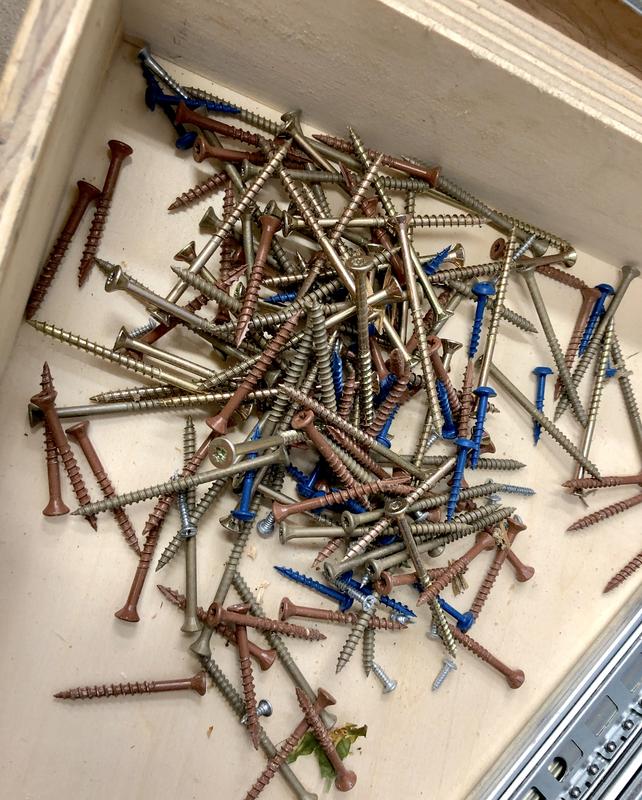
A3B23FCF-3448-47A4-8BAE-57A0405961C0.jpg


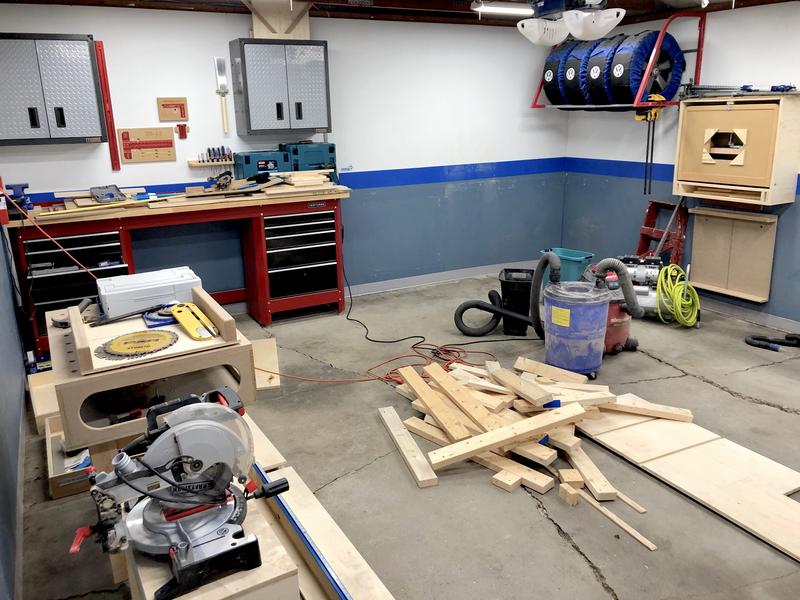
Then used... the Miter Saw... to cannibalize its own workbench.
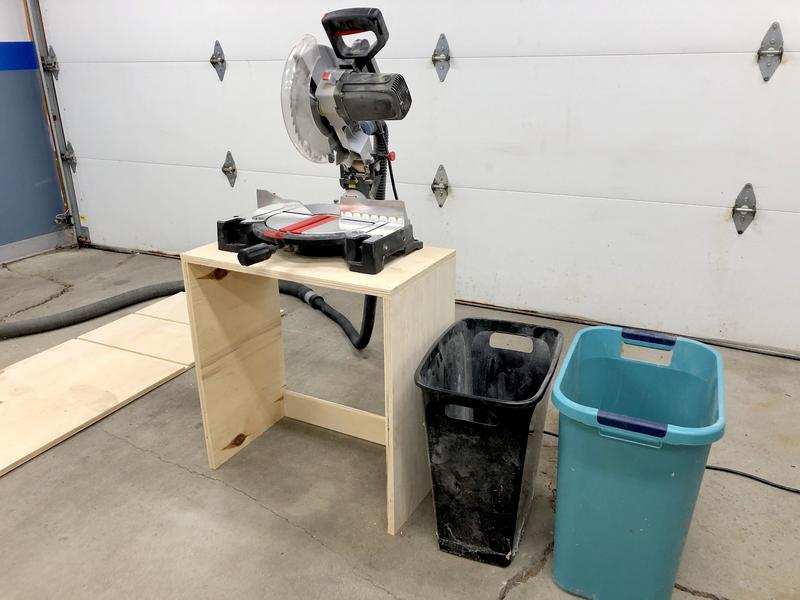
01BEE1CE-1752-4565-A133-F13E9ACBFFB0.jpg


B6F81131-3E9B-477A-9237-8B2D5D4BCFDF.jpg


FC2BDF11-098F-483F-A60D-E465A8475163.jpg


Unfortunately while processing the lumber I had an accident. I had set the miter saw on the bench's former "hood" as a stand, and after one of the cuts when the handle sprang back it tipped the saw off balance and it toppled over onto the floor, breaking the blade guard and some other plastic bits.

I'm bummed about this because now not only do I have no miter bench, but the saw itself is lacking a major safety feature which I'll have to figure out how to fix.

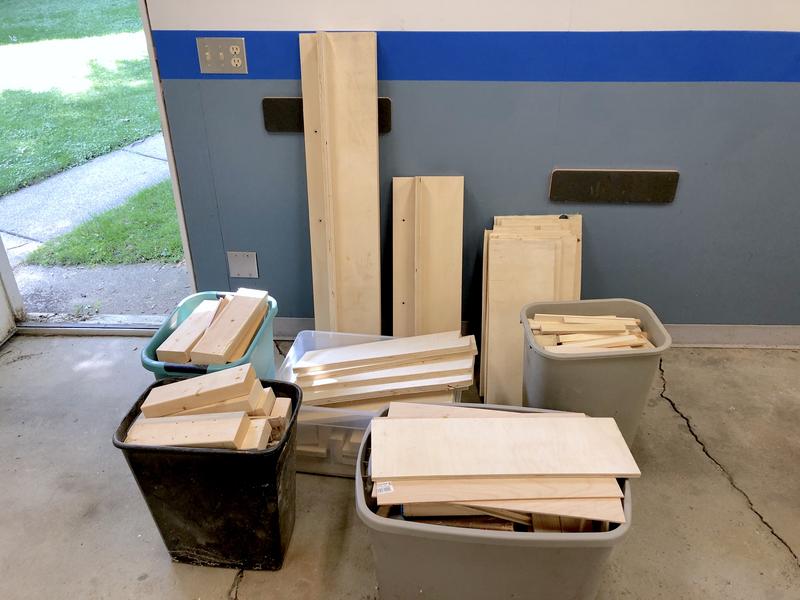
Then I took all this beautiful plywood and 2x4's to my in-laws who had a bagster disposal unit from an ongoing deck remodel, and threw it all away.

Pains me to do so but I'm going to try not to hoard every little scrap from now on. I just don't have the room.

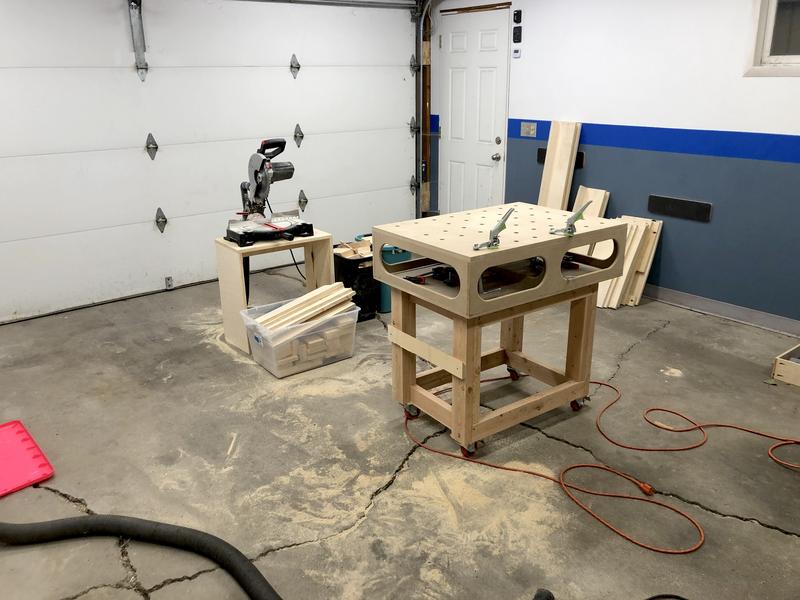
At least the TS fits in the garage now:
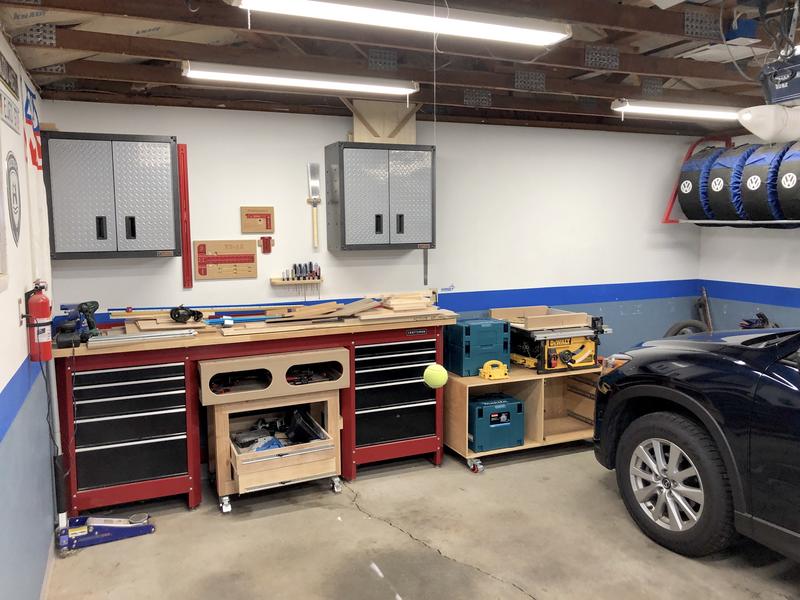
CF2D887B-E626-4A94-A36B-53D075BB9B90.jpg


Drawers are in the basement getting finish applied:
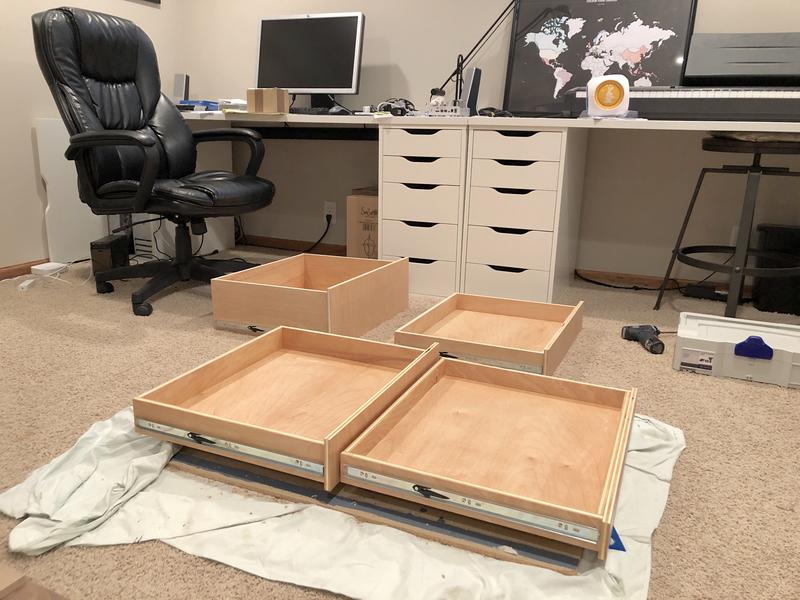
A459AEC8-F690-4B4A-9A0D-DDAF7D1C7333.jpg


It truly was a bit bittersweet to tear it down, as it was the first thing I made myself for the garage, as well as my first shop project. But... gotta make room for other stuff, so onwards and upwards.

:beer:
 
To avoid these ads, REGISTER NOW!

Mr. Roboto

Well-known member
Joined
Dec 11, 2012
Messages
2,160
Location
New Hampshire
You do realize that your saw tried to commit suicide over losing it's home on that miter station, right? hahaha... admittedly, I've pulled the blade guards off my mitre saw and my table saw. The guard on my miter saw I felt actually made the saw even less safe because it really cut down on my visibility. And the one on my table saw was just pure garbage... Anyways, I'm sure it was sad to see the station go, but it sounds like you got your use out of it and it served you well.

Also... how do you like that Ikea desk setup? I've been considering buying 2 sets of those "alex" drawers and DIYing something for a topper for my gaming PC setup.
 
OP
N

nicholam77

Well-known member
Joined
Dec 18, 2016
Messages
2,671
Location
Minneapolis, MN
You do realize that your saw tried to commit suicide over losing it's home on that miter station, right? hahaha... admittedly, I've pulled the blade guards off my mitre saw and my table saw. The guard on my miter saw I felt actually made the saw even less safe because it really cut down on my visibility. And the one on my table saw was just pure garbage... Anyways, I'm sure it was sad to see the station go, but it sounds like you got your use out of it and it served you well.

Also... how do you like that Ikea desk setup? I've been considering buying 2 sets of those "alex" drawers and DIYing something for a topper for my gaming PC setup.

Haha, that's funny! I think you are right! :lol_hitti

I never had an issue with visibility with the blade guard -- it just seems like without it there's a LOT of exposed blade, and a large one at that. I did continue to use it without to finish the breakdown, but only after I screwed down the saw :bounce:

I do like the Ikea Alex units. Overall I have a love-hate relationship with Ikea. I like that they democratize Scandinavian and modern designs with accessible prices, since that sort of style is often very expensive. And have helped popularize things like Euro-style cabinets in America. And they have some gems like the Poang chair. But some of their stuff is not the best quality in my opinion, even for the prices. There are, however, some exceptions I think, and I think the Alex units are one of those things that are of a decent quality and good value.
From what I've seen online they're pretty popular for computer desk setups, and I think they would go great with a custom top. Someday if I ever get to the basement in my house I'll probably make my own cabinets, but for now they work just great and I have no complaints.
 

Unruh

Well-known member
Joined
Aug 12, 2017
Messages
1,431
Location
Silverdale, Washington
You just tore down your station! I was thinking of building one! How can we get that Kreg rail system mailed to me...hmmmm.
 
Last edited:
OP
N

nicholam77

Well-known member
Joined
Dec 18, 2016
Messages
2,671
Location
Minneapolis, MN
You just tore down your station! I was thinking of building one! How can we get that Kreg rail system mailed to me...hmmmm.

Yes, it's gone! I do have plans to make a new station to replace it and will most likely be re-using the Kreg stop block. Miter station version 2.0. But I'm sure you will find a mint condition Kreg rail stop at a garage sale shortly!!

:lol_hitti

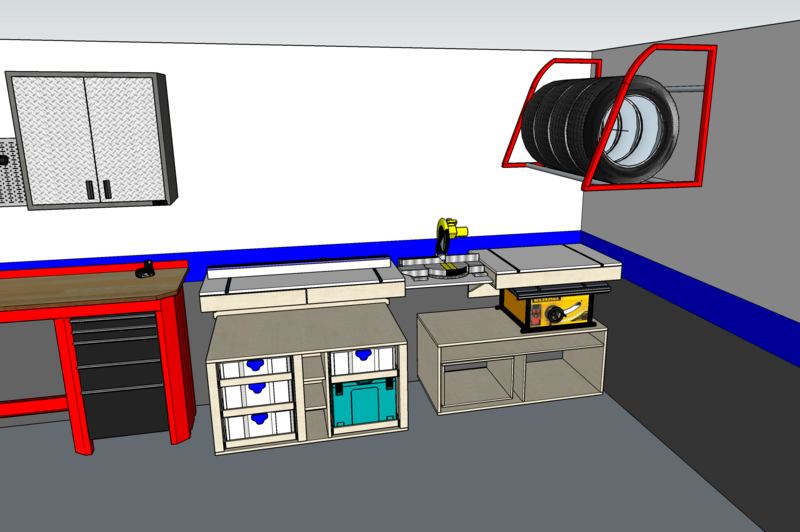
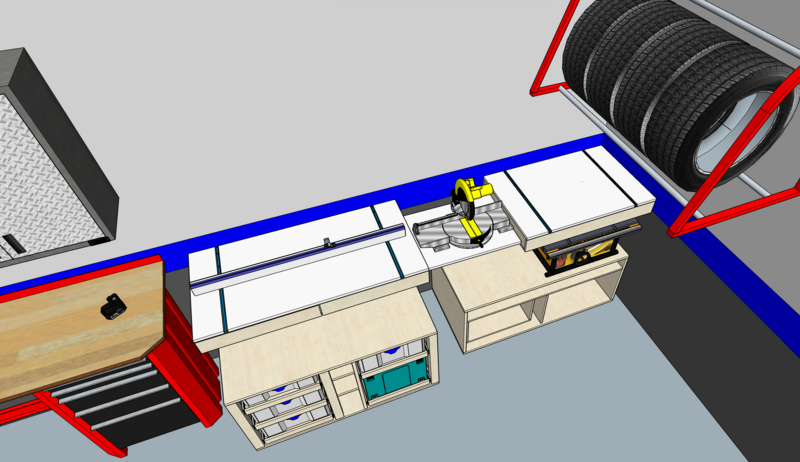
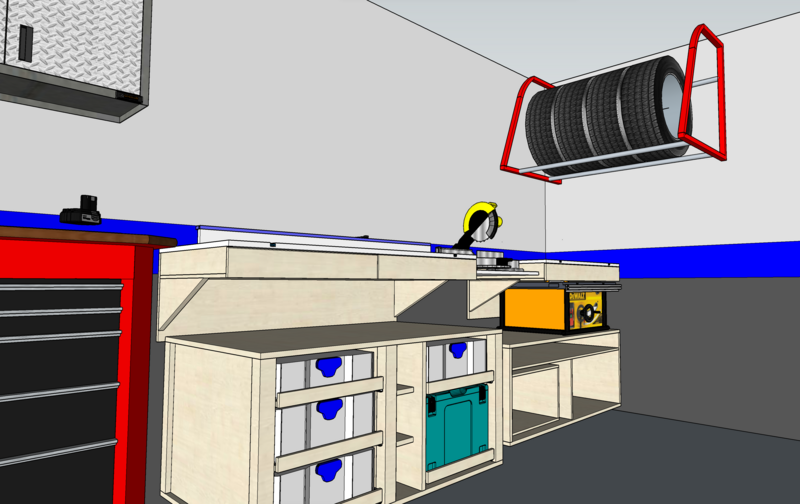
This isn't the final design necessarily, I'm still trying to figure out how I can incorporate some other tools like drill press, sanders, into my small setup. Also some wood and tool storage. So I may not go full miter station all the time, it might be more modular or set it up when I need it, but regardless there will likely be a new floating bench where the old one was. Here's an idea that was kicking around in my head:

Screen_Shot_2019-08-26_at_9.57.49_AM.png


Screen_Shot_2019-08-26_at_9.57.57_AM.png


Screen_Shot_2019-08-26_at_9.58.11_AM.png


It fits the table saw cart and (yet to be built) larger assembly table / MFT with systainer storage, allowing them to dock underneath. The model is not complete but will have a raised perforated top like the old one.

I have lots of things to figure out with this potential setup, like where dust the dust collection live, where does the small compressor go, etc.

I think I might lose the tire tack, as cool as I think it looks, and store my wheels inside the house in the attic during the winter. It just takes up so much room and is a hazard for bonking my head.

Not much to update from this weekend, spent a lot of time with family. The little one just figured out how to crawl yesterday, so... I have some baby-proofing to do in the house.

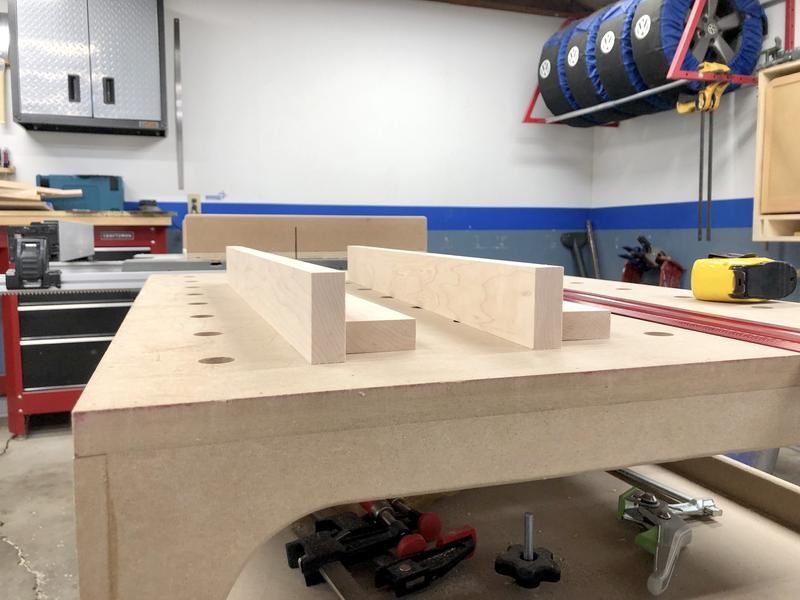
I did spend a short 30min during one of her naps starting on some floating picture frame shelfs my wife requested I make for her birthday. I'll divulge more details on that project, later, but in the meantime I got some pieces of maple cut:

30392274-1E91-4E02-9CEE-AB4FC01F8A6C.jpg


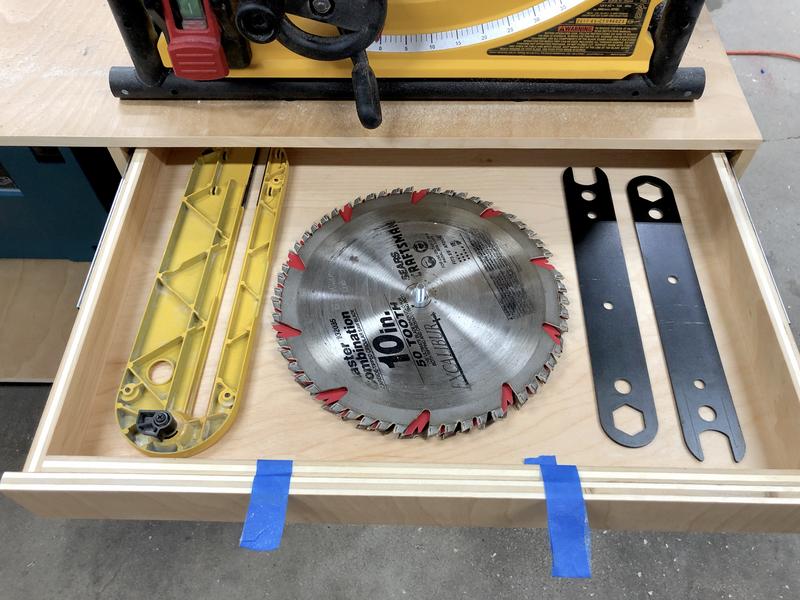
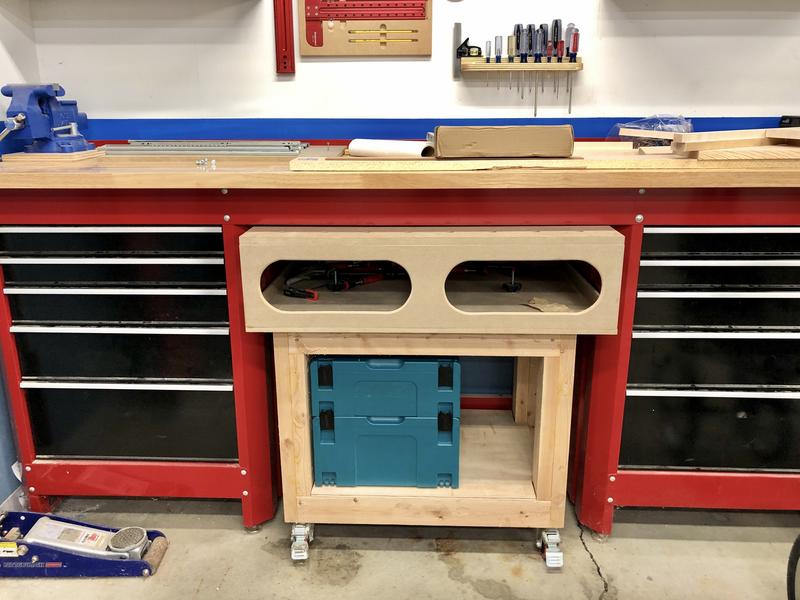
Having the TS cart on wheels in the garage is awesome, I can already tell I'm gonna love it. And having the accessories on board is great.

A0E2875F-6625-4CE2-B800-F1EA1E492B29.jpg


Can't wait to get the drawer storage completed.

:beer:
 

bj383ss

Well-known member
Joined
Sep 29, 2011
Messages
3,166
Location
TX
Uh-oh. Tire rack is going away. All things automotive getting the boot! :D

Bret
 
OP
N

nicholam77

Well-known member
Joined
Dec 18, 2016
Messages
2,671
Location
Minneapolis, MN
Unruh, thanks, and yes it would have some sort of dust collection. Probably a containment hood and hose on the saw's dust port.

That's what I had on the old one and it worked... ok. Hard to fully collect on a miter saw without a sophisticated setup, but better than nothing. Trouble was I only connected the shop vac half the time since it's a bother to keep switching tools. Which leads me to... I really need to implement a halfway decent dust collection system in the first place.

I'd love to have a HF or similar dust collector, some sort of cyclone, and plumbed lines for table saw, miter saw, and router table. Then at least one outlet to attach tracksaw / orbital sander / other handheld tools. And I need to figure out adapters for all the tools! There needs to be a standard! I digress...

My shop vac + dustright cyclone take up a lot of floor space, so I'm looking to replace with dust collector and wall mount, possibly where the tire rack currently is.

Need air filtration, too. Particulate is a problem especially when I have the overhead door closed, which I often do to cut down on noise pollution for the nearby neighbors.
 

Kriesel

Well-known member
Joined
Mar 25, 2014
Messages
138
Location
Afton, Minnesota
Need air filtration, too. Particulate is a problem especially when I have the overhead door closed, which I often do to cut down on noise pollution for the nearby neighbors.

I've been using a WEN 3410 filter for that, works really well, and is decently cheap on amazon
 
OP
N

nicholam77

Well-known member
Joined
Dec 18, 2016
Messages
2,671
Location
Minneapolis, MN
I've been using a WEN 3410 filter for that, works really well, and is decently cheap on amazon

Already have it in my Amazon "woodworking" wish list! :bounce:

Good to know you like it. I've been debating making a DIY one, or doing the box fan + furnace filter thing, but the timer feature seems nice and I really don't need another project added to the list.
 
OP
N

nicholam77

Well-known member
Joined
Dec 18, 2016
Messages
2,671
Location
Minneapolis, MN
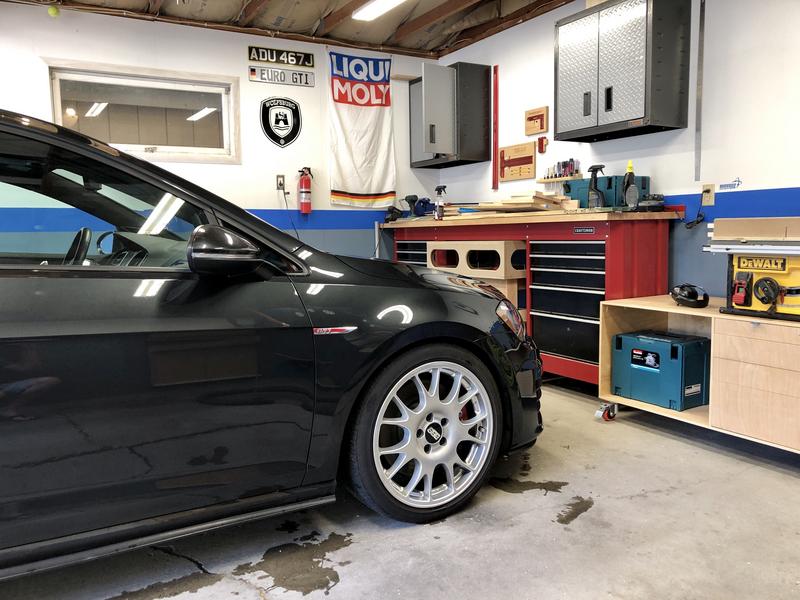
Long weekend is off to a good start. I got off work early today and I'm taking tomorrow off for a wedding. Just enough time when I got home to wash the VW.

It's hard to admit out loud but it's almost been a year since I've hand washed it :spit:

Funny how that coincides almost perfectly with the birth of my daughter... :headscrat :)

FDA6229A-09B8-4C54-A1B7-6DE36C17219E.jpg


9C0D5D68-4619-4039-A50F-1C6F89A16593.jpg


7D1679EE-98E8-43E4-B298-9D4ABA1BF6F7.jpg


Forgot how good Carbon Steel Gray looks when it's actually clean.

D3756285-FA3-C-4100-BC89-07173-B9055-DB.jpg
 

bj383ss

Well-known member
Joined
Sep 29, 2011
Messages
3,166
Location
TX
Car looks good Nick. No shame I haven't washed any of my cars in months. The tires and wheels I try to keep clean. The 95' desperately needs a coat of wax baking out in the Hot Sun.

Bret
 

6SpeedBowtie

Well-known member
Joined
Feb 7, 2005
Messages
70
Location
WV / MD
It's hard to admit out loud but it's almost been a year since I've hand washed it :spit:

Funny how that coincides almost perfectly with the birth of my daughter... :headscrat :)


I think most relatively new parents can relate.

I bought a new truck nearly 2 years ago, and I've hand washed it just once, and only applied wax to the hood and roof once. Before my son arrived, I'd have polished/waxed it easily 6-8 times, and the hand wash would have been far more frequent. Truth is, it drives me crazy not having the time to get out and detail the cars - not sure if it's the dirty truck, the lack of free time, or the lack of my "therapy" time that is most frustrating.

But, time with the family/little man is certainly better spent. Fortunately, he's now starting to get old enough that "therapy" time and time with the little man can be at the same time as he's now wanting to start "helping" me clean up the cars.
 
OP
N

nicholam77

Well-known member
Joined
Dec 18, 2016
Messages
2,671
Location
Minneapolis, MN
I think most relatively new parents can relate.

I bought a new truck nearly 2 years ago, and I've hand washed it just once, and only applied wax to the hood and roof once. Before my son arrived, I'd have polished/waxed it easily 6-8 times, and the hand wash would have been far more frequent. Truth is, it drives me crazy not having the time to get out and detail the cars - not sure if it's the dirty truck, the lack of free time, or the lack of my "therapy" time that is most frustrating.

But, time with the family/little man is certainly better spent. Fortunately, he's now starting to get old enough that "therapy" time and time with the little man can be at the same time as he's now wanting to start "helping" me clean up the cars.

Totally on the same page with you :bounce:

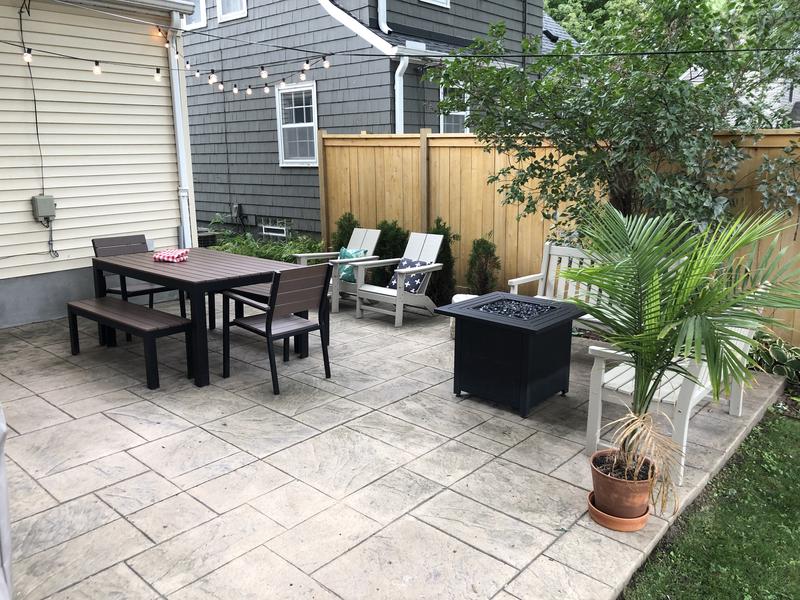
Speaking of spending time with family, that's mostly what my 4 days off over Labor Day weekend consisted of. Summer is winding down here. We got in some good time outside, had in-laws over for an evening patio BBQ one night, went out for an early birthday dinner for the wife. All-in-all a great weekend and beautiful weather.

071326E5-F010-49C9-B717-0D84AE3EE676.jpg


3C167F92-9446-46A4-BDEA-799C702B265B.jpg


4257F0D9-E6E8-457F-922E-E64F3C81DE65.jpg


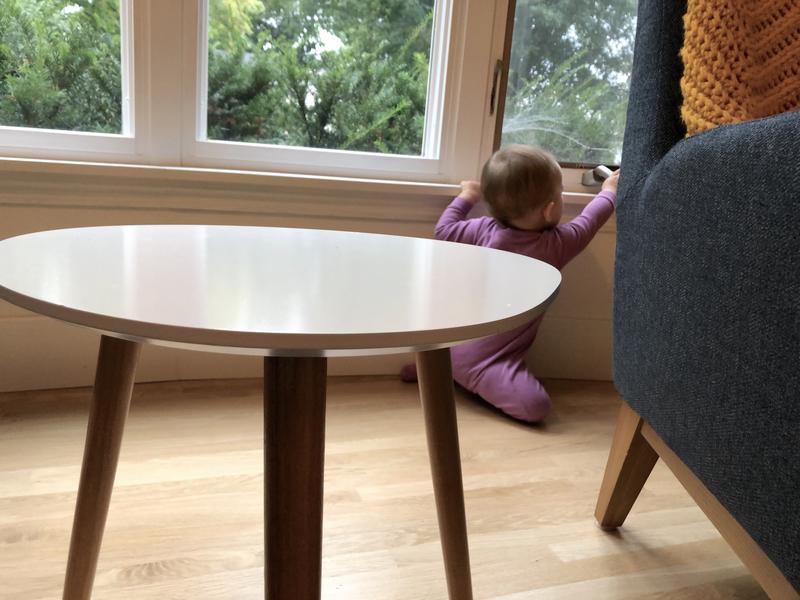
Our little girl started crawling a few weeks ago, so I have to keep an ever-watchful eye and get things baby-proofed.

1E46DD3B-0504-4819-9931-1D10863AF8BC.jpg


She's also been refusing her 2nd nap sometimes which cuts down on possibility to get projects worked on.

Nevertheless I managed a few small things.

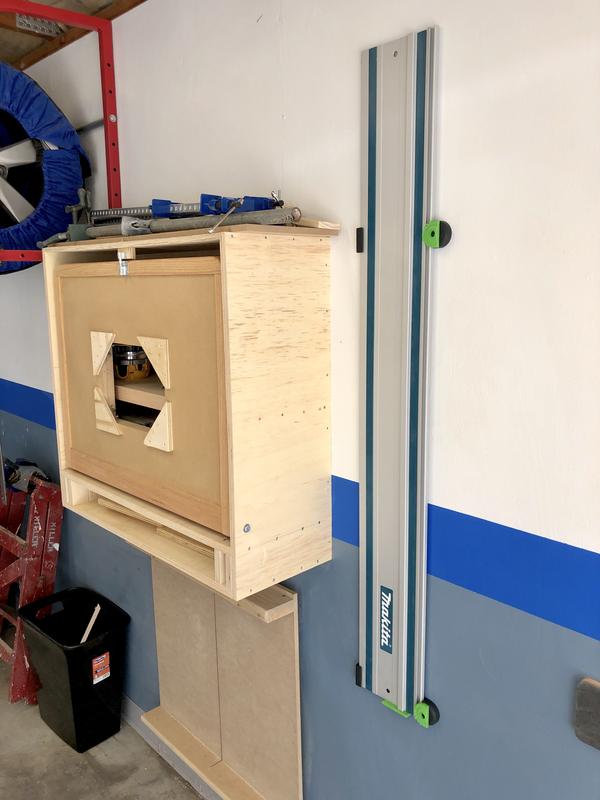
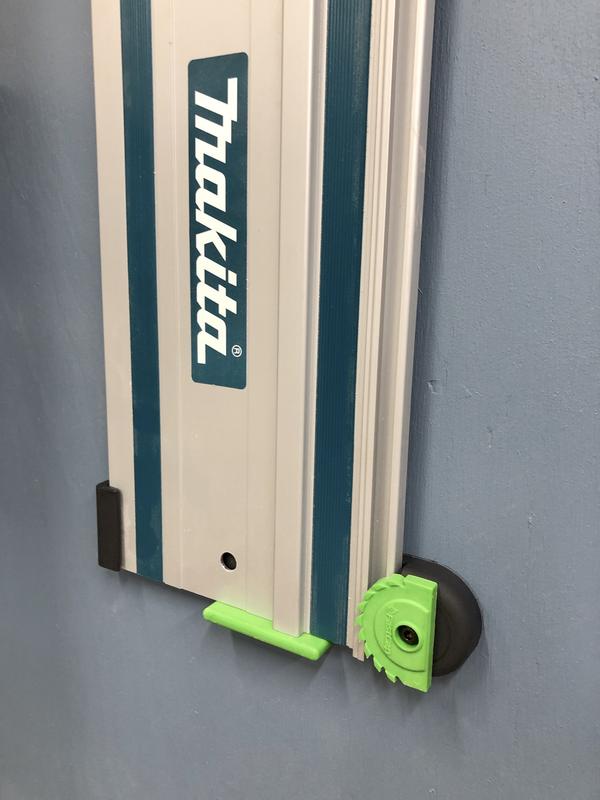
1) Hung Makita track saw track with Fastcap rail holders -- new product from them and they are pretty sweet

2E349F1A-4927-46A6-AD55-EDE06E69159F.jpg


F904B7E9-EDF2-4519-A8C3-EC899C742AB4.jpg


One less thing piled on the work bench :thumbup:

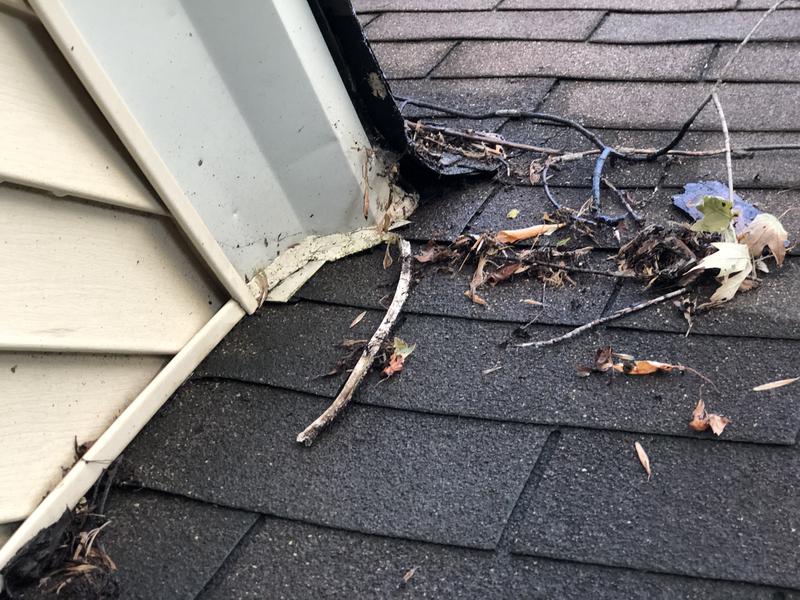
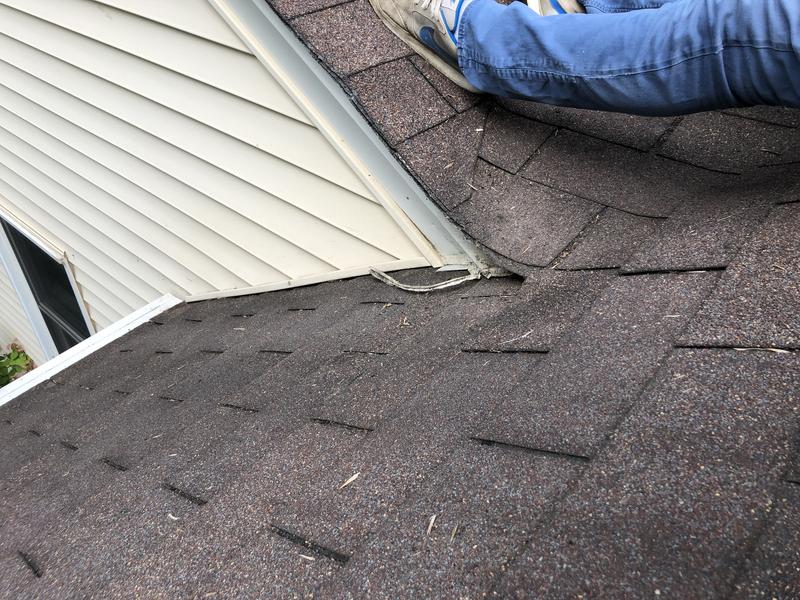
2) Attempted to seal a roof leak. Some water leaked down drywall corner inside the front door. Looking at the roof above I noticed some loose caulking where the gables meet, so I cleaned it up and sealed with some asphalt roof cement.

AC0D7AAD-BA9E-4E96-B5B3-722C14242925.jpg


909312E0-39CC-4235-9E88-205923575282.jpg


[no AFTER pics, oops]

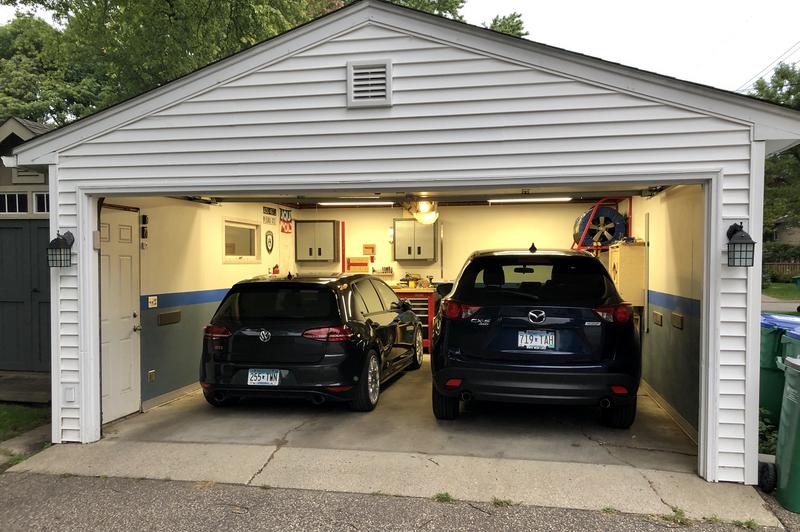
A dusk shot of the cars tucked in for the night.

B7C7E024-2ECC-4C5F-8A26-DD1906E2EACC.jpg


Hope everyone had a good weekend

:beer:
 

Jarch

Active member
Joined
Aug 8, 2018
Messages
40
Location
Little Rock, AR
I think most relatively new parents can relate.

I bought a new truck nearly 2 years ago, and I've hand washed it just once, and only applied wax to the hood and roof once. Before my son arrived, I'd have polished/waxed it easily 6-8 times, and the hand wash would have been far more frequent. Truth is, it drives me crazy not having the time to get out and detail the cars - not sure if it's the dirty truck, the lack of free time, or the lack of my "therapy" time that is most frustrating.

But, time with the family/little man is certainly better spent. Fortunately, he's now starting to get old enough that "therapy" time and time with the little man can be at the same time as he's now wanting to start "helping" me clean up the cars.

New parent as well and i can relate.. got my CC in January and I've waxed the hood and trunk once.. like you said, i would have done a full detail at least twice by now... but nap time is key for at least a quick wash. problem is i park in the driveway so my wife can park her Durango in the garage, so it still gets dirty quick... i like all the wall mount stuff you have.. its tempting to do the same for me because i have a small garage but will be moving soon so i cant justify really organizing it like i want..
 

Mr. Roboto

Well-known member
Joined
Dec 11, 2012
Messages
2,160
Location
New Hampshire
Wow, that spot you did some caulking on is a tough one. Looks like you have 3 different directions of shingles intersecting on one spot. You may want to consider a kickout diverter there or something along those lines to help keep water away from the area.
 
OP
N

nicholam77

Well-known member
Joined
Dec 18, 2016
Messages
2,671
Location
Minneapolis, MN
Wow, that spot you did some caulking on is a tough one. Looks like you have 3 different directions of shingles intersecting on one spot. You may want to consider a kickout diverter there or something along those lines to help keep water away from the area.

Yes, it is 3 roof angles intersecting. Good idea with the diverter. I already applied a lot of that asphalt roofing cement but I'll look into it. It rained heavily today and last night and no further leaks so far that I can tell.
 
OP
N

nicholam77

Well-known member
Joined
Dec 18, 2016
Messages
2,671
Location
Minneapolis, MN
Floating Picture Shelves

*lot's of pics, please don't quote them all*

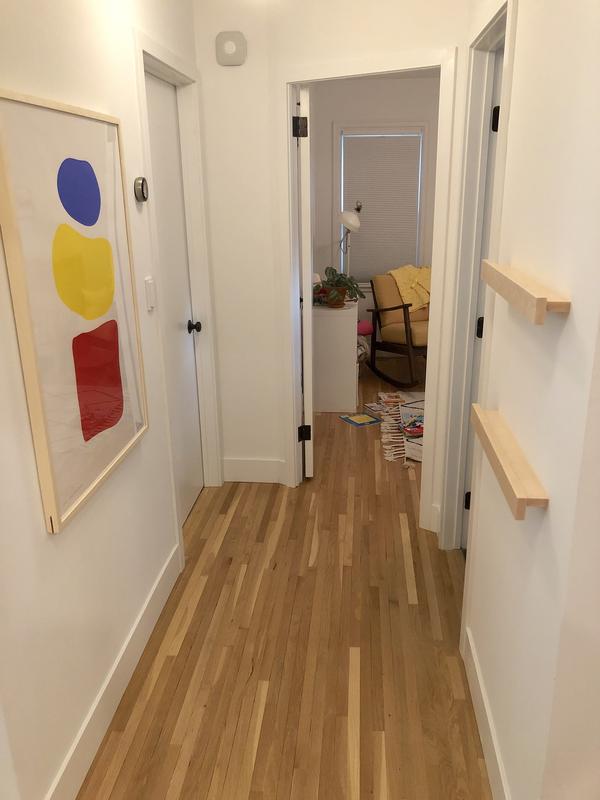
It was my wife's birthday this past weekend and as part of her present she asked for some floating picture shelves outside the bathroom (hallway) wall, to display family photos.

I had wanted to save this area for a framed print or piece of part -- we don't have a lot of spaces for art in our place and the hallway didn't seem very long for shelves to me.

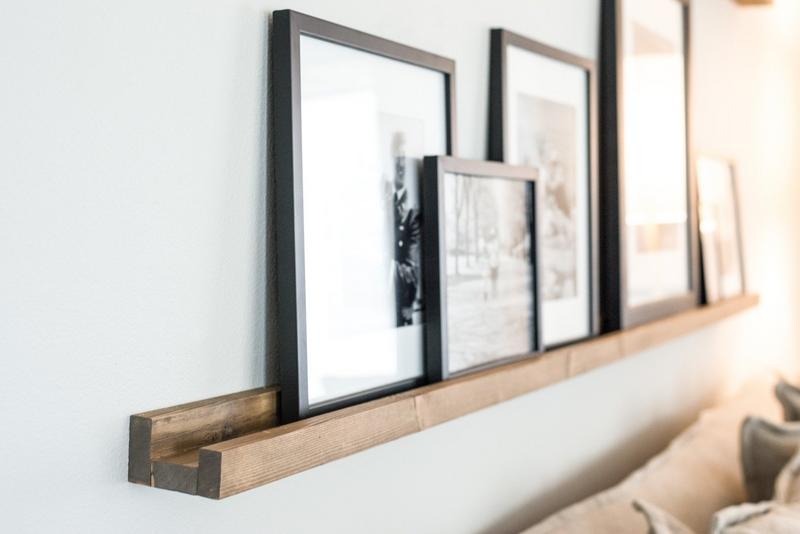
I looked around the internet and 99% of wooden ones were kind of a "J" shape and protruded 5-6" to support larger frames, which was much too far and heavy for my liking:

91038319-DC16-43F2-AE44-034F13EECAEA.jpg


So not super keen on the idea and not wanting to compromise on aesthetic I told her I would make some.

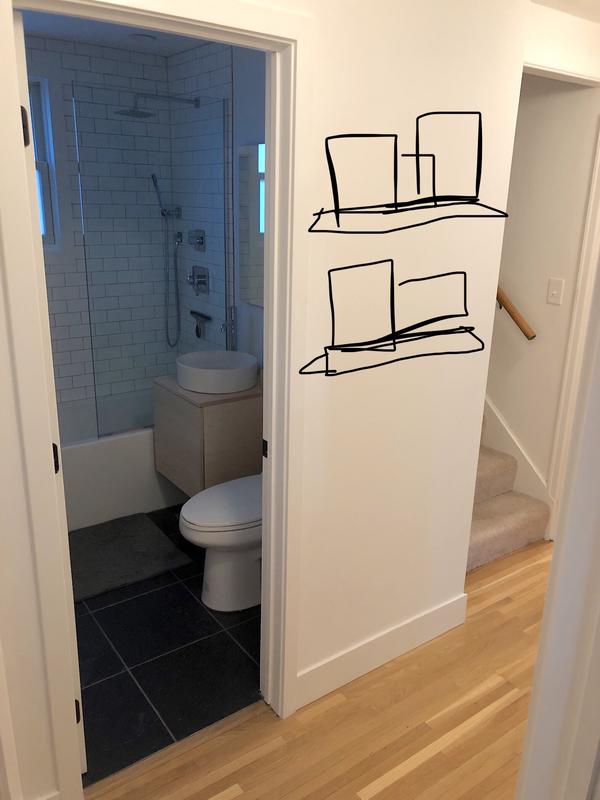
I started by making some scribbles on my phone:

89C83F65-E758-4E0C-A9A4-A7A4A7EAD185.jpg


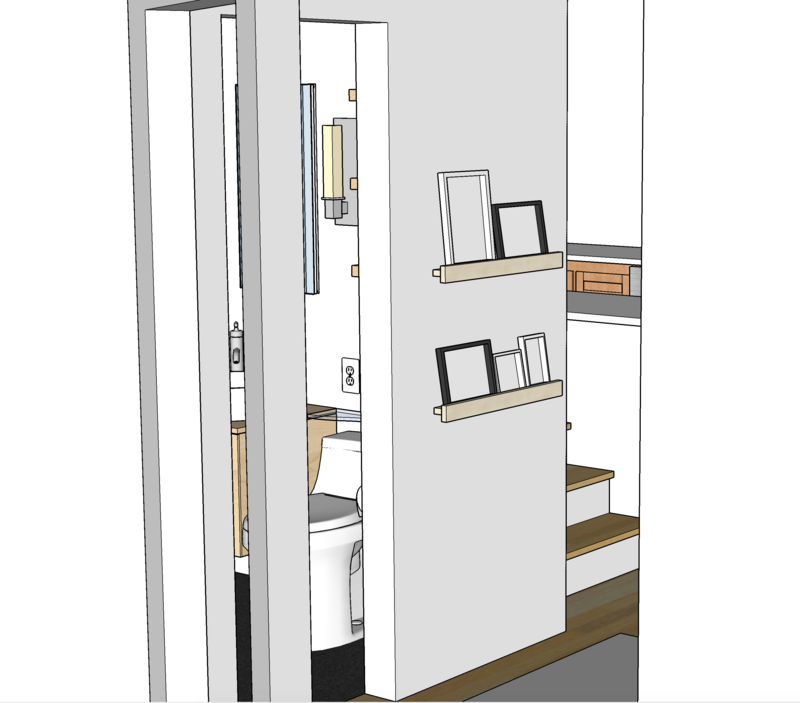
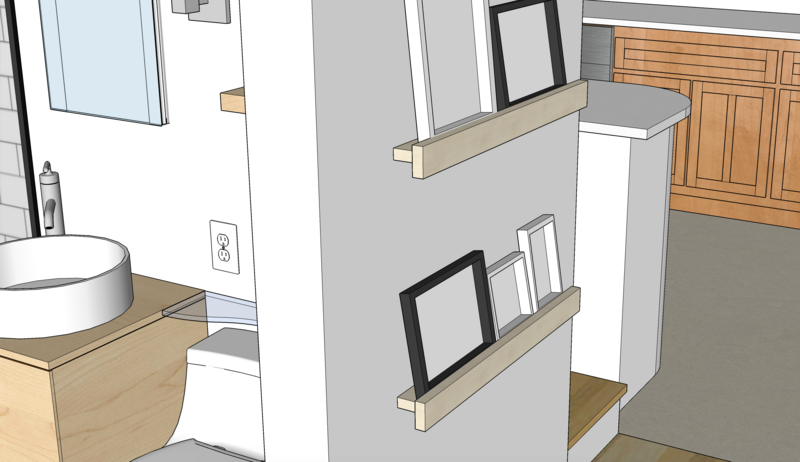
Then fleshed it out in Sketchup.

Screen_Shot_2019-08-16_at_10.31.28_AM.png


Screen_Shot_2019-08-16_at_10.31.41_AM.png


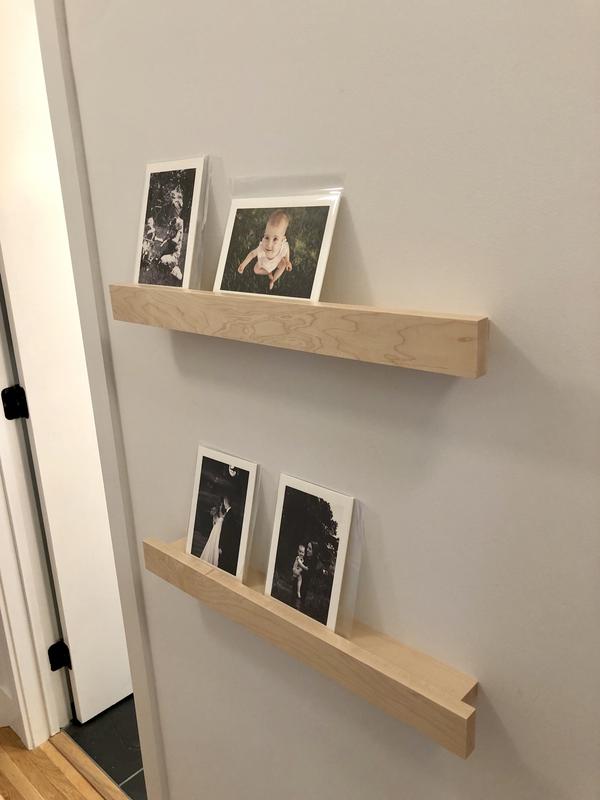
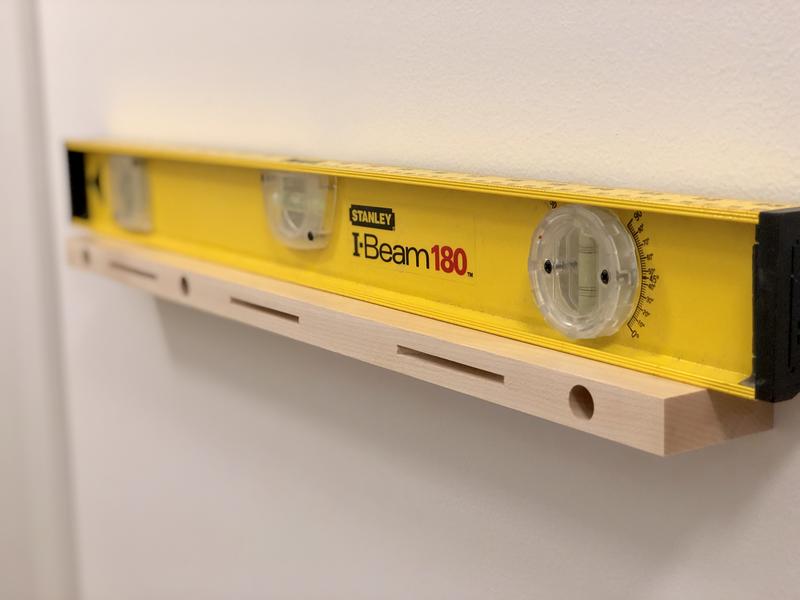
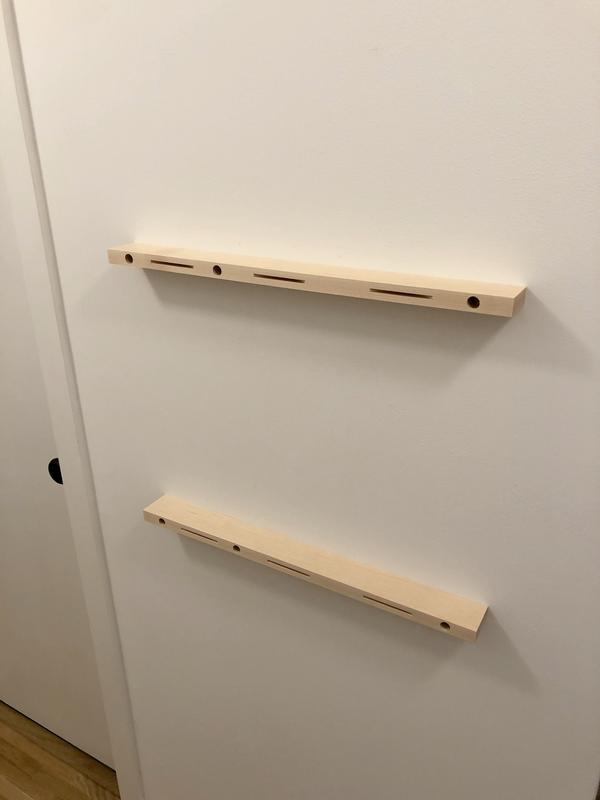
The idea is each shelf is two boards, 3/4" stock, that are both 2" wide. The shelf board is recessed 1" on either side of the "face" board, so from the front angles the "face" appears to be floating. My other goal was no visible joinery.

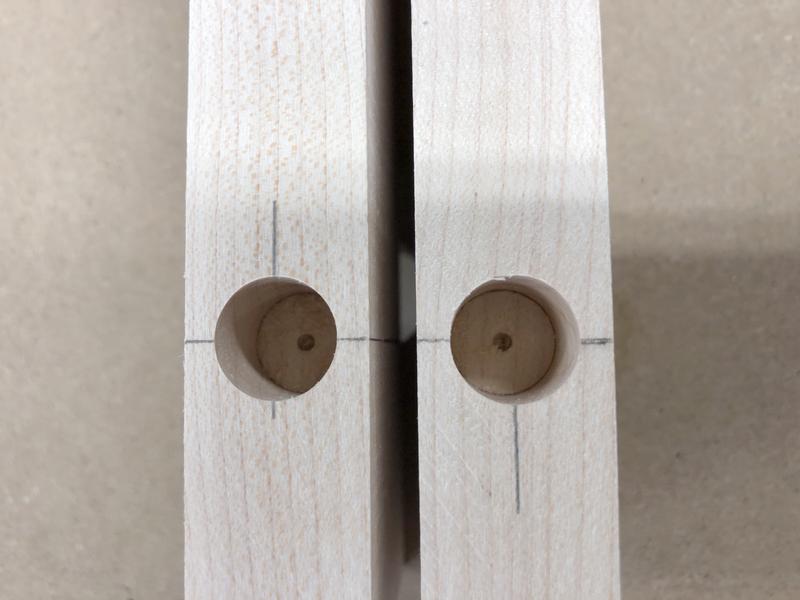
I had just enough maple left over from the vanity build to cut my pieces. To attach to the wall I drilled 1/2" holes with a Forstner bit, and then smaller screw-size holes through to the wall. 3 per shelf, one will hit a stud in the middle, the outer ones to drywall anchors.

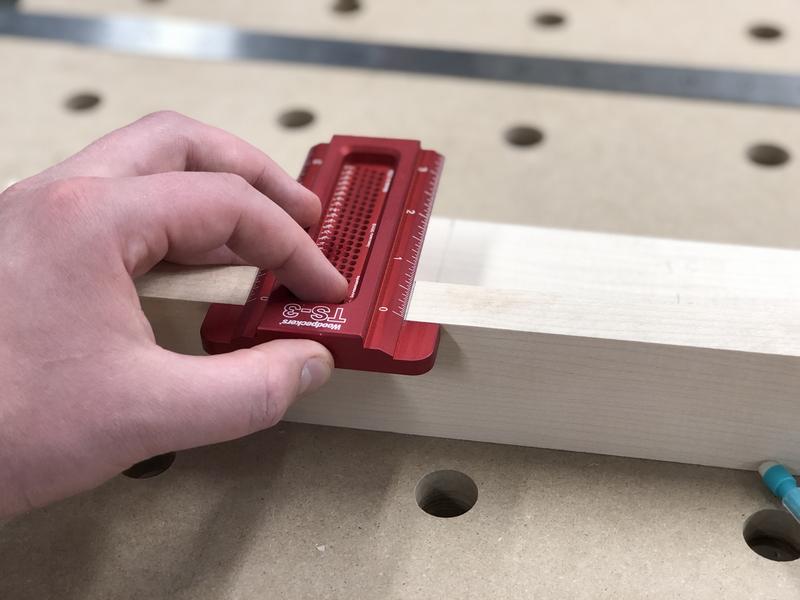
Laying out with the TS-3 and an awl makes the hole placement as accurate as I can be without a drill press (I drilled them by hand).

4B9C3A7D-87D4-4A19-B44B-578081C51C6D.jpg


8DFE1D4A-F39E-499C-AF0C-B232EC03C9FE.jpg


E5907F2E-004A-4CF6-9FF1-CD8BEFAC24C0.jpg


C5F344EF-5D23-4184-9480-35E753771A4B.jpg


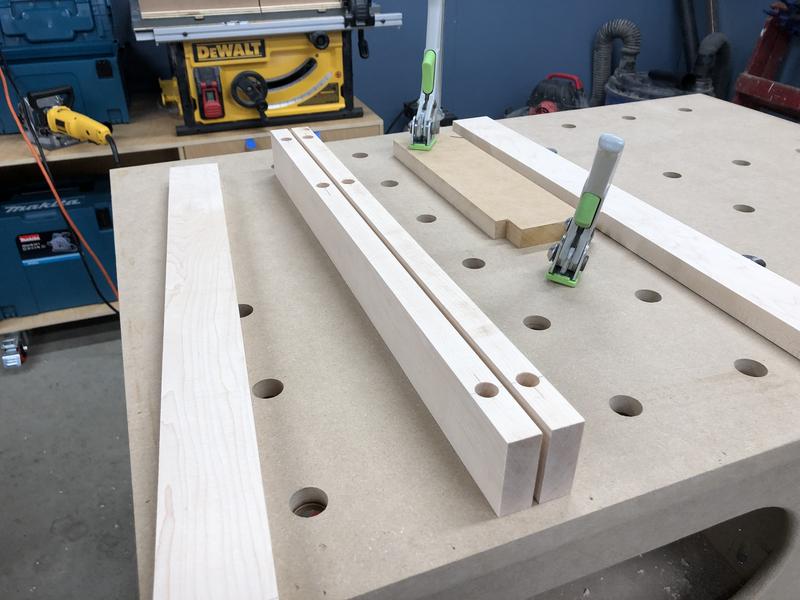
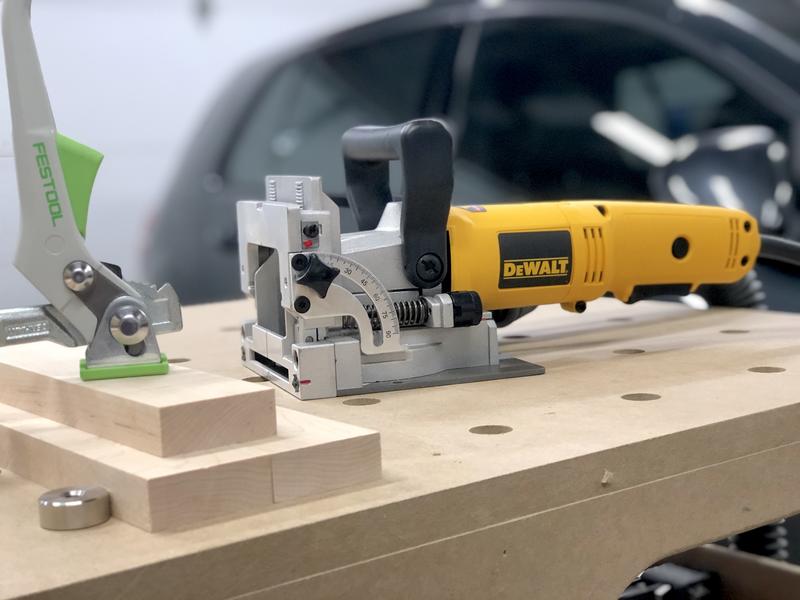
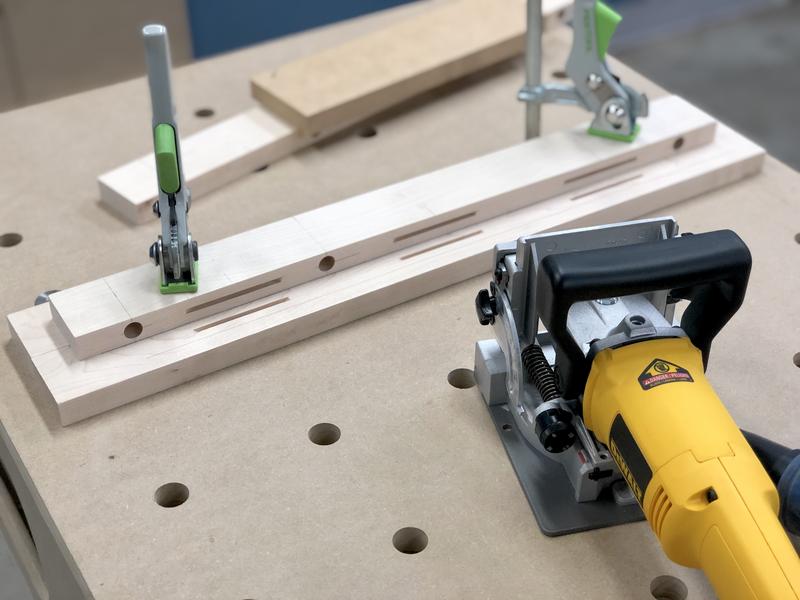
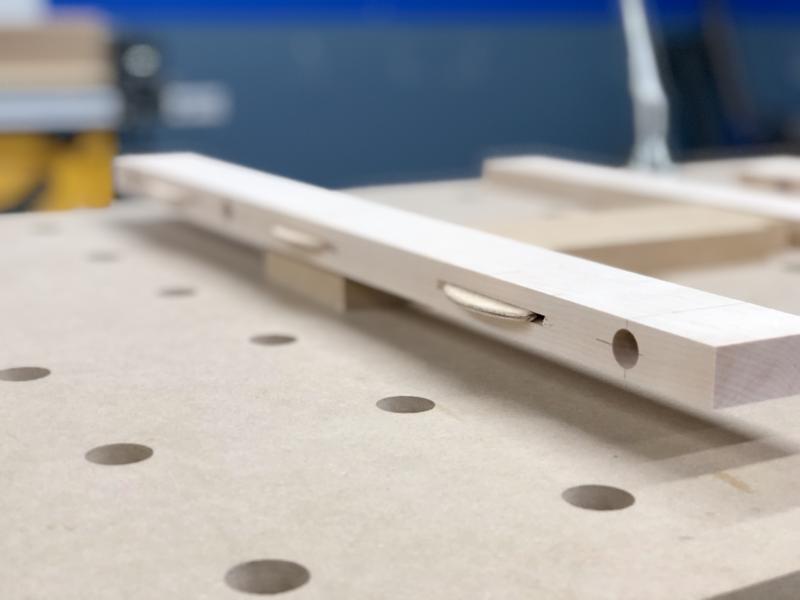
To attach the faces I used biscuits.

Oh HELLO THERE!!!!

622EF5B9-9E17-4704-B8C4-5BB3F72928AA.jpg


Been going back and forth on this guy for a long time. Was turned off by people saying biscuits are only good for alignment and not strength. This may be true, but I think in a lot of situations they will be plenty strong enough, and I seriously look forward to the alignment capabilities. I waited for about a year for it to go on sale.

8A525336-4ECE-4B8F-B347-DF477FF513A9.jpg


Worked just like it should out of the box, and with shop vac attached almost no dust.

45A7BD00-A1CC-463F-B161-46CFC4DABABF.jpg


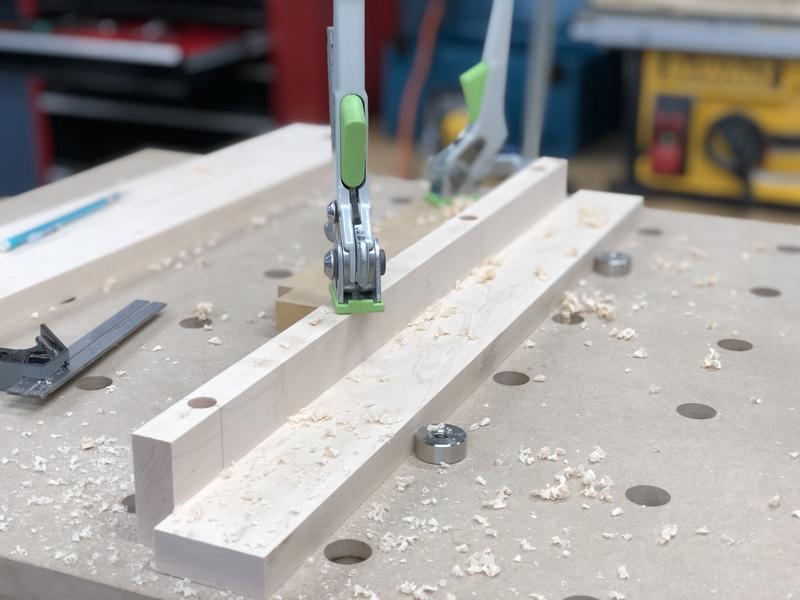
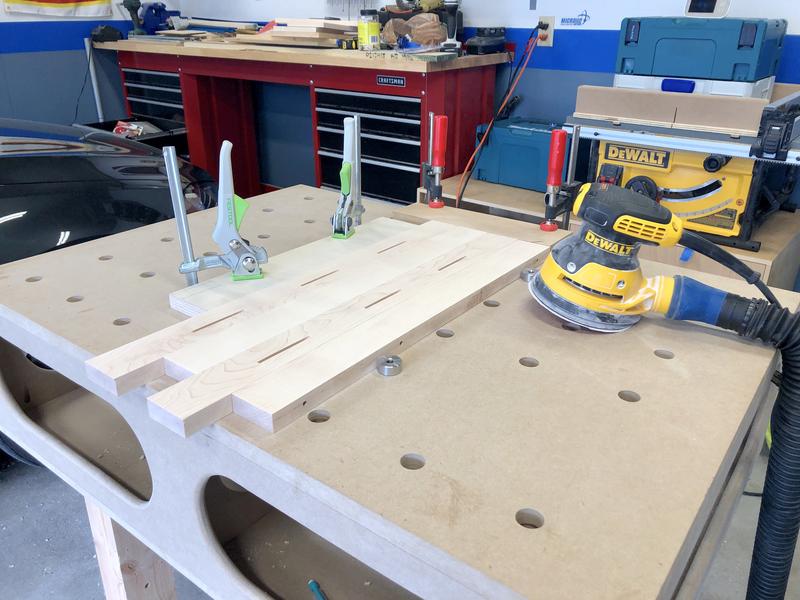
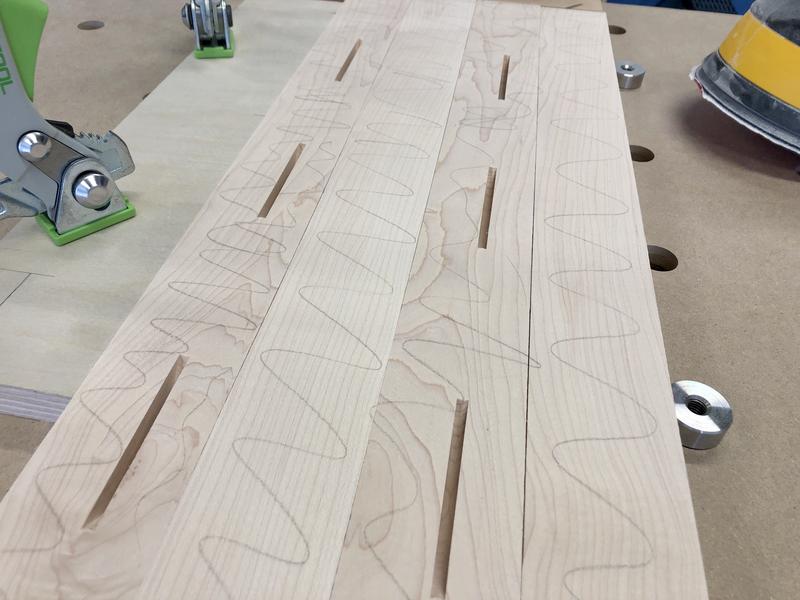
Since the boards had a little twist to them I clamped them together for sanding and drew pencil everywhere to try and sand them evenly.

3AC97261-10A5-4E0F-92D0-7651E60B062B.jpg


6420153F-C139-451D-9E79-0CD77DBA988B.jpg


Screwing into the wall. I don't think this level is accurate :spit:

6FA0BB25-61D5-48D0-9BC3-17B59EF161DC.jpg


CB4AE48D-9600-42BB-B415-1D3A0D728833.jpg


Did not take any pics of the glue up because it was stressful. I used Titebond II which seemed to tack up pretty quickly with the biscuits and trying not to have any squeeze out because I had already applied finish. Couldn't figure out how to clamp them either, so I just pushed them on as hard as I could and secured with some blue tape for 30min. Clamps would have been better but it worked well enough.

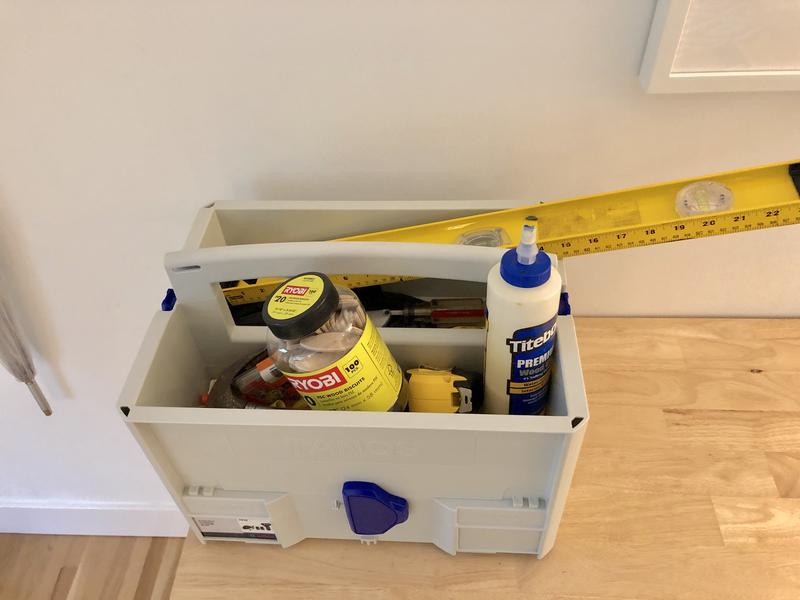
Using my Sys Tool Box to hold my stuff and keep things tidy. Can't have tools laying around the house with my little girl crawling around.

E22DD923-C2BF-465B-9EEF-6B7E71553E58.jpg


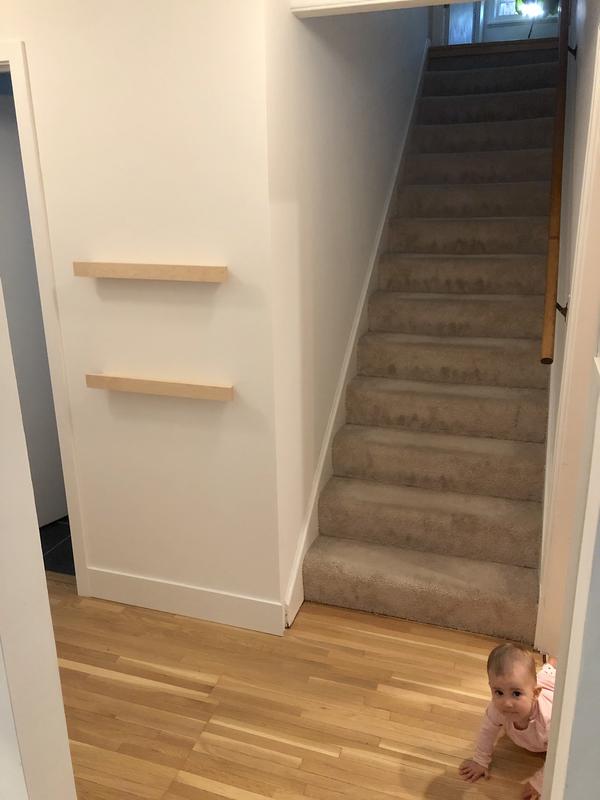
The big reveal:

E2096DD6-36BE-4EF8-B746-D741A49834EF.jpg


D4CC943F-38C0-429D-9D04-5CB3573B31AF.jpg


With some sample pics:

5774FF24-E3B6-4534-8D04-6DCB752DA488.jpg


Hard to see but the "faces" have figured grain.

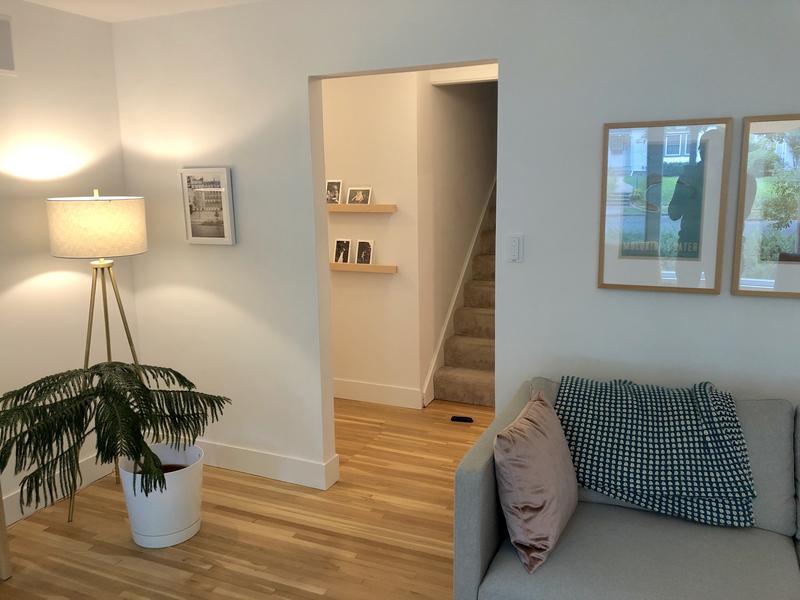
And there's finally something visual to look at through the passage way.

6E53A162-13BF-4D34-81CF-4805B5A7BF0A.jpg


I have to say I really like how they turned out. They don't stick out too far and satisfy my love for simplicity. The floating effect is pretty neat in real life.

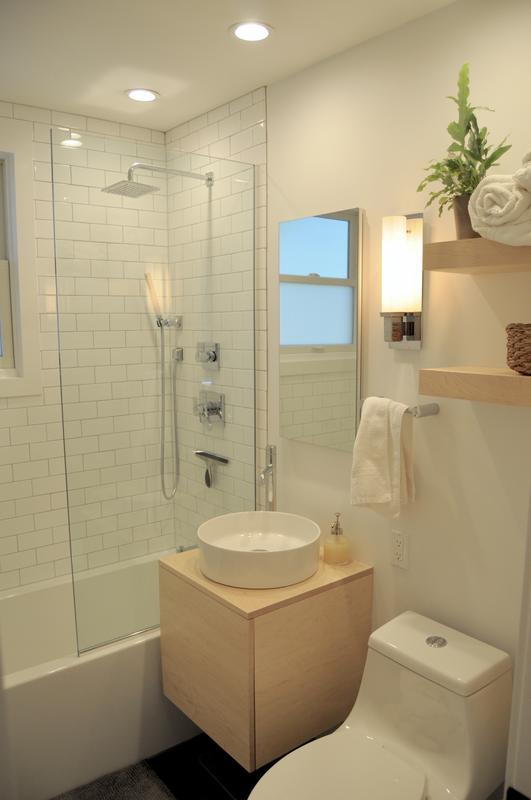
Being from the same wood they also have a connection to the inside of the bathroom which they share a wall with, which I find a nice cherry on top.

FCDDF764-25B9-4F08-B363-4ACDD9FF121B.jpg


So... it turns out my wife was right and I was wrong. Eh, what's new? :lol_hitti
 

bj383ss

Well-known member
Joined
Sep 29, 2011
Messages
3,166
Location
TX
Looks great Nick. I am sure the wife was very happy.

Good decision on the biscuit jointer. I have used mine on a ton of projects and never had any issues. All those Naysayers were probably on the Domino train!

I never have understood why they cost so much. It's just an angle grinder with a slot cutter and a fence. I got mine as a gift. I recommend trying out the miter joints with it. You will be amazed how awesome it does. A tip from me make sure you store your biscuits in an air tight container they are designed to absorb moisture and swell. That's their secret.


P.S. I made this desk for my father in law 10 years ago using biscuits to join the top and it is great condition.

Picture 028 by bjohnson388, on Flickr

Picture 037 by bjohnson388, on Flickr

Bret
 
Last edited:
To avoid these ads, REGISTER NOW!
OP
N

nicholam77

Well-known member
Joined
Dec 18, 2016
Messages
2,671
Location
Minneapolis, MN
Looks great Nick. I am sure the wife was very happy.

Good decision on the biscuit jointer. I have used mine on a ton of projects and never had any issues. All those Naysayers were probably on the Domino train!

I never have understood why they cost so much. It's just an angle grinder with a slot cutter and a fence. I got mine as a gift. I recommend trying out the miter joints with it. You will be amazed how awesome it does. A tip from me make sure you store your biscuits in an air tight container they are designed to absorb moisture and swell. That's their secret.


P.S. I made this desk for my father in law 10 years ago using biscuits to join the top and it is great condition.

camera-icon-GJ.jpg


Bret

Thanks Bret, yes she was happy with how they turned out.

Agree about the biscuit joiner being expensive for what it is, but it's so fast and easy I can see myself using it a ton going forward, especially on plywood-based things like cabinets and drawers. Biscuits + glue + pocket screws could be a fast, accurate, and strong approach I think.

Great tip on keeping the biscuits dry, and yes I am looking forward to using it on miters. Could have used that when I made the fireplace mantel, as well as on all the door casings, some of whose miters opened up over the winter.

It will be interesting to see if other tool companies come out with a more affordable slot mortiser once the Domino patent expires.

And holy ****, that desk you made is incredibly beautiful and inspiring. Is it cherry, or what wood?
 

WunTon

Well-known member
Joined
Jun 22, 2018
Messages
339
Location
My house in Purcellville VA
I picked up a barely used Porter Cable 557 biscuit joiner a couple months ago with a few thousand biscuits of various sizes from an old man on CL for $100 and I have been using it recently for my miter station cabinet build and it has made installing face frames almost to easy to get perfect alignment! I also used it to put a hardwood edges on my doubled up mdf with hardboard top and it just makes the alignment portion of things so easy and then with a solid coat of glue and a few brad nails here and there to hold things while the glue dries its almost like cheating as far as I am concerned. I don't think I would trust them for structural joints but I don't really think thats what they were intended for either. I watched a video that a guy used his biscuit joiner to cut splines on miter cuts and then found many diy jigs to make it really easy to do, so there are also other uses out there for the joiner as well!
 
OP
N

nicholam77

Well-known member
Joined
Dec 18, 2016
Messages
2,671
Location
Minneapolis, MN
@WunTon that's really cool. Pretty much the type of stuff I plan on using it for, too. Good idea on the splined miter jig, I'll have to look that up.

:thumbup:
 
OP
N

nicholam77

Well-known member
Joined
Dec 18, 2016
Messages
2,671
Location
Minneapolis, MN
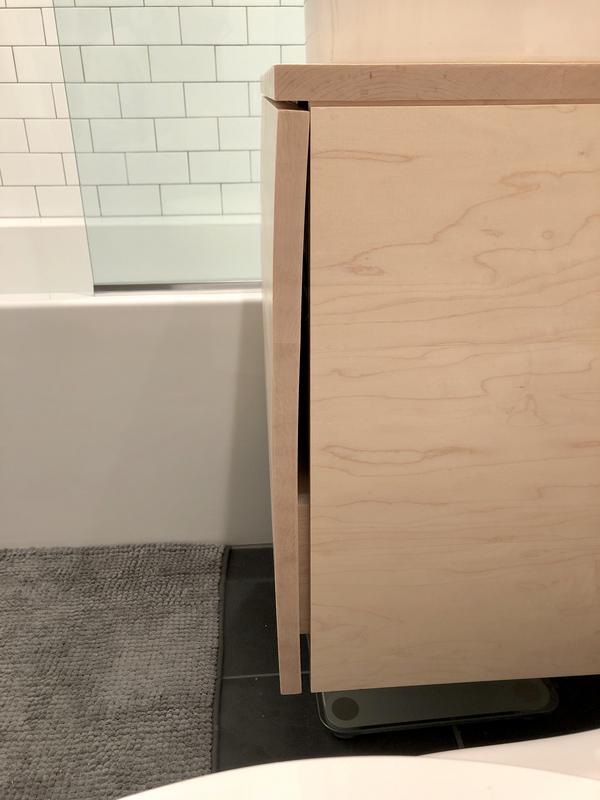
Awhile ago I mentioned my bathroom vanity drawer face had warped pretty bad over the winter:

IMG-6174.jpg


I had bought some 3/4 Maple plywood from Home Depot with the intention of edgebanding it and using it to replace the drawer front.

But now... after being stored in my shed for awhile I don't know how perfectly flat it will be anymore. I always seem to have issues with wood warping. And the grain pattern is not the best.

Part of my problem is the cabinet design, too, since the drawer face is the front of the cabinet, it is only secured at the bottom with nothing structural to keep it straight. That combined with a lot of humidity from the shower is not good.

My latest thought was to use some maple sheet veneer and glue it to a flat substrate, and then edge band the whole thing.

Something like this for the veneer product:

https://www.homedepot.com/p/Edgemat...neer-with-2-Ply-Wood-Backer-8101300/207118097

The original drawer face was .75 inches thick, and this veneer sheet is .02 inches thick. I'm thinking with a .75 substrate I could still get away with that bringing the total to .79 inches.

My question for everyone is... is this a good/bad idea, and what should I use as the substrate that will --

1) hold it's shape and stay flat (must be rigid enough, too)
2) be durable enough for bathroom use
3) allow the veneer and edgebanding to be glued to it

MDF is pretty flat and 3/4" is pretty sturdy. I know it doesn't like moisture but wondering if sealed in a veneer surface if it would work.

Also thought about phenolic since it doesn't warp but not sure if the veneer would adhere well to that and it's probably expensive.

Any and all suggestions would be appreciated.
 

Phreak480

Member
Joined
Dec 5, 2014
Messages
9
Could you not add some structure to the inside of the drawer face that comes nearly to the top but still is hidden inside when closed? If you only made it 3/4" thick on the inside it probably wouldn't impede usability.
 

Mr. Roboto

Well-known member
Joined
Dec 11, 2012
Messages
2,160
Location
New Hampshire
Nick, did you make that front drawer face by edge joining smaller pieces? I cant remember, but it looks like that may be the case (I think I can see a joint line in your photo above, but not positive). I think the biggest issue is you have a large, unsupported piece of wood in a bathroom where the temperature and humidity vary by a good margin daily.

I would try to save what you have there first by running a few V-channel stiffeners up the back of it. I'm sure there are difference sizes to source, but here is just what came up from a quick search for an example of what I am referring to. They are relatively low profile and stiff.

https://www.amazon.com/gp/product/B01DOZDUEK/?tag=atomicindus08-20

Clamp the board flat, zip these into the back, and see what happens.

Phenolic is great due to it's resiliency and stability, but it is expensive, and heavy. Since your sliders are at the bottom of a very tall drawer face, it would load the sliders up funny and cause some binding (I'd guess, anyways). Not sure if you have the clearance due to plumbing, but is making 2 smaller drawers an option? This would leave you with 2 shorter drawer faces more resistant to warping.
 

bj383ss

Well-known member
Joined
Sep 29, 2011
Messages
3,166
Location
TX
Nick I think Roboto's suggestion of 2 smaller drawer faces might be the way to go. I think you could get away with the MDF but if it ever got wet it would be done for.

Bret
 

sawduststeve

Well-known member
Joined
Oct 7, 2016
Messages
2,139
Location
Havering-Atte-Bower,London/Essex boarders, England
Hiya Nick,

There's a lot of skill and people pay good money for bow fronted draws, good work fella :bowdown: you could scribe the cabinet to fit the draw front.:lol_hitti
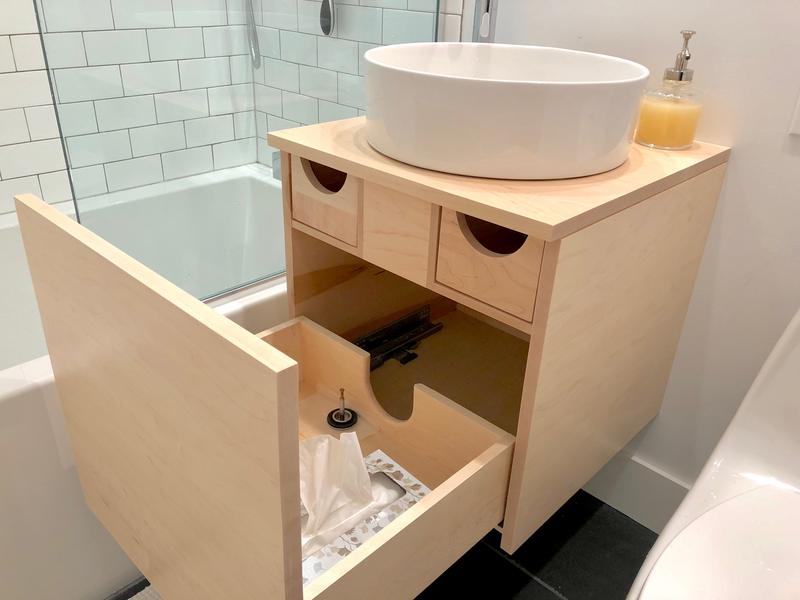
Failing that possibly cut the front into three to release the tension and get it back to flat, and if you have some of the same material left glue up a smaller panel ,
1" smaller all round maybe, with the grain in the opposite direction and glue screw/pin to the inside.

Hope you're all well and had a great summer with the little one.

good luck
Steve:beer:
 

Robey5

Well-known member
Joined
Jan 18, 2010
Messages
406
Location
North of Detroit, Mi
Beautiful woodwork you've done.

I really like that woodpeckers TS3 scale that you have. I know that the woodworking tools they have are heirloom quality, and appreciate that they make very nice tools. I cannot seem to find that TS3 you have in browsing the interweb.... they stop making that item?
 
OP
N

nicholam77

Well-known member
Joined
Dec 18, 2016
Messages
2,671
Location
Minneapolis, MN
Phreak480, Mr. Roboto, Bret & Steve, thanks all for the advice.

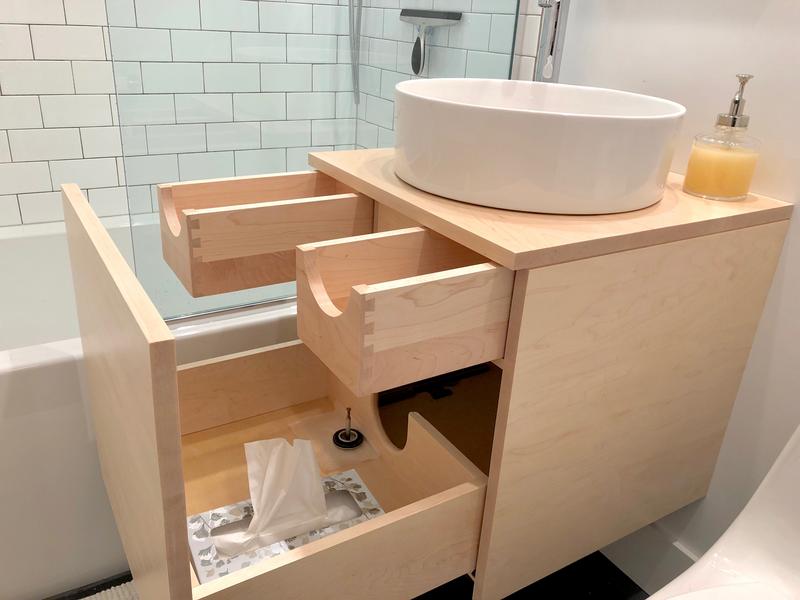
You guys are 100% right about the design and bathroom humidity. Back when I designed it, I was focused more on aesthetics than structure I think. Two smaller drawers would be fine, except there is indeed plumbing in the way up top, and it would not only require making a second drawer with plumbing cutout, but an extra set of Blum slides, and ditching the existing dovetailed drawers which I bought pre-manufactured and were kind of expensive. I'd hate to just toss them out.

749360-CA-10-E2-44-D4-811-D-AB9137-FBFD51.jpg


FBC632-D7-EFA8-4-A29-B9-A8-307-F74456276.jpg


Currently with those top pull-out drawers in the way, it would be difficult to add something structural all the way up the main drawer face back unless it was inset. I'll check out those V-channels, and think about if there's another way to add some bracing.

Good idea about slicing the original panel and re-gluing it. Unfortunately I've used all the boards from this build now, but I'm sure I could find some that would match well enough.

I might still try the veneered MDF route and see how it holds up, and save the original piece as a backup. Or if it goes poorly it might end up being the 2-drawer conversion / rebuild. Lots to think about.


There's a lot of skill and people pay good money for bow fronted draws, good work fella :bowdown: you could scribe the cabinet to fit the draw front.:lol_hitti

Hope you're all well and had a great summer with the little one.

Steve:beer:

:bounce: That cracked me up

Yes we had a great summer, only complaint is it flew by in the blink of an eye. Little one is growing fast and keeping me busy.

E6-A5-A294-31-B9-4-E04-9-ABB-A31-BB94-D0076.jpg


Hope you had a great summer as well!

:beer:
 
OP
N

nicholam77

Well-known member
Joined
Dec 18, 2016
Messages
2,671
Location
Minneapolis, MN
Beautiful woodwork you've done.

I really like that woodpeckers TS3 scale that you have. I know that the woodworking tools they have are heirloom quality, and appreciate that they make very nice tools. I cannot seem to find that TS3 you have in browsing the interweb.... they stop making that item?

Thank you!

The TS3 was part of their One-Time Tool program, which if you're not familiar are basically limited-run and then retired. Here is the product page, but you cannot order them anymore:

https://www.woodpeck.com/one-time-tools/pocket-t-square-2019.html

The closest thing they have currently are the Saddle T-Squares:

https://www.woodpeck.com/saddle-t-square.html

Those would fulfill a very similar purpose and have the added benefit of extending a mark across the corner of a board.

If there is enough demand for a previously retired One-Time Tool, Woodpecker's sometimes will re-issue an old one. You can add your request for any previous products to be re-issued here:

https://www.woodpeck.com/ottsignup

But yeah... the TS3 is very handy and it was even "cheap" by Woodpecker's standards due to it's small size.

:thumbup:
 

Mr. Roboto

Well-known member
Joined
Dec 11, 2012
Messages
2,160
Location
New Hampshire
After seeing that photo, I would cut your panel in half right under the 2 mini top drawers. Attach the top half of the panel as a single drawer front to the 2 mini drawers so they open as one unit. Re-attach the remainder to the bottom drawer. You'll have a nice tight gap in between the 2 panels due to the blade kerf. This way you keep all your existing drawers and slides. It's kind of hard to explain via text, but hopefully you can understand what I am saying.
 

mmsheb

Well-known member
Joined
Mar 30, 2008
Messages
365
Location
Wisconsin
I was going to suggest what Mr. Roboto said, but wouldn't have said it so eloquently. Good luck!
 
OP
N

nicholam77

Well-known member
Joined
Dec 18, 2016
Messages
2,671
Location
Minneapolis, MN
We use trash rollouts at work similar to this, and maybe you could fab up a bracket that would strengthen the door front but only tall enough to clear your upper drawers

Interesting, thanks for sharing. Lots to think about here, I'll see what I can come up with.
 
OP
N

nicholam77

Well-known member
Joined
Dec 18, 2016
Messages
2,671
Location
Minneapolis, MN
I guess I'm continuing on the Systainer train. I love the organizational aspect of Systainers, and I love the look in a shop of a cabinet / wall / "SysPort" of them sitting neatly, waiting to be accessed. But I hate how expensive they are. :mad:

I thought about putting everything I want to organize this way in the MakPac boxes, as they are cheaper, but the latches are so inferior to the T-Loc latch I became unhappy with them. After leaving one outside in the winter and then summer, the latches have become so difficult to open and close it's frustrating. That plus the idea of putting DeWalt Tools in a Makita box made my brain melt.

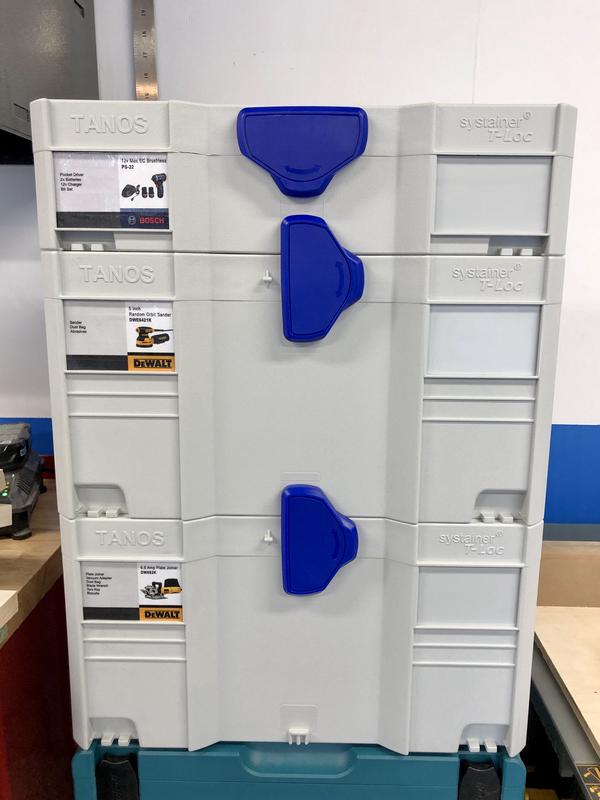
With the Tanos boxes being so expensive, I sold some stuff on Craigslist recently, and got a decent price on these two Sys 3 T-Locs. So they were a wash.

33CBA222-885C-48F0-BFB9-4F8D31EA227A.jpg


9D2898AA-C5A9-4B51-BFB8-33668C16BBF7.jpg


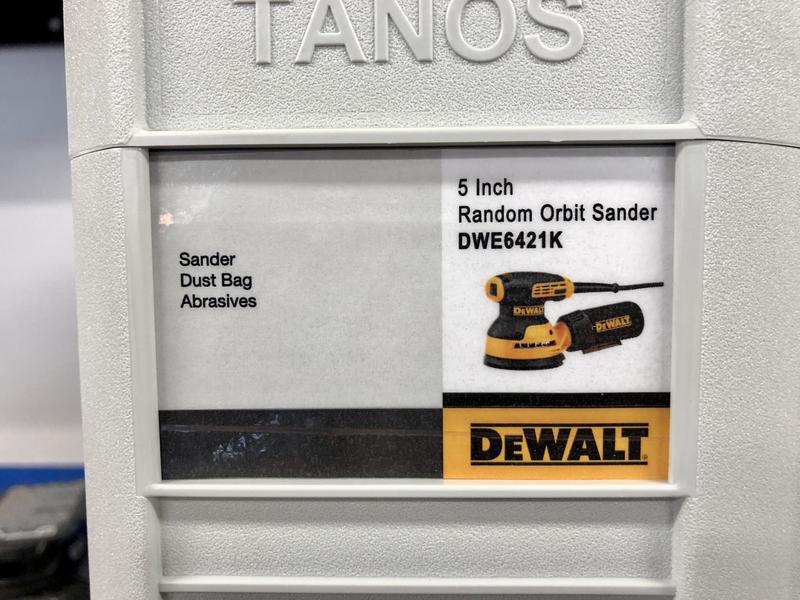
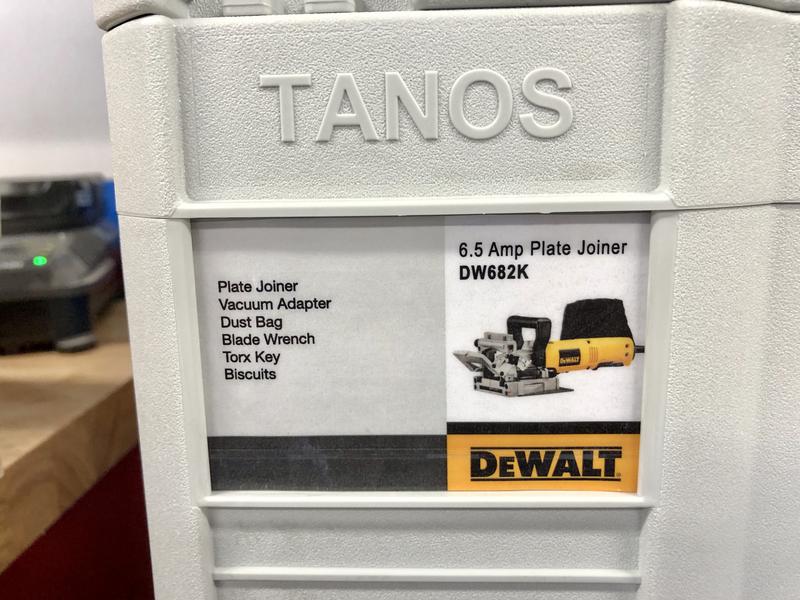
They will house my DeWalt Orbital Sander, as well as the new Plate Joiner. I made some labels for them:

97C7C566-95AF-44DE-B428-8E2D1E39D31E.jpg


DEA5C2D0-19C5-48FF-ABA6-43DCC0D6540D.jpg


The new Systainer 3 is coming out soon, and I prefer the existing T-Loc's, so I figured I better grab a couple while they're still available. I'm definitely not going to put every tool in a Systainer, but I like the idea of having most commonly reached for tools stored this way with their accessories. It's really easy to quickly see what's what with the labels. And makes it really easy to transport a tool+accessories to the house.

I have some Kaizen foam on the way to help outfit them :bounce:
 
OP
N

nicholam77

Well-known member
Joined
Dec 18, 2016
Messages
2,671
Location
Minneapolis, MN
Those do look great! Those labels are slick!

Thanks! The labels are more or less a copy of the Festool ones.


Weekend Update:

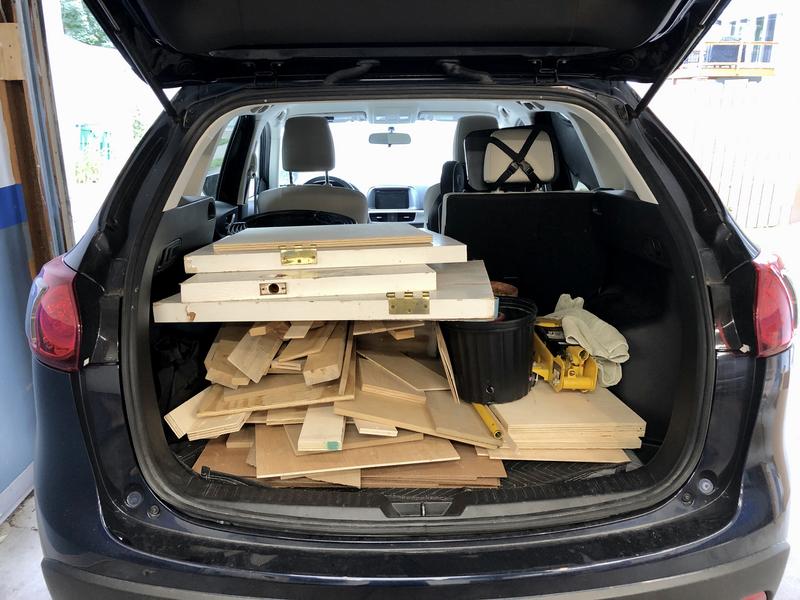
This Saturday my city had a "fall cleanup day" where you could take large trash items by the car load to Waste Management for a small fee ($12). In my suburb it is difficult to throw away anything big, especially construction debris and scrap wood. So I jumped on this opportunity and continued to sort and breakdown old materials that I've been storing but haven't used in a long time.

AF099F77-28F7-40E5-AA89-B6F3E568F763.jpg


A lot of it was in my storage shed, which I'm trying to do a total re-organization on. I'll have a post on that later.

Loaded up the CX-5 and took it to the city drop off.

FB8677AC-4259-47A0-8445-556398977FCB.jpg


It feels wasteful to me to just throw away this stuff, even if mostly MDF and relatively cheap big box plywood. But on the other hand I do have limited storage on our small city lot and it definitely feels good to "clean house".

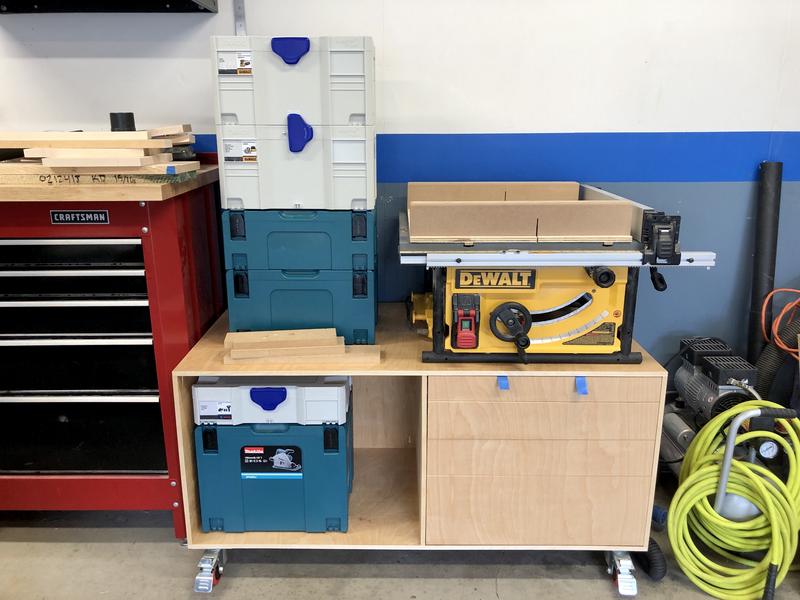
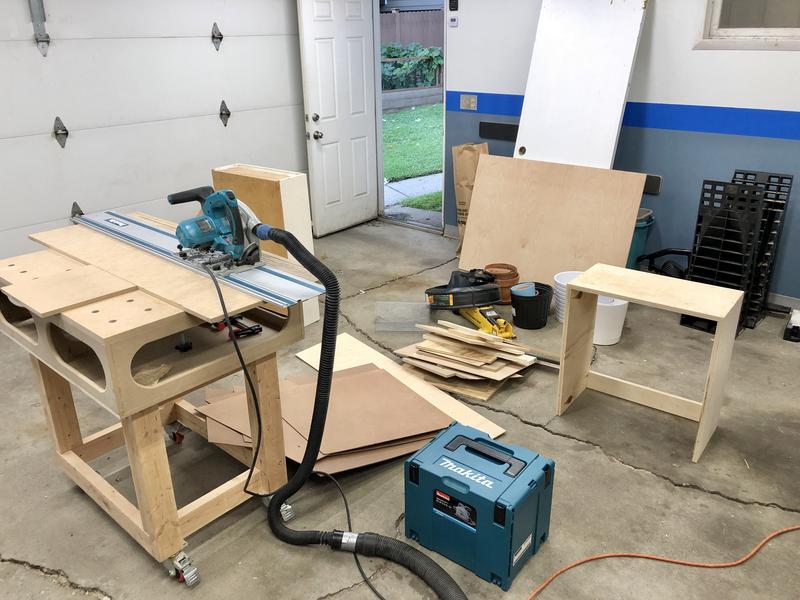
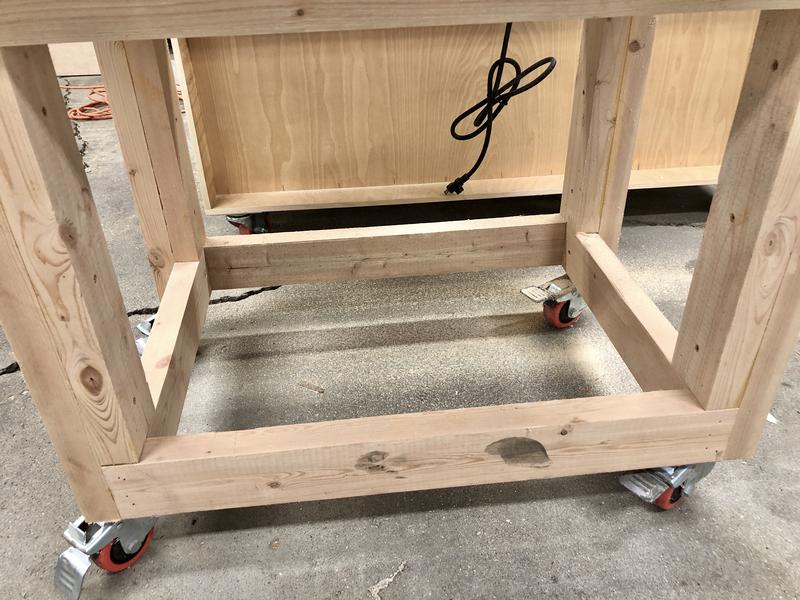
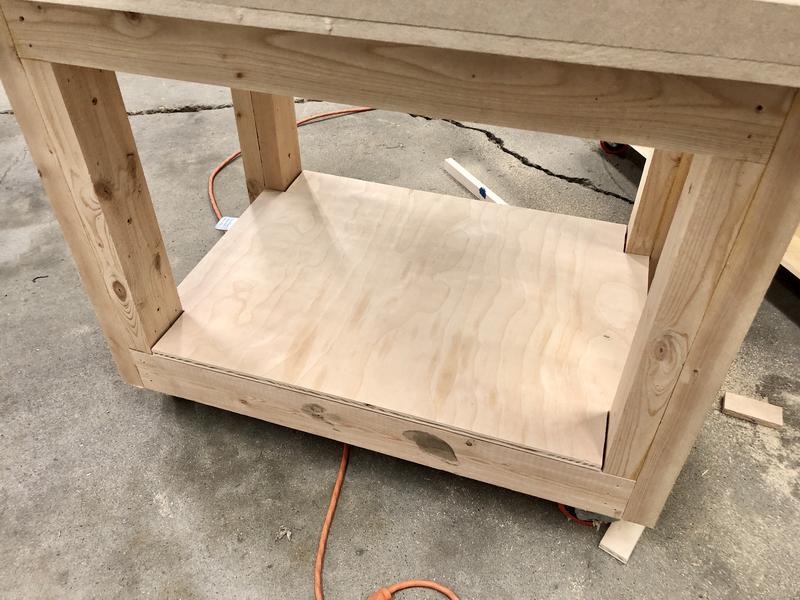
While going through stuff I saved one piece of plywood and used it as a shelf in the bottom of my MFT cart which was previously open:

DBCDED50-25EC-49AB-A2BB-A582029808A6.jpg


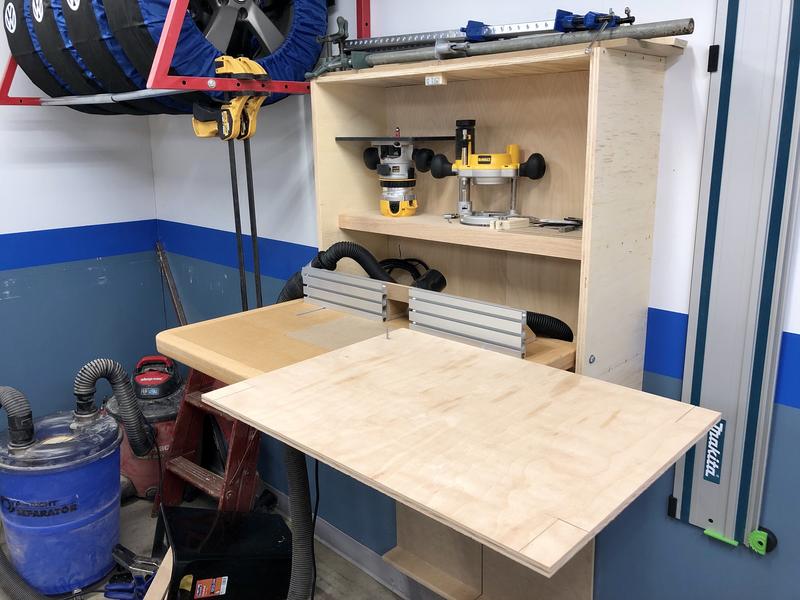
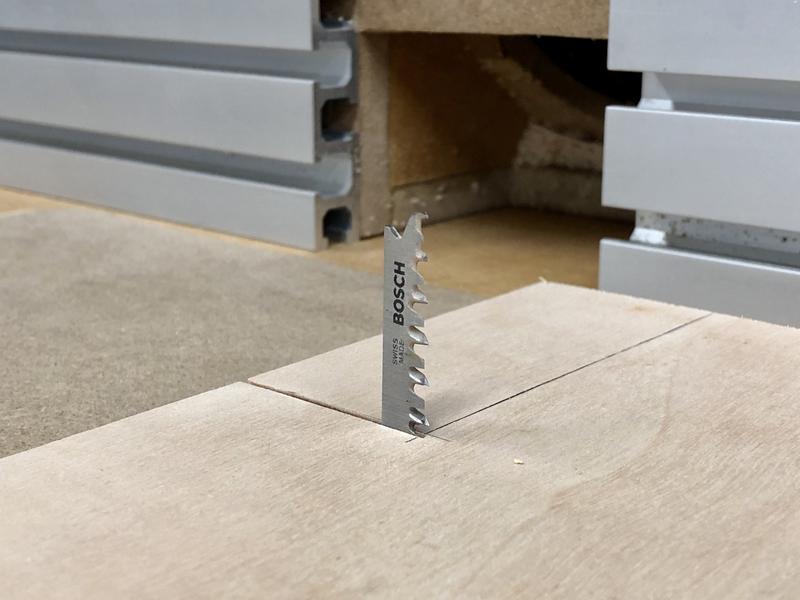
I notched out the corners with the inverted jigsaw on the router table:

6331EBA9-22BA-42F2-B638-768C3A7D6CD4.jpg


668D6009-37CB-47BB-90E1-72065890F274.jpg


CE3C2FE2-852E-4C53-8D69-05C68C3AB720.jpg


For now I threw some of the MakPac boxes on it to get them off the workbench. They barely fit :bounce:

5E154A81-64C8-49FF-9BAE-ED84E6D4B67B.jpg


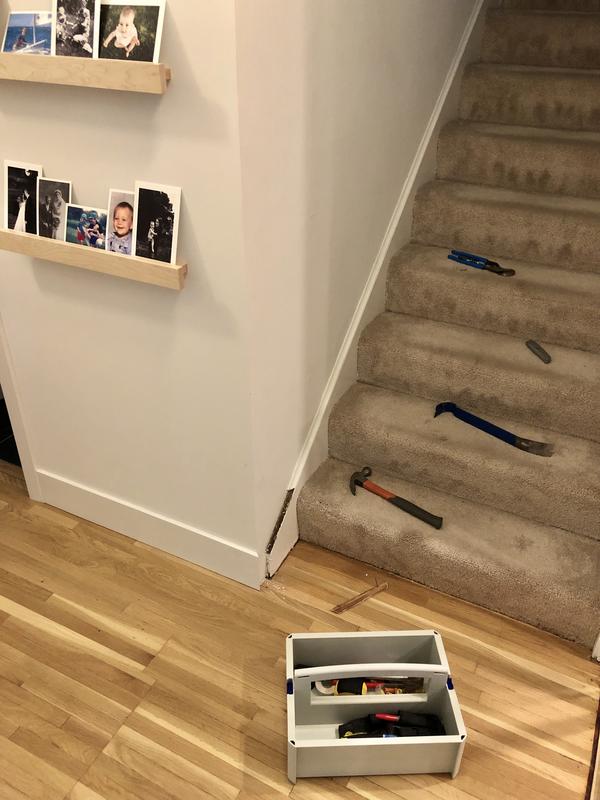
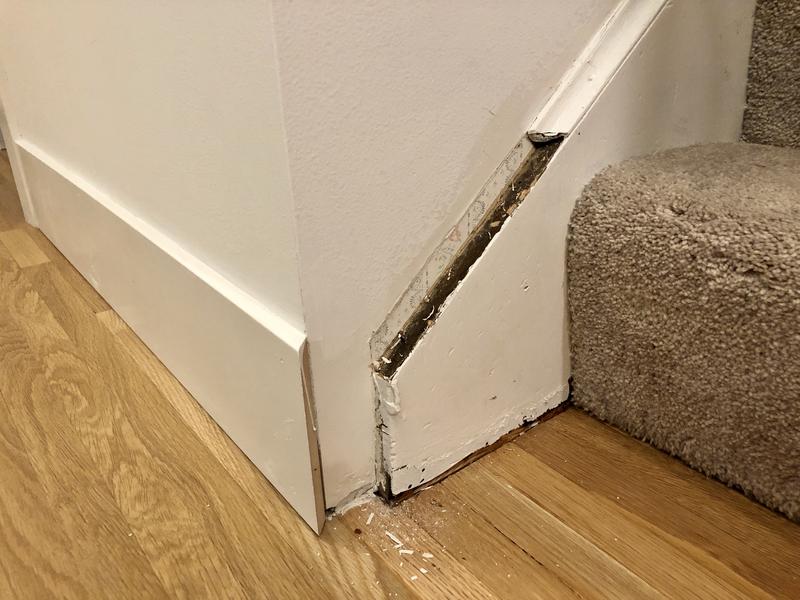
Inside the house, I have a number of baby-proofing items and things to button up in short order. One such item is a baseboard return to the staircase that I never put in. Basically just ran out of time before she was born and never got around to it. But now with her crawling, it's a sharp edge, and I need to get it finished.

CDEC4847-183C-41AE-8D1E-D7B5804A4A4D.jpg


B1370020-6922-4B8D-8F50-B674E4F950E2.jpg


Quarter-round goes all the way up the wall string, which I intend to remove, so I popped off the piece at the end. Going to need some scraping and sanding, and skim coat of mud to cover the wallpaper. I'll get this corner negotiated... and then hopefully get to the whole staircase this winter.

Hope everyone had a great weekend!
 

bj383ss

Well-known member
Joined
Sep 29, 2011
Messages
3,166
Location
TX
Looks like you had a good weekend Nick. Sometimes it feels almost as good to get rid of stuff as it does acquiring stuff.

Bret
 
To avoid these ads, REGISTER NOW!
Top Bottom