To avoid these ads, REGISTER NOW!

Nobody’s project corner.

OP
N

Nobody-named-Olli

Well-known member
Joined
Jan 9, 2025
Messages
1,636
Location
North Rhine-Westphalia; Germany
@drivesitfar

That is really a beautiful job you did with the edges. Lot’s of sweat & work (especially the hand mixed concrete, and yeah, I’ve done that as well …), but it definitely paid off.

Thanks for explaining the numbers, that makes sense - I just had never heard fertilizer being referenced like that. But that might be because we get our supplies at a big box store type garden center where the average home owner shops, not from a ‘professional’ supplier. I will see what products I can find locally to get the lawn going. :)

Again, thank you very much for explaining all that in detail! And thank you for the advance credit regarding the possible outcome of the gardening adventures! :)

Kind regards,
Olli
 
Last edited:
To avoid these ads, REGISTER NOW!
OP
N

Nobody-named-Olli

Well-known member
Joined
Jan 9, 2025
Messages
1,636
Location
North Rhine-Westphalia; Germany
#11 Screening compost, re-assembly of composter, compacting soil.

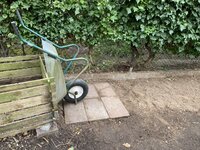
Another great day to do some stuff in the garden. Since that little patch from #10 needed a lot more soil, I went and screened the compost that was ready for use.

IMG_4859.jpeg

IMG_4860.jpeg

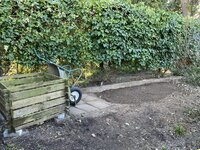
Dismantled the composter the deeper I got and finally had everything screened. Time to generously cut back the ivy and dig a bit around the composter’s place.

IMG_4863.jpeg

I got 8 loads from the composter.

IMG_4866.jpeg

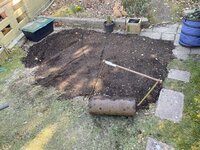
Compacting with a very old roller made from concrete and bend steel plate. We ‘inherited’ this from the pre-owners of the house & property.

IMG_4869.jpeg

IMG_4870.jpeg

Still quite a bit of soil missing, but there is a bit more I can screen and re-distribute next to the composter that was overgrown by ivy.

IMG_4871.jpeg

Also spread some at the worst spots of the lawn.

IMG_4867.jpeg

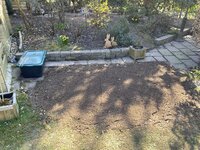
A little early to seed, still quite a bit more soil needed. This is what the patch looks like right now. Will definitely wait for some rain, then add soil and compact again, then seed.

IMG_4872.jpeg

Called it a day as the ‘Apfelstrudel’ was waiting for me. ;)

Kind regards,
Olli
 
OP
N

Nobody-named-Olli

Well-known member
Joined
Jan 9, 2025
Messages
1,636
Location
North Rhine-Westphalia; Germany
#12 More manual screening and leveling in the composter area.

12.1

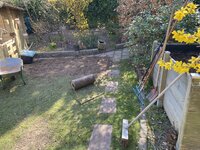
So this is what I was left with at the composter area after I called it a day last Saturday. Today at roughly 10:30 AM I picked up spade & shovel again.

IMG_4925.jpeg

So lets jump right into it.

IMG_4931.jpeg

IMG_4932.jpeg

At this point I realized that many moons ago, I had thrown 2x3 slabs next to the composter as designated screening area. Over time that became more of a dumping area and ultimately lead to the state shown before. I have no one to blame for this than myself.

IMG_4934.jpeg

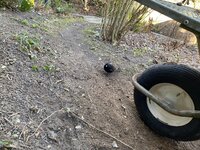
Then I got a visitor. Normally these birds take off the second they anticipate you might ever so slightly move in their direction. But with ground/soil work, they get really bold. It’s like they know exactly what you are doing and that that will result in their best chance to catch many earthworms. This fella came back multiple times.

IMG_4941.jpeg

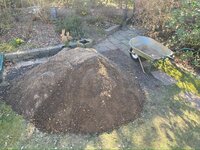
By about 12:30 PM my soil stack looked like this. And I had made some visible progress, advanced through the soil.

IMG_4948.jpeg

IMG_4949.jpeg

At about 13:40 it had again visibly grown larger.

IMG_4955.jpeg
 
Last edited:
OP
N

Nobody-named-Olli

Well-known member
Joined
Jan 9, 2025
Messages
1,636
Location
North Rhine-Westphalia; Germany
12.2

Next came the incredibly tedious work of cutting the ivy and especially getting all the old, dry, branches out.

IMG_4958.jpeg

IMG_4960.jpeg

IMG_4963.jpeg

At about 15:00 I had prepared the raised bed so I could use a portion of the screened soil to top it off.

IMG_4973.jpeg

After that, it was time to at least start distributing another portion of the soil on the lawn and get the composter area a bit more level.

IMG_4979.jpeg

IMG_4980.jpeg

After that I called it a day.

And here is another picture, how I many, many moons ago envisioned the use of those 2x3 slabs. Currently I’m debating with myself if I’m going to level those slabs for the intended use or not. I have some ‘sharp sand’ to set them, but I don’t know how much use I will ultimately get out that spot.

IMG_4978.jpeg

Kind regards,
Olli
 

drivesitfar

Well-known member
Joined
Oct 23, 2013
Messages
36,047
Location
Pacific Northwest
Looks like you’re definitely getting your exercise while making a ton of progress. Nicely done.

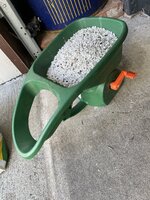
Here’s the fertilizer I put in my grass every 6-8 weeks during our winter (November thru February) and about every 3-4 weeks the rest of the year.

Grubb killer I’ve been applying once in March/April and again September/October that seems to work the last 3 years. As noted before I dug out my maybe 5 year old lawn including top soil full of grubs and replaced with garden mix and new sod.

Anyway here’s the fertilizer, grub killer and the little hand spreader.

It’s been a very early spring here which I’m guessing is also why your yard has some color too now.
 

Attachments

  • IMG_8487.jpeg
    IMG_8487.jpeg
    1.5 MB · Views: 9
  • IMG_8484.jpeg
    IMG_8484.jpeg
    1.3 MB · Views: 6
  • IMG_8483.jpeg
    IMG_8483.jpeg
    729.2 KB · Views: 6
  • IMG_8482.jpeg
    IMG_8482.jpeg
    818.6 KB · Views: 8
OP
N

Nobody-named-Olli

Well-known member
Joined
Jan 9, 2025
Messages
1,636
Location
North Rhine-Westphalia; Germany
@drivesitfar

Thank you very much! That spreader looks like a really nifty tool! I had one of those spreaders that you either drag behind or shove - and that never worked to my full satisfaction. Couldn’t find a setting that was quite right.

I’ll see if I can find such a spreader here, should be very useful.

Kind regards,
Olli
 

swsman

Well-known member
Joined
May 5, 2021
Messages
600
Location
Earthbound
Olli,

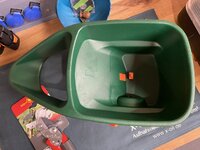
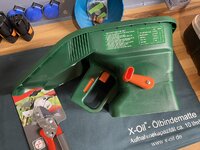
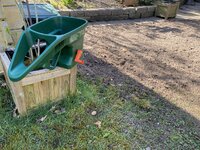
I know you reside in different part of the world, perhaps you can find something like this via Amazon.

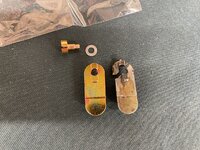
I have and use this one to spread the grass seeds. Feed rate can be adjusted, and it has an extendable arm rest.
 

Attachments

  • IMG_20250323_225550612.jpg
    IMG_20250323_225550612.jpg
    531.4 KB · Views: 5
  • IMG_20250323_225556231.jpg
    IMG_20250323_225556231.jpg
    489.8 KB · Views: 7
  • IMG_20250323_225607436.jpg
    IMG_20250323_225607436.jpg
    624.6 KB · Views: 7
  • IMG_20250323_225653571_HDR.jpg
    IMG_20250323_225653571_HDR.jpg
    611.7 KB · Views: 9

drivesitfar

Well-known member
Joined
Oct 23, 2013
Messages
36,047
Location
Pacific Northwest
Ollie: it's far from a perfect spreader, but if you can use it when the wind isn't blowing it works pretty good. I can't recall the setting I use but with my small yard I just try to get some coverage so i might make two passes and maybe save the last bits in the bin for the edges.

since I quit using weed and feed and hand pick out a few weeds (also keeping weeds out of the flower beds next to it fairly often) I haven't had any issues. I have a mole or two that run around in our flower beds and occasionally they pop their heads up in our lawn, but since they don't have any food (grubs was their main meal) they move on quickly so I don't have to get the traps out.

good luck!!
 

drivesitfar

Well-known member
Joined
Oct 23, 2013
Messages
36,047
Location
Pacific Northwest
I rarely plant or spread extra seed cause the birds and squirrels eat up most of it. That said if you don’t have those issues I hope it grows quickly. When I have put in seed I usually put topsoil or a peat over the seeds which helped in my area.

Glad you were able to buy the little spreader and even more happy that it worked ok and you liked it.

It looks like you did amazing job in prep so now just to wait a bit and start mowing soon.
 
OP
N

Nobody-named-Olli

Well-known member
Joined
Jan 9, 2025
Messages
1,636
Location
North Rhine-Westphalia; Germany
#14 Downstairs ‘guest-bathroom’ window repair.

14.1

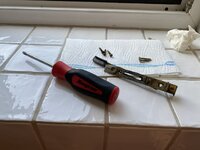
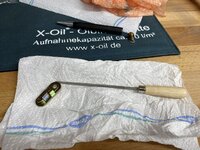
One of the lockbar of our decades old euro turn/tilt windows broke, it wouldn’t lock in tilt position. After quite some research I found a manufacturer selling aftermarket/ 3rd party parts for these locking assemblies/ windows that are long out of production.

New & old.

IMG_5138.jpeg

IMG_5139.jpeg

Disassembly.

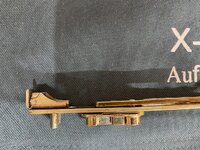
IMG_5145.jpeg

IMG_5146.jpeg

So when this then popped out, I knew that was going to be the ‘lynch pin’ of the whole repair in the end, and it would be the deciding factor between failure and success.

IMG_5147.jpeg

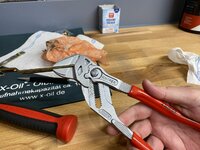
Important information on the next steps: After I knew who the original manufacturer of the locking assembly was and also the correct German term for the locking bar - I easily found a video on YT showing this repair. What I saw made sense so I followed these steps.

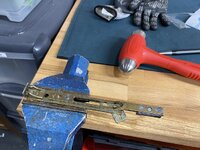
Set up in vise and drive pin out.

IMG_5151.jpeg

Just beautiful how the peened/riveted rim separated from the pin.

IMG_5152.jpeg

As expected, as it happened/ was shown in the video as well: One part bend a little. But as easily bend back.

IMG_5158.jpeg

IMG_5159.jpeg
 
Last edited:
OP
N

Nobody-named-Olli

Well-known member
Joined
Jan 9, 2025
Messages
1,636
Location
North Rhine-Westphalia; Germany
#14 Downstairs ‘guest-bathroom’ window repair.

14.2

Next this needed to get back together - utilizing the new parts.

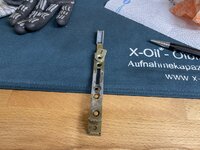
Old parts re-used and oriented correctly.

IMG_5160.jpeg

New lockbar needed a little tweaking, there was a burr inside that needed to go.

IMG_5161.jpeg

Stacked together for a dry fit.

IMG_5162.jpeg

Pin peened/ ‘riveted’.

IMG_5164.jpeg

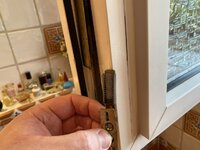
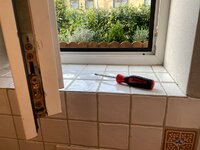
And back assembled and installed to the window.

IMG_5168.jpeg

Happy to report, works like a charm. And without adding too many words, getting that assembly back in was quite some fumbling and hustling with tape and such … But it worked and no tape was left in the mechanism.

Normally you would take out the whole lock assembly that goes all around 2 sides of the window … Probably remove/ separate the wing from the frame as well. For reasons that lie in the past, that would have been quite a job on its own, so I’m happy that part popped out when it did, and I was able to get in back in - as is.

Kind regards,
Olli
 
OP
N

Nobody-named-Olli

Well-known member
Joined
Jan 9, 2025
Messages
1,636
Location
North Rhine-Westphalia; Germany
#15 Quick planter coaster for the patio. (First ‘project’ in the ’project workshop’ after the makeover.)

IMG_5607.jpeg

A lot of times when starters inquire about manual miter saws, on our side of the big pond they get told to forget anything that doesn’t say ‘Ulmia’ on it. Or, if absolutely necessary to purchase now/ without hunting down a deal, to get one from the ‘Küpper’ lineup, which are still in production. For the few manual cuts I make, I decided to get Stanley’s manual miter saw. Now make no mistake, this is neither a ‘Küpper’ nor let alone an ‘Ulmia’. But I would still recommend this saw as a value for money purchase if you only make very few manual cuts a year. I’m using the Stanley for 7 years now - almost to the day, I checked - and it has not disappointed me.

IMG_5609.jpeg

IMG_5611.jpeg

Drilling.

IMG_5613.jpeg

Countersinking.

IMG_5614.jpeg

Aligned & screwed down.

IMG_5615.jpeg

Layout/ aligning of the the feet.

IMG_5616.jpeg

The feet are some leftover spacers, washer and pan head screw.

IMG_5617.jpeg

IMG_5618.jpeg

With the other two I made immediately after finishing the deck/ patio a couple of years ago. They make quite the difference/ give peace of mind in terms of keeping the deck nice.

IMG_5620.jpeg

Fun little project.

Everyone, have a great time!

Kind regards,
Olli
 
OP
N

Nobody-named-Olli

Well-known member
Joined
Jan 9, 2025
Messages
1,636
Location
North Rhine-Westphalia; Germany
#16 Old oak dining room chair repair.

16.1 Part one

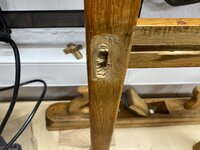
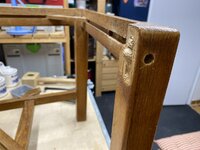
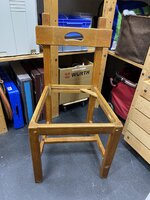
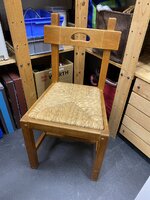
Our current dining room chairs are being picked up by the upholstery specialist for some work, so we/ I needed to get the old ones from storage and ready to be placed in the dining room. One has suffered damage, I have no recollection on how or when - but it is what it is. Since we need 6 functional chairs, I went and rectified the damage.

As it was:

IMG_6055.jpeg

IMG_6056.jpeg

IMG_6057.jpeg

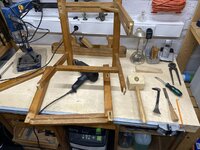
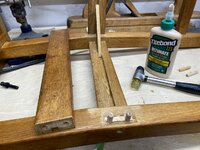
Taking out the first strut where the plaited seat goes on. All of this had to be done, trying not to cause any more substantial damage.

IMG_6058.jpeg

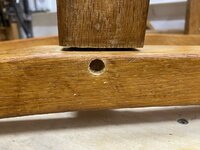
Then I went for the damaged cross member. “Tickling” out what I, at this point in time, still believed to be dowels.

IMG_6061.jpeg

Grab & pull.

IMG_6062.jpeg

Surprise. Just blinds. (And one less worry!)

IMG_6064.jpeg

Carefully removing more of the struts.

IMG_6067.jpeg

IMG_6068.jpeg

IMG_6072.jpeg

Will continue in 16.2
 
Last edited:
OP
N

Nobody-named-Olli

Well-known member
Joined
Jan 9, 2025
Messages
1,636
Location
North Rhine-Westphalia; Germany
#16 Old oak dining room chair repair.

16.2 Part two

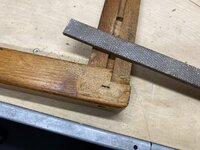
Clear view on the actual damage, these old tenons have to be removed.

IMG_6073.jpeg

IMG_6074.jpeg

Carefully heating the still intact joints & driving them apart.

IMG_6078.jpeg

Came apart wonderfully.

IMG_6082.jpeg

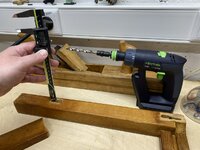
Measuring depth on the intact mortises to set drill bit for drilling out the broken tenons.

IMG_6084.jpeg

Double checking that my 8mm drill bit will be ok to remove most of the tenons without cutting into the mortise.

IMG_6085.jpeg

Setting depth with some FrogTape.

IMG_6086.jpeg

Flattening the broken tenons for drilling.

IMG_6087.jpeg

Drilling.

IMG_6088.jpeg

Nicely weakened.

IMG_6090.jpeg

Will continue in 16.3
 
OP
N

Nobody-named-Olli

Well-known member
Joined
Jan 9, 2025
Messages
1,636
Location
North Rhine-Westphalia; Germany
#16 Old oak dining room chair repair.

16.3 Part three

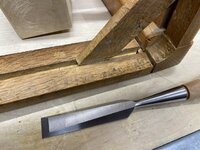
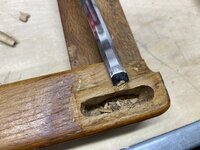
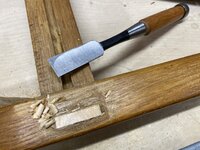
Cleaning out the rest of the tenon from the mortise with a chisel.

IMG_6091.jpeg

IMG_6092.jpeg

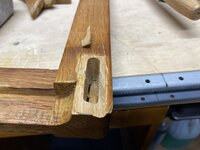
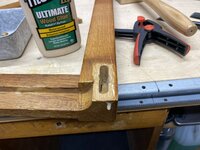
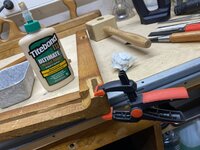
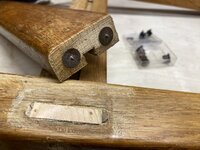
When taking the chair apart, a little damage was caused. Time to glue that little chip back in.

IMG_6094.jpeg

IMG_6095.jpeg

IMG_6096.jpeg

IMG_6098.jpeg

Time to flatten the old tenons on the crossmember.

IMG_6099.jpeg

IMG_6100.jpeg

Drilling into the crossmember for dowels.

IMG_6102.jpeg

Will continue in 16.4
 
OP
N

Nobody-named-Olli

Well-known member
Joined
Jan 9, 2025
Messages
1,636
Location
North Rhine-Westphalia; Germany
#16 Old oak dining room chair repair.

16.5 Fifth and final part.

Marking.

IMG_6121.jpeg

IMG_6122.jpeg

Drilled and dowels in.

IMG_6123.jpeg

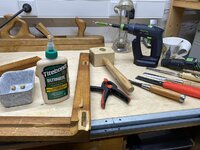
Now it needed to go all back together, and that rather fast.

IMG_6125.jpeg

Struts back in.

IMG_6127.jpeg

Test fit. Works! :) Now it just needs a little wax on, wax off love and it’s good to go in the dining room.

IMG_6128.jpeg

Hope you enjoyed the repair.

Kind regards,
Olli
 
To avoid these ads, REGISTER NOW!
OP
N

Nobody-named-Olli

Well-known member
Joined
Jan 9, 2025
Messages
1,636
Location
North Rhine-Westphalia; Germany
@stinkity stoink Thank you very much!

@larry4406 Thank you very much!

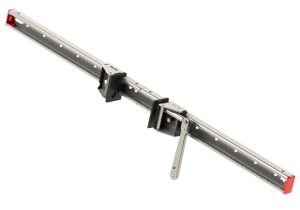
The Rali Press Evolution is worth its weight in gold, honestly. Very, very versatile. You can clamp work pieces in front of the workbench or on top of the workbench. You can use it to mount a classic Black&Decker Jobber as well as clamp down a real vise with a little custom made holder/plate. Ideal for me, who does neither fit the classic “woodworker” or “fabricator/machinist” shoes. It’s also a very low profile setup that doesn’t get in the way. Running it for about 5 years now. Very happy, quality is great - just as one expects it being Swiss made.

Kind regards,
Olli
 
OP
N

Nobody-named-Olli

Well-known member
Joined
Jan 9, 2025
Messages
1,636
Location
North Rhine-Westphalia; Germany
#17 Landing of outdoor basement staircase.

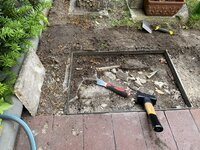
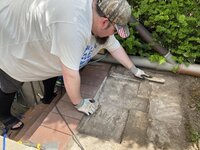
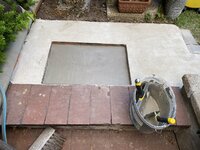
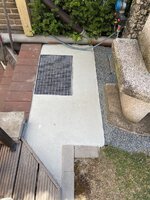
When I build our new deck on the roofed patio, I left the landing of the outdoor basement staircase alone because I didn’t want to mess with the height of the landing. Now it’s four years later and most of the old patio/ staircase landing was severely broken, so I needed to fix that.

17.1 Removal of old natural stone tiles, clean cut at the joint, prep work & priming.

Here we go again.

IMG_6216.jpeg

Removing barely adhering natural stone tiles.

IMG_6224.jpeg

Frame for the doormat out, will be reused.

IMG_6226.jpeg

Clean cut where I will meet/ join to the original height of the old natural stone patio. Normally I would have used a dust shroud when making such a cut, but I needed to get as close as I could without removing the deck. No guard was absolutely ruled out, so the half/ grinding guard it was. + FFP2 mask and vac as close by as possible.

IMG_6228.jpeg

Prepping the surface for primer with wire brush.

IMG_6229.jpeg

All prepped.

IMG_6236.jpeg

Stirring the primer.

IMG_6241.jpeg

Generously applying primer. Floor mat frame back in.

IMG_6246.jpeg

Will continue in 17.2
 
OP
N

Nobody-named-Olli

Well-known member
Joined
Jan 9, 2025
Messages
1,636
Location
North Rhine-Westphalia; Germany
#17 Landing of outdoor basement staircase.

17.2 ”Pouring” new landing & texturing.

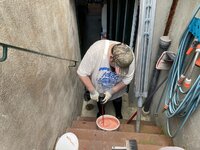
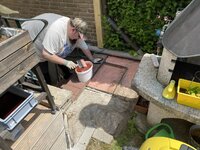
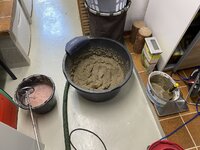
We decided to simply “pour” a new lading - meeting the original height - and lightly texture that. The stairs will be replaced someday eventually - then we can have a landing meeting the deck.

With it being 32 degree celsius (89.6 F) I decided to mix in the basement and do a rather wet mix.

IMG_6253.jpeg

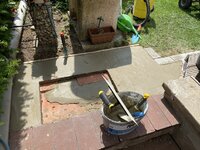
“Poured”. Run out of material so I couldn’t fill the floor mat cut-out completely, but that was expected. A little bag purchased next week will take care of that.

IMG_6256.jpeg

Had to deal with some rain in between. Being prepared is everything.

IMG_6260.jpeg

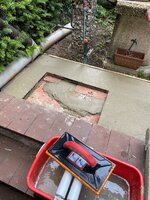
Texturing.

IMG_6263.jpeg

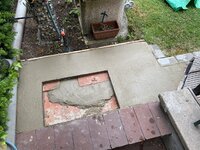
Time to let it cure. - Finished for the time being.

IMG_6264.jpeg


Will fill the floor mat cut-out to appropriate height next week. Then purchase floor mat. And this will work perfectly fine until the stairs are getting re-build/ renovated.

Kind regards,
Olli
 
Last edited:
OP
N

Nobody-named-Olli

Well-known member
Joined
Jan 9, 2025
Messages
1,636
Location
North Rhine-Westphalia; Germany
#18 (Fail) Kitchen Aid Artisan two bay toaster fix.

We have a couple of Kitchen Aid appliances that we are generally pretty happy with, but lately the two bay Artisan toaster has been acting up. It goes on and off on it’s own, sometimes toasting a full cycle to whatever the time selector has been left at, sometimes just driving the lifts up and down 3 times in a row. … Obviously that is very dangerous, so it was immediately unplugged after the discovery.

It’s an older unit, long out of any warranty - so I checked the internet and found that sometimes this issue is the result of either dirty lenses of the photoelectric barrier (for automatic toasting/ “bread in” detection) or an issue with the main button.

I figured it’s worth my time to try and see if cleaning of the photoelectric barrier‘s lenses and some visual inspection/ cleaning of the button might do the trick.

18.1 Trying to open the toaster results in ”making” a tool.

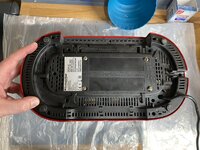
IMG_6293.jpeg

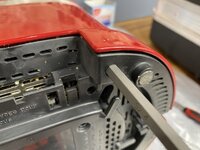
Gotta love recessed “security” screws.
IMG_6294.jpeg

Obviously the bits I have will not reach the recessed screws.

IMG_6302.jpeg

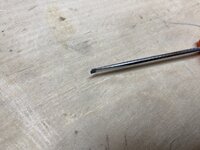
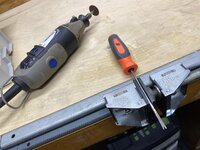
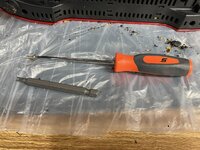
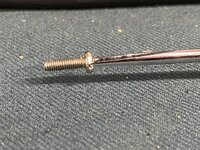
They are the simple “spanner”-type “security” screws, so a tool is rather easily ”made”/ modified. Looking through my toolbox I found an older Snap-On mini Instinct handle type slotted driver that has a broken and bend tip due to some misuse. It was tool I didn’t buy off the truck, but had someone from the US purchase for me online and ship much earlier in time. I kept it to *****, poke … Now it’s time had come to shine once more.

IMG_6295.jpeg

IMG_6296.jpeg

Setting it up in the RALIpress.

IMG_6297.jpeg

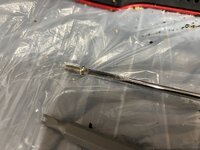
Squaring up the tip & cutting the notch. (And yes, doing this on the still very thin blade will come back to bite me during re-assembly of the toaster.)

IMG_6299.jpeg

Works (for now!)

IMG_6300.jpeg

IMG_6301.jpeg


Will continue in 18.2
 
OP
N

Nobody-named-Olli

Well-known member
Joined
Jan 9, 2025
Messages
1,636
Location
North Rhine-Westphalia; Germany
#18 (Fail) Kitchen Aid Artisan two bay toaster fix.

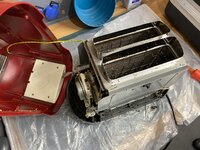
18.2 Finally opening the toaster & work. (Just for good measure: DO NOT DO THIS WITH THE TOASTER PLUGGED IN !)

IMG_6303.jpeg

IMG_6305.jpeg

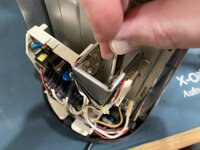
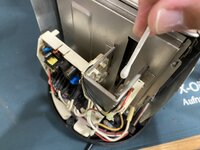
The photoelectric barrier (main focus). Something that caught my eye, circled in red, is the black residue on one of the electronic components on that board.

IMG_6307.jpeg

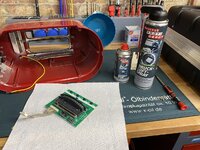
Cleaning the photoelectric barrier

IMG_6317.jpeg

IMG_6318.jpeg

Cleaning the main button.

IMG_6311.jpeg

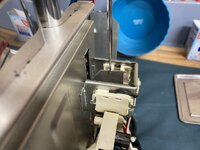
How the photoelectric barrier works/ detects “bread in”.

No bread in.

IMG_6327.jpeg

Bread in.

IMG_6328.jpeg

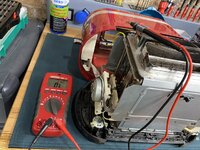
Before putting the lid back on, testing it is bonded/ protective earthing works correctly.

IMG_6319.jpeg

Will continue in 18.3
 
OP
N

Nobody-named-Olli

Well-known member
Joined
Jan 9, 2025
Messages
1,636
Location
North Rhine-Westphalia; Germany
#18 (Fail) Kitchen Aid Artisan two bay toaster fix.

18.3 Fixing the ”shop made spanner tool” and reassembly.

I should have ground back more of the tip in first place, as the prongs were a little too thin. One broke during reassembly. Here shown, with the rectified version of “shop made spanner tool”.

IMG_6332.jpeg

This time also, much better seating in the spanner drive.

IMG_6334.jpeg

Reassembly.

IMG_6321.jpeg

IMG_6320.jpeg

I proceeded to test the toaster and after being plugged in for 5 minutes it started acting up again. So this did not fix the problem. Spoke to the service center, and this one will probably go in for a repair in the coming days.

Kind regards,
Olli
 
OP
N

Nobody-named-Olli

Well-known member
Joined
Jan 9, 2025
Messages
1,636
Location
North Rhine-Westphalia; Germany
#17 Landing of outdoor basement staircase.

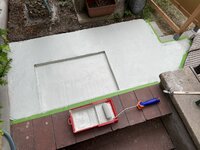
17.3 Finishing floor mat recess & coating.

Primer applied to floor mat recess.

IMG_6354.jpeg

Filled to height.

IMG_6356.jpeg

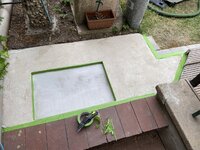
Dried and masked for coating.

IMG_6372.jpeg

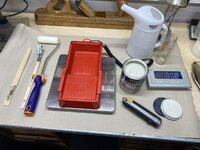
Prepare to apply coating.

IMG_6373.jpeg

IMG_6374.jpeg

The coating is applied in 3 layers. 1st coat is thinned with 10% water, 2nd coat is thinned with 5% water, 3rd coat is not thinned.

IMG_6375.jpeg

Edges first.

IMG_6376.jpeg

All coats applied.

IMG_6382.jpeg

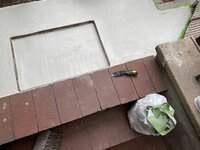
Masking tape removed.

IMG_6383.jpeg

Fully cured.

IMG_6395.jpeg

Will continue in 17.4
 
OP
N

Nobody-named-Olli

Well-known member
Joined
Jan 9, 2025
Messages
1,636
Location
North Rhine-Westphalia; Germany
#17 Landing of outdoor basement staircase.

17.4 Finishing touches and ”floor mat” from grating.

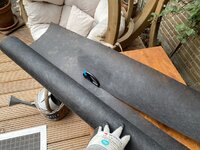
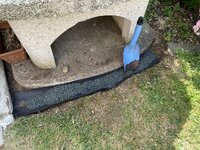
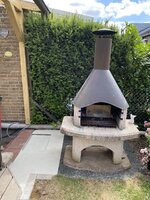
To keep that landing cleaner I decided to use some fine gravel around the water tap and old stone BBQ.

Cutting a water permeable but weeds stopping liner.

IMG_6396.jpeg

The fine gravel.

IMG_6398.jpeg

Filling.

IMG_6402.jpeg

Finished.

IMG_6406.jpeg

Time for the “floor mat”

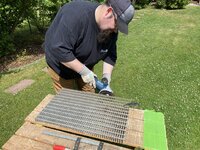
Your friendly Binford Tools sales rep. off-duty, fiddling with some project. ;) More power *grunt* *grunt* *grunt* (Oh, and please don’t tell Mr. Binford about the Snap-On cap …)

IMG_6428.jpeg

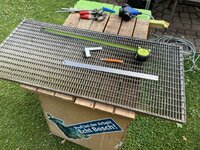
Leftover piece of grating, marked & ready to cut.

IMG_6432.jpeg

Cutting.

IMG_6439.jpeg

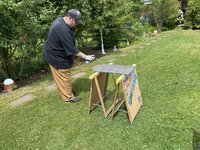
Cleaning up the edges.

IMG_6455.jpeg

Applying zinc spray/ coating.

IMG_6467.jpeg

Finished.

IMG_6480.jpeg

This will do until the staircase makeover. #17 finished.

Kind regards,
Olli
 

drivesitfar

Well-known member
Joined
Oct 23, 2013
Messages
36,047
Location
Pacific Northwest
Looks amazing. Nice work!!

What blade do you like to use when cutting metal with your hand grinder??

Sorry I just checked your other thread and you did a big post on your cutting blades so I’ll read they and thank you in advance for your thoughts. Thanks!!

Have a great weekend!!
 
OP
N

Nobody-named-Olli

Well-known member
Joined
Jan 9, 2025
Messages
1,636
Location
North Rhine-Westphalia; Germany
Last edited:

OP
N

Nobody-named-Olli

Well-known member
Joined
Jan 9, 2025
Messages
1,636
Location
North Rhine-Westphalia; Germany
#19 ”Potting table” conversion for the material shelter

My better half asked me if I had an idea for making her a small potting area/ table, with a small container for potting soil, in the back of the garden where the temperature doesn’t rise as fast as on the patio (where we have a nice potting table) and generally is a lot of shade.

Looking at the small shelter for gardening materials/ bagged soil I build years ago, I thought maybe I could convert that into something suitable.

IMG_6168.jpeg

I had an idea in my head, and on Saturday I had to make an urgent trip to the big box store to pick up a light switch as one in our hallway was about to fail. I took the extra minute to get a sheet of Egger OSB 3 board. (https://www.egger.com/get_download/...ealth-declaration-OSB3-English.pdf?country=DE )

19.1 Cutting to size, cut out for Euro container, holes to mount Euro container.

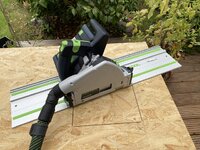
Cut reference edge & cutting to width.

IMG_6838.jpeg

Cut reference edge & cutting to length.

IMG_6841.jpeg

Euro container cut out.

IMG_6843.jpeg

IMG_6846.jpeg

IMG_6848.jpeg

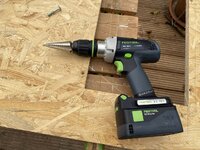
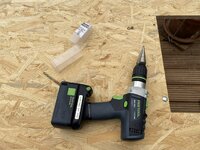
Drilling holes & countersinking.

IMG_6852.jpeg

IMG_6853.jpeg

IMG_6855.jpeg

Will continue in 19.2
 
Last edited:
OP
N

Nobody-named-Olli

Well-known member
Joined
Jan 9, 2025
Messages
1,636
Location
North Rhine-Westphalia; Germany
#19 ”Potting table” conversion for the material shelter

19.2 Mounting Euro container, add bracing, mounting table - finished project.

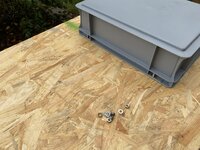
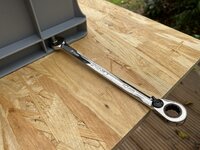
Mounting the Euro container. Very tight fit in terms of fitting the nuts and washers.

IMG_6858.jpeg


IMG_6860.jpeg

Used a strip of tape over each bolt to hold in place while working.

IMG_6859.jpeg

Add some bracing. Not that I expect this to carry a lot of weight, but the 18mm (0.71”) OSB will fare a little easier through time with some added bracing.

IMG_6862.jpeg

IMG_6865.jpeg

Time to mount to the shelter. Had to make a little recess for the middle beam.

IMG_6871.jpeg

Finished project.

IMG_6870.jpeg

Kind regards,
Olli
 

Jgaz

Well-known member
Joined
Dec 16, 2016
Messages
1,699
Location
AZ
Nice job!
I especially liked your use of the track saw for the plunge cuts.

Ive never used one, (just a circular saw with an edge guide) but I’m starting to look more at a track saw. I think with my current cabinet pull out shelves project it would make things easier.
 
To avoid these ads, REGISTER NOW!
Top Bottom