To avoid these ads, REGISTER NOW!

Ohio 30'X40'X12' Pole Barn Garage

fizznizzy

Well-known member
Joined
Sep 13, 2017
Messages
54
Location
NE Ohio
Purpose: The barn will serve my needs for space to work on and build cars, fabricate parts, and store my tiny off-road collection of goodies.

Background: I'm a mechanical engineer currently stuck in NE Ohio in the Akron area. I've been saving to build a barn for a few years and recently pulled the trigger on getting things moving. I'm looking forward to having space beyond the 2 car garage that is now completely full between parking daily drivers, welders, tools, etc... too many race cars, not enough space basically.

The Build:
Step 1 was an intimidating hurdle - Permits and Plans. With some help from forum members, I was able to locate my septic, dig out my property markers, and submit my proposal. I was limited on square footage by the 'footprint' of the house (1200 sq ft max) and limited on the height due to city regulations (18' max). I eventually settled on a 30'X40'X12' barn maxing out my limitations and budget...

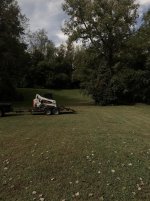
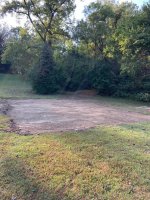
Things got moving in September 2019:
attachment.php

attachment.php


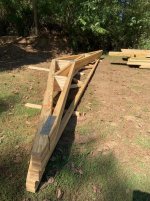
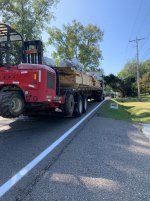
Then material was delivered a couple weeks later. The truck was too big for the driveway, so directing traffic on a fairly busy road for 2 hours was stressful. Also the cops weren't too thrilled:
attachment.php

attachment.php

attachment.php


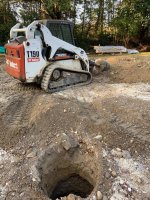
Next up was getting the post holes dug and signed off on by the inspector:
attachment.php


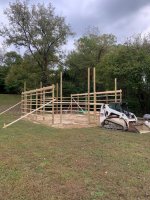
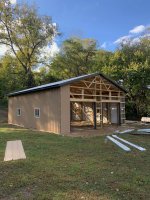
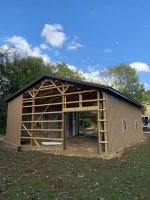
I had a crew do the assembly on the pole barn kit. They worked quick and the initial structure was up in a couple days:
attachment.php
 

Attachments

  • IMG_2815.jpg
    IMG_2815.jpg
    147.1 KB · Views: 2,970
  • IMG_2992.jpg
    IMG_2992.jpg
    148.4 KB · Views: 2,940
  • IMG_2976.jpg
    IMG_2976.jpg
    149.3 KB · Views: 2,941
  • IMG_2866.jpg
    IMG_2866.jpg
    149.3 KB · Views: 2,938
  • IMG_2863.jpg
    IMG_2863.jpg
    148.4 KB · Views: 2,937
  • IMG_2860.jpg
    IMG_2860.jpg
    146.9 KB · Views: 2,962
  • IMG_2838.jpg
    IMG_2838.jpg
    146.9 KB · Views: 2,945
To avoid these ads, REGISTER NOW!
OP
F

fizznizzy

Well-known member
Joined
Sep 13, 2017
Messages
54
Location
NE Ohio
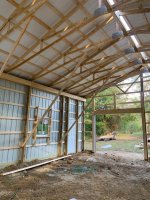
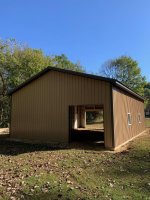
Roof and siding was up within the next 2 days:
attachment.php

attachment.php


Vapor barrier between the roof panels and trusses:
attachment.php


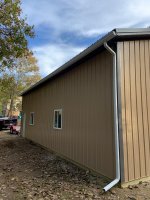
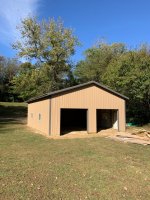
Finished siding:
attachment.php

attachment.php


Next up was concrete. I had a 4" slab poured with vapor barrier and 2 4'X4' squares of 6" thick for a 2 post lift. I also added a 4' skirt out front for fun:
attachment.php


Once the slab was poured I hung some gutters since the ground was getting beat up by the roof drainage:
attachment.php
 

Attachments

  • IMG_3006.jpg
    IMG_3006.jpg
    147.8 KB · Views: 2,936
  • IMG_3010.jpg
    IMG_3010.jpg
    134.7 KB · Views: 2,935
  • IMG_3011.jpg
    IMG_3011.jpg
    148.3 KB · Views: 2,943
  • IMG_3168.jpg
    IMG_3168.jpg
    122.7 KB · Views: 2,918
  • IMG_3144.jpg
    IMG_3144.jpg
    89 KB · Views: 2,945
  • IMG_3027.jpg
    IMG_3027.jpg
    143.6 KB · Views: 2,922
  • IMG_3025.jpg
    IMG_3025.jpg
    146.9 KB · Views: 2,919
Last edited:
OP
F

fizznizzy

Well-known member
Joined
Sep 13, 2017
Messages
54
Location
NE Ohio
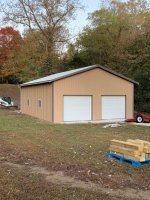
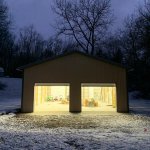
Garage doors hung and functioning:
attachment.php


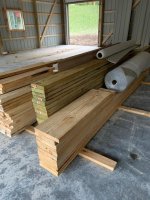
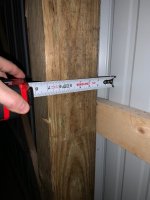
For whatever reason, I had all this material leftover after the build. Maybe the kit I got allows for some interior finishing? Either way, that's my plan with it. I'd like to use this to run along the inner face of the main poles so I can attach OSB/drywall eventually:
attachment.php


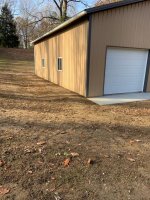
Finished up the backfill on the outside edges:
attachment.php


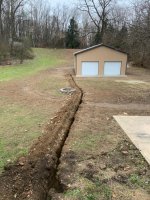
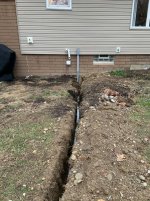
And this brings me to where I currently stand... with a trench dug out for running power to the barn. Plan is for a 100A panel off the house service with 4/0 in conduit. Pulled the electric permit and should be running wire next weekend:
attachment.php


At the moment I'm trying to figure out my plan with insulation. I want to run all the wiring first, but don't have the 2x4's in place to set the outlets out to the correct location for the drywall to attach to.

Which do you normally do first? I'd like to run the 2X4's down the length to get the attachment for the outlets, but don't want them to be in the way for when I start insulation. Also, I think I need some kind of vapor barrier on the walls... open to suggestions here if anyone has input. The plan is to use fiberglass insulation since spray foam seems so expensive:
attachment.php
 

Attachments

  • IMG_3178.jpg
    IMG_3178.jpg
    150.3 KB · Views: 2,903
  • IMG_3193.jpg
    IMG_3193.jpg
    108 KB · Views: 2,904
  • IMG_3482.jpg
    IMG_3482.jpg
    148.3 KB · Views: 2,885
  • IMG_3537.jpg
    IMG_3537.jpg
    149.5 KB · Views: 2,887
  • IMG_3553.jpg
    IMG_3553.jpg
    80 KB · Views: 2,889
Last edited:
OP
F

fizznizzy

Well-known member
Joined
Sep 13, 2017
Messages
54
Location
NE Ohio
Update:
We have power. Inspector is coming tomorrow to hopefully check things off without a hitch. I have 2 50amp 220v outlets for the welder, a 30 amp outlet on the ceiling for a lift accompanied by a 110 box so I can put an outlet on the lift post in the center of the shop, 110 boxes on every post (8'), and outlets installed on the rafters for lighting.

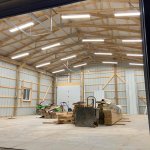
Next up, hang the 20 maxlite led ballasts I have and see how bright everything is :beer:

attachment.php


attachment.php


attachment.php
 

Attachments

  • IMG_3620.jpg
    IMG_3620.jpg
    151 KB · Views: 2,475
  • IMG_3622.jpg
    IMG_3622.jpg
    124.8 KB · Views: 2,478
  • IMG_3623.jpg
    IMG_3623.jpg
    103.3 KB · Views: 2,477
Last edited:

jblnut

ALLIANCE MEMBER
Joined
Jan 17, 2015
Messages
7,143
Location
In the Middle of MN
When we finished out one of our pole sheds we built 2' high "bookshelves" between the poles so we could use 24" insulation and we had places to mount outlets and such. Actually, we did that on two sheds but the second one we scrapped the outlets and wiring in the walls and surface mounted all the wiring. We figured after all it is a farm shop, it needs to function well first and look good second. Might be a little different than a racecar shop but it works well and actually looks nice having it all surface mounted in EMT.

The whole thing came together nice and quick and looks AMAZING to boot !! You will never want to go back in the house :lol_hitti
 
OP
F

fizznizzy

Well-known member
Joined
Sep 13, 2017
Messages
54
Location
NE Ohio
When we finished out one of our pole sheds we built 2' high "bookshelves" between the poles so we could use 24" insulation and we had places to mount outlets and such. Actually, we did that on two sheds but the second one we scrapped the outlets and wiring in the walls and surface mounted all the wiring. We figured after all it is a farm shop, it needs to function well first and look good second. Might be a little different than a racecar shop but it works well and actually looks nice having it all surface mounted in EMT.

The whole thing came together nice and quick and looks AMAZING to boot !! You will never want to go back in the house :lol_hitti

Interesting... so you ran the insulation horizontally? I was stuck on vertical and didn't even think about running it horizontal... that opens up options.

Thanks!
 

Moosefire

Well-known member
Joined
Oct 26, 2018
Messages
754
Location
Detroit
What pitch roof is that, and how much more interior headroom did you get out of it? Was it worth the cost vs conventional trusses?

Sent from my SM-N960U using Tapatalk
 

jblnut

ALLIANCE MEMBER
Joined
Jan 17, 2015
Messages
7,143
Location
In the Middle of MN
Interesting... so you ran the insulation horizontally? I was stuck on vertical and didn't even think about running it horizontal... that opens up options.

Thanks!
Correct. It also eliminated the need for a separate run of 1x4 or 2x4's to mount wall steel to. It worked very well. We used joist hangers to mount the 2x6's to the 6x6 posts in the one building and used a 21" scrap nailed to the 6x6 between the "shelves" to space the boards out in the other shed. The scrap method was WAY faster but makes for a 9" wide chunk of insulated wood post every 8'.
 
OP
F

fizznizzy

Well-known member
Joined
Sep 13, 2017
Messages
54
Location
NE Ohio
What pitch roof is that, and how much more interior headroom did you get out of it? Was it worth the cost vs conventional trusses?

Sent from my SM-N960U using Tapatalk

The roof pitch is 5/2 (resulting in my max building height of 18')

The cost of the scissor trusses are really not much different than a standard truss. It's a similar amount of material and cost ~$15-$20 more each. It gives the interior of the barn a more open feel since I wasn't able to go higher on the wall height.
 

Growlertdi

Well-known member
Joined
May 17, 2016
Messages
410
Location
Millersport, Ohio
Nice start. looking forward to the updates. I have a 28x32 pole barn myself. was originally built in 1984 according to the scratches in the concrete :)

I need to do a grand purge to restart my organization.
 

welder57

Well-known member
Joined
Feb 26, 2011
Messages
414
Plus spray insulation on the panels will void any warranties on the panels.
Looks great!!!
 

Deezler

Well-known member
Joined
Nov 1, 2011
Messages
240
Location
Southeast MI
For whatever reason, I had all this material leftover after the build. Maybe the kit I got allows for some interior finishing? Either way, that's my plan with it. I'd like to use this to run along the inner face of the main poles so I can attach OSB/drywall eventually:
attachment.php

Um, wat? That is way too much leftover material. The only thing I can figure is that you were supposed to run another course of the treated wood around the bottom perimeter, and maybe run headers around the eave end wall tops (even though its completely unnecessary and your builders look to have done a great job).

Can it be returned? I made my kit supplier (a large local lumber yard) take back returns on every good piece of leftover lumber I could on my 30x36x10 (aside from the various scrap 2x4 bits) to save cash since I was broke. You can easily find uses for 2x4s and 2x6s but the big boards might just be in your way for a very long time. Thats like a thousand dollars worth of wood right there!
 

cgs2k2

New member
Joined
Dec 6, 2019
Messages
4
Location
ohio
i'm in NE Ohio as well. what area are you in? my new garage is going up next week - 20x24. pole barn looks good!
 

Kevin54

MEMBER EMERITUS
Joined
Jan 12, 2005
Messages
29,341
Location
Urbana, Ohio
Aren't those two rolls of material, your insulation? I see that you don't have any at all. That's a lot of lumber left over for some reason. Either they put your barn kit together wrong, or some jamoke figured the material wrong. Even making a mistake, you shouldn't have all of that left over. Did you get a plan sheet with your kit?

If you plan on using what you have leftover, and the barn is built properly, that's all great. But if not, you have quite a few hundred dollars laying there that you could use for something else.
 
OP
F

fizznizzy

Well-known member
Joined
Sep 13, 2017
Messages
54
Location
NE Ohio
Um, wat? That is way too much leftover material. The only thing I can figure is that you were supposed to run another course of the treated wood around the bottom perimeter, and maybe run headers around the eave end wall tops (even though its completely unnecessary and your builders look to have done a great job).

Can it be returned? I made my kit supplier (a large local lumber yard) take back returns on every good piece of leftover lumber I could on my 30x36x10 (aside from the various scrap 2x4 bits) to save cash since I was broke. You can easily find uses for 2x4s and 2x6s but the big boards might just be in your way for a very long time. Thats like a thousand dollars worth of wood right there!

Agreed, but I'm planning on using most, if not all of it for hanging drywall and shelving. It's likely they have some buffer for material, but it seems excessive. At this point it's material I'd be buying anyway so better to use it than try and work out a return.

i'm in NE Ohio as well. what area are you in? my new garage is going up next week - 20x24. pole barn looks good!

I'm just south of Akron in Green

Aren't those two rolls of material, your insulation? I see that you don't have any at all. That's a lot of lumber left over for some reason. Either they put your barn kit together wrong, or some jamoke figured the material wrong. Even making a mistake, you shouldn't have all of that left over. Did you get a plan sheet with your kit?

If you plan on using what you have leftover, and the barn is built properly, that's all great. But if not, you have quite a few hundred dollars laying there that you could use for something else.

The extra rolls of material are not insulation, it's 'double bubble' vapor barrier, which I'm not exactly clear on why it wasn't used before putting siding up. I'm also pretty sure that there's not enough there to do the sides, so maybe it was additional buffer like the wood. I did get a plan sheet, and should probably review further just to make sure I'm not missing anything critical.
 

OutlawDrifter

Well-known member
Joined
Jan 20, 2015
Messages
3,901
Location
KS
Nice start! What are your plans for the ceiling?

In my 36x40x14, I had the walls bookshelved and ran the R19 vertical behind everything. All of my electrical is mounted outside the walls(7/16 painted OSB). Then I did about 20" of blown in insulation in the ceiling. I also had some high density 1" foam under the cement pad for further insulation from the ground. The 3 ton heat pump keeps up well, especially in the hot humid summers. Only costs me an extra $25 to run the AC at a consistent 74* during the summer time.
 

Torque&Recoil

Well-known member
Joined
Dec 13, 2015
Messages
435
Location
NE Ohio
Greetings from Bath.

fyi - I always thought double-bubble was sold as inexpensive insulation for metal pole buildings. I'm sure it's NBD to leave it out, especially if you are going to put some more effective insulation in the walls. Although, as you are discovering, it's not so easy to insulate a pole building.

What do you race, and with whom? Heck, we might even know each other...
 
To avoid these ads, REGISTER NOW!
OP
F

fizznizzy

Well-known member
Joined
Sep 13, 2017
Messages
54
Location
NE Ohio
Nice start! What are your plans for the ceiling?

In my 36x40x14, I had the walls bookshelved and ran the R19 vertical behind everything. All of my electrical is mounted outside the walls(7/16 painted OSB). Then I did about 20" of blown in insulation in the ceiling. I also had some high density 1" foam under the cement pad for further insulation from the ground. The 3 ton heat pump keeps up well, especially in the hot humid summers. Only costs me an extra $25 to run the AC at a consistent 74* during the summer time.

I'm trying to layout everything I need plus some more for electrical so I can leave that all closed in. For the ceiling, I'm planning on putting insulation directly on the upper metal panels (avoiding the need to create an area that needs to be vented between the bottom of the trusses and roof panels.

Greetings from Bath.

fyi - I always thought double-bubble was sold as inexpensive insulation for metal pole buildings. I'm sure it's NBD to leave it out, especially if you are going to put some more effective insulation in the walls. Although, as you are discovering, it's not so easy to insulate a pole building.

What do you race, and with whom? Heck, we might even know each other...

Right, but I am mildly concerned about not having a vapor barrier between the insulation and the wall... something I need to do more research on. Maybe putting batting against the metal is okay?

I don't exactly 'race', just go to grassroots drifting events for fun. Events I go to are held at Lake Erie Speedway, Midvale Speedway, Pittrace, and occasionally Kil-kare. Clubloose II, Drift Cleveland, and Drift Indy groups. I do a little bit of autocross and occasionally help out with pit crew duties for team Sahlen's champ car and AER. Little bit of everything...
 

JalopyJake

Active member
Joined
Oct 23, 2019
Messages
35
Location
TC
looking great, were about at similar points in our builds. i'm working on wiring and closing in the inside of my barn currently.
 
OP
F

fizznizzy

Well-known member
Joined
Sep 13, 2017
Messages
54
Location
NE Ohio
Update - got my 20 maxlite 2 bulb ballasts all installed. I still have 4 additional lights I plan to put on the wall around the lift and detailing area to get some better side lighting.

This was a big step and makes the space finally feel usable. I have a few things to address that the electrical inspector wanted, but nothing too major and I was given 'rough in' approval. I can finally fill in the ditch running the wire to the barn!

attachment.php


attachment.php
 

Attachments

  • A36B3AA7-25C8-4C32-A008-17837B88178E.jpg
    A36B3AA7-25C8-4C32-A008-17837B88178E.jpg
    151.4 KB · Views: 1,690
  • D5E39312-5BFC-4878-945A-E88E326CBD32.jpg
    D5E39312-5BFC-4878-945A-E88E326CBD32.jpg
    144.9 KB · Views: 1,701
Last edited:

dodge610

Well-known member
Joined
Aug 22, 2010
Messages
5,467
Location
North Canton Ohio
Update - got my 20 maxlite 2 bulb ballasts all installed. I still have 4 additional lights I plan to put on the wall around the lift and detailing area to get some better side lighting.

This was a big step and makes the space finally feel usable. I have a few things to address that the electrical inspector wanted, but nothing too major and I was given 'rough in' approval. I can finally fill in the ditch running the wire to the barn!

attachment.php


attachment.php

Very Very nice you are about 1 1/2 hrs from me. Gotta add more lights to my barn.
 

Bryan96GT

New member
Joined
Oct 10, 2017
Messages
4
Love this build. Pretty much identical to what I want to do. Do you mind sharing how much money you have into it thus far? I've gotten a quote from a builder piecing everything together using local materials, but I don't know how it compares to a pole barn "kit" like you purchased
 

that-guy

Well-known member
Joined
Sep 6, 2012
Messages
603
Location
NoVA
love this build. practically what i am looking for size wise. i am curious of the cost for the kit and to have a crew put everything up. please send me the number in a PM if you are comfortable with sharing? thanks
 
OP
F

fizznizzy

Well-known member
Joined
Sep 13, 2017
Messages
54
Location
NE Ohio
To answer cost questions (I have no reason to not share...):
Barn materials delievered: $~15K
4" slab with 4' apron and >6" 4'x4' lift pads: ~$6k
Site prep and fill: ~$2k
Contractor labor: ~$6k
Plus local permits and other minor fees that add up to ~$1k

Keep in mind that is for the exterior shell only. There's still costs for electric, ceiling panels, insulation, heat, and wall finishing.

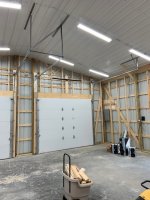
I have some updates - I've been working on getting ceiling panels up. Decided to go with white ribbed steel so it can span the 4' gap between the trusses without sagging. This was about twice the cost of sheet rock, but it looks nice, doesn't require paint/finishing, and I don't have to put up girts to span the gap between trusses.

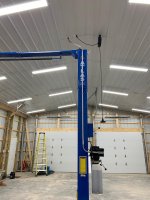
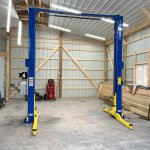
I also got an Atlas 9k lift installed. Turns out the concrete guys actually put in ~10' thick pads where I requested for the lift. My only instruction to them was >6" and they went overboard. I still need to finalize the wiring for that with conduit.
attachment.php


Next up is blowing ceiling insulation, framing walls in for OSB and insulation, and on to epoxy floor coating.

Since the last update I added some extra wiring for a compressor and a heater.

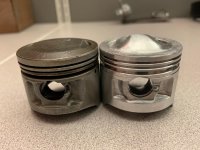
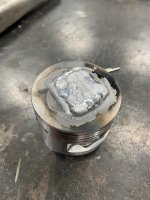
I've seen a few other threads here showing off hobbies and outside interests, so I decided to post up some of my winter projects. This one is currently in the basement of the house where it's warm until the barn is finished and heated, but I needed something lower cost to work on while the barn is getting finished.

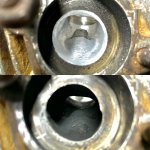
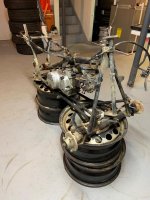
My friends and I have a small gang of tiny off road vehicles that we tinker around with. I decided while I had the engine out for a refresh I'd play around with porting, make a sketchy high compression piston, add a larger carb/inlet, and throw it on the flowbench because engineering. The frame is getting blasted to take off the rust and I had a few things to fix/reinforce while I was in there.
attachment.php

attachment.php

attachment.php

attachment.php

attachment.php

attachment.php
 

Attachments

  • IMG_3952.jpg
    IMG_3952.jpg
    69.4 KB · Views: 1,420
  • IMG_3922.jpg
    IMG_3922.jpg
    148.7 KB · Views: 1,426
  • IMG_3913.jpg
    IMG_3913.jpg
    93.6 KB · Views: 1,421
  • 930561D1-F655-47F5-A276-621DBF527CD8.jpg
    930561D1-F655-47F5-A276-621DBF527CD8.jpg
    107.9 KB · Views: 1,424
  • IMG_3582.jpg
    IMG_3582.jpg
    104.9 KB · Views: 1,421
  • IMG_3558.jpg
    IMG_3558.jpg
    98.8 KB · Views: 1,425
  • 49FEA945-A089-4F53-B7CE-D34D89C9EF04.jpg
    49FEA945-A089-4F53-B7CE-D34D89C9EF04.jpg
    150.7 KB · Views: 1,450

that-guy

Well-known member
Joined
Sep 6, 2012
Messages
603
Location
NoVA
this place is awesome and thank you very much for sharing all of the pictures and pricing. working out finding a building for myself in the very near future and this one caught my eye. was this a custom build, or did you buy the kit from somewhere and then get a contractor to put the whole thing up? sorry for so many questions, and please feel free to PM me if you don't want this to litter up your thread
 
OP
F

fizznizzy

Well-known member
Joined
Sep 13, 2017
Messages
54
Location
NE Ohio
this place is awesome and thank you very much for sharing all of the pictures and pricing. working out finding a building for myself in the very near future and this one caught my eye. was this a custom build, or did you buy the kit from somewhere and then get a contractor to put the whole thing up? sorry for so many questions, and please feel free to PM me if you don't want this to litter up your thread

No problem - the kit was assembled through DIY Polebarns. The kit was customized for door/window size/spacing, color, trusses, overhang, etc. They basically just have a program that spits out the materials based on what you want, send you the quote, and then ship a kit to your door. I had a contractor assemble the kit because the pricing was right and things were starting to get cold around October of last year and I didn't want this to take forever for me and a few buddies to figure out.
 

JalopyJake

Active member
Joined
Oct 23, 2019
Messages
35
Location
TC
Looks great!! love the vaulted rafters! wish i would of gone that route.
 
Last edited:
OP
F

fizznizzy

Well-known member
Joined
Sep 13, 2017
Messages
54
Location
NE Ohio
Ceiling panels are up and I ran some quick conduit for the lift. Nothing spectacular, but it gets the job done. The ceiling panels make it look a lot more 'finished'.

attachment.php

attachment.php
 

Attachments

  • A6C8D339-F8EB-4A2F-95D3-07DC9DE8D1CE.jpg
    A6C8D339-F8EB-4A2F-95D3-07DC9DE8D1CE.jpg
    139.8 KB · Views: 1,282
  • IMG_4044.jpg
    IMG_4044.jpg
    92.3 KB · Views: 1,272

UTCiv

Well-known member
Joined
May 11, 2008
Messages
70
Location
Ohio
Good looking barn, lift, lights, and ceiling!

Did you notice a sound increase with the ceiling panels? I set mine up to allow panels or exposed vapor barrier and haven't pulled the trigger on anything yet.

I'm with you on the small offroad vehicles, we have a small buggy, and I just picked up a free YZ250F with no engine to either turn electric, or swap in (LO206? GX?? 650 twin from a Versys?) something fun.
 
OP
F

fizznizzy

Well-known member
Joined
Sep 13, 2017
Messages
54
Location
NE Ohio
No noticeable sound increase. There is a layer of vapor barrier behind the panels also. Right now, with almost nothing in the barn taking up space, everything is still echoing quite a bit. Walls, insulation, and 'stuff' will make a huge difference.

I like the idea of the 650 twin.
 
OP
F

fizznizzy

Well-known member
Joined
Sep 13, 2017
Messages
54
Location
NE Ohio
Update time. I got the walls framed out with 2' on center 2x4's for future insulation and wall panels. I used every 2x4 that was leftover from the initial wood order and added some PT 2x4's to the bottom and sealed them with liquid nails to the floor. I also added a few more outlets just because... planning everything you need in the walls beforehand is difficult...
attachment.php

attachment.php


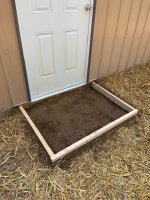
2 weeks ago I took some time to layout a small pad for the man door and also one on the back side for a compressor 'hut'. I still have yet to pour concrete, but it will get done in the next couple weeks
attachment.php

attachment.php


Lastly, I finally took on the task of blowing in ceiling insulation. First machine I brought home from Home Depot was a dud and had to go back for a replacement. Otherwise, this stuff is super easy to install. The 1200 sq ft (scissor truss) ceiling took ~30 bags. At qty 30 you get a bulk discount and save over 25% FYI... $850 for ~R50 with a little less towards the sides due to the smaller distance between ceiling and the roof panel with the scissor trusses. Not a fun job, but I'm glad it's done. I removed 2 side panels from the barn to gain access to the attic.
attachment.php
 

Attachments

  • IMG_4205.jpg
    IMG_4205.jpg
    143.1 KB · Views: 1,144
  • IMG_4204.jpg
    IMG_4204.jpg
    136.4 KB · Views: 1,138
  • IMG_4128.jpg
    IMG_4128.jpg
    99.6 KB · Views: 1,425
  • IMG_4127.jpg
    IMG_4127.jpg
    116.5 KB · Views: 1,162
  • 99222C9F-6B0A-4A5C-B0B1-35DA10E017BB.jpg
    99222C9F-6B0A-4A5C-B0B1-35DA10E017BB.jpg
    58.2 KB · Views: 1,141
To avoid these ads, REGISTER NOW!
Top Bottom