To avoid these ads, REGISTER NOW!

Older kitchen sink venting plumbing

andyvh1959

Well-known member
Joined
Feb 15, 2020
Messages
2,598
Location
Green Bay WI
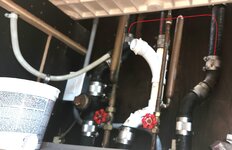
My 1973 built contemporary home has a breakfast bar opposite the kitchen sink, and the breakfast bar projects out 90 degrees from an outside wall. So the vent lines for the two sink drains and dishwasher drain is not a direct shot into the outside wall and up through the attic to the roof vent. Since plastic pipe was not common for drains/vents back in 73, mine is plumbed with black pipe with multiple elbows and lines as in this picture. The white portion is what I installed during the 1st remodel back in 2003.
wet vent system.jpg
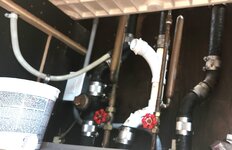
I assume this is a wet vent system. The white center section is the actual drain, which is vented vertically to a tee between the other two vertical vent lines. All three route under the kitchen floor to a vent line that routes 90 degrees to the right, up inside the outside wall and up into the attic vent stack. The three lines shown above all tee together up at a level just below the countertop. Am I right to assume the vent lines must tee together high enough to be above any potential high water level in the sink bowls?

Or, to gain more space behind the farm/apron sink I just installed, can I lower the vent tee lines to the level shown by the red lines? That would put the teed vent lines at a level near the bottom of the apron sink, well below the max possible water height in the bowls. Doing this would open a lot more space behind the apron sink and below the countertop level. The faucet set plumbing all fits right now, but the vent system is plumbed with 50+ year old black pipe, and if I can shorten all of it I might do that and replace it with new sched 40 plastic pipe. So can I lower the vent tee level or does it need to stay as high as possible like it is now?
 

Attachments
  • wet vent system.jpg
    wet vent system.jpg
    442.1 KB · Views: 12
Last edited:
To avoid these ads, REGISTER NOW!

stihlcollector

Active member
Joined
Oct 3, 2021
Messages
42
Location
Glen St Mary FL
I'm not following what you have, but I have an under sink vent on the farm sink in my 2 year old double-wide, came from the factory that way. I installed one on the utility sink in the craft studio I built for the wife. Both applications work fine, no noise, no smell, no drain problems. Maybe you can put on in there that would solve your problem.
 
OP
A

andyvh1959

Well-known member
Joined
Feb 15, 2020
Messages
2,598
Location
Green Bay WI
I think what I have is the old way of venting double bowls under the sinks. I bet there are newer ways to do it that take up less space and get rid of the old black pipe.
 

housewolf

Well-known member
Joined
Feb 3, 2021
Messages
1,144
Location
East Texas
I’m not exactly sure what you have there, the photo is kind of blurry but I will answer a couple of your questions. Vent pipes shouldn’t tie together horizontally until they are 6” above the flood rim of the fixture. This is to keep solids from becoming trapped diring a blockage/backup and (permanently) stopping up the horizontal section of the vent. It’s okay to tie them together at 45. You’d use a 45 on the one on the left, a wye with the branch looking down on the middle, and a wye with the branch pointing toward the middle on the right side riser. Or a mirror image.

That should be a sanitary tee looking out to catch the trap on the middle riser, not a combination like you have. You should add a cleanout to that riser.

I really can’t imagine why you have three risers coming up under your KS though.

I won’t ever use an AAV (“automatic vent” 🙄) unless it’s that or nothing in an existing situation. I’d certainly never plan for one. You may be able to cap one or maybe two of those risers, but there is a way (within compliance) to tie them all together below the flood rim.
 
Last edited:
OP
A

andyvh1959

Well-known member
Joined
Feb 15, 2020
Messages
2,598
Location
Green Bay WI
Thanks, you answered my assumption about the horizontal pipes being above the flooded rim of the fixture. I'll leave the vent piping as is.

As to the cleanout, I have that option from below because when I replaced rotted/rusted connections in the ceiling of my office below the kitchen I added a cleanout for the drain line.
 
To avoid these ads, REGISTER NOW!

carlaisle

Well-known member
Joined
May 14, 2022
Messages
384
If you can figure out why you have so many lines you would be well on your way to consolidating them. For future reference, your existing drains are hubless cast iron. Generally good for a solid 100 year service life.
 
OP
A

andyvh1959

Well-known member
Joined
Feb 15, 2020
Messages
2,598
Location
Green Bay WI
Yup. The two risers behind the sink tee together into the actual sink drain riser. Here is a picture of the kitchen drains under the kitchen floor, which is also the ceiling in my office directly below:
1722638974883.png
to the RH side of the picture are the three lines that go up behind the aprin sink I just installed. About two years ago I had a leak in one of the drain lines where the black iron pipe had actually rusted through. I replaced it all with black ABS sched 40 pipe, after I finally cleared a totally clogged vent line (which in the picture is the line to the bottom). That was a ****** in itself. Since then everything drains and vents properly, sink drains without gurgling or burbing, dishwasher drains properly.

I ended up creating a vented cap that rest on top of the vent stack above the roof. It fully allows air under the cap and into the vent stack, but leaves, debris, small birds, etc cannot get into the vent stack. Been up there now for two years with no issues.

So, through all that I will leave the complicated vent system behind the new apron sink as is, at the level it is. IF I do anything it would be just to replace all the black iron vent system in the kitchen with black ABS plastic pipe. For now I'm good with it.
 

housewolf

Well-known member
Joined
Feb 3, 2021
Messages
1,144
Location
East Texas
I think I understand what you have there and I can see how it’s probably functioning “okay”. If that one riser is nothing but a cleanout, it doesn’t need to be tied in to the vent, in fact it shouldn’t even be there. A CO below the tee would ensure access to all the pipe downstream. The vent is kinda wonky but I can see that it may function.

This is the proper way to do an island vent (not my sketch). I’ve done quite a few like this and it’s a lot of extra pipe, fittings and work but when you’re getting paid to do a job, it should be done properly. I know a lot of areas allow AAVs but only allowing air in, it’s really not a proper vent. It’s certainly not something that would be allowed on a commercial project (that I’ve had experience with) under the watchful eye of a knowledgeable design team. If I had an island sink in my house, I’d do it this way.

IMG_3105.jpeg
 
OP
A

andyvh1959

Well-known member
Joined
Feb 15, 2020
Messages
2,598
Location
Green Bay WI
Thanks for the details, your sketch makes sense. I agree that the three risers on my original venting don't reall make sense and that two risers would do the venting. But for now I'll leave it as is. When I got into cleaning the clogged vent line I also found a near horizontal run in the attic, not sloped in the right direction at all. In fact it was sloped down toward the vertical stack, perhaps it settled over time.

In my house the 1.5" vent line makes another 90 turn above the wall top plate and runs back across the kitchen ceiling joists before turning 90 again to project through the roof (its a contempoary house and the roof over the kitchen and dining room is maybe a 3/12 pitch at most). No wonder the run of the vent line got full of **** and plugged solid. It took a lot of effort to get it all cleared out and venting. I also reset the pitch on the run in the attic so it sloped down properly.
 
To avoid these ads, REGISTER NOW!
Top Bottom