Hi, I'm new to this forum and after several months I joined. Hopefully you'll enjoy this build. Ask any questions you like and recommendations are certainly welcomed. There's plenty of photos too.
Well, here we go, the start of our new barn in upstate NY (Franklin).
We are setting out to build a super strong, "low maintenance", large space to shed our tractors and double as a nice shop. We are taking advantage of a longside southern exposure, with plenty of windows and light. We decided to leave our interior heating decision to later on.
So here are the details:
The barn is 40'x80', stick built, 14' sidewalls on top of a 4' tall x10" wide concrete stem wall. The footer is 2' wide and down 4' (per code). We'll be using 8 pitch "attic truss" for the roof frame, 2' OC with 2' overhang. The attic space will be 14'x80'x8'. The metal roof will be "standing seam" from Everlast Roofing, www.everlastroofing.com, 24ga. on top of 5/8" advanTech roof sheathing. Oh, the sidewalls are 5/8" AdvanTech too with Tyvek fabric wrap. We are planing on 2 12'x12' doors on the gable ends along with 4 man-doors at each corner and 3'x6' windows (double hung, low e, from American Craftsman).
The exterior sheathing is going to be a DutchLap profile from CanExcel Ridgewood D-5 www.lpcorp.com/sidingtrim/lpcanexel/lpcanexel.aspx, prepainted, with 25/15yr warranty; made in Canada. The exterior trim will be Azek www.azek.com trim boards and soffits. The soffit vent is Cor-A-Vent (a honeycomb-like material), www.cor-a-vent.com.
All materials were bought local from Jess Howes, Sidney NY
Pre-construction - This is how the open-space looked before we started Oct08; you can see the layout pins if you look close (there's one near the silo with a yellow tag and a few on either side of the GMC Yukon). Our 100 year old cow barn is to the left nearly 70' away from the site. We tried to keep the new barn as far from the cowbarn as possible to reduce fire risk. The side hill to the right eventually kept us from moving much further though.

My neighbor, Joe Taggert, did all the excavation with his JD750, he did an awesome job. He scraped off the first foot of topsoil and piled it alongside the jobsite. We later used the topsoil when regrading the top layer, I greatly appreciated the extra detail. Man did he move a "ton" of dirt. We were very lucky to not encounter any large rocks!!

You can see we have a long drainage swale to the right. It runs the length of the new barn and will be 16' away from the sidewall. We're in a sidehill and want to ensure we keep water moving away from the foundation.

Found the house spring-line the hard way ! You can see we spliced in new line (and eventually ran a additional line through the foundation). Next to it (not pictured) was an old 1/2" LEAD line used many many years ago. We later buried the line almost 4' below grade.

The trenching is ready for form boards, the concrete contractor was pleased with the size of the hole which made it easy to work below groundlevel...although backfilling was more than expected. We were very carefull to leave the hardpan dirt completely undisturbed in the trenches. This will ensure a very solid footing. We installed a full perimeter drainage system and a seperate system for downspout drains and interior drains. All designed to keep water moving away from the footing and foundation

It rained for nearly two weeks after the foundation was poured (75 yards if I remember it right). Best condition possible to slow the curing process...and strengthen the concrete. It was 50 degrees outside. You can see in the right rear of the foundation, a small piece of the footing. We backfilled later on with crushed stone and lots of tamping.

I made a last minute decision to "paint" sealer on the exterior foundation... figured it couldn't hurt and will ultimately help keep water outside the foundation. That's me in the hole with the dirty job no-one else wanted

All backfilled and tamped, ready for the sticks, notice the interior pink 2" foundation insulation to act as a thermal break for the future heated floor. If you look close, you will notice the white PVC downdrains (next to my son), and in the middle of the building is another 4" PVC pipe for the floor drainage system. Bet you can't find the water hydrant (located standing in the rear of the foundation, all the way to the right. That's the location we spliced in the springline.

The walls are built on the ground and go up in 16' sections. The sidewalls are 2x6's, 12inches O.C. The gable ends will be 16" O.C. That's Lee Cohen, our builder in the foreground, to the right.

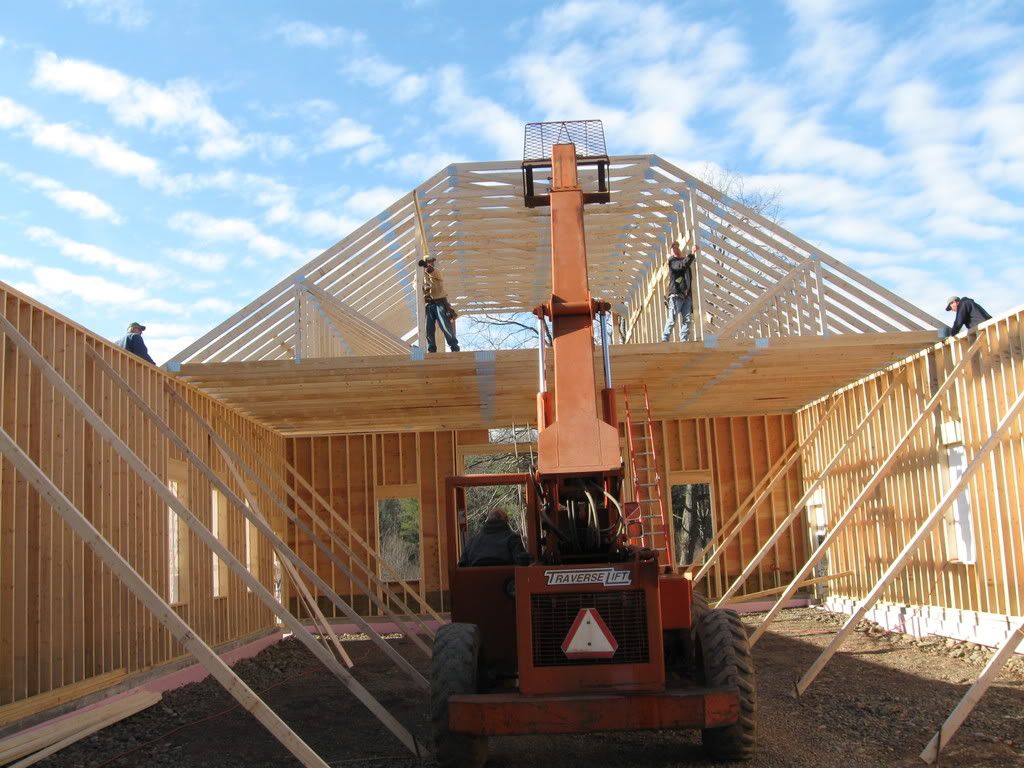
Trusses going up (44 feet wide), 2 feet O.C., and the shed is really starting to take shape...we used a "piggy back" truss system (two piece) because the DOT will not allow oversize on the highway. The upper section of the trusses (piggy backs) were installed last (you can see them laying on top of the large trusses in the foreground). I had these engineered and constructed locally and with the 8/12 pitch the snow should slide right off, decreasing the load on the sidewalls. Also a good photo of the drainage swale doing its job (look all the way to the right) of keeping the water away from the foundation.

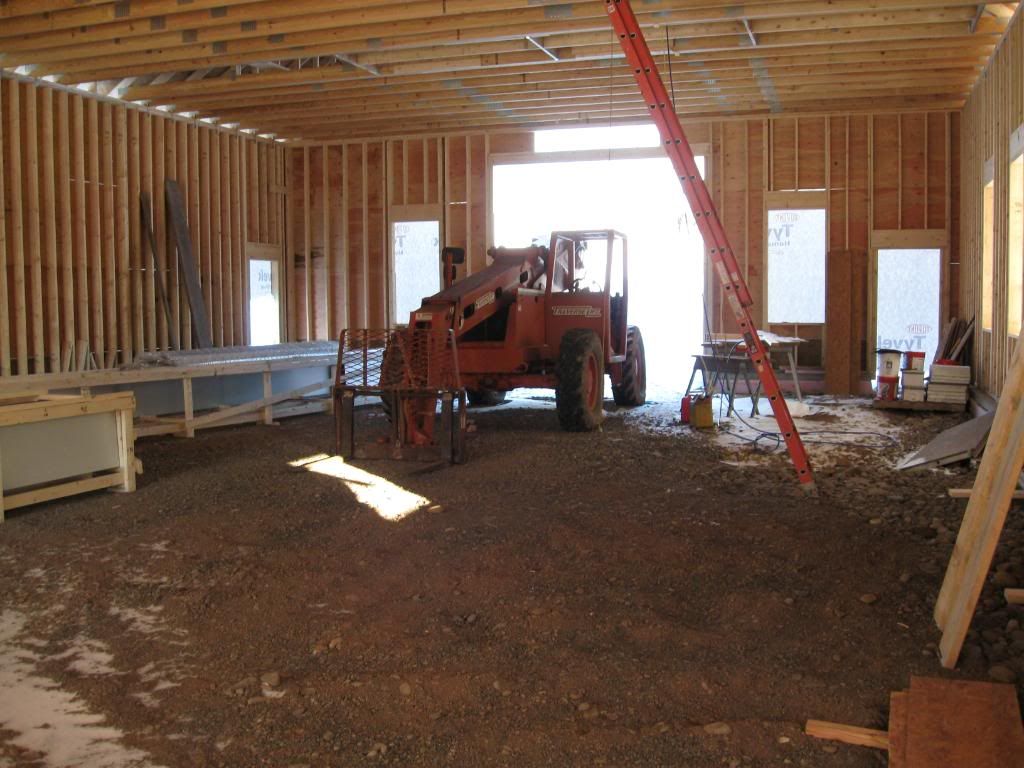
Got to have one of these to ease the trusses into place, we left the East-side gable wide open to drive through
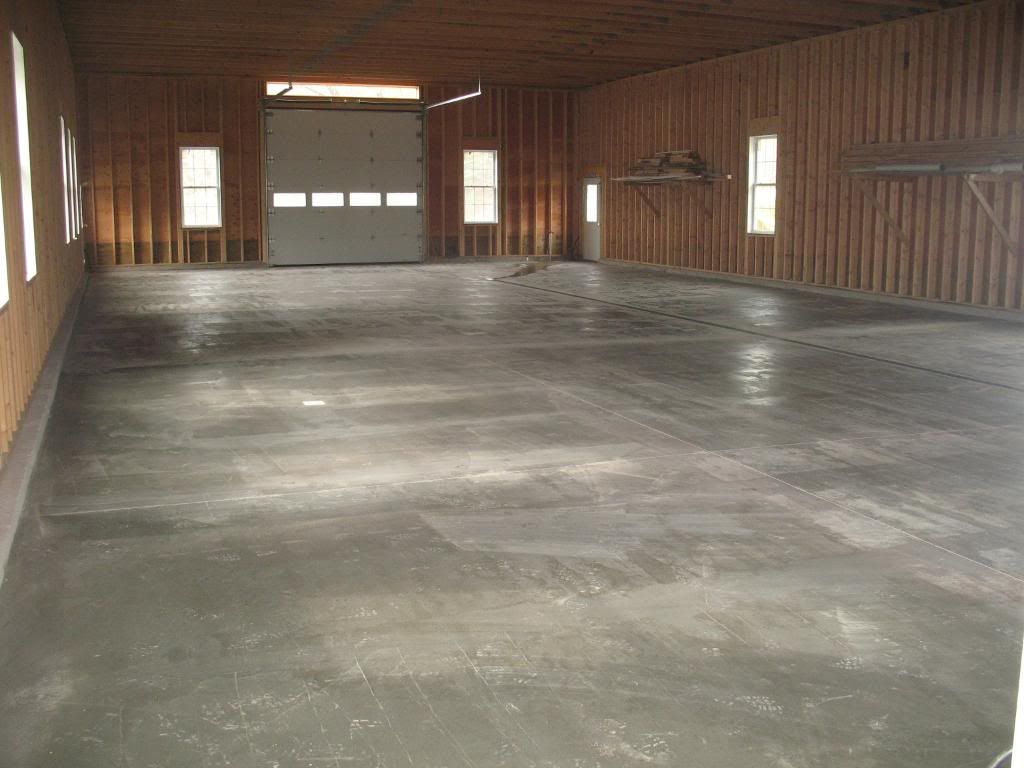
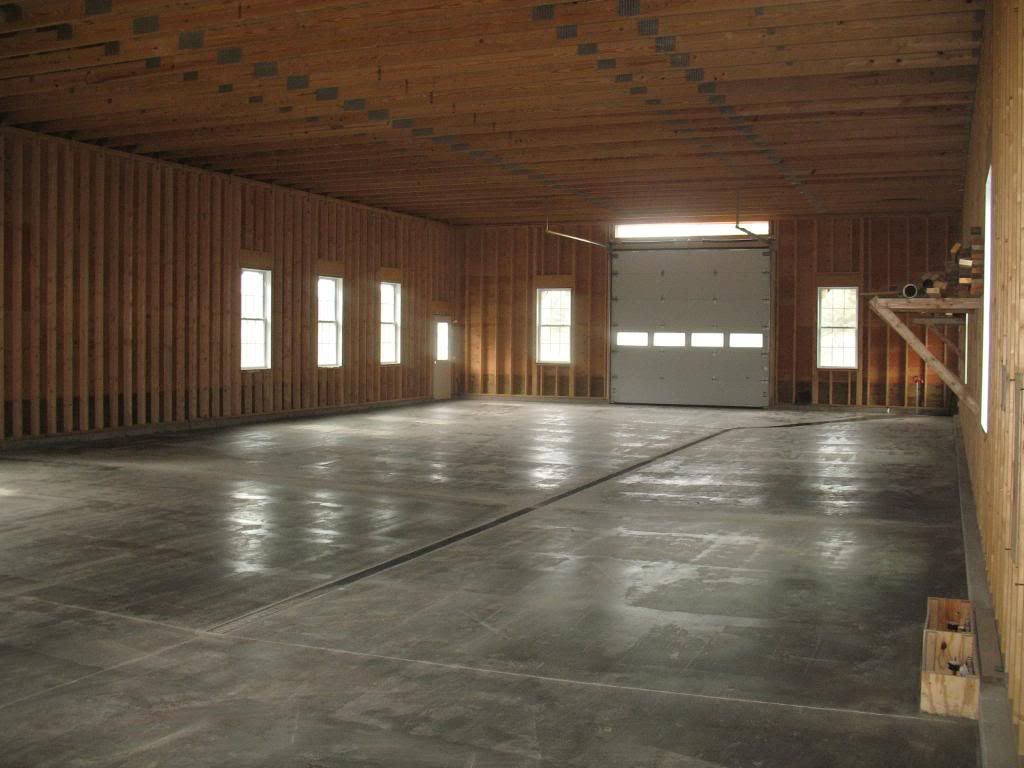
Pretty good sized space inside...to the far left is the metal roof stored until the weather gives us a break
My neighbor, Elton Cook, surveys the "attic" space....14'W x 8'H x 80'L....might make a good bowling alley ! I had the trusses designed for a live load, so a decent amount of weight can be stored in this space. There is truss bracing all-over up there. Notice the "A" framed on the outside of the sidewalls...all needed for the structural integrity of the system...same for the AdvanTech 3/4" TG flooring http://www.advantechperforms.com/. If you read up on it and you'll see why I choose this product for all my sheathing and subfloor; super strong and water resistant.

The cupola measures 8'x12' and is the ultimate "tree-stand" Actually, we have sliding windows planned and they will let the heat out in the summer. You can actually stand up inside the cupola.
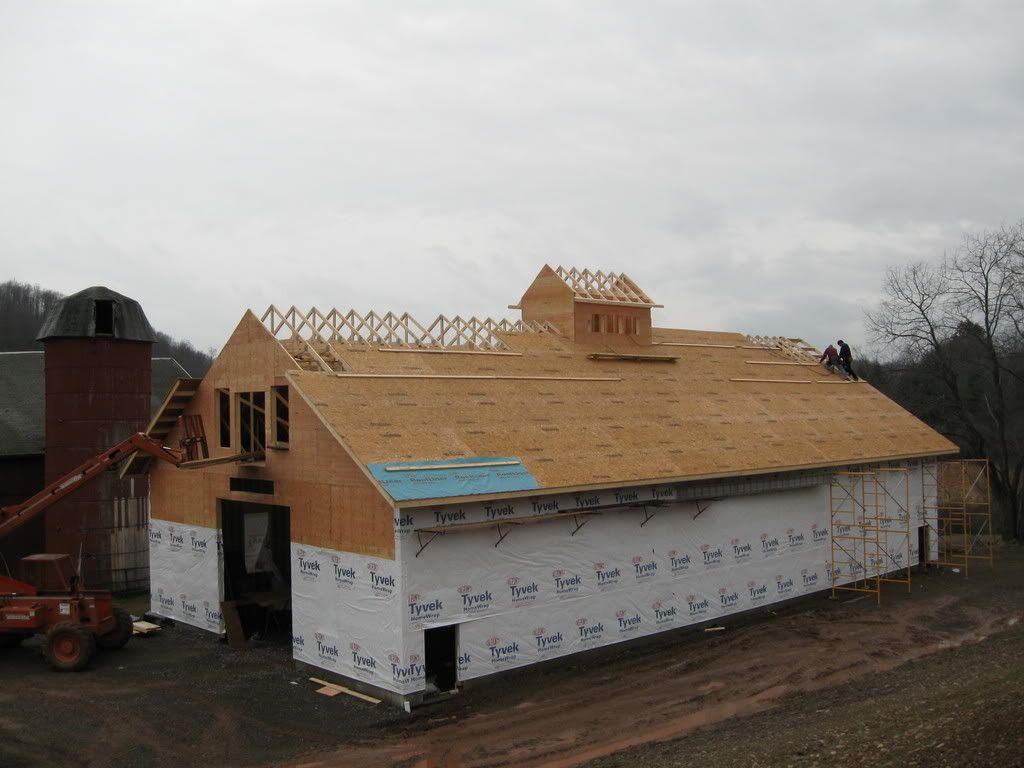
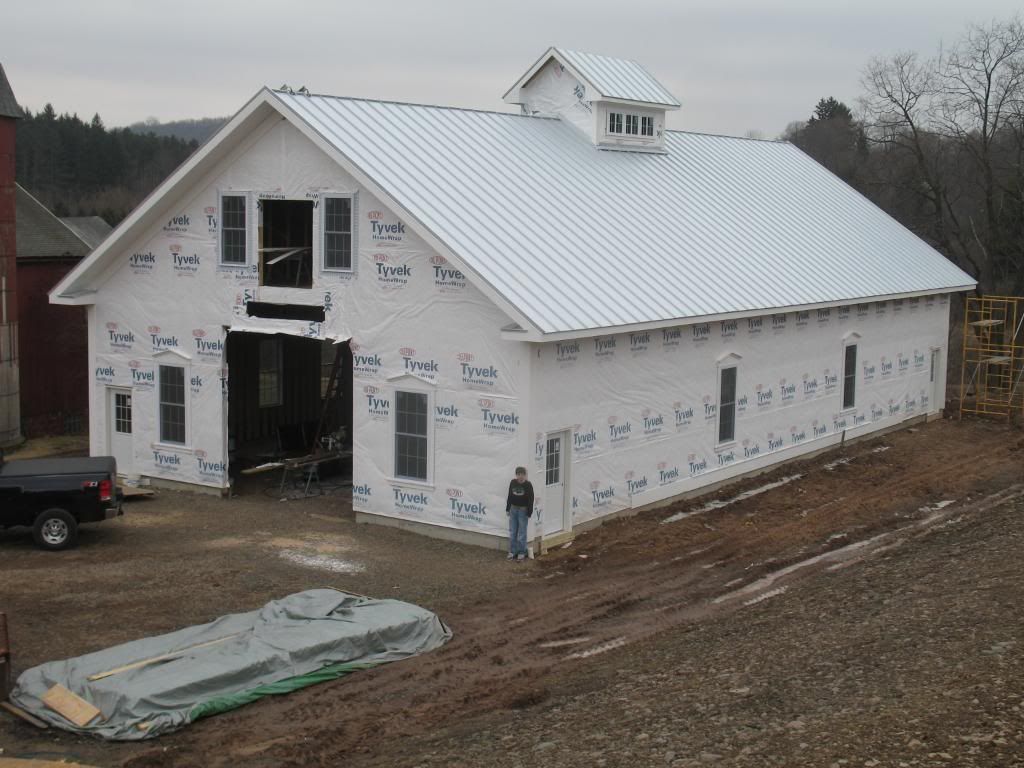
This is how the barn stands as of Jan 09....with a water tight membrane roof and just 1 degree outside. The cold weather shut us down for 6 weeks, so the metal roof, siding and windows will need to wait. Stay tuned for updates. thx Paul

Well, here we go, the start of our new barn in upstate NY (Franklin).
We are setting out to build a super strong, "low maintenance", large space to shed our tractors and double as a nice shop. We are taking advantage of a longside southern exposure, with plenty of windows and light. We decided to leave our interior heating decision to later on.
So here are the details:
The barn is 40'x80', stick built, 14' sidewalls on top of a 4' tall x10" wide concrete stem wall. The footer is 2' wide and down 4' (per code). We'll be using 8 pitch "attic truss" for the roof frame, 2' OC with 2' overhang. The attic space will be 14'x80'x8'. The metal roof will be "standing seam" from Everlast Roofing, www.everlastroofing.com, 24ga. on top of 5/8" advanTech roof sheathing. Oh, the sidewalls are 5/8" AdvanTech too with Tyvek fabric wrap. We are planing on 2 12'x12' doors on the gable ends along with 4 man-doors at each corner and 3'x6' windows (double hung, low e, from American Craftsman).
The exterior sheathing is going to be a DutchLap profile from CanExcel Ridgewood D-5 www.lpcorp.com/sidingtrim/lpcanexel/lpcanexel.aspx, prepainted, with 25/15yr warranty; made in Canada. The exterior trim will be Azek www.azek.com trim boards and soffits. The soffit vent is Cor-A-Vent (a honeycomb-like material), www.cor-a-vent.com.
All materials were bought local from Jess Howes, Sidney NY
Pre-construction - This is how the open-space looked before we started Oct08; you can see the layout pins if you look close (there's one near the silo with a yellow tag and a few on either side of the GMC Yukon). Our 100 year old cow barn is to the left nearly 70' away from the site. We tried to keep the new barn as far from the cowbarn as possible to reduce fire risk. The side hill to the right eventually kept us from moving much further though.
My neighbor, Joe Taggert, did all the excavation with his JD750, he did an awesome job. He scraped off the first foot of topsoil and piled it alongside the jobsite. We later used the topsoil when regrading the top layer, I greatly appreciated the extra detail. Man did he move a "ton" of dirt. We were very lucky to not encounter any large rocks!!
You can see we have a long drainage swale to the right. It runs the length of the new barn and will be 16' away from the sidewall. We're in a sidehill and want to ensure we keep water moving away from the foundation.
Found the house spring-line the hard way
! You can see we spliced in new line (and eventually ran a additional line through the foundation). Next to it (not pictured) was an old 1/2" LEAD line used many many years ago. We later buried the line almost 4' below grade.
The trenching is ready for form boards, the concrete contractor was pleased with the size of the hole which made it easy to work below groundlevel...although backfilling was more than expected
. We were very carefull to leave the hardpan dirt completely undisturbed in the trenches. This will ensure a very solid footing. We installed a full perimeter drainage system and a seperate system for downspout drains and interior drains. All designed to keep water moving away from the footing and foundation
It rained for nearly two weeks after the foundation was poured (75 yards if I remember it right). Best condition possible to slow the curing process...and strengthen the concrete. It was 50 degrees outside. You can see in the right rear of the foundation, a small piece of the footing. We backfilled later on with crushed stone and lots of tamping.
I made a last minute decision to "paint" sealer on the exterior foundation... figured it couldn't hurt and will ultimately help keep water outside the foundation. That's me in the hole with the dirty job no-one else wanted
All backfilled and tamped, ready for the sticks, notice the interior pink 2" foundation insulation to act as a thermal break for the future heated floor. If you look close, you will notice the white PVC downdrains (next to my son), and in the middle of the building is another 4" PVC pipe for the floor drainage system. Bet you can't find the water hydrant (located standing in the rear of the foundation, all the way to the right. That's the location we spliced in the springline.
The walls are built on the ground and go up in 16' sections. The sidewalls are 2x6's, 12inches O.C. The gable ends will be 16" O.C. That's Lee Cohen, our builder in the foreground, to the right.
Trusses going up (44 feet wide), 2 feet O.C., and the shed is really starting to take shape...we used a "piggy back" truss system (two piece) because the DOT will not allow oversize on the highway. The upper section of the trusses (piggy backs) were installed last (you can see them laying on top of the large trusses in the foreground). I had these engineered and constructed locally and with the 8/12 pitch the snow should slide right off, decreasing the load on the sidewalls. Also a good photo of the drainage swale doing its job (look all the way to the right) of keeping the water away from the foundation.
Got to have one of these to ease the trusses into place, we left the East-side gable wide open to drive through
Pretty good sized space inside...to the far left is the metal roof stored until the weather gives us a break
My neighbor, Elton Cook, surveys the "attic" space....14'W x 8'H x 80'L....might make a good bowling alley
! I had the trusses designed for a live load, so a decent amount of weight can be stored in this space. There is truss bracing all-over up there. Notice the "A" framed on the outside of the sidewalls...all needed for the structural integrity of the system...same for the AdvanTech 3/4" TG flooring http://www.advantechperforms.com/. If you read up on it and you'll see why I choose this product for all my sheathing and subfloor; super strong and water resistant.
The cupola measures 8'x12' and is the ultimate "tree-stand"
Actually, we have sliding windows planned and they will let the heat out in the summer. You can actually stand up inside the cupola.
This is how the barn stands as of Jan 09....with a water tight membrane roof and just 1 degree outside. The cold weather shut us down for 6 weeks, so the metal roof, siding and windows will need to wait. Stay tuned for updates. thx Paul
 Wow! It looks like you could park the Goodyear blimp in there with room to spare. I've got to follow this thread; it's going to be AMAZING!