GLTHFJ60
Well-known member
File to cut masking tape, will have to remember that. Looking forward to this coming together!

File to cut masking tape, will have to remember that. Looking forward to this coming together!
Paco and Mike,
I too bought the same tap wrench from my SO industrial rep in 1990 and it is still my "go to' tap wrench. I'm pretty it was made in Germany.
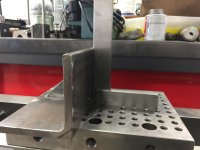
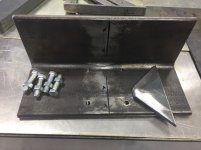
Nice work on the brake Paco.
Wow this is a nice thread full of cool machines and work projects.
That’s pretty crazy. I came across one on a 550i BMW one time that was like that. Engine was out though, so I rigged up a way to stop the engine from rotating and I literally had to hang from the end of 6’ of black iron pipe to get it to break loose. I’m sure glad I wasn’t trying it in the car. It sounded like a small gun firing when it broke loose. I was sure I had snapped the head off but nope, it came right out.
It’s amazing to me any bolt can handle that kind of force
 .
.I just battled a 1JZ crank bolt and I didn't have the luxury of still having the engine in the car. I tried a 3/8" battery impact wrench, 1/2" breaker bar, the 700ftlb kobalt 1/2" impact and eventually tried a 3/4" drive impact from work. None worked. Eventually I took a mapp gas torch and a BBQ grill thermometer and heated the middle of the bolt head. With the impact and 160deg reading on the head the bolt came right out.Yesterday a friend called asking for help. He was trying to break free the harmonic balancer (HB) bolt on his 1990 Toyota 22RE 4-runner with no luck.
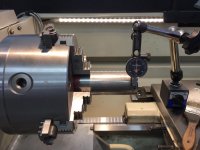
I was working on a press tool for the last of the bushings on the main body of the brake when he arrived so more on that latter.
Being a land cruiser guy, he felt I could help get that bolt loose to replace the leaking front seal and oil pump O-ring. I put him in the automotive bay to prep access to the stubborn bolt while I continued machining the press tool.
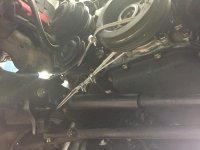
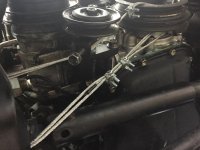
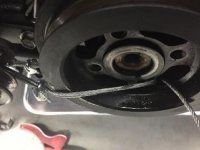
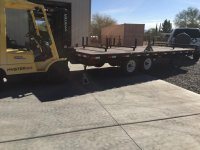
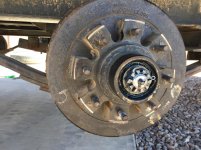
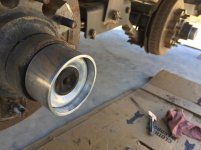
Once he got the radiator pulled as well as the fan, and belts, I tried everything I could think of including starter bump with the breaker bar resting against the passengers frame (coil wire removed), heat, big *** impact with 130 PSI. Nothing was working as the crank wanted to rotate CCW even with the transition in gear and E-brake set. Then I saw the solution in my minds eye!. I had some 1/8" aircraft cable and three cable clamps. We lashed the balancer to the passengers frame rail and used a 4' cheater bar on the 1/2" breaker bar. I thought the 18mm bolt had twisted, but it broke loose!
The cable was threaded through the HB and around the frame PS frame rail three times then two clamps secures the three cables from the bottom and one clamp secured the cables from the top.
Here are some photos of the set up that worked well. I wanted to share them as I know someone will find this solution useful.
fist photo is a top view, the last two are looking from the bottom. You can see how the cable was threaded preventing the CCW rotation of the crank.
New seals went on without drama and he's back on the road.
I would be interested to learn any other tricks you gentlemen might have to share for the same situation.
Thanks for looking.
For the HB bolt I've used a section of an old ring gear to make a tool that would hold the flywheel in place and bolted to some of the trans mount bolts. Worked like a charm but still took everything I had and 4.5' of 3/4" breaker bar.
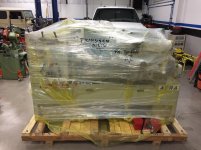
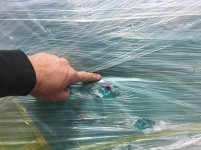
Paco, the work you do is very impressive and I love following along. I agree on the lathe, I'd be very upset if a new piece of equipment arrived to my house like that.
JB
That ***** about the lathe Paco. I feel for ya bud. Nothing worse that having to look at damage because of someone else's stupidity or ignorance. It's bad enough when you do something yourself but when you pay for a quality machine and it shows up less than that it is very frustrating.
I remember when my mill showed up lying on its side in the back of the truck and how frustrated I was. I guess if there is a bright side, it is at least you already have a lathe so you won't be without one.
Hope you get everything sorted out my friend.
That's a shame about the lathe Paco. Hopefully round 2 goes better for you.
Mike,
You would have been proud of me for not ripping that guy a new one. I remained calm on the outside but man was I pissed. It passed shortly after talking with Tom from Acra. Apparently this machine is 1 of 100 he had shipped in so looking forward to perusing warehouse when I drop this off and load the new machine.
A mill on its side looks horrible in my minds eye. Yes my Birmingham will remain in service. I have really grown to love that machine. After running it for seventeen years, I know all the sweet spots for different operations and materials.
Hows the overflow tank coming along?
Take care brother,
Paco


")