To avoid these ads, REGISTER NOW!

OSB: Holds Nails Well?

To avoid these ads, REGISTER NOW!
OP
B

Bull

Super Moderator
Joined
Dec 12, 2005
Messages
16,189
Location
MA
Re: Painting, Caulk, and Aquanet

What caulk are you useing?

Not sure yet. I just realized all I have on hand is non-paintable silicone. I need to run to the store tomorrow and grab some latex.
 

trbomax

Well-known member
Joined
Mar 21, 2010
Messages
2,556
Location
starvation lake,mi.
Re: Painting, Caulk, and Aquanet

I cauked all my osb as well as trim in the house with the cheapo white latex caulk from wally. It used to be $1/ tube,now its $1.20,but still a hell of a deal.Decent shrinkage,skins over in a couple hours.I bet Ive bought 50 tubes of that stuff.Used it to glaze the nail holes in trim and staples in the osb.

edit) I pump it in with the gun and squegge it off with a plastic autobody filler squeege.Keep a can of water and a wash cloth to keep the squeege clean.Scrape the joints down like you were doing drywall.
 
Last edited:
OP
B

Bull

Super Moderator
Joined
Dec 12, 2005
Messages
16,189
Location
MA
Re: Painting, Caulk, and Aquanet

I was just going to go to Lowe's or HD; never even would have considered Wally. But based on your rec and that low low price, I think I will go there instead!

The method you describe is basically what I am planning on doing. I don't have one of those plastic squeegee deals; maybe I can find one at Wally while I am there.

I am just going to do the seams, no screw divots or anything like that.

I cauked all my osb as well as trim in the house with the cheapo white latex caulk from wally. It used to be $1/ tube,now its $1.20,but still a hell of a deal.Decent shrinkage,skins over in a couple hours.I bet Ive bought 50 tubes of that stuff.Used it to glaze the nail holes in trim and staples in the osb.

edit) I pump it in with the gun and squegge it off with a plastic autobody filler squeege.Keep a can of water and a wash cloth to keep the squeege clean.Scrape the joints down like you were doing drywall.
 

trbomax

Well-known member
Joined
Mar 21, 2010
Messages
2,556
Location
starvation lake,mi.
Re: Painting, Caulk, and Aquanet

When you are squeegeing it off ,force it down into the joint by wipeing crossways,then do the cleanup wipe in the direction of the joint,lots of pressure on the tool,dont leave much buildup on the board,thats what makes the joints obvious when you paint because it changes the texture of the osb.Ive got most of my joints so that fron 10 feet away you cant even see them,and the walls are painted w/high gloss white rustoleum.
 
OP
B

Bull

Super Moderator
Joined
Dec 12, 2005
Messages
16,189
Location
MA
Re: Painting, Caulk, and Aquanet

I will absolutely be taking your advice on the method, thank you. I will report the results in my OSB thread when I am done.

I believe the paint brand I got today is valspar, and it is the high gloss ultra white. It should really give me the light reflectivity and ease of cleaning that I am looking for! I did not want to pay $28 for a gallon of paint, but there was no cheaper high gloss ultra white available at Lowes. I guess you pay for the gloss!
 

trbomax

Well-known member
Joined
Mar 21, 2010
Messages
2,556
Location
starvation lake,mi.
Re: Painting, Caulk, and Aquanet

Those white plastic putty knives you see in the 3 pac would work too.Ive used a metal knife in a jam,but the results are not as good.
 

Torque1st

MEMBER EMERITUS
Joined
Sep 14, 2008
Messages
5,668
Location
KC Metro, Kansas
Re: Painting, Caulk, and Aquanet

With Valspar you may be able to just use the primer and one coat of finish paint. Pigment content is the expensive part of paint that determines coverage and Valspar is good stuff with a lot of it.
 
OP
B

Bull

Super Moderator
Joined
Dec 12, 2005
Messages
16,189
Location
MA
Re: Painting, Caulk, and Aquanet

With Valspar you may be able to just use the primer and one coat of finish paint. Pigment content is the expensive part of paint that determines coverage and Valspar is good stuff with a lot of it.

Well, that is good news! I only put down one coat of primer. Hopefully, that will be sufficient for a respectable finish.
 
OP
B

Bull

Super Moderator
Joined
Dec 12, 2005
Messages
16,189
Location
MA
Re: Painting, Caulk, and Aquanet

I think that tomorrow, I will merge this thread with my OSB thread. I hadn't intended for this to be a continuation of that other discussion, but that's what we've got here.

Just lettin' you fellas know in case this one disappears on you!
 

Torque1st

MEMBER EMERITUS
Joined
Sep 14, 2008
Messages
5,668
Location
KC Metro, Kansas
Re: Painting, Caulk, and Aquanet

Put on a good finish coat and don't plan on another to hide defects. Some people are not as careful when they figure on two coats. Then see how it comes out with just the one finish coat.

Might as well merge them.
 
To avoid these ads, REGISTER NOW!

TOOLS4WORK

Well-known member
Joined
May 31, 2010
Messages
146
Re: Painting, Caulk, and Aquanet

Have not posted yet just been reading, but the problem with painting over chaulk that isnt dried isnt with smearing or smudging the chaulk- it is that if the gap it is spanning is large enough it will shrink enough to crack the paint, high gloss paint is the worst, and another coat wont fix it as it will crack again.
Grew up painting, grandfather was a contractor.
 
OP
B

Bull

Super Moderator
Joined
Dec 12, 2005
Messages
16,189
Location
MA
I finished the OSB a while back, but was waiting to post pics until I got some of the tool boards up. I am completely satisfied with this OSB experience and will certainly be using the same techniques for the rest of the garage, at least the downstairs part of it.

I am sure that with even more care and effort I could have an even smoother finish. But, this is good enough for me. Caulking the seams and using a plastic putty knife to clean them up really made a big difference. Yes, you can see where the seams are, but really, does it matter?

Thanks to everyone who participated in this thread.

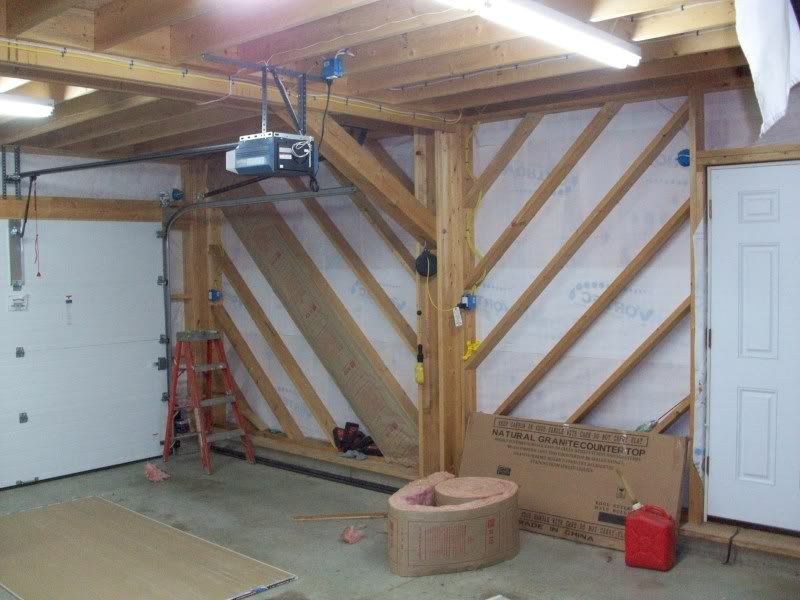
I mean good grief, let's start with the "before" pic!

100_4532.jpg


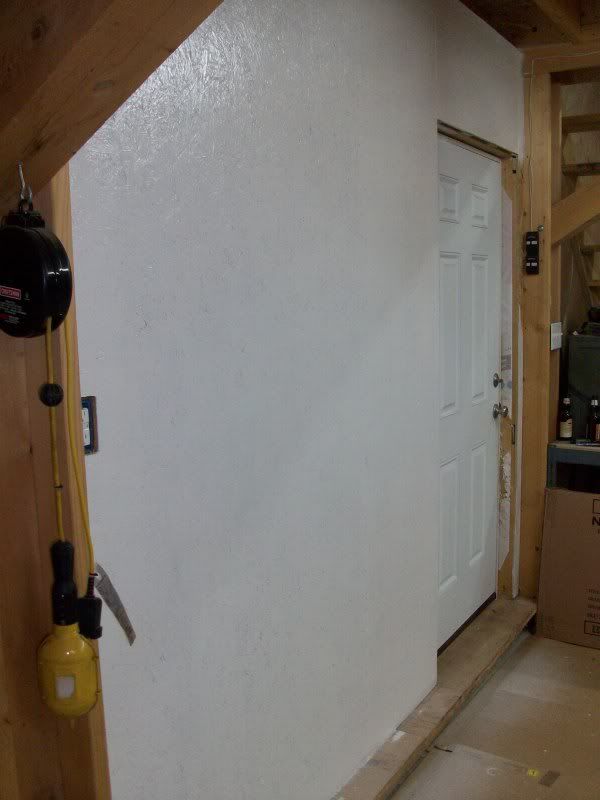
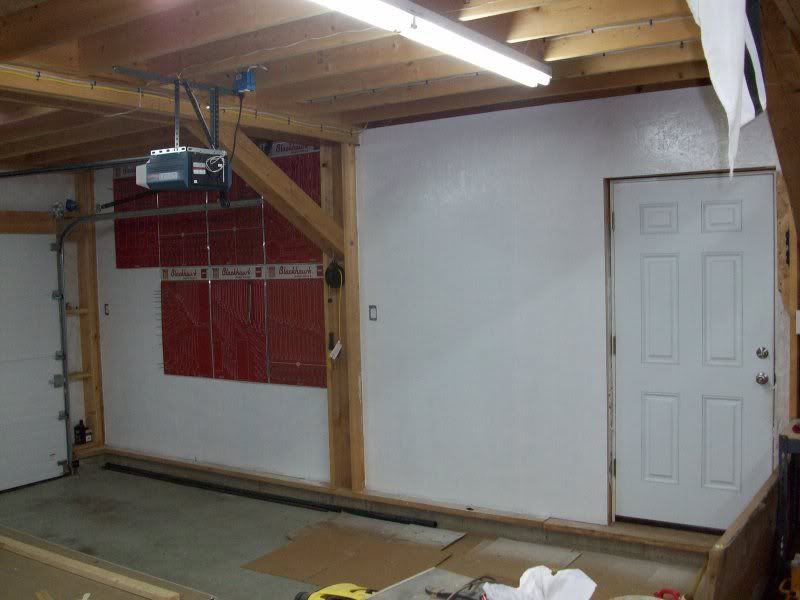
And now, after!

100_4819.jpg


100_4822.jpg


100_4823.jpg
 
OP
B

Bull

Super Moderator
Joined
Dec 12, 2005
Messages
16,189
Location
MA
Thanks :)

I probably used 1/2 gallon of primer and maybe 1/3 gallon of paint. Those are rough estimates. I was using a 1/2" nap roller. An even thicker nap would have gotten into the nooks and crannies more effectively. I had to apply a lot of pressure and go over certain areas repeatedly to force the primer/paint into the OSB valleys.


That looks great!

How much paint did you use?
 
OP
B

Bull

Super Moderator
Joined
Dec 12, 2005
Messages
16,189
Location
MA
Bull- Was that just one coat of each?

The texture reminds me a little of stucco.

Yes, just one coat of the old primer I found and one coat of the good quality paint from Lowe's.

I debated two coats of primer, but just wanted to get the project done!
 

Torque1st

MEMBER EMERITUS
Joined
Sep 14, 2008
Messages
5,668
Location
KC Metro, Kansas
Thanks for the info. I am glad it worked out for you. I hate having things not work for people when it has always worked well for me. I have found good paint usually does the job and is worth the extra $$.
 

NUTTSGT

Super Moderator
Staff member
Joined
Sep 14, 2009
Messages
51,059
Location
Northern Central Ohio
Looks good Bull. One good thing about using screws (until you caulk over them) is being able to take them and easily remove the sheet of OSB. I've used both screws and nails when hanging OSB. By far the fastest way is with the framing nailer, and for some reason, it gets more fasteners :lol_hitti

Start saving your bucks too, you need one of these.
 

Attachments

  • 0509101811[1].jpg
    0509101811[1].jpg
    76.2 KB · Views: 30
OP
B

Bull

Super Moderator
Joined
Dec 12, 2005
Messages
16,189
Location
MA
Thanks for the info. I am glad it worked out for you. I hate having things not work for people when it has always worked well for me. I have found good paint usually does the job and is worth the extra $$.

Thanks man. Here's some virtual suds for you :beer:

Looks good Bull. One good thing about using screws (until you caulk over them) is being able to take them and easily remove the sheet of OSB. I've used both screws and nails when hanging OSB. By far the fastest way is with the framing nailer, and for some reason, it gets more fasteners :lol_hitti

Start saving your bucks too, you need one of these.

You know, I actually didn't even caulk over the screw heads, so other than having paint in them, they are ready to be taken out should a piece of OSB need to come down for some reason.

A member on here, who saw my plight without an impact driver, has offered to send me an older deWalt 12v unit once he gets a chance. Should be awesome when I do the next section!
 
OP
B

Bull

Super Moderator
Joined
Dec 12, 2005
Messages
16,189
Location
MA
I received my new-to-me 14.4 volt deWalt impact driver in the mail today, thanks to a generous member who took pity on me. I am now inspired to tackle the back wall of my garage, which is about 12' high.

I found some old siding from a shed I tore down last year. I was going to use this siding on a small addition to my old garage to be used as a recycling and trash can center. But, that project isn't happening any time soon, so instead I am going to use the boards as my furring strips. They are 3/4" thick.

My question now is about drywall screws. Are they strong enough to use to attach the furring strips to the diagonal studs. I mean, they will have to carry the weight of the 7/16 OSB plus whatever I hang on that wall. I have both 1 1/4" and 1 5/8" screws to choose from. I'd prefer to use the 1 1/4" if they will do the job, as I have a ton of them.
 

wbrian63

Well-known member
Joined
Mar 31, 2010
Messages
843
Location
Houston, TX
You'll quickly find that drywall screws are for attaching drywall - not much else.

Lumber-to-lumber is the domain of heavier gauge screws. These are what are sold at Home Depot down here in the south. There may be other brands at your local big-box store. I just use a #2 square drive bit for mine - although the in-the-box bit does work well to remove stubborn screws.

http://www.deckmatescrews.com/

I think for "most" applications, drywall screws would be OK, but you'll find as soon as the screw binds in any way, it will snap. Drywall screws have threads that go all the way to the top of the screw, so when attaching one board to another, if there's any "push back" as the screw point comes thru the first piece of wood before it bites into the second piece, you'll be stuck with a gap between the pieces. Try to overcome that gap by adding more "torque" and you'll be rewarded with a clean snap of the screw, and two boards that are "almost" attached to one another.

Of course, you can pilot drill the first piece of lumber...

Even with DeckMate screws, you may find you'll need to pilot the siding you've chosen to use - it's most likely dry as kindling and will be prone to splitting.

The DeckMate screws are coated and will work well in almost all environments with no rusting issues. They're rated to work with the new AcQ treated lumber as well. The coating creates a nice smooth surface on the screw which aids in installation. The easier the screw goes in, the more screws you can drive on a charge.

General rule for normal framing work is the fastener should penetrate into the substrate at least the thickness of the board being attached, with minimum acceptable penetration of about 3/4" for screws. At least that's what I've used in the past. DeckMate makes a #7x1-5/8" screw that works well on all 3/4" thick lumber installations, whether dimensional lumber, or plywood.

Warning - the screws aren't cheap. Around here - a 5# box of DeckMate screws goes for around $29. 5# of #7x1-5/8" screws is about 1,100 screws, which goes along way...
 
To avoid these ads, REGISTER NOW!
Top Bottom