To avoid these ads, REGISTER NOW!

Paint Question for Metal Cabinets

Luscombe1940

Member
Joined
Mar 29, 2012
Messages
12
I picked up some metal wall cabinets from Craig's list this week. They are a bit older, in good shape but I would like to freshen them up before I install them.

I thought I would clean and then lightly sand them before painting. I have a touch up spray gun and compressor. thought I would use a primer to hide the sanding marks but not real sure on the finish paint. Any recommendations?

How have others handled repainting metal cabinets?


Appreciate the help and will post before and after photos.

Gary
 
To avoid these ads, REGISTER NOW!

ard

Well-known member
Joined
Feb 16, 2015
Messages
4,391
Location
Sierra Foothills... California
What kind of finish do you want? A high gloss, car-like perfection? Matte or semi-gloss?

Are they going into a conditioned space? Or basically "outside but no rain"??

Can you shoot industrial coatings, like two part cured urethanes, or basic latex and enamels?

I think these questions will help with guidance....
 

Bill Bowman

Well-known member
Joined
Mar 28, 2007
Messages
3,146
Location
Metro Chicago
Rustoleum, primer and top color [same brand] of your choice, with roller. Nice even texture and very durable.


Sent from my SM-J320V using Tapatalk
 

Stuart in MN

Well-known member
Joined
Sep 8, 2005
Messages
23,075
Location
Minneapolis
If they are in good shape, I'd think you could just clean them, scuff the existing paint with a Scotchbrite or similar, and then put on the new paint. Shouldn't be a need for heavy sanding or primer unless you have bare metal showing.
 
OP
L

Luscombe1940

Member
Joined
Mar 29, 2012
Messages
12
The cabinets are in good shape, some signs of rust on edges. Thought if I was going to paint them I would do it with a good finish. After thinking about it some more I am leaning towards an auto paint. I don't need high gloss but would like a nice smooth finish so light sand and primer then good finish on top.

I have applied different kinds of paint with the touch up gun but nothing for show. Not afraid of any of them just want to keep it simple. I have a couple base units I will pick up from the same guy in the next couple of weeks and they will get a coat too.

When we built the house, I had them enlarge the garage, finish the interior, insulate it and put a Modine heater in it. I keep it at 50 in the winter time. No cooling as we rarely need it in the summer here. Living in southern Wisconsin.

20170727_100554.jpg

20170727_100604.jpg

The cabinets are 48 x 48 x 16 a bit larger than I need but the price was right. I have a high ceiling so no worries there. I can store the seldom used items on the upper shelves. I need to declutter my garage and the cabinets will help. Also need to get rid of the project Alfa and I am parting that out now.

Let me know your suggestions and the best place to get the painting supplies. I do not want to do this with a rattle can, roller or brush.

Once I get them painted and installed I do not want to have to take them down again.
 

wren57

Well-known member
Joined
Jan 13, 2016
Messages
92
I got basically the exact same cabinets in the exact same shape a few weeks ago. Hit them with some medium-grit sandpaper using a palm sander for a few brief passes, then used Rustoleum Primer and Rustoleum Paint. I sprayed it on at first which was a mistake, then brushed it on (which was also a mistake). I'd go with a roller and Rustoleum.
 

JazzBlueRT

Well-known member
Joined
Jun 11, 2017
Messages
1,215
I picked up some metal wall cabinets from Craig's list this week. They are a bit older, in good shape but I would like to freshen them up before I install them.

I thought I would clean and then lightly sand them before painting. I have a touch up spray gun and compressor. thought I would use a primer to hide the sanding marks but not real sure on the finish paint. Any recommendations?

How have others handled repainting metal cabinets?


Appreciate the help and will post before and after photos.

Gary

Grind any rust off.
Scuff them up with 240grit.
Wipe with tack clock
Apply Zinc Chromate Primer over any exposed steel.
Coat with a filler primer.
Sand with 320 grit
Wipe with tack clock
Apply second coat of filler primer
Sand again with 320 grit
Wipe with tack clock
Fill in any scratches with Glazing putty
Sand again with 320 grit
Wipe with tack clock
Spray a thin coat of eggshell black (camera case black).
Sand again with 320 grit (will show any low spots from scratches.)
Wipe with tack clock
Fill any low spots with glazing putty.
Final sanding with 400 grit
Wipe with tack clock
Top coat with a paint compatible with the primer you used. Acrylic with acrylic, lacquer with lacquer, alkyd with alkyd, etc...
 

ducksface

Banned
Joined
Oct 25, 2012
Messages
2,477
A wrap might not only be less expensive but easy to design something nice or can be all one color.
Mine were wrapped.
No pics available.
I think it was 120 bucks to do 3x15 feet.
 

knightp25

Member
Joined
Jun 28, 2016
Messages
19
Location
Pittsburgh, PA
Some Napa stores will mix spray cans of paint for you, its very nice and easy to paint with them and the finish (if dont correctly) looks just as good as if you would have used a compressor.
 

slip knot

Well-known member
Joined
Mar 22, 2010
Messages
2,861
Location
Texas gulf coast
I picked up a couple of metal cabs that needed refinishing. Took the pressure washer to them and scuffed them with 150, shot a couple of coats of primer and a couple coats of color. they came out really nice..... costed out about the same as buying them new!
 

yhprum

Well-known member
Joined
Jul 27, 2006
Messages
1,387
Location
Brisbane Australia
I was at a paint store one day and they were painting a large steel filing cabinet black with a foam roller. I was surprised how good it looked. Really smooth.
 

CGT80

Well-known member
Joined
Aug 29, 2014
Messages
863
Location
IE, SoCal, USA
Grind any rust off.
Scuff them up with 240grit.
Wipe with tack clock
Apply Zinc Chromate Primer over any exposed steel.
Coat with a filler primer.
Sand with 320 grit
Wipe with tack clock
Apply second coat of filler primer
Sand again with 320 grit
Wipe with tack clock
Fill in any scratches with Glazing putty
Sand again with 320 grit
Wipe with tack clock
Spray a thin coat of eggshell black (camera case black).
Sand again with 320 grit (will show any low spots from scratches.)
Wipe with tack clock
Fill any low spots with glazing putty.
Final sanding with 400 grit
Wipe with tack clock
Top coat with a paint compatible with the primer you used. Acrylic with acrylic, lacquer with lacquer, alkyd with alkyd, etc...

This is great advice......been there done that and was a pro building painter and did doors, cabinets, lockers, gates, everything including a couple automotive projects of my own.

What would I do? Sand, rustoleum primer, light sand, rustoleum finish. A 1/4" nap roller is great or I would shoot it with a conventional binks automotive style gun, not a little touch up gun. It would be fairly easy, inexpensive, and would look good. Paint changes all the time so what I used in the past and worked well isn't even made anymore.

Rustoleum is ok and their universal gloss black spray can had a great spray and coverage with very fast drying. It was perfect for painting the garage door springs for my toyhauler door. For the frame and ramp frame, I use some old whiteline 019 gloss black "poly/alkyd" according to the label. It was our go to paint for a small school we did every year or so but I should have added some pentrol or thinner to make it brush out better and sag less with the 90+ degree heat today.

I'm a fan of a great automotive finish, but if I had it in a garage and dinged it up, I would want to cry after all the hard work and money was put into it. Before I dropped the last sbc 406 into my 79 pickup, I sanded the heck out of the engine bay, primed, and sprayed base clear with a semigloss finish. It was a ton of work and is now dirty, but it is holding up well and looks good when it is clean. This is a daily driver/work truck/hot rod/tow vehicle, but not a show truck. I'm not sure it was worth that much trouble, but the 019 industrial paint was just ok back in 2003, and the POR 15 was an ugly joke, so the auto paint soothed my OCD.
 
OP
L

Luscombe1940

Member
Joined
Mar 29, 2012
Messages
12
Sweet antenna!

;)

I am pretty active on another forum and have posted many photos. I am always amazed at what people find and comment about in the photos.

Great eye!
Although it does not work as good as it should.
 
OP
L

Luscombe1940

Member
Joined
Mar 29, 2012
Messages
12
Grind any rust off.
Scuff them up with 240grit.
Wipe with tack clock
Apply Zinc Chromate Primer over any exposed steel.
Coat with a filler primer.
Sand with 320 grit
Wipe with tack clock
Apply second coat of filler primer
Sand again with 320 grit
Wipe with tack clock
Fill in any scratches with Glazing putty
Sand again with 320 grit
Wipe with tack clock
Spray a thin coat of eggshell black (camera case black).
Sand again with 320 grit (will show any low spots from scratches.)
Wipe with tack clock
Fill any low spots with glazing putty.
Final sanding with 400 grit
Wipe with tack clock
Top coat with a paint compatible with the primer you used. Acrylic with acrylic, lacquer with lacquer, alkyd with alkyd, etc...

When these cabinets are installed they will be there for a very long time. Given that I am inclined to finish them just like painting a car. I am not sure I will follow all of your steps as there are numerous holes drilled in the side panels; most of those will be covered when I hang them side by side. Even then I will still paint the sides.

I am leaning towards using an epoxy primer by Southern Polyurethane Inc.
I used this on a car I restored and coated the engine bay, cabin and trunk area with the product; sprayed on bare metal. This was the second application. The first was a POR coating over these same areas. Followed the recommended prep and application. It started to peel after about two months. I hit it with the power washer and it lifted like a hot knife through butter. To prepare for the epoxy primer, I had to take it down to bare metal with abrasive discs, wire wheels, etc. Major PITA and took many hours. I will never use or recommend POR for any project.

Since I do not want to do this twice I will use a gun cause I know how it will turn out. I want to paint them in a dark silver or light grey rather than black or white. I can use any type of paint on top of the epoxy primer. The question is whether it is a two stage or single stage.

I am not looking for a high gloss but would like a good finish. the cabinets are worth spending a couple hundred $ on paint as they will be a major part of the walls.

So for a darker silver, light grey, am I better off with a single stage or two stage paint. In either case I plan on using a urethane paint.

I appreciate the help, advice and experience.

IMG_3608.jpg

IMG_3824.jpg

IMG_3853.jpg

74 Eng Bay wrk 0014.jpg

74 Eng Bay wrk 0036.jpg

This is the POR. It subsequently failed and I took it all off down to bare metal. I do not have a photo of the White Epoxy primer I used on the bare metal.

74 Eng Bay wrk 0027.jpg
 
Last edited:

Jack Olsen

Super Moderator
Staff member
Joined
Mar 22, 2009
Messages
6,678
Location
Los Angeles
Are these used cabinets or a new Roll/s,,, wtf?

I won't complain about anyone going overboard. But for my cabinets, I cleaned, scuffed, and applied semi-gloss housepaint with a roller. Simple and easy to repaint/touch-up if I ever get that in my head. :)
 

iamhomeless

Well-known member
Joined
Jul 6, 2009
Messages
336
Location
Indy
I used to buy/refresh/and flip a lot of shop equipment.

Rust-Oleum tractor enamels are by far my favorite for painting.

If it had major paint/rust issues I would hit it with a wire wheel, if not, a Scotch Brite disc to scuff and clean. Wipe it down with alcohol, prime if needed, and start rolling that thick stuff (the paint in the pint cans is much thicker than in the rattle cans.

It's thick enough to cover a lot of flaws, the "hammer finish" will hide even more mistakes.

I like the tractor enamels because the seem to be able to take more of a beating and resist fading in the sun a bit better. If they will be out of the sun and unlikely to get hit with flying metal or sparks, "appliance epoxy" paint is pretty good, but had limited selection.
 
OP
L

Luscombe1940

Member
Joined
Mar 29, 2012
Messages
12
I used to buy/refresh/and flip a lot of shop equipment.

Rust-Oleum tractor enamels are by far my favorite for painting.

If it had major paint/rust issues I would hit it with a wire wheel, if not, a Scotch Brite disc to scuff and clean. Wipe it down with alcohol, prime if needed, and start rolling that thick stuff (the paint in the pint cans is much thicker than in the rattle cans.

It's thick enough to cover a lot of flaws, the "hammer finish" will hide even more mistakes.

I like the tractor enamels because the seem to be able to take more of a beating and resist fading in the sun a bit better. If they will be out of the sun and unlikely to get hit with flying metal or sparks, "appliance epoxy" paint is pretty good, but had limited selection.

I have used their appliance epoxy in rattle cans. I found it to be quite durable and yes you must wait the 2-3 days between top coats. Don't ask how I know. What could possibly happen?

I appreciate all of the suggestions. I want to get this project started and completed in the next couple weeks. The spray approach will produce fantastic results, that I am sure of but it will also take the longest.

The hammer finish in a silver applied with a small foam roller may be a good alternate. I will have to check out the tractor enamels for colors.

Did you experience the paint staying soft or did it eventually cure out hard?

I have a bullet vise I need to clean up and restore, I presume you would recommend the Tractor paint for that?

Thanks for helping out.
Gary
 
To avoid these ads, REGISTER NOW!
OP
L

Luscombe1940

Member
Joined
Mar 29, 2012
Messages
12
I was really hoping the farm paint would be a good solution. Color selection is pretty much limited that's right, farm implements and equipment.

I would have one choice in a grey. Might work but would want to add some red trim me thinks. I like the idea of the roller and I could practice on the back sides of the doors, hmmmmm..............
 

Thirdyfivepickup

Well-known member
Joined
Nov 15, 2016
Messages
1,947
Location
Portage, Indiana
I was at a paint store one day and they were painting a large steel filing cabinet black with a foam roller. I was surprised how good it looked. Really smooth.

With good prep and patience you can roll on paint with the foam roller... build up the thickness with a few coats, then wetsand and buff and have a mirror like finish that is really durable.

Are these used cabinets or a new Roll/s,,, wtf?

Some people actually like to make things look nice... whether it's old cabinets or a car. But thanks for the thoughtful contribution to this thread...

:confused:
 
OP
L

Luscombe1940

Member
Joined
Mar 29, 2012
Messages
12
With good prep and patience you can roll on paint with the foam roller... build up the thickness with a few coats, then wetsand and buff and have a mirror like finish that is really durable.


Some people actually like to make things look nice... whether it's old cabinets or a car. But thanks for the thoughtful contribution to this thread...

:confused:

Thanks for the encouragement!

I tend to be labeled as the "How" guy. Once I get an end vision in mind the challenge is to figure out How to get there. I like the idea of a durable and mirror like finish, but need a little more info on the How. Will this approach work with the rustoleum product, do I need a clear coat so I don't sand through the color coat. What products and how have you done this in the past?
 

sberry

Banned
Joined
Jun 18, 2005
Messages
35,747
Location
Brethren, Michigan
Some people actually like to make things look nice... whether it's old cabinets or a car. But thanks for the thoughtful contribution to this thread...
The guy first posted about painting some cabs, the second gave a who;le list of expensive prep work for a hi dollar automotive job, the third said he did lots of work and had a failure and had to do it again but he wanted to now do more work just so "he wouldn't have to do it again".
No one is saying to make a booger out of it but any painter worth a pinch of poop would scuff it off and get some color on it, get it done today already vs 100's of dollars in materials and week long process unless it was really worth it?
 

sberry

Banned
Joined
Jun 18, 2005
Messages
35,747
Location
Brethren, Michigan
As for the colors and the farm paint. We use some, we use some Imron also and on occasion some single stage auto paint most of the time. I realize the colors are limited with the farm paint as is the real service life in rugged conditions and sunlight but for lotso stuff its fine, its easy and its safe. Its cheap enough and farm store is not the only place to find common enamel. I like to stock some and live with factory colors if I can, I keep a gallon of red, a couple green, yellow, black and white. I will mix black and white. I might use some other color for specific or on occasion it can be had for 10 or 15 a gallon.
 

Attachments

  • Paint cabnit.JPG
    Paint cabnit.JPG
    48.4 KB · Views: 27
  • paint cans.JPG
    paint cans.JPG
    38.7 KB · Views: 29
  • pallet parts.JPG
    pallet parts.JPG
    32.4 KB · Views: 34

sberry

Banned
Joined
Jun 18, 2005
Messages
35,747
Location
Brethren, Michigan
There was a point I had to have the latest greatest. I find myself now back to the basics, old stuff I started with and the easiest way that gets good results, acceptable results.
The top reel is just for paint, a little final filter and pressure regulator.
 

Attachments

  • Paint gun DeV.JPG
    Paint gun DeV.JPG
    35.7 KB · Views: 25
  • paint mix.jpg
    paint mix.jpg
    136.1 KB · Views: 27
  • paint air 2.jpg
    paint air 2.jpg
    142.3 KB · Views: 24

sberry

Banned
Joined
Jun 18, 2005
Messages
35,747
Location
Brethren, Michigan
I was at a paint store one day and they were painting a large steel filing cabinet black with a foam roller. I was surprised how good it looked. Really smooth.
With good prep and patience you can roll on paint with the foam roller... build up the thickness with a few coats, then wetsand and buff and have a mirror like finish that is really durable.
My bet would be they simply painted it with the roller. Doubt they wet sanded and buffed the filing cab.
 

wayne55

Well-known member
Joined
Oct 28, 2010
Messages
359
I don't really do this type of painting, but as Sberry said, I painted some metal porch chairs with Rustoleum in a can and a foam roller and was very satisfied with how they came out.
 
OP
L

Luscombe1940

Member
Joined
Mar 29, 2012
Messages
12
I stopped at Farm & Fleet today and picked up a quart of Massey Furgeson Grey, a smooth foam 4" long roller, and a rattle can of white and red for stripes.

I'll power wash the cabinets, hit them with 3m scuff pads and roll them out. I'll do the inside of the door and see how it comes out before tackling the exterior. Would like to get this job done in a week or less.

Sberry, you go east to about the Lake Huron coast and north 50 miles and you will find Hillman. Grew up there
 

sberry

Banned
Joined
Jun 18, 2005
Messages
35,747
Location
Brethren, Michigan
I was looking to order some body stuff, last purple brite I got had sticker shock from the jobber, they went insane with pricing. I would like to find a deal on some hardener too, generic stuff. That kind of paint goes on well with foam brushes too. Something like a tractor starter, I believe maybe they painted the pump part with a brush, took just a few minutes. A little hardener makes it shine and zippy to dry.
I didn't prime any of this, had about half a gallon of left over paint from a tractor, no sandblasting but some DA and scuff pad.
 

Attachments

  • pump painted.jpg
    pump painted.jpg
    140.5 KB · Views: 37
  • Pump paint.jpg
    Pump paint.jpg
    138.7 KB · Views: 38
  • Pump painting.jpg
    Pump painting.jpg
    142.1 KB · Views: 38
Last edited:

sberry

Banned
Joined
Jun 18, 2005
Messages
35,747
Location
Brethren, Michigan
Some of this is my favorite to paint. I can do fancy too but zippy and decent has its rewards.
The red is just dirty here. I scuffed the places that the DA couldn't get and foam brushed some color on, may have sprayed the red while I did something else, I cant remember now. I remember sanding the top though, you never really notice its not perfect.
 

Attachments

  • parts washer.JPG
    parts washer.JPG
    26.7 KB · Views: 34
Last edited:

sberry

Banned
Joined
Jun 18, 2005
Messages
35,747
Location
Brethren, Michigan
My A frame was painted piecemeal and about 3 different colors from revision at one point,,, well a long time. One day I had it, helper and I painted the posts with sponge brush and if you look close you can tell, it would be even harder if it had another coat but it totally changes the appearance with consistent color on it.
Indoor equipment doesn't really need the same protection. One thing I do is mask, I don't paint stuff not sposed to be painted, rubber grommets and get a masking machine, well worth it.
I was trying to find a pic of the machine, it was an HF type unit and I tried a lot of things to store the thing but it was awkward till I cut the wheels and handles off ad installed it all 90 degrees so it was skinny and wheeled it endways, its covered with rags in this pic for dust but now slides under the paint bench.
 

Attachments

  • paint mix.jpg
    paint mix.jpg
    136.1 KB · Views: 26
  • Hose paint reel.jpg
    Hose paint reel.jpg
    133.4 KB · Views: 28
Last edited:

Jeff May

Well-known member
Joined
Nov 1, 2012
Messages
343
Location
Fayetteville, PA
I repainted a few in my shop. I just washed them down with TSP. Prior to painting I wiped them again with acetone. I used the paint Tractor Supply sells, Majic brand tractor and implement enamel. I added a little of their hardner into each batch I mixed. I used a cheapy HVLP spray gun, they came out looking really good. I allowed them to sit a few days to really dry before I started handling them to much.
A lot of people don't like TSC Majic brand of paint, I have never had a problem with it.
I recently painted several machines in my shop with the Majic, one I sprayed, the other I just brushed. With a decent brush the paint went on real nice and flowed out very nicely as it dried.....
I should mention, I did use a primer on the cabinets. I used the Majic brand of that also with excellent results....
 

sberry

Banned
Joined
Jun 18, 2005
Messages
35,747
Location
Brethren, Michigan
The paint is ok for what it is. Its kind of like the house brand oil, made by Valvoline and put in a different jug. Majestic may even be the maker. For me paint is a lot like welding, its something I do well but don't really know a lot about. I really don't care all that much.
The difference with it all is longevity. I sandblast some piece of equipment, it sits outside or goes on the road and there is no comparison in the service life. The common enamel will fade and wear off, simply erode. Bright colors are more noticeable but its obvious with 2 tractors painted side by side and then 15 years later. The Imron still shines like new sometimes decades later.
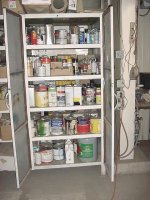
If it gets dirt and mold, bird **** will wash right off and not need refinish. For stuff in the shop a spray can paint job lasts. If some spot comes off, clean it and roll it on.
As for prep work, its important with a tractor as there is simply lots of opportunity for oil. A car not so bad but I rarely use any of that stuff. Obviously we wipe oil and stuff off but I usually finish with scotchbrite, blow off and paint. For utility work same for rust that is tight or sealed.
When its sandblasted,,,,,,,,,,,,,,,,,, I know its popular to try to use every product, 3 primers and double wash with **** but,,,,,,,,,,,, I wash my hands and pretend its sterile. You learn to see when something is scuffed and feel when its smooth, it doesn't need to be all 600 but to hit hi spots. Sandblast has lots of hi spots and is rough, feel the difference with a simple swipe of brite on it. I sandblast, scotchbrite, blow off with air and paint it.
What looks like rust comimg thru is peaks in the surface poking thru and had the paint run off, especially with light penetrating primers, in theory 2 coats with sanding between is best. Heavy epoxy primers help as do coatings like coal tar etc.
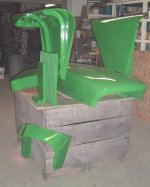
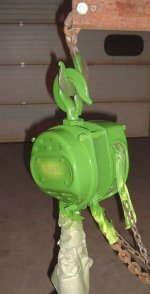
I had an expensive quart of green extra mixed a while back. I found another machine, washed out some big flat spots and zipped some scuffing and then stretched the paint where it showed, really looked a lot different and 20 years newer.
 

sberry

Banned
Joined
Jun 18, 2005
Messages
35,747
Location
Brethren, Michigan
I painted a lot after I first moved in this building, I had a lot of broke worn stuff. I didn't have a good way to paint, not that I knew anything about it at the time but had a chance to build it in.
Where this is super nice is when its not used. I did one paint last spring, one before that and I can go a long time without needing it. A permanent structure would have been time consuming and in the way. I can be spraying in about 10 minutes, 15 without rushing.
Masking means a lot, **** paint with good mask, no overspray even on stuff that may not seem to matter, I don't overspray the concrete on house or barn.
That Furgeson grey is great, I had some Ford and used it for a change plus someone gave it to me. I wasn't fussy on the pumping unit of keeping the pump the factory color so we used the Ford red on it.
I collect paint like I do steel. Keep some thinner on hand and get gallon or 5 of lacquer thinner. I collect brushes, foam stuff too. Rollers so I can toss them and use my old paint gun if I can where I can clean it in a couple minutes with small amount of materials and exposure and not trying to recycle thinners for cleaning. Keep all the stuff in factory cans, keep paper towels handy and wipe immediately and can even remove a run or 2 with them. I wipe up as I go, tidy up the gun between fil if I have to and its all fast.
The chain fall didn't get paint on chains and had the label masked. I will take a minute to mask a bolt or fitting or shield from overspray. Spray can paint.
The shelves in one of the pics above simply8 has the faces painted where they were seen, they did have some paint on them but we whizzed the faces with foam brush or roller.
 

Attachments

  • paint booth half way 2.JPG
    paint booth half way 2.JPG
    42.1 KB · Views: 28
  • paint booth lit.JPG
    paint booth lit.JPG
    28 KB · Views: 25
  • chain fall trolly.JPG
    chain fall trolly.JPG
    35.2 KB · Views: 27
  • chain fall.JPG
    chain fall.JPG
    42.8 KB · Views: 28
Last edited:
OP
L

Luscombe1940

Member
Joined
Mar 29, 2012
Messages
12
A little update on the painting project.
I opted to not spray the cabinets as I did not want to deal with the over spray in my finished garage.

So, I power washed them outside and the next day I took one cabinet and roughed up the paint with the DA sander. These cabinets are large, 4'x4'x16" and I had to sand the outside, top and side, inside top bottom, sides and back. That's a lot of sanding and messy.
Next step -wiped it down with alcohol, let it dry and then applied the paint.

Paint is Val spar Farm Implement Massey Ferguson Grey. I stirred the paint well and used a brush to get in the corners and a mini foam roller to do the flat surfaces. It did not cover very well and did not float out much either. The foam roller introduced a lot of air bubbles. Not really thrilled with the results and I have another 5 cabinets to go.

Decided to make a few changes. Instead of sanding all of the surfaces I got some M-1 gloss remover from Sherwin Williams. This is a clear liquid that will clean and de-gloss the paint and prepare it for top coating, painter friend recommended it. All you have to do is wipe it on the surface and then wipe dry. I believe it has a very low PH as in base rather than acid. You must wear chemical resistant gloves. It is easy to use and much quicker than sanding.

I also changed out the roller to a suede roller, really short nap.
Decided to thin the paint and to use a hardener in it. Wiped two cabinets down yesterday evening, let them dry, mixed the paint, hardener, thinner and started painting. Start to finish it took about 3 hours on the 2 cabinets.

This morning the paint is dry and the results are better.

My take aways are:
It will take two coats to get complete coverage.

The thinner resulted in the paint flowing out better and the dry finish has less orange peel texture than first cabinet.

The suede roller is better in that it does not add any air bubbles.

You have to be careful about too much back rolling. It is better to wait until the paint is dry and
then apply a thin light second coat.

I will post photos to this thread when I get the cabinets finished.
I removed the doors and will have to paint them, both sides as well as the shelves, top & bottom. This is a much bigger project than I originally thought but plan on doing it only once. That said, the original putty color was just too depressing.
I will hang the cabinet frames as I finish them and then as I finish doors and shelves, will install them into the supported frames.

The final finish on the metal is not as smooth as the original but from 5' away it looks pretty darn good. A spray on finish would have been much smoother but I did not want to have to deal with the over spray.
 
To avoid these ads, REGISTER NOW!
Top Bottom