I thought I would post a write up on a “complete” solution for anyone that might be watching, including the OP, as well as for my own future reference. Sorry in advance for the long post... Although this is not exactly the way I would do it, this is how I would advise friends with fewer tools and less knowledge to do it. Personally, I would use wire already in my stash along and soldering and heat shrinking most of the connecting points, but this solution doesn’t require soldering irons, heat guns, or any special tools. My personal preference would be to install / have installed a switched outlet to turn the AC power supplying the power adapter on and off instead of switching the DC, but that’s just me there shouldn’t be any problem leaving the power adapter powered up as long as it is decent quality and UL listed.
I haven’t actually used the materials listed here, but have done my best to insure that they all fit together as expected. I have ordered a reel of the LED strip lighting to use in a couple of upcoming projects. Once it arrives, I will post back with personal experience on that piece. I tried to keep all referenced parts to either Home Depot or Amazon Prime and 3+ star reviewed items.
For reference, one 16’ reel of the LED strip lighting produces approximately 1000 lumens and draws 24 Watts at 12V or approximately 2A. This lumen output is roughly equivalent to a 100W incandescent bulb. However, being spread out the light will obviously be dispersed differently. There are also color differences which affect perception of brightness.
My preference, as suggested earlier in this thread, would be to run the strips down the back side of the door jamb, or better yet on the drywall inside the pantry just beside the door jamb where they will be somewhat hidden. I would also consider running a strip over the top of the door. I will discuss an option for mounting to the front of the shelves later.
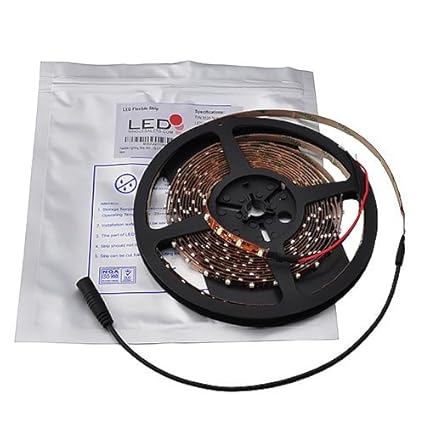
The LED strips are available in
6000K bright white as referenced in my earlier post, a more
neutral white,
warm white, or several colors which aren’t really appropriate for this purpose. My preference is bright white, but others prefer warmer whites. The color is entirely preference, but to me bright white seems, well, brighter. The warmer, yellower, lights just seem dimmer to me. Anyway, pick a color and order enough to go around your doorway. Most “standard” “7ft” doors are roughly 6’8” from the top of standard 5” baseboard to the top of the door jamb. So, one 16’ reel will easily line both sides of the door and leave some for the top of the door. Most of the parts listed here, except the power supply, are good for connecting up to 1 ½ reels (about 24 feet) of LEDs. The LED strip will come on a reel and the photos from Amazon show 1 power adapter in place at the beginning of the reel.
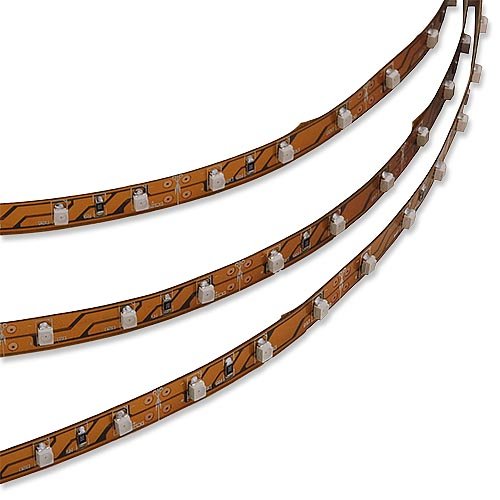
The strips can be cut about every 2” or 3 LEDs along the indicated cut lines to create separate strips for each location:
Once the strips are cut, a
power adapter can be affixed to the end of strip that was just cut.
While the LED strips are adhesive backed, I prefer the security of
mechanical fasteners to insure that they stay put permanently. Make sure the power adapter is already attached to the end of the LED strip and simply remove the paper backing from the adhesive strip and place the strip in the desired location. I would keep the power connectors at the top of the strip. Once they are in place, secure with several clips along the length of the strip. The strips are very light weight and the screw for the clips will certainly hold in the wood door jamb. They would probably hold “good enough” in drywall without anchors. If you are running a strip across the top of the door, orient the power adapter end to the side of the door where the switch will be located.
Secure the power adapter end of each strip with a
cable staple or
cable clamp. I would use a plastic anchor here if securing to drywall.
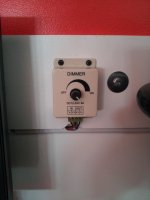
Secure the switch in a convenient location. There are a couple of options here. First is a
manual switch . Secure this using the same cable staples or clamps used for the power adapter ends above. Another option is a
proximity sensor on-off switch This will automatically turn the lights on when movement is detected. Not having any direct personal experience with this switch, I would probably opt for the manual switch.
Connect the male end of the switch cabling to a
3’ extension cable to reach the top of the door jamb and plug the other end into a
splitter cable. Plug one of the splitter cable ends into the power adapter on the LED strip along that side of the door. If you ran a strip above the door, plug one of the splitter cable ends into its power adapter. Plug another 3’ extension cable into one of the remaining splitter cable ends and run it to the LED strip on the opposite side of the door. Secure all of this cabling to the door jamb or wall with the same cable staples or clamps used above.
Now you should be ready for power. Plug a
power adapter into the nearest AC outlet and run the cable to female connector on the switch, using an extension if necessary. You can use one of the 3’ extensions listed above or a
6’ extension . Alternatively you could use the
battery referenced earlier in the thread.


")