To avoid these ads, REGISTER NOW!

Portable Welding table

vettelvr75

Active member
Joined
Jan 4, 2014
Messages
36
Location
Norman, OK
I had made my first post on the "show us your welding projects" thread, but this project for me is something that will be going on for a little while as I add stuff and tweak my current design as I build. So I decided I should start a thread dedicated just to the project alone. I will insert some pics below of what I have currently.

What I have planned to do from this point on:
-Fenders to rear tires for protection from welding.
-Compartments for tips, other welding accessories.
-Compartments for misc. hardware
-36" straight edge with measurements on the front edge of the table top for making quick measurements. Allows me to make measurements without fumbling around a tape measure or square.
-MIG gun holster
- Hitch receiver input so I can quickly add/remove a vise, miter saw, etc. to table

Stay tuned for more crazy ideas that come into my head as I build it!
Also, take a look at the current progress and give me any tips/advice/suggestions/ideas you may have. Im only 20 and have been welding for a few weeks now so I am like a sponge, I am thirsting for more knowledge! Thank you guys so much!

Here is the frame of the table-


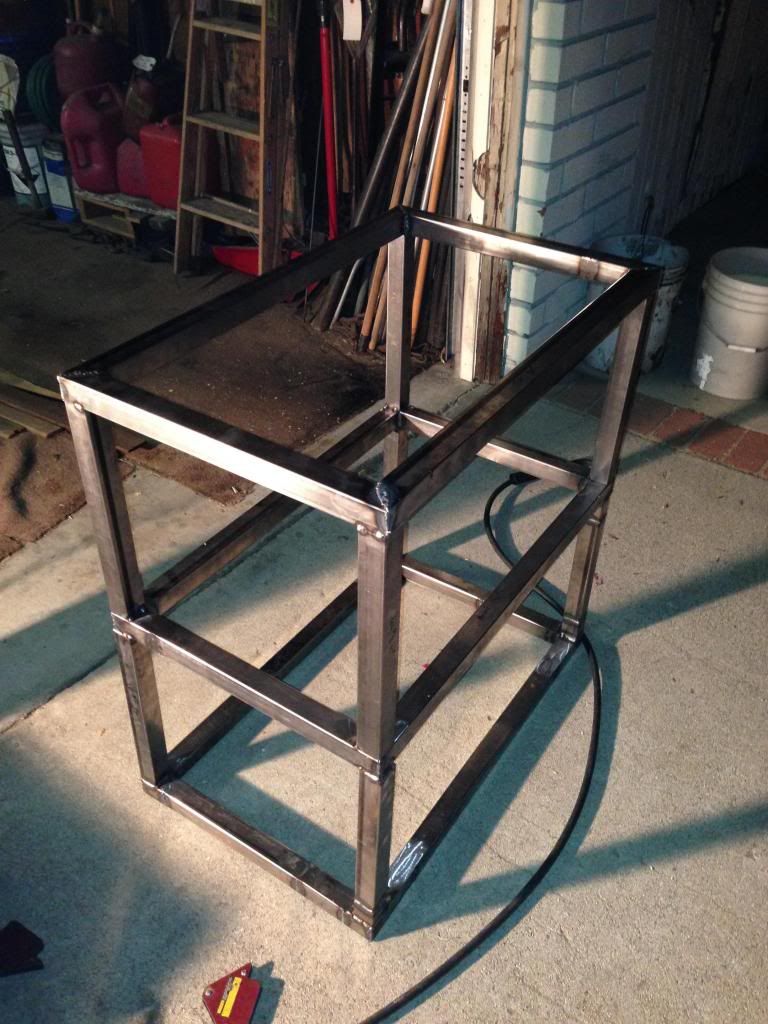
The first picture after getting the basis assembly done-


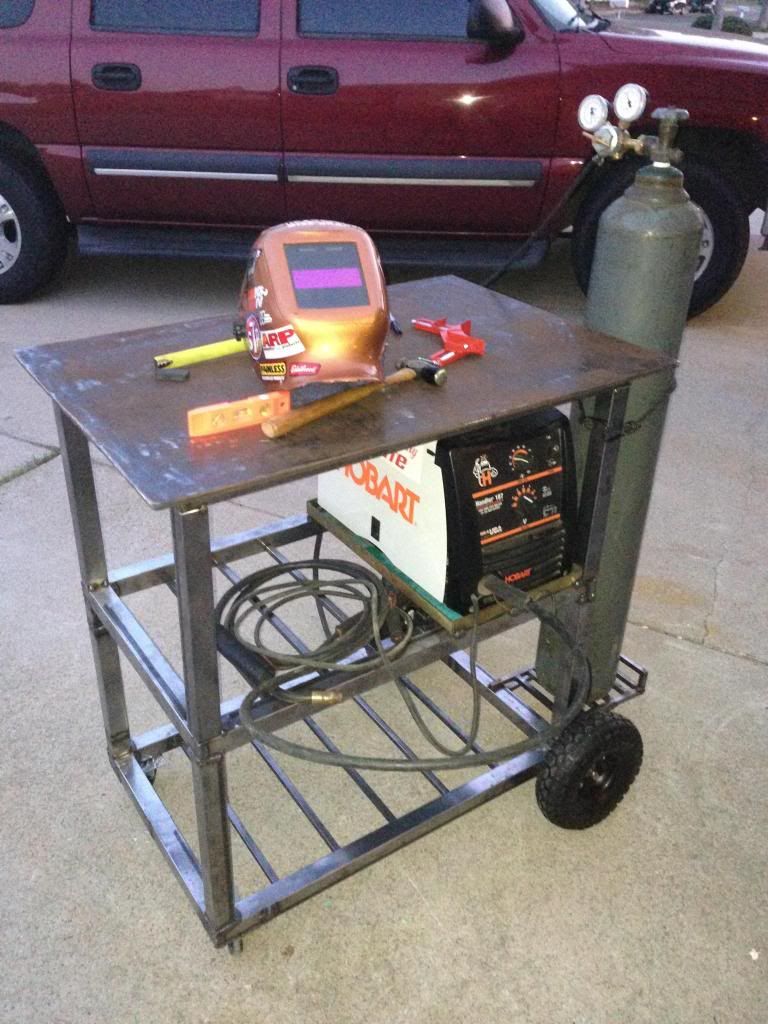
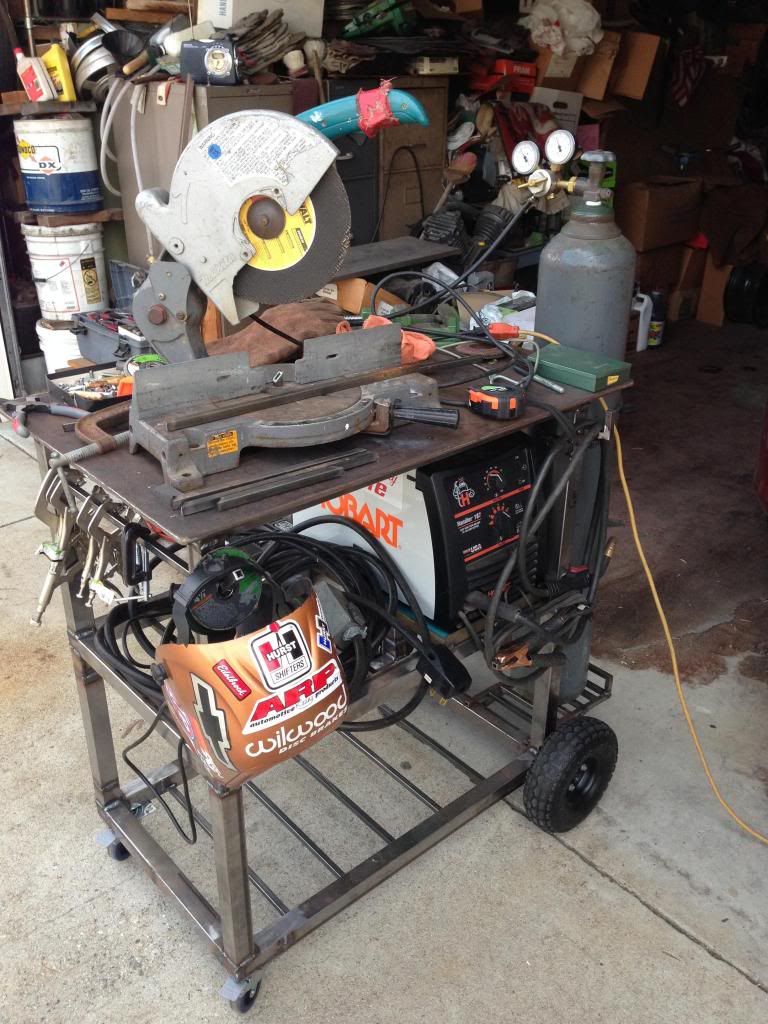
A random picture as i was doing some work. If you look on the left, you can see one of the first additions: a cross bar to hang clamps on-


To hold the pneumatic tires on, I welded a 5/8" bolt which acted as the axle to a 1/8" plate approx 3"x2" and then welded the plate onto the frame at the proper height for a level top-


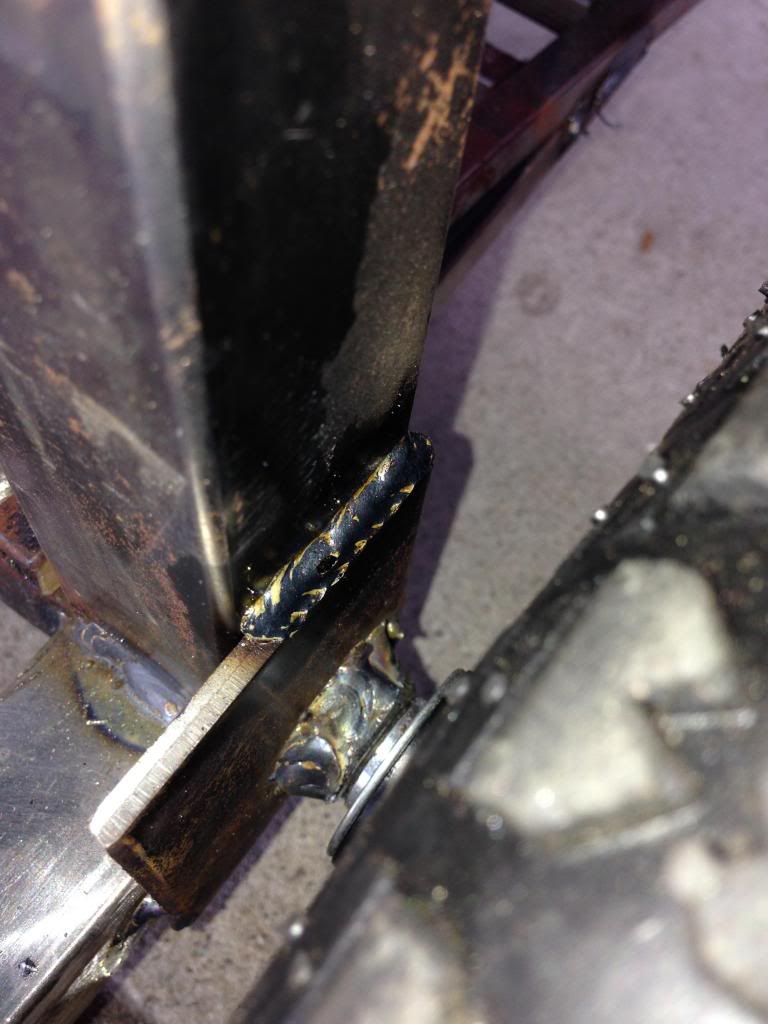
One close up of one of the welds I did. I found this tray that had a motor mounted onto it that was made out of 1/8" material. It was the exact size for my welder to sit in.:thumbup: So I just used it to set my welder in so it doesn't slide while moving the table. I know i should have cleaned it more, and I had every intention to do so but I have very little time to work on my table so I felt i needed to make the most of it! if it were structural I would have taken the time.

 
To avoid these ads, REGISTER NOW!

beakie

Well-known member
Joined
Feb 21, 2014
Messages
492
Location
Ontario, Canada
simple piece of advice, on that last pick, if you spend a bit of time prepping the area you're about to weld, it will be a much better weld.
grind away the rust, mill scale, dirt, etc. you want clean metal.
 
OP
V

vettelvr75

Active member
Joined
Jan 4, 2014
Messages
36
Location
Norman, OK
simple piece of advice, on that last pick, if you spend a bit of time prepping the area you're about to weld, it will be a much better weld.
grind away the rust, mill scale, dirt, etc. you want clean metal.

Thanks for the tip!!! I appreciate it. If you read what I said in the caption I talked about how I knew I should have cleaned it better, just dont have much time when i get to work on my table and it wasnt structural, just there to hold the tray in place. But either way, I am thankful for the time you took to reply.
 

R.Anderson

Well-known member
Joined
May 26, 2012
Messages
906
Location
Wisconsin
Nice build, like the bared shelves so dirt/dust can pass for easy cleaning. I cringe every time I see a gas bottle right next to a welding table (take care not to let your work come in contacted with it you do not want any arcing on the bottle ) also your abrasive wheel on the miter saw looks a little scary with a chunk missing. Abrasive wheels can tear apart at high (odds greater when damaged) and be dangerous and or lethal.
 

bullnerd

Well-known member
Joined
Sep 17, 2012
Messages
5,690
Location
Jersey
I have that same chop saw,its a tank, paid $30 at a yard sale about 20yrs ago.

Hows that blade? looks a little sketchy?
 
OP
V

vettelvr75

Active member
Joined
Jan 4, 2014
Messages
36
Location
Norman, OK
Nice build, like the bared shelves so dirt/dust can pass for easy cleaning. I cringe every time I see a gas bottle right next to a welding table (take care not to let your work come in contacted with it you do not want any arcing on the bottle ) also your abrasive wheel on the miter saw looks a little scary with a chunk missing. Abrasive wheels can tear apart at high (odds greater when damaged) and be dangerous and or lethal.

I am still adding expanded metal to the shelves so the big stuff wont fall through the bars. But it still shows the idea, as compared to a solid metal shelf. I think I may build a shield for the side of the bottle that is exposed towards the table. And I am aware about my abrasive wheel, I need to get a new one but havent gotten to it. Ive only been cutting thin stuff, nothing more than 14 gauge and Ive been careful.

I have that same chop saw,its a tank, paid $30 at a yard sale about 20yrs ago.

Hows that blade? looks a little sketchy?

This saw is great! I got it off craigslist a couple months ago for $20!
Do you use yours for metal cutting? I have been looking at a metal cutting blade for it... it one of the carbide tipped 100tpi blades and its about $60 Im just wondering if its worth spending the money for it, The abrasive wheels only cost $5 but I bet the metal cutting blade produces a cleaner cut and not so much debris off the metal. Any thoughts?
 

bullnerd

Well-known member
Joined
Sep 17, 2012
Messages
5,690
Location
Jersey
I use the same blade you have mounted and also switch to a carbide tipped blade but for wood or non-ferrous only. This saw spins at a higher RPM than the new "cold" saws your thinking of. It will not work properly and would be dangerous. Stick with the abrasive blade or buy the newer saw.
 
OP
V

vettelvr75

Active member
Joined
Jan 4, 2014
Messages
36
Location
Norman, OK
I use the same blade you have mounted and also switch to a carbide tipped blade but for wood or non-ferrous only. This saw spins at a higher RPM than the new "cold" saws your thinking of. It will not work properly and would be dangerous. Stick with the abrasive blade or buy the newer saw.

Sweet thanks! I have liked the abrasive wheel, and they're cheap so its not that big of a deal. I just bought a portable bandsaw and will be making a stand for it that I can switch between horizontal and vertical, so I will do all of my thick metal cutting with that. The thin wall and miter cuts will stay with the chop saw:thumbup:
 

MarkG

Well-known member
Joined
May 23, 2012
Messages
1,219
Location
Elgin, IL
simple piece of advice, on that last pick, if you spend a bit of time prepping the area you're about to weld, it will be a much better weld.
grind away the rust, mill scale, dirt, etc. you want clean metal.

+10. Cleaning the joint area down to bright shiny metal before welding is some of the best advice you'll get about welding ANYTHING. If there's not enough time to do that, there sure isn't enough time to grind it down and RE-weld it after it fails! :S It's not the reputation you want to have.

Yes, I know not everything we weld has to be 'perfect', but this is so basic and easy to do that it should apply to every joint you weld----it's a requirement for a good joint.
 
Last edited:
To avoid these ads, REGISTER NOW!
OP
V

vettelvr75

Active member
Joined
Jan 4, 2014
Messages
36
Location
Norman, OK
+10. Cleaning the joint area down to bright shiny metal before welding is some of the best advice you'll get about welding ANYTHING. If there's not enough time to do that, there sure isn't enough time to grind it down and RE-weld it after it fails! :S It's not the reputation you want to have.

Yes, I know not everything we weld has to be 'perfect', but this is so basic and easy to do that it should apply to every joint you weld----it's a requirement for a good joint.

Great! I will definitely take my time on all my projects now. I guess it is better for the project to take longer and end up with a great result than to get the project done quickly but not of good quality.
 

toolin' around

Well-known member
Joined
Feb 3, 2014
Messages
337
Location
Los Angeles, CA
Looks good. I like some of your ideas, and look forward to the updates. I recently built something similar, so I may steal some ideas!
I have concerns with your bottle set up, as others have mentioned. I used a smaller 60ci bottle so it sits totally under the bench top. I also have a vise permanently mounted on one end, and grinder on the other, but mine's 4' long. (The other side provides clear work space.)
Make sure the MIG gun holster is non metallic?
Cheers.
 
OP
V

vettelvr75

Active member
Joined
Jan 4, 2014
Messages
36
Location
Norman, OK
Looks good. I like some of your ideas, and look forward to the updates. I recently built something similar, so I may steal some ideas!
I have concerns with your bottle set up, as others have mentioned. I used a smaller 60ci bottle so it sits totally under the bench top. I also have a vise permanently mounted on one end, and grinder on the other, but mine's 4' long. (The other side provides clear work space.)
Make sure the MIG gun holster is non metallic?
Cheers.

Obviously from the replies of y'all I should build a shield for the bottle. That has been added to the list:thumbup: And I will do that for the mig holster, however, reasons as to why it should be non metallic?
 

gibbon_guy

Well-known member
Joined
Apr 11, 2008
Messages
435
Location
Redmond, WA
So you don't weld to it? I am guessing.

The metal holder could conduct electricity so I am sure it has something to do with it.
 

toolin' around

Well-known member
Joined
Feb 3, 2014
Messages
337
Location
Los Angeles, CA
It's easy to bump the trigger of the MIG gum accidentally, particularly if you rest it over the edge of the bench, if it slides under the weight of the feed hose, the trigger can accidentally be activated on the bench edge... The same thing could occur with a holder (depending on your design, I guess) which could result in unintentional feed of live wire.

I initially visualised a holster type device when I initially replied, but as I think about it more, there would be a number of alternate options that would address this issue.

Cheers.
 
OP
V

vettelvr75

Active member
Joined
Jan 4, 2014
Messages
36
Location
Norman, OK
This turned out great, im going to use this idea with only one change. Fenders to cover the tires from weld splatter. Nice table.

I am not sure if I mentioned it in this thread or not, but fenders are one of the things on my list! unfortunately that list is very long... I have added expanded metal on the shelves, and I love it! I hope to get some more updates on this thread soon if I can find the time to take some pictures of what I've done. If you're interested, My measurements for the top were 3 feet wide by 4 feet deep. I designed it with 2" overhang around all sides so the base is 32"x20". This also worked out perfectly for me because my welder is 20" deep so it fit perfect on my shelf.
 
OP
V

vettelvr75

Active member
Joined
Jan 4, 2014
Messages
36
Location
Norman, OK
It's easy to bump the trigger of the MIG gum accidentally, particularly if you rest it over the edge of the bench, if it slides under the weight of the feed hose, the trigger can accidentally be activated on the bench edge... The same thing could occur with a holder (depending on your design, I guess) which could result in unintentional feed of live wire.

I initially visualised a holster type device when I initially replied, but as I think about it more, there would be a number of alternate options that would address this issue.

Cheers.

When I was thinking about the "Holster", I guess that was the wrong term to use, as it could constitute confusion. I am intending to use a piece of pipe or tube just barely bigger than my nozzle on my gun, and weld it to the table at an angle whereas the trigger on the gun will be parallel to the ground, but nothing will be touching the trigger itself. I see now how you may have confused my holster term as something that would hold the whole gun.
 

AntiBling

Member
Joined
Oct 29, 2005
Messages
10
Location
Western Nebraska
I have been looking at a metal cutting blade for it... it one of the carbide tipped 100tpi blades and its about $60 Im just wondering if its worth spending the money for it, The abrasive wheels only cost $5 but I bet the metal cutting blade produces a cleaner cut and not so much debris off the metal. Any thoughts?

Don't have others around when you use it and enjoy your injury and damage!

I'm going to say this for you and others.


WOOD CHOP SAWS ARE NOT SAFE FOR CUTTING STEEL OR STAINLESS STEEL!!!

Wood chop saws have no clamping device, my Dewalt cold saws have two clamps for using on the upswing of the blade, a regular one like chop saws use, and a second one that holds the piece down on to the base and keeps the metal from ripping upwards out of the other clamp. Wood chop saws cut on the upswing, so if you put a carbide metal blade on there, it will rip out of there sending it shooting. Your abrasive blades break too because there is no clamping device and cutting unsecured metal is a sure way to destroy a blade. Spend less than $200 and get a decent metal cutting chop saw. Hospital bills are more expensive than the proper tools.
 
Last edited:
To avoid these ads, REGISTER NOW!
Top Bottom