To avoid these ads, REGISTER NOW!

Pouring concrete lintel in place.

acer66

Well-known member
Joined
Dec 4, 2010
Messages
4,418
Location
Western North Carolina
Hello,

I need to pour a lintel in place and all blocks will be core filled and I am following an engineered and approved plan when its comes to rebar layout etc. and it will be inspected.

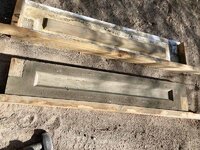
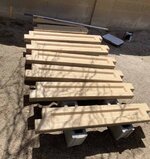
I either plan to use leftover 2x6” or osb for the form.

Seems to be straight forward or are there things I need to be thinking about.

Here is a visual.
2CEE493B-74F1-431E-BCA9-D8A3293EF4DF.jpeg

Thank you.
 
To avoid these ads, REGISTER NOW!

readhead

Well-known member
Joined
Dec 8, 2012
Messages
6,181
Location
Durango, Co.
Do the plans call out a steel lintel in addition to the bond beam or just the bond beam? If just the block, frame a 2x6 wall at 24”oc with a double top plate and lay up the block and rebar, get inspected and grout. Let it sit with the frame for 3-4 weeks or whatever is required on the plans and then remove the framing.
Is there a specific call out on the plans for the grout mix?
 

brownbagg

Well-known member
Joined
Mar 20, 2006
Messages
5,208
use a close bottom lintel block, 2 #5 and go one cell pass the opening on each end
 

Chris705

Well-known member
Joined
Nov 1, 2012
Messages
834
Location
The Finger Lakes of NY
Seems straightforward as you indicate. Consider using something other than osb for the form(plywood or melamine finished mdf). Or maybe paint the osb before cutting and caulk the joints. Do the plans call for using stirrups for holding the horizontal reinforcement in place?
 

WNYflyer

Well-known member
Joined
Sep 13, 2009
Messages
2,120
Location
Lockport, NY
Do the plans call out a steel lintel in addition to the bond beam or just the bond beam? If just the block, frame a 2x6 wall at 24”oc with a double top plate and lay up the block and rebar, get inspected and grout. Let it sit with the frame for 3-4 weeks or whatever is required on the plans and then remove the framing.
Is there a specific call out on the plans for the grout mix?
^^^^
This is what I would do to shore the block during construction of what I am assuming is all block construction.
 
OP
A

acer66

Well-known member
Joined
Dec 4, 2010
Messages
4,418
Location
Western North Carolina
Thank you for the replies.

There is no mentioning of a steel lintel just a rebar plan.

Good call on the curing time which I missed and it says to wait at least 2 weeks.

Grout mix is Type S meeting ASTM C270.

Concrete is 3000 psi pea gravel concrete.

What would be the benefit of using closed bottom lintel blocks?

I was thinking about using melamine but was looking at what I have at hand so I might just caulk and paint everything I use.

There will be #4 rebar coming out vertical from the nearest blocks left and tight of the opening tying into the horizontal rebar sticking out on top.

My idea was to pre made the lintel rebar according to plan and then secure it to the horizontal and vertical rebar of the walls.

Thanks again, this addition is already way more involved due to complications and the inspector is very firm on that I follow the plans to a tee.
 
OP
A

acer66

Well-known member
Joined
Dec 4, 2010
Messages
4,418
Location
Western North Carolina
80" opening ? You're going to need some vertical bracing under your form.
There will be 2x6 or even 2x8 support wall framed underneath it for support.
Couldn't you just use precast concrete lintels instead?
I was thinking about that but since all the walls will be core filled I thought it might be easier just to pour it in place and make everything truly one piece.
 

rustyjames

Well-known member
Joined
Dec 28, 2008
Messages
1,077
Location
central nj
@acer: I get that thinking, your structure is certainly well built, judging the size of the footing and the quality of the masonry. Are you using a commercial steel door? Is so you should grout the frame in while you're at it. Also, check rough opening sizes.
 

larry4406

Well-known member
Joined
Jan 27, 2006
Messages
19,418
Location
Northern Virginia
Looks good. What's going on top?
I’m curious also. If a slab I think I would pour it concurrent with the lintel.

Wrap your lintel form boards in 6 mil plastic before you pour. The surface finish almost looks like glass. Really neat.

Definitely want to shore it well.
 
OP
A

acer66

Well-known member
Joined
Dec 4, 2010
Messages
4,418
Location
Western North Carolina
@acer: I get that thinking, your structure is certainly well built, judging the size of the footing and the quality of the masonry. Are you using a commercial steel door? Is so you should grout the frame in while you're at it. Also, check rough opening sizes.
Haha, it is well build. While my plans were wrong they were approved and I had an absolute brain fart when I followed my own wrong plans not realizing what I was doing.
The only “excuse“ I have is that I was digging with my new tractor and got carried away.
Should have double checked with the pros here on GJ.😜
Anyway I compromised the plane of the existing building footing in the back and had to have a geo guy come out and hire an engineer to come up with a solution.
Which resulted in 3’ wide and 1’ deep foundation all the way around except for the one in the front with the opening where they let me get away with a 2’ wide and 1’ deep one and other fun stuff.
Door will be a regular patio door and yes on checking the rough opening.
The opening is a few inches wider than needed and I want to put a spacer above the opening so I have a bit more clearance for the door.
Looks good. What's going on top?
Thank you, it will be a sorta sun room extending from the house with the same roof line with a 2’ overhang on both sides.
In the left and right of the additions will be a big picture window each and facing this side will be another patio door.
There will be a wrap around deck on the upper level and the roof line will extend over the deck in front of the patio door.

I’m curious also. If a slab I think I would pour it concurrent with the lintel.

Wrap your lintel form boards in 6 mil plastic before you pour. The surface finish almost looks like glass. Really neat.

Definitely want to shore it well.
See above with what is going on top and there will be no slap on top just a regular stick build.

That is a great tip with the plastic, cheap and easy.
Thank you.
 

NUTTSGT

Super Moderator
Staff member
Joined
Sep 14, 2009
Messages
51,043
Location
Northern Central Ohio
Good call with using plastic Larry. I was going to mention that using OSB will leave the osb flake pattern in the finished concrete.

Acer, if you are core filling the vertical voids along the door frame, I would fill ty lintel form at the same time along with some connecting rebar... can't say it's right or wrong but it's what I would do to tie it all together.
 

rustyjames

Well-known member
Joined
Dec 28, 2008
Messages
1,077
Location
central nj
The lintel finish should coincide with what you plan on doing for final finish. If you're painting the block smooth is fine, but if you want to parge (i.e. stucco) the masonry, including the lintel, you don't want a smooth finish.
 
OP
A

acer66

Well-known member
Joined
Dec 4, 2010
Messages
4,418
Location
Western North Carolina
Good call with using plastic Larry. I was going to mention that using OSB will leave the osb flake pattern in the finished concrete.

Acer, if you are core filling the vertical voids along the door frame, I would fill ty lintel form at the same time along with some connecting rebar... can't say it's right or wrong but it's what I would do to tie it all together.
Yes that is the plan.
I will tie all the rebars of the wall and lintel together as much as I can and walls and lintel will be poured at the same time.
The lintel finish should coincide with what you plan on doing for final finish. If you're painting the block smooth is fine, but if you want to parge (i.e. stucco) the masonry, including the lintel, you don't want a smooth finish.
Good thinking and as of now the cinder blocks will stay as they are.

Plastic seems like an easy and fast way to seal everything and taking down the form too.

I almost want to get creative with the surface but the inspector is a bit of a stickler.

But now I also thinking
 

rayra

Well-known member
Joined
Dec 1, 2014
Messages
4,724
Location
Escaped from Los Angeles
Easy to frame. I'd face it with something like melamine-coated particle board, for a clean surface. You could even cast in some face details, an inset bevel design.
I'm about to do the same thing, albeit on a smaller scale, for my grill island. Need to span (3) 32" openings, I'm pre-casting the lintels separate and setting them in place. arched bottoms, rebar reinforced. With an inset face detail.
 

Attachments

  • sparta grill counter 017.jpg
    sparta grill counter 017.jpg
    83.2 KB · Views: 88
  • sparta garden veg 22 Cilantro Oregano Basil.jpg
    sparta garden veg 22 Cilantro Oregano Basil.jpg
    151.6 KB · Views: 78
OP
A

acer66

Well-known member
Joined
Dec 4, 2010
Messages
4,418
Location
Western North Carolina
I passed the steel in wall inspection and this is how it looks now.
5D5C2080-4C6C-45F9-A8D4-AB6F94339F87.jpeg

Which bring me to the next question.
The core filling will be done using premixed concrete bags and a lot of manual labor myself included.
Can this be done in stages and if those are there any pitfalls I have to watch out for while doing so?

Thank you.
 

NUTTSGT

Super Moderator
Staff member
Joined
Sep 14, 2009
Messages
51,043
Location
Northern Central Ohio
I prefer to use Quikrete rather than Menards or Sakrete, just personal experience. I buy in 80lb bags and add extra portland cement as it goes in the mixer.

Hands down, if you are mixing bagged concrete, use a mixer. Also use an extendable handle to slush in in the cores if you don't have a ******** to prevent any voids.

I would do the core(s) on one side then the other side or pour both at same time in lifts, then pour the lintel. Either way, make the lintel last.

Do you have 2 cores to fill on each side or just one ? Have plenty of bags on hand and buy extra, you can return the extra later or save for the interior floor pour.


To avoid these ads, REGISTER NOW!

rustyjames

Well-known member
Joined
Dec 28, 2008
Messages
1,077
Location
central nj
I passed the steel in wall inspection and this is how it looks now.
5D5C2080-4C6C-45F9-A8D4-AB6F94339F87.jpeg

Which bring me to the next question.
The core filling will be done using premixed concrete bags and a lot of manual labor myself included.
Can this be done in stages and if those are there any pitfalls I have to watch out for while doing so?

Thank you.

It looks you through-bolted the ends of bottom of the lintel form? Did you do anything for the bottom middle? If not there's a good chance the bottom can bulge once you get pouring, especially with aggressive vibrating. I would use a few sticks of pencil rod or even all-thread to tie the bottom together.
 

driftpin

Well-known member
Joined
Dec 22, 2016
Messages
11,289
Location
Miami-Dade/Broward Co. Florida
It looks you through-bolted the ends of bottom of the lintel form? Did you do anything for the bottom middle? If not there's a good chance the bottom can bulge once you get pouring, especially with aggressive vibrating. I would use a few sticks of pencil rod or even all-thread to tie the bottom together.
Snap-ties and 'shoes?' That's what I was using doing form-work, many years ago. I also used perforated black-painted steel banding-iron through ~3/4" holes in the plywood forms and then nailed with duplex nails into the 2x4's.
 
OP
A

acer66

Well-known member
Joined
Dec 4, 2010
Messages
4,418
Location
Western North Carolina
It looks you through-bolted the ends of bottom of the lintel form? Did you do anything for the bottom middle? If not there's a good chance the bottom can bulge once you get pouring, especially with aggressive vibrating. I would use a few sticks of pencil rod or even all-thread to tie the bottom together.
There are two continuous 2x’s the same width as the cinderblocks that sit on the columns and the ply is held in place with with that upright 2x that is screwed in with a bunch of long structural screws that are normally used for deck ledgers into the continuous 2x’s the lintel sits on from both sides.
The same screws are used to secure the flat 2x’s on top.
There are easy a $100’s worth of structural screws in there which will be reused for the deck ledger.
 
OP
A

acer66

Well-known member
Joined
Dec 4, 2010
Messages
4,418
Location
Western North Carolina
Snap-ties and 'shoes?' That's what I was using doing form-work, many years ago. I also used perforated black-painted steel banding-iron through ~3/4" holes in the plywood forms and then nailed with duplex nails into the 2x4's.
Never heard those terms, have to look them up.
 
OP
A

acer66

Well-known member
Joined
Dec 4, 2010
Messages
4,418
Location
Western North Carolina
I prefer to use Quikrete rather than Menards or Sakrete, just personal experience. I buy in 80lb bags and add extra portland cement as it goes in the mixer.

Hands down, if you are mixing bagged concrete, use a mixer. Also use an extendable handle to slush in in the cores if you don't have a ******** to prevent any voids.

I would do the core(s) on one side then the other side or pour both at same time in lifts, then pour the lintel. Either way, make the lintel last.

Do you have 2 cores to fill on each side or just one ? Have plenty of bags on hand and buy extra, you can return the extra later or save for the interior floor pour.


I will use a mixer especially since I down to one man right now which is unfortunately me which is why I was asking if the core filing can be done in stages.

I went with 60lbs quikrete since Ia showing my age and my back is acting up anyway.
Got point on buying more which I did and I also got more because I have to pour a bunch of more foundations for the deck.

The walls have to completely be filled according to the plans.

I will pour the lintel last. 🙏🏼
 

Awag

Well-known member
Joined
Aug 27, 2019
Messages
51
Location
SE NE
I don't know why you couldn't split the core fill up. But I wouldn't want any cold joints in any of the cores. I'd make sure you fill what ever core you're filling all the way up. I'd do the lintel in one continuous pour, no cold joints in that.
 

rayra

Well-known member
Joined
Dec 1, 2014
Messages
4,724
Location
Escaped from Los Angeles
Looking good so far.
You'll want a loose mix for pouring / grouting the cells in the block. Any rebar in those voids? What if any rebar are you putting in the lintel?
It might be worth your time to make a simple linear funnel that you can set atop the wall so you can pour a bucket of concrete into the cells. Couple sloped pieces and cross supports that will brace them and socket over the top of the wall so it won't shift off the wall when you miss the pour. And you will when you get tired.


We're running neck and neck. I'm just finishing the forms for my cast lintels for my grill counter project. They're a good bit smaller than yours, but I'm still going with a few pieces of #4 rebar in each mold.

I'm adding crossbraces on both the bottom and top / open part of the mold to prevent bulging. One-use molds formed up from scraps / offcuts. The beveled pieces are going on the visible face.
 

Attachments

  • sparta grill lintel molds 10.jpg
    sparta grill lintel molds 10.jpg
    81.6 KB · Views: 39
  • sparta grill lintel molds 08.jpg
    sparta grill lintel molds 08.jpg
    77.8 KB · Views: 33
  • sparta grill counter 017.jpg
    sparta grill counter 017.jpg
    83.2 KB · Views: 35

rayra

Well-known member
Joined
Dec 1, 2014
Messages
4,724
Location
Escaped from Los Angeles
It might be worth your time to make a simple linear funnel that you can set atop the wall so you can pour a bucket of concrete into the cells. Couple sloped pieces and cross supports that will brace them and socket over the top of the wall so it won't shift off the wall when you miss the pour. And you will when you get tired.
 

rayra

Well-known member
Joined
Dec 1, 2014
Messages
4,724
Location
Escaped from Los Angeles
make the funnel slopes align with the edges of cell openings / inboard of the outer edges of the block. Make it a block long. Set the so the cell you are filling is near one end, fill that cell / column, then drag the funnel onto the next cell alignment, screeding the overage into the next hole as you go. With something like this you can get a little sloppy when lifting 50# buckets of loose mix near head height.
Don't fill the 5gal buckets, you'll just get tired quicker. 2/3 full is more than enough. Sling 2-3 buckets on your scaffold, dump them all in and repeat.
'Efficiency' is the key to not wrecking yourself and getting more done in a given period of heavy work.
 

Attachments

  • wall grouting funnel.jpg
    wall grouting funnel.jpg
    67.7 KB · Views: 50
OP
A

acer66

Well-known member
Joined
Dec 4, 2010
Messages
4,418
Location
Western North Carolina
Looking good so far.
You'll want a loose mix for pouring / grouting the cells in the block. Any rebar in those voids? What if any rebar are you putting in the lintel?
It might be worth your time to make a simple linear funnel that you can set atop the wall so you can pour a bucket of concrete into the cells. Couple sloped pieces and cross supports that will brace them and socket over the top of the wall so it won't shift off the wall when you miss the pour. And you will when you get tired.


We're running neck and neck. I'm just finishing the forms for my cast lintels for my grill counter project. They're a good bit smaller than yours, but I'm still going with a few pieces of #4 rebar in each mold.

I'm adding crossbraces on both the bottom and top / open part of the mold to prevent bulging. One-use molds formed up from scraps / offcuts. The beveled pieces are going on the visible face.
Thank you and there is vertical #4 16 o/c in the walls, the lintel has 2 horizontal #4 rebar at the top and bottom tied into the vertical rebar coming up from the cinder blocks left and right of the opening.
Additional there is a continuous #4 rebar run at the top of the walls including the lintel.

Nice and success, are you posting about your project on GJ?
 

rayra

Well-known member
Joined
Dec 1, 2014
Messages
4,724
Location
Escaped from Los Angeles
Thank you and there is vertical #4 16 o/c in the walls, the lintel has 2 horizontal #4 rebar at the top and bottom tied into the vertical rebar coming up from the cinder blocks left and right of the opening.
Additional there is a continuous #4 rebar run at the top of the walls including the lintel.

Nice and success, are you posting about your project on GJ?


ha, just shoehorning it in your topic :)
A little in the 'what did you do in your yard' and 'what did you do in your garage' topics.

I ought to have a project topic. But I will probably do a collective topic on several concrete-related projects very soon. I've been working on several interconnected things with various molds and forms that folks seem to find interesting. And I usually do 'how to' topics on lots of things.
I'll be casting a large concrete countertop and building a domed pizza oven later this year. I should have some dedicated topics by then. Right now I'm working on setting / adding the walls (with lintels) for the 8' x 6' cooking island. Propane grill docked on one side, charcoal weber inset on the offside and pizza oven / patio fireplace on the other. Lots of concrete, travertine and plaster work to come.
 

Attachments

  • sparta concrete casting 18.jpg
    sparta concrete casting 18.jpg
    138 KB · Views: 42
  • sparta concrete casting 43.jpg
    sparta concrete casting 43.jpg
    67.5 KB · Views: 42
  • sparta concrete casting 41.jpg
    sparta concrete casting 41.jpg
    144.9 KB · Views: 44
  • sparta concrete casting 57.jpg
    sparta concrete casting 57.jpg
    90.1 KB · Views: 40
  • sparta patio planter 28 assembly completed.jpg
    sparta patio planter 28 assembly completed.jpg
    88.2 KB · Views: 42
  • casting molds 07.jpg
    casting molds 07.jpg
    84.4 KB · Views: 41
  • casting molds 12.jpg
    casting molds 12.jpg
    79.6 KB · Views: 44
  • sparta pergola beams 94 up they go.jpg
    sparta pergola beams 94 up they go.jpg
    69.4 KB · Views: 46
  • sparta grill block laying 06.jpg
    sparta grill block laying 06.jpg
    107.9 KB · Views: 64
Last edited:
OP
A

acer66

Well-known member
Joined
Dec 4, 2010
Messages
4,418
Location
Western North Carolina
ha, just shoehorning it in your topic :)
A little in the 'what did you do in your yard' and 'what did you do in your garage' topics.

I ought to have a project topic. But I will probably do a collective topic on several concrete-related projects very soon. I've been working on several interconnected things with various molds and forms that folks seem to find interesting. And I usually do 'how to' topics on lots of things.
I'll be casting a large concrete countertop and building a domed pizza oven later this year. I should have some dedicated topics by then. Right now I'm working on setting / adding the walls (with lintels) for the 8' x 6' cooking island. Propane grill docked on one side, charcoal weber inset on the offside and pizza oven / patio fireplace on the other. Lots of concrete, travertine and plaster work to come.
Wow, looks like you did this before and I might use your work as inspiration. 👍🏽

My stuff looks a bit more rudimentary in general.

The metal bracket is made out of old scaffolding pipes that I were on the property and I might got carried away with it.

Right now the important horizontal one is the second from the top because gets me to a height were I just tip in the bucket without bending the back.
The other ones are just in case and to make it heavier than it needs to be since the job is easy peasy anyway.

Ramp is not set properly and therefore a bit crooked.

Funnel is soaked in release agent.

Thank you.


One pic of random concrete/thinset or whatever leftover was at hand lawn art.
 

Attachments

  • 460F80B3-5590-487D-B2C9-392EA2C5C9D2.jpeg
    460F80B3-5590-487D-B2C9-392EA2C5C9D2.jpeg
    693.5 KB · Views: 64
  • 00ED9F11-8970-4172-95B0-0B09ECDE5095.jpeg
    00ED9F11-8970-4172-95B0-0B09ECDE5095.jpeg
    471.7 KB · Views: 65
  • D3F903AC-B466-417D-B83D-ED4CC7177E4F.jpeg
    D3F903AC-B466-417D-B83D-ED4CC7177E4F.jpeg
    848.6 KB · Views: 68
OP
A

acer66

Well-known member
Joined
Dec 4, 2010
Messages
4,418
Location
Western North Carolina
Cover that ac with thick plastic so when a wheelbarrow eats it off the right, it doesn't fill the coil with concrete
Good point, will do even I do not plan to use a wheel barrow at this point.

I overbuild this a bit because I want to make sure I do not slip that easy at the end of the day.

Edit. You got me thinking Mike and I might give the wheelbarrow a try where I have access like this.
 
Last edited:

rayra

Well-known member
Joined
Dec 1, 2014
Messages
4,724
Location
Escaped from Los Angeles
Wow, looks like you did this before and I might use your work as inspiration. 👍🏽

My stuff looks a bit more rudimentary in general.

The metal bracket is made out of old scaffolding pipes that I were on the property and I might got carried away with it.

Right now the important horizontal one is the second from the top because gets me to a height were I just tip in the bucket without bending the back.
The other ones are just in case and to make it heavier than it needs to be since the job is easy peasy anyway.

Ramp is not set properly and therefore a bit crooked.

Funnel is soaked in release agent.

Thank you.


One pic of random concrete/thinset or whatever leftover was at hand lawn art.
Perfect! lol That should work nicely. 2x material is plenty, the pipe work is good overkill.
Just be careful about how loose the mix is if you try to pour out of a wheelbarrow, it might sail right over the funnel if you flip the barrow too fast.

My granddad was a bricklayer. My Navy dad was using me for child labor to build block walls etc when I was about 12. I'm 58 now, working on my 5th house and having done many kitchen and bathroom remodels for others. Just finished building a 6x10 shed from scratch at my folks place a few days ago.
/the work never ends

I kept plugging away today and got everything finished out, molds completed and coated with polyurethane, rebar diced and bent / curved, brown and white dye powders measured out in solo cups. Looks like I'm casting my lintels in the morning. My 'construction yard' has been in use for ~14mos. This grill counter will be the last big concrete project here.
 

Attachments

  • sparta grill block laying 05.jpg
    sparta grill block laying 05.jpg
    110.2 KB · Views: 56
  • sparta grill lintel molds 18.jpg
    sparta grill lintel molds 18.jpg
    78.2 KB · Views: 62
Last edited:
OP
A

acer66

Well-known member
Joined
Dec 4, 2010
Messages
4,418
Location
Western North Carolina
s
Perfect! lol That should work nicely. 2x material is plenty, the pipe work is good overkill.
Just be careful about how loose the mix is if you try to pour out of a wheelbarrow, it might sail right over the funnel if you flip the barrow too fast.

My granddad was a bricklayer. My Navy dad was using me for child labor to build block walls etc when I was about 12. I'm 58 now, working on my 5th house and having done many kitchen and bathroom remodels for others. Just finished building a 6x10 shed from scratch at my folks place a few days ago.
/the work never ends

I kept plugging away today and got everything finished out, molds completed and coated with polyurethane, rebar diced and bent / curved, brown and white dye powders measured out in solo cups. Looks like I'm casting my lintels in the morning. My 'construction yard' has been in use for ~14mos. This grill counter will be the last big concrete project here.
Nice and and thank you for sharing your background and wisdom.

I am not sure how much I will use a wheelbarrow since this is the only spot where I have a somewhat flat access.
The other side is just one slope with already dug, smart move on my end 🙄
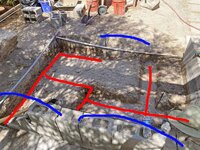
, holes as an extra challenge for the deck footings.

But it all depends how things go and I will take it to the heart what you said and go easy on myself and not fill buckets etc. up to the brim.

Not really in hurry anyway and maybe that leads to lower lumber prices.
 

rayra

Well-known member
Joined
Dec 1, 2014
Messages
4,724
Location
Escaped from Los Angeles
You're welcome and happy to help.

I just got mine cast this morning. Just quit at 1100hrs / 100F. And the surplus mix used to set the first couple footer blocks on the grill island.
There's 3 pieces of 1/2 rebar in each, all slightly curved. the bottom 2 are about 1-1/2" above the bottom. And a third centered above them. 32" L pieces in a 36" long box.

Covered the top of the lintel molds with saran wrap to keep them wet. Moisture control on small concrete projects has been a real problem here in Vegas, high heat and the usual humidity is only 13%


I could smell the mixer motor overheating after the third batch. It really doesn't seem to handle 2 bags as well as it once did. Everything is lubed. The motor housing is still cranked open for ventilation but I may remove the front half of that clamshell entirely. And just add a broader brim up top as a sun shade.
Still have to figure out the block lay today and tomorrow morning I set some more footings. Hopefully all of them.
 

Attachments

  • sparta grill lintel molds 19.jpg
    sparta grill lintel molds 19.jpg
    142.1 KB · Views: 57
  • sparta grill lintel molds 20.jpg
    sparta grill lintel molds 20.jpg
    136.1 KB · Views: 52
  • sparta grill block laying 07.jpg
    sparta grill block laying 07.jpg
    106.9 KB · Views: 52
To avoid these ads, REGISTER NOW!
Top Bottom