To avoid these ads, REGISTER NOW!

quadrcr87's garage projects

OP
Q

quadrcr87

Well-known member
Joined
Jul 5, 2013
Messages
1,036
Location
Travelers Rest, SC
With power and internet restored, it feels good to get back out in the garage on projects. Although I did spend a good portion of the day Saturday power washing the entire house. I also scheduled a roof inspection and gutter clean/adjustment.

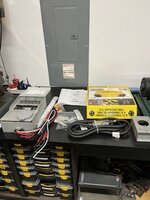
In order to be more prepared next time, I bought a 6-breaker generator transfer switch. I was going to install it yesterday, but I was scratching my head trying to figure out the cleanest way to install and wire a surface mount panel into my main.

I did a little research and found that reliance sold a flush mount kit for this panel for another $60. I am glad I found that because I didn't want this box sticking out above my new cabinet right at the work surface. I also decided to install the inlet right in the panel rather than routing to the outside. With a 25' cord I can run it out to the generator in the driveway.

Reliance Flush Mount Kit
IMG_6634.jpeg

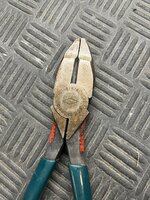
I picked up a gallon of Evapo-rust a few weeks ago after hearing how well it worked. I had a rusted-up pair of Diamond pliers in the drawer that was a perfect candidate. These were a garage sale find a while back.
IMG_6636.jpeg

The grips slipped off easy and I set the pliers up to soak overnight.

IMG_6637.jpeg

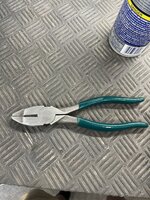
I was pretty impressed the next morning. Between this and my ultrasonic, restoring old hardware is going to be much easier. I rinsed them off with water and lightly rubbed them with Scotchbrite and they shined right up.
IMG_6640.jpeg

I put a little WD40 in the pivot and they feel like new. I am a little disappointed that I lost the model number and Diamond info, it was gone before I wiped them off. Maybe it was printed on and not etched?

IMG_6641.jpeg

I had a few free hours on Sunday when the Boss went out shopping. I was able to check a quick project off the to do list. I had 2 problems, a messy scrap material pile and bunch of left over 3/4 plywood I didn't want to store.

IMG_6642.jpeg

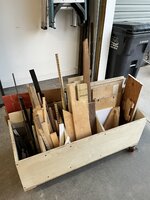
I solved both problems by making the scrap material cart that has been in my head for a while. Unlike my normal approach, I did not draw or plan this project. I took a few quick measurements and started cutting. I just knew I wanted small scraps in the front and the ability to store 4' long sheets in the back.

IMG_6643.jpeg

It fits in my old scrap space with some room to spare. This should make it easy to roll out and gives a little space to collect random trash/treasures around it. I was able to repurpose the casters from my the drill press stand.

IMG_6644.jpeg

It sticks out from the 18" deep cabinets but still leaves plenty of space to park the truck. Taking the ladders down will be much less hazardous now that I can roll it out of the way.

IMG_6645.jpeg

It felt good to finally sort and organize the scrap pile. It's an odd assortment of wood and steel, just like my projects. I struggle with the mental battle deciding what to trash, burn or keep. Probably safe to assume you all struggle with the same affliction.
IMG_6647.jpeg

Thanks for following along!
 
Last edited:
To avoid these ads, REGISTER NOW!
OP
Q

quadrcr87

Well-known member
Joined
Jul 5, 2013
Messages
1,036
Location
Travelers Rest, SC
I made some progress on the never-ending battle of organization. Organizing the scrap material inspired me to order the material rack and I had been looking at. I didn't have much free wall space, but I had just enough behind the garage door rail.

IMG_6675.jpeg

I have just enough room to access from a ladder. I won't be using this daily, so it doesn't have to be super easy. I am going to pick up a 2nd set of racks so I can support 10' boards. Right now, these are only spaced 48" apart.

IMG_6677.jpeg


IMG_6678.jpeg

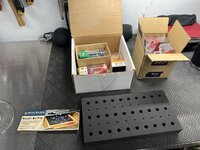
While I was at Rockler, I spotted this foam router bit organizer. I have accumulated several bits over the past few years and the packaging them came in was poor for storage. It was hard to see what I had and hard to access.


IMG_6653.jpeg

This should work really well in a drawer. Plenty of room for expansion.
IMG_6655.jpeg

Now I just need a drawer to hold all the router bits and accessories. My plan is to build a riser/ drawer to go inside one of my cabinets. This will place a drawer right below the routers.

IMG_6658.jpeg

I drew it up this weekend and picked up a set of 12" drawer slides.

IMG_6686.jpeg

The flush mount kit for the transfer switch arrived on Friday so I was able to get started. IMG_6680.jpeg

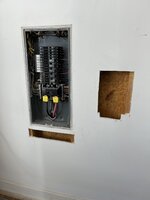
I spent way too much time trimming the drywall to fit the box. I was trying to get it to fit with minimal drywall cutting but with this design it needed to be oversized to fit the wiring and the brackets. I ended up have to cut another 2" larger in both directions. I entered the main panel from the bottom as it was the least cluttered.

IMG_6690.jpeg

Once the patch work and paint are complete it will be a nice clean install. Before I could start wiring it in, I had to pick up a few 20amp breakers as the ones pre-loaded in the transfer switch didn't match my circuits. I picked up some Wago connectors to tie into the existing circuits. I think it will look a little cleaner than wire nuts and be easier to remove and return to the main if needed.

IMG_6692.jpeg

Now onto the fun part of hooking it all up.
 
Last edited:
OP
Q

quadrcr87

Well-known member
Joined
Jul 5, 2013
Messages
1,036
Location
Travelers Rest, SC
The weekend was too short, but I was productive. I was also able to get back up to the mountains for a little fun.

During the week, I spent several nights after work mudding, sanding and painting the holes I made around the panels. It turned out pretty well after the 3rd coat of mud. The flat white paint I had left over from our old house was a perfect match.

IMG_6716.jpeg

Saturday afternoon I cut power to the main to wire the 6 circuits in. It was perfect timing while the BOSS was at an art fair downtown.

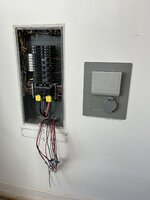
I tried to keep the wiring as clean as possible which was hard with the limited length on some of the wires. I also left a couple wires long in case of future changes.

I used Wago connectors which worked great and will be easy to remove if I ever need to make a quick change.


IMG_6756.jpeg

With everything tested, I was ready to close up the panel.

IMG_6757.jpeg

I mounted the transfer switch 6" above the counter to leave space for power cords below without blocking the generator plug.

IMG_6758.jpeg

With everything in place, I needed to determine how I wanted to run the power cords to the machines. I am tired of unplugging things all the time. I considered mounting power to the cabinet but decided the wall is better. There is a 20amp plug on each side of the bench on separate circuits, so I have plenty of power, I just need more receptacles.

I ended up ordering two metal power strips that should be here in a couple of days. 8 Outlet Power Strip

IMG_6769.jpeg

I work at an industrial plant where EHS is a major focus. Working safe and being prepared for accidents is pretty engrained in me as it's part of my responsibility as the site leader. I decided it was time to up my game at home a little bit.

I bought a two pack of fire blankets and mounted one under the kitchen sink and the other in the garage. I would much rather use this than cover the house in the powder from an extinguisher.

IMG_6751.jpeg

I have had a first aid kit mounted in my garage since the first home I purchased in 2010. I did not however have anything for a major trauma. I picked up some quick clot and a tourniquet, just in case. I even made sure the BOSS knew how to use them as she is likely the first responder.

After hurricane Helene and the devastation that hit the Carolinas, my mindset changed a little bit. I ordered some basic MREs and supplies to keep in a go bag. I even ordered some chain saw chaps. I am by no means a "prepper" but I little preparedness can't hurt.

IMG_6754.jpeg

Saturday night we tested out the LED backlights I installed on the outdoor TV. I always thought these were a little gimmicky, but the BOSS wanted to give them a try and she found a deal on Prime day. I must admit, they are pretty good. You can even set them to change with the colors on the TV screen.

Govee TV Backlight

IMG_6760.jpeg

Sunday morning started with a hike at Table Rock State Park. The park was able to open a couple of trails at the base of the mountain but all of the high elevation areas were still unsafe to open. This was one of the many uprooted trees.

IMG_6773.jpeg

Of course we ran into another snake. Thankfully this one was harmless, but I still hate it.

IMG_6774.jpeg

Thanks for following along!
 
Last edited:

Xti04

Well-known member
Joined
Nov 11, 2016
Messages
2,347
Love seeing the preps! As an ER nurse/ EMT I keep a well stocked first aid kit in each car and the boat. When I needed it for my son scalping himself I had everything I needed and was knew how to use it which was nice. Wife has been shown some of the basics and I even let her start an iv on me recently so she would know how. She gets super calm in traumatic situations and its amazing how well she does under stress. The hurricane has shown us all how quick things can change for sure! My generator setup is not quite ready since redoing my panel and our salon build, but it is about to get re configured so we can have power when ours goes out.
 
OP
Q

quadrcr87

Well-known member
Joined
Jul 5, 2013
Messages
1,036
Location
Travelers Rest, SC
The power strips I ordered arrived over the weekend. I was able get them mounted and finish up the wiring to the machines on Saturday. I still have plenty of open outlets which is going to be great. Excuse the mess on the bench, that's the next cabinet project mid process.

IMG_6823.jpeg

IMG_6838.jpeg

The power strips have 16" hole spacing but that didn't work for me as the electrical panel blocked a stud. I had to install drywall anchors. I had just enough cable length to make my foot pedal work for the bandsaw.
IMG_6839.jpeg

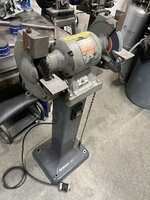
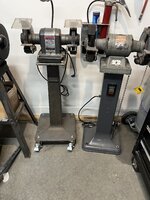
I also added another bench grinder to the garage that I probably don't need. I picked it up at a work auction for $60 and I think the base alone is worth that. It's a 7" Rockwell vintage not yet known. Ill have to wire it to 120V and decide what to do with it.
IMG_6808.jpeg

IMG_6809.jpeg

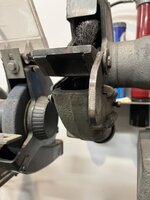
When I got it home, I realized that one of the machinists had handmade this tool rest. He did a good job too.
IMG_6815.jpeg

Things are getting a little crowded in here. The newer Delta is the first grinder I bought. Its 8" with variable speed. I am thinking about adding a 2" wide belt sander attachment to it. Anyone have experience adding one to a bench grinder?

IMG_6814.jpeg
 
Last edited:
OP
Q

quadrcr87

Well-known member
Joined
Jul 5, 2013
Messages
1,036
Location
Travelers Rest, SC
I had a few free hours this weekend to continue my work organizing the garage. I have been gathering more wood working tools and the cabinets have gotten a little out of control.

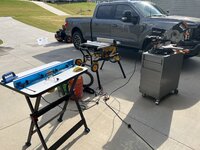
It was a beautiful day, so I set up the outdoor wood shop to minimize dust in the garage. Last weekend I swept the garage and cleaned the sawdust off everything, and I didn't want to spoil that. I haven't really solved or focused dust extraction in the garage, so it gets covered in dust very fast. I am planning to buy the new Harbor Freight dust extractor that was just released, and I am hoping that will help. It should work well with the sander; router table and table saw. My miter saw has horrible dust collection, so I plan to get a dedicated wood saw as well. I have my eye on a Makita. I plan to keep the Evolution saw for metal cutting until I upgrade to a dedicated metal saw.

Working outside in a neighborhood has its benefits and negatives. My neighbors are always wondering what I am doing when they see the tools in the driveway. A few curious ones like to stop by to see what's going on. Best case scenario they chat for 5 minutes and head on their way. Worst case, they hold me up for 30 mins and then ask me for help on something. Nothing kills progress or burns precious project time like the guy who won't take the hint and let me get to work!

IMG_6832.jpeg

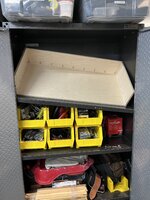
The goal of my project was to improve storage for my routers, bits and accessories. The Gladiator cabinets have been great, but the wide shelf spacing leads to items being stacked on top of each other. I am always having to take stuff out to get to what I need. My solution is building a cabinet within a cabinet.

To get started I measured the max width and height that would fit in the cabinet and leave space on top for the tallest router. After cutting the 1/2" Baltic birch ply, I secured the back and sides with pocket hole screws for a test fit. I needed to make sure I could actually get it into the Gladiator cabinet before I fully committed. It was a tight fit and required unbolting the metal shelf below.

IMG_6796.jpeg

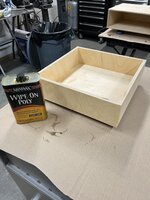
Once in place I took some measurements to decide on final drawer dimensions. I left enough space on the left for a storage bin. For the drawer, I used a simple glue and pin nail construction with a rabbit for the 1/4" ply bottom. A put a quick coat of wipe on poly on everything. I skipped the stain since this will be hidden in a cabinet. One coat of poly should make it easier to keep clean. Dirty fingerprints on plywood hurts my brain.

IMG_6836.jpeg

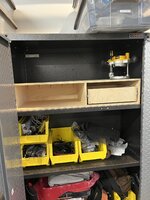
I mounted the drawer recessed into the cabinet with 14" full depth Rockler ball bearing slides. One last check to make sure everything was going to fit.

IMG_6840.jpeg

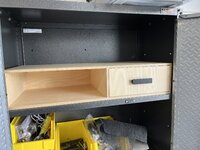
I made the drawer front from the same 1/2 ply and added a 45* back bevel detail with a trim router. A little fancy for shop furniture but at least I was able to resist using the walnut I originally planned.

IMG_6842.jpeg

Working with Baltic birch is a pleasure. A 5'x5' sheet of 1/2" is pretty reasonable too ~$70 a sheet. I am glad I found 'th Lumber Yard in Mauldin, SC. They are close to my work and carry a nice inventory including hardwoods.

IMG_6847.jpeg

Due to the awkward angle and shelf removal, I enlisted the help of the BOSS to get it in place. Her comment was, "wow that's really nice, why don't I have one of these in my bathroom cabinet?". ****, I guess I'll add that project to the list. haha

I am learning and getting better with each cabinet. I think I am at the point now that I feel comfortable building a full cabinet for the house. Our laundry room needs some work and the vanity in our master bath has zero drawers. I have plenty of work to keep me busy.

IMG_6851.jpeg

The organization in the cabinet is a huge improvement. Way more functional and easier to access the tools. I am not sure if the electrical kit and tools will stay on the left side. I may end up making another drawer in that space for table saw blades, small wood tools, fixtures, etc. It works well for now and controls the mess.
IMG_6855.jpeg

The biggest win with the new drawer, was getting rid of all of the carboard boxes filled with router parts and consolidating it all into one place. The routers are now a lot less likely to fall out of the cabinet or get damaged.

IMG_6854.jpeg


The BOSS has laid down the law, no more projects until the master bedroom is painted. I suppose I have avoided it long enough. Thanks for following along!
 
Last edited:
OP
Q

quadrcr87

Well-known member
Joined
Jul 5, 2013
Messages
1,036
Location
Travelers Rest, SC
Nothing fun happening in the garage, but I’m making some progress on the house interior paint. Like every other room in the house, the master needed a lot of drywall repair and caulking before I could get started. Dealing with the large furniture wasn't fun either.

IMG_6911.jpeg

An example of a poor job they did finishing the drywall and paint around each outlet and door/ window frame.

IMG_6912.jpeg

Before we got started, we pushed all the furniture to the center of the room and covered it in plastic. I sweat I have been using the same roll of plastic for the past 10 years. It just never runs out. This was a messy job with sanding, so it was worth the effort. I didn't even strip the bedding.

IMG_6921.jpeg

The BOSS selected Sherwin Williams Popular Grey so I’m buying it 5 gallons at a time to cover the entire house. This makes it easier, no waiting days for color decisions. She was so excited to get this done, she even did all the cut in along the baseboards saving my knees and back. I was very pleased.

IMG_6919.jpeg

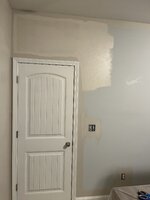
I must admit, it was worth it. Big improvement over the baby blue. Our furniture instantly looked better.

IMG_6924.jpeg

We have a lot of green tones in our decorations, so the blue was clashing. That is all according to the BOSS.

IMG_6923.jpeg

I finished off a successful project with some pizza on the Ooni. Only 5 more rooms to go know, it's going to be a busy weekend!

IMG_6922.jpeg
 
Last edited:
OP
Q

quadrcr87

Well-known member
Joined
Jul 5, 2013
Messages
1,036
Location
Travelers Rest, SC
I took a short break from painting to work on some tool upgrades. In the pursuit of improved accuracy and cut quality, I decided it was time for zero clearance inserts.

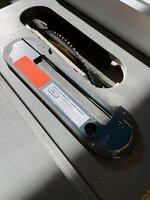
First up was the Dewalt table saw. This one was a no brainer as Leecraft has created a great insert for this saw.

After adjusting the height and fit with the included adjustment screws it was time to fire up the saw on and raise the blade. I also aligned the blade and fence to the miter slot. The blade was a little off and the miter fence is actually bent. Not sure if that was damaged by me or if it's from the factory. Hoping those parts are available.

IMG_6990.jpeg

The cut was very clean with zero chip out. What a relief, I was nervous. I had to extend the slot for the riving knife with a jig saw. I was a little surprised that the insert showed up in Makita blue instead of yellow but I dig it.

IMG_7057.jpeg

There is very little material left at the back of the insert but I was able to avoid breaking through.

IMG_7056.jpeg

Next up was the Evolution saw. It is good for cutting metal and wood but not great for either. I found some cheap Fastcap zero clearance tape so I figured it was worth a shot.

Not only is the blade slot 3/8” wide and tapered, but the insert sits about 1/16” below the table height.

IMG_6078.jpeg

The potential solution
IMG_6999.jpeg

Trimming to fit and applying was easy. The tape sits flush with the table. I was feeling good at this point.

IMG_7001.jpeg

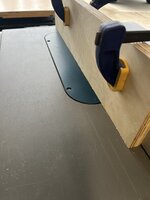
The first cut was a letdown. Lots of chip out and pieces flying. I don’t think it’s the tapes' fault. There is just too much unsupported material with nothing underneath. It flexed a lot and caught the blade. The slower blade speed of the Evolution saw may have been an issue as well.

I either need to make a new wood insert or finally upgrade to a dedicated wood saw. I waste a lot of project time trying to get the quality I am after. I need something that is fast to set up and repeatable.

IMG_7004.jpeg

Next up is a mini remodel for the BOSS' office. Thanks for following along!
 
Last edited:
OP
Q

quadrcr87

Well-known member
Joined
Jul 5, 2013
Messages
1,036
Location
Travelers Rest, SC
It’s been a busy few days completing a mini remodel on my wife’s office. She has been in Michigan visiting her parents the past four days, so I had the freedom to work and make noise all hours of the day.

The first step was to clear the room, repair 50 spots of drywall/ caulk and paint it popular grey. I’ll spare the details as you have all seen it before.

This is the crafting corner where she makes cold process soap. She doesn’t know it yet, but a Bambu Labs 3D printer is coming to this area soon. Haha

IMG_7014.jpeg

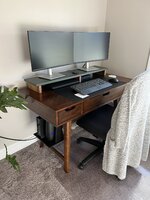
As I was moving her desk to prep for paint, I realized she still had her monitors stacked on 4” of books. We did this when she noticed some neck/shoulder pain. I planned to build a stand and never got around to it.

Here is what I was working with. It needed to fit on the 4’ desk with space for a laptop and docking station below. She has a large engineering laptop which is a challenge on a small desk.

IMG_4080.jpeg

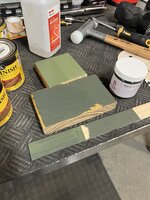
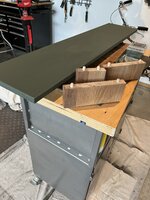
I was going make this as a surprise, but I decided I needed her input on color and material. That turned into a bit of a nightmare. She picked Baer a color for the top, but it ended up way too light. Home Depot tried to make it darker, and it barely changed. I thought I wasted $30. Then we had the idea to add black mica from her soap supplies. 1 tsp of black oxide powder later we had the green light to proceed. It took forever to mix in and I was still fighting black streaking as I brushed it on.

IMG_7035.jpeg

I made the legs from a white oak stair tread, applied some weathered oak stain and finished them with Rubio Monocoat clear. Rubio is my favorite finish.

IMG_7034.jpeg

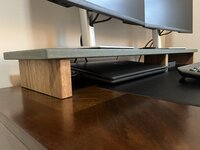
It turned out to be a very clean setup. I am excited to see what she thinks on her first day back to work.

IMG_7063.jpeg

We went with a very simple design with 1/8” round overs on all edges and dowels to attach the legs. I haven’t glued them on yet as there is still a chance she will want to make a change.

IMG_7064.jpeg

Next up was a new top for the craft table. I used a prefab laminate countertop before, but it was big and ugly. A local renovation supply shop had an Acacia butcher block for $119. Not bad at all. I cut it to size, rounded the edges, sanded and applied some Rubio.

If you live in the Greenville, SC area, check out Home Emporium.

IMG_7047.jpeg

This felt like a big improvement. We will see how it holds up. The beauty of Rubio is that it will be easy to refinish if needed.

IMG_7050.jpeg

It’s up to the boss where she wants the artwork. I just staged them to get an idea.

IMG_7088.jpeg

The last thing I had to finish was another little detail for the desk. To be continued…
 
Last edited:

bugnut

ALLIANCE MEMBER
Joined
Jul 14, 2012
Messages
3,981
Location
Central Ohio
Really liking the monitor shelf and there should be points for the remodel, but that'll probably be wiped off the board with the Bambu showing up.
 
OP
Q

quadrcr87

Well-known member
Joined
Jul 5, 2013
Messages
1,036
Location
Travelers Rest, SC
Really liking the monitor shelf and there should be points for the remodel, but that'll probably be wiped off the board with the Bambu showing up.
The idea is that the Bambu is a Christmas present for both of us. She has mentioned all the things she can make with one. Something about organizing her makeup drawer. ;)
 
OP
Q

quadrcr87

Well-known member
Joined
Jul 5, 2013
Messages
1,036
Location
Travelers Rest, SC
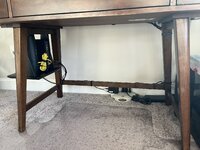
The final piece of the puzzle for the desk setup was finding a solution for the internet router and modem. We were having WIFI signal issues and recently had the router relocated from a bedroom to her office. The signal coverage was vastly improved but now I needed a place to place the equipment.

Her desk has a very clean mid-century design and I didn't want to take away from that aesthetic. To mimic the design I followed some of the existing angles on the legs as well as the router profiles.

I didn't take many photos as I was building this late into the night. To maintain perfect symmetry, I made a router template out of 1/4" ply and used a template bit to mill the 3/4" poplar. I used a 3/8" round over on the outside leading edge to match the desk legs. I would have liked an even larger radius, but this was the largest bit I had on hand. The rest got a simple 1/8" round over.

IMG_7041.jpeg

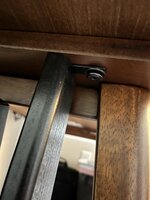
I wanted to avoid permanently modifying the desk, so I used 2 existing bolt locations. In order to accomplish this, I had to install some metal brackets. This was a little out of my comfort zone as I don't do much chisel work. It turned out pretty well for this application, but I am far from being ready to hand cut dovetails. This felt more like installing a lock set which I am comfortable with.

IMG_7039.jpeg

With the brackets recessed on the inside, they are a lot less visible in the final install. These were off the shelf brackets that only required drilling one hole oversized to match the desk hardware. Believe it or not, I already had these in my spare hardware bin. Reminder- save everything, you may need it someday. 👌

IMG_7037.jpeg

With everything machined and assembled it was time to apply some finish. I went with solid black gel stain and a satin poly. Gel stain is a mess to work with, but it works well for a solid color finish. My goal was for this shelf to disappear visually. I considered matching the green of the monitor stand, but I didn't want to draw your eye to it, even if I did spend hours designing and building it.

IMG_7044.jpeg

The measuring paid off and the angles matched. The 45* bevel on the bottom makes the shelf appear thinner than it is.

IMG_7066.jpeg

The mounting detail. These existing bolts secure the base to the desk cabinet.

IMG_7072.jpeg

Hopefully if I change internet providers in the future their equipment is the same size. I made the dimensions a little generous in case that happens in the future. It's also screwed together without glue so it can be modified.

IMG_7071.jpeg

I spent extra time getting all of the cords organized. Hopefully this prevents our dog Ash from unplugging everything when he crawls under the desk. The 20' long yellow network cord is an eye sore, that will need to be changed.

IMG_7087.jpeg

The office is finally finished just in time for the BOSS to go back to work today. It's been a journey, but the payoff was worth it.

IMG_7086.jpeg

Cleaning the garage and putting all of the tools away is one the most satisfying parts of finishing a project. Clearing the garage floor clears my mind if that makes sense. It would be nice not having to setup/teardown the table saw, router table and miter saw every project. That's just the reality if I want to be able to park the truck inside. I envision a future shop with a dedicated wood shop separate from the metal and auto shop. That can't happen at this property, but it remains the long-term goal.

IMG_7091.jpeg

It's time to go paint another bathroom. Thanks for following along!
 
Last edited:
OP
Q

quadrcr87

Well-known member
Joined
Jul 5, 2013
Messages
1,036
Location
Travelers Rest, SC
This is going to be a bit of a random post of things from the past week.

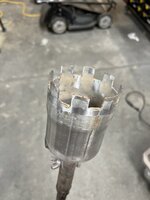
First up is a homemade tool. I have been having an issue with my Bermuda grass growing over my sprinkler heads. This makes them near impossible to find when they sprinklers are not running, and the grass has started to affect their operation. Of course, I could have bought a sod cutter but where is the fun in that.

I started with an exhaust adapter and cut some teeth in the band saw. I cleaned up he cuts with a die grinder and small drum sander. They are not sharpened but I did try to break the blunt edges a little.

IMG_7076.jpeg

The rest I was able to build with scraps I had on hand. I made the head removable so I can make another size cutter in the future. The welds actually turned out decent where I resized the pipe to fit the handle.

IMG_7077.jpeg

I finished it off with a quick coat of black Rustoleum. This was my first time using a spray can handle and I was pretty impressed. I always thought they were a gimmick, but they are actually awesome.

IMG_7079.jpeg

Long term update on the door insulation kit; not good. It has made a difference in the temps but the tape is failing all over the place. I have rolled it multiple times and it only sticks for a couple of days. I have started applying new tape and securing it with the door hinge hardware. Next time I will put in under the hardware and install additional self-tappers from the start.
IMG_7085.jpeg

I finished the paint in the master bath Sunday morning. This was after doing prep work in the evenings all week. The BOSS said she will give me a break from painting until after Christmas. Thats a relief because all work, and no play makes me a dull boy. I don't hate painting, but it is boring, and it eats up all of my free time.

IMG_7100.jpeg

IMG_7102.jpeg

Time to put away the paint kit for a while.

IMG_7107.jpeg

It's been almost 2 months, but I finally got back out to the MTB trails. Even better that it was a new trail system that just opened 15 minutes from my house. The trails were built really well, lots of flow, berms and rollers. Nothing very technical but it's a great place for a quick lap and very close to home.

IMG_7104.jpeg

I only rode about 1/3 of the new trail system. Looking forward to getting out there again to check it all out.

IMG_7106.jpeg

Thanks for following along!
 
Last edited:
OP
Q

quadrcr87

Well-known member
Joined
Jul 5, 2013
Messages
1,036
Location
Travelers Rest, SC
I still don’t know what I am doing with 3 pedestal grinders in a small garage but at least one of them is now portable.

I picked up a set of casters from my favorite supplier, Service Caster Corporation.

IMG_7112.jpeg

I love Grandpa’s old block grinder, but the base was too short for me. Killing 2 birds with 1 stone, the casters will raise the height 4" and make it easier to move around.

IMG_7113.jpeg

You can catch Tetanus and a spider bite at the same time under this old pedestal.


IMG_7114.jpeg

I like the new height but it’s not quite as stable as before. It would have been better to have fixed wheels in the back but they didn’t offer them in the stem mount style. If it becomes a problem I might have to tack weld them solid.

IMG_7115.jpeg

I’m pretty excited for my next project. I just ordered a Hellwig sway bar and stiffer links for the rear of our Jeep Grand Cherokee. I don’t expect it handle like a sports car, but some reduced body roll will be welcome in the twisty mountain roads.

Thanks for following along!
 
Last edited:
OP
Q

quadrcr87

Well-known member
Joined
Jul 5, 2013
Messages
1,036
Location
Travelers Rest, SC
I took advantage of the 4 day Thanksgiving holiday to get some work done on the Boss’ Jeep. Being only 3 years old with less than 30k miles, you wouldn’t expect it to need much. Sadly, that was not the case as it spent the start of its life in NY.

Overall the Jeep was in great shape when we bought it, but the rusty brake calipers were very visible through the 20” wheels.
I was expecting a simple repaint on the calipers as the brake pedal felt good and there were no issues stopping.

IMG_7207.jpeg

What I found when I pulled the wheels off was heavily rusted brake rotors. The inside of at all 4 corners had so much rust and pitting that only about 25% of the pad was making good contact. Fortunately, all the calipers and slides moved freely but pins were pretty dry. I thought I escaped the rust when we moved to SC, but I am an idiot and bought a NY vehicle. :confused:

IMG_7236.jpeg

The rust had even made it to the clips securing the pads to the caliper bores. A couple broke off during removal.

IMG_7213.jpeg

Being her daily driver and what should essentially be a new car, I knew I couldn't ignore this. $400 and a trip to advance auto and I had new pads and rotors all the way around. With the project scope expanded, I proceeded to continue with my plans to replace the sway bar links in the front. I had been hearing a mild clunk over speed bumps and our driveway apron since we bought it. Thankfully it was only the links and not a control arm bushing or strut mount. This also gave me an opportunity to upgrade to stronger links that should provide a small handling improvement.

IMG_7210.jpeg

The grease zerks are a bonus as well.

IMG_7209.jpeg

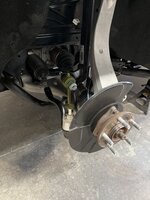
I cleaned everything and repainted the tie rod ends while I was in there. At some point in the Jeep WK2 production run 2011-2021 they upgraded from steel to cast aluminum lower control arms and knuckles. I was glad to see this as they won't rust.

IMG_7231.jpeg

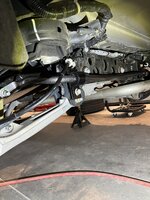
After removing all of the brakes in the rear, I moved onto the sway bar upgrade. The diameter of the Hellwig bar is near the same but it is solid vs. the hollow OE bar. The bushings are molded to the OE bars, so the Hellwig kit came with new bushings, clamps and parking brake cable brackets.
IMG_7223.jpeg

The install went smooth, and I didn't have to remove anything to gain access which was nice. I upgraded to stronger greaseable links as well to match the front.

IMG_7225.jpeg

I started cleaning and masking the calipers before closing the garage on day 1. I considered pulling them off the car, but cleaning and hanging them in place wasn't too bad. Just a tedious time-consuming process but the end result was worth the effort.

IMG_7230.jpeg

I also took some time to spread some holiday cheer in the neighborhood. Believe it or not, this was my wife's idea.

IMG_7240.jpeg

#defundtheHOA
 
Last edited:
To avoid these ads, REGISTER NOW!
OP
Q

quadrcr87

Well-known member
Joined
Jul 5, 2013
Messages
1,036
Location
Travelers Rest, SC
I was able to finish up the brake install on Sunday after applying 2 coats of VHT satin black caliper paint. After the car was back on the ground, I realized I didn’t take many pictures. I guess I was too focused on finishing it.

I took if for a test drive Monday night and the improvement in handling from the sway bar was noticeable. I could immediately feel less body roll and turn in felt more consistent. I rallied around some curves near my house, but I need to get up to the mountains to really see how it does. For those familiar with the area, a trip up to Ceasar's Head on the SC/NC border will be a good proving ground.

Once I had all 4 brake hangers cleaned and masked, I hung them up for paint. I used a combination of wire wheels and scotchbrite pads on a die grinder and it worked pretty well.

IMG_7229.jpeg

Ready to grease and install.
IMG_7237.jpeg

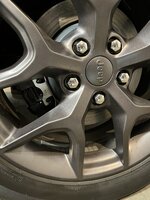
No photos before the wheels went on but you can see the finished product. It's a subtle change since we went with black, but it looks so much better than the rusted factory finish. Excuse all the brake dust, the Jeep needs a bath this weekend after the paint cures for a couple days.

IMG_7259.jpeg

IMG_7258.jpeg

IMG_7260.jpeg

IMG_7255.jpeg

At some point soon I will be replacing the fuel pump. It is developing the long crank issue which is common on these. It starts up fine when cold but after it sits warm for 2-4hrs it cranks for over 10 seconds before starting. Sometimes it won't even start until you hit the start button a second time. The issue is a bad check valve in the fuel pump causing it to drop fuel pressure. Because of the saddle tank design in these Grand Cherokees, I will have to drop the exhaust and drive shaft in order to drop the fuel tank. Sounds like fun, right? I will ignore that for now and enjoy this small victory of having the brake job complete.

Thanks for following along!
 
Last edited:
OP
Q

quadrcr87

Well-known member
Joined
Jul 5, 2013
Messages
1,036
Location
Travelers Rest, SC
I didn’t feel like like starting a new project this weekend so I spent some time cleaning up the jeep and organized the garage.

After a quick oil change and wash, I pulled the Jeep back into the Boss’ garage and cleaned up the interior and engine bay.

IMG_7308.jpeg

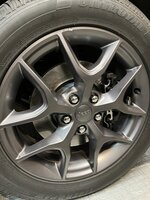
Rust and brake dust free. Does anyone have a good source for wheel touch up paint? These have a few curb scrapes from its early life in NY. I don’t expect them to be perfect but the shiny aluminum is pretty noticeable on this one.

IMG_7321.jpeg

It’s no Hemi but the 3.6L V6 is easy to work on with more room in the engine bay. Oil changes are way easier and I like the cartridge filter on top.

IMG_7294.jpeg

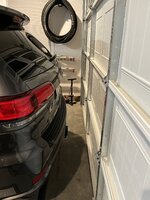
It’s a good thing my wife is a good driver and really takes care, her parking position is pretty tight. Just enough room for me to squeeze through.

IMG_7307.jpeg

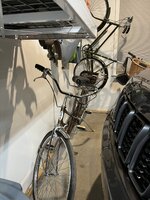
As far as I can tell, she hasn’t even bumped the tandem yet. I liked this picture with the two vintage bikes.

IMG_7306.jpeg

IMG_7311.jpeg

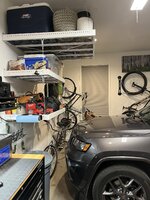
Lots of room on the driver side.
IMG_7310.jpeg

Things are a little tight on this side until I get our old refrigerator sold.

I still need to wash the Harley and the Quad. They are both covered in dust and grass clipping from the summer. Using this garage as the shed makes a mess.

IMG_7309.jpeg
 
Last edited:
OP
Q

quadrcr87

Well-known member
Joined
Jul 5, 2013
Messages
1,036
Location
Travelers Rest, SC
I hope everyone has had a great holiday with friends and family. The wife and I stayed home this year which gave us some time to relax. It also gave me some time to start learning how to use her new 3D printer. It’s hers I swear, haha.

Straight out of the box the Bambu A1 has worked flawlessly. Setup and assembly was very straight forward.


IMG_7497.jpeg
We had some fun on the first couple prints. You know, to make it obvious that it was her gift and not mine. ;)

She loved the print in place panda. The multi color really showed off how the AMS system works. Hit go and come back in about 8hrs to a finished model.


image000000.jpeg

He found his way into one of the house plants. She sent this picture to me while I was back at work the day after Christmas!

image000001.jpeg

Bambu sent a couple parts kits along with the printer. The LED light kit came with a corded puck light with an inline switch. Some clever designer made this model that places the switch inside the mushroom cap. Press on the top and “click” the light turns on.

IMG_7521.jpeg


IMG_7523.jpeg

Moving on to more utilitarian prints. I printed the AMS top mount and used the hardware supplied by Bambu. The fit and finish on these parts really impressed me. Everything lined right up and the tolerances were tight. Quite a long print and lots of filament but the cost was still under $8.
IMG_7498.jpeg
IMG_7506.jpeg


IMG_7509.jpeg

And then the mandatory poop bucket and chute. On the multi color prints there are lots of little droppings. The waste from the panda print spilled onto the floor.

IMG_7501.jpeg

As I’ve been playing with the printer I have been comfortable in my new chair. Eventually it will make it out to the garage but it has been pretty nice where it’s at for now.

IMG_7513.jpeg

I have a feeling I will be spending 1,000s of hours organizing drawers in 2025. Thanks for following along!
 

nicholam77

Well-known member
Joined
Dec 18, 2016
Messages
2,674
Location
Minneapolis, MN
34e69f9abc39c5702f0095640b05f6dd.jpg

I had to laugh at this because I have the exact same setup (dewalt 618 w/plunge base, bosch edge guide, and dust right hose).

I've been slowly perusing your thread over the last few weeks. Awesome projects all around! I'm biased towards the woodworking but everything looked good.

Straight out of the box the Bambu A1 has worked flawlessly. Setup and assembly was very straight forward.


IMG_7497.jpeg

Love it! It's such a good value.

Some clever designer made this model that places the switch inside the mushroom cap. Press on the top and “click” the light turns on.

IMG_7521.jpeg

Huh, that is pretty neat! I love that they send you the LED puck. I turned mine into a unicorn lamp for my daughter.

But I've been thinking about ordering another LED kit to make one of these mini-Panthella lamps:


I have a feeling I will be spending 1,000s of hours organizing drawers in 2025. Thanks for following along!

Do it! I'm sure you've happened across Gridfinity. Not 100% necessary but it can help with finding pre-existing bins for various items since there are quite a bit of models out there, and for custom stuff it's sort of nice to design to a standard.

It's one of my 2025 goals as well.

Subscribed!
 

zanyad

ALLIANCE MEMBER
Joined
Apr 26, 2018
Messages
2,817
Location
NE Ohio
I am a little disappointed that I lost the model number and Diamond info, it was gone before I wiped them off. Maybe it was printed on and not etched?
I think that depends on the etch. If it's an electrochemical etch, the Evaporust may have taken it off with the rust. Same with a shallow laser etch.
 
OP
Q

quadrcr87

Well-known member
Joined
Jul 5, 2013
Messages
1,036
Location
Travelers Rest, SC
Do it! I'm sure you've happened across Gridfinity.
Yes, I already started a few prints on gridfinity. It’s one of the things that pushed me to get a printer. I am noticing it does take a while. I like how modular it is so I can progress a little at a time.
IMG_7529.jpeg
IMG_7532.jpeg


IMG_7539.jpeg

Just getting started on this drawer for the printer tools and parts.
 
OP
Q

quadrcr87

Well-known member
Joined
Jul 5, 2013
Messages
1,036
Location
Travelers Rest, SC
Happy New Year GJ! I am slowly making progress on the first gridfinity drawer. I am maintaining a delicate balance between prints I want and prints my wife wants. After all, it is her printer. Haha

IMG_7621.jpeg

I printed several bins with this hex pattern. It is nice that it saves some filament but I quickly realized they are pretty delicate when printed with PLA. I also discovered 0.5 width bins which work great for pliers and scissors. It’s all about taking up less space in the drawer. I have learned a lot already and I hope to apply that knowledge to some of my toolbox drawers.

IMG_7622.jpeg

After Christmas, I flew to Cancun to spend a few days with my family celebrating the new year. It was a mega resort with thousands of people. More chaos than relaxation but there were plenty of bars. Not really my ideal destination but I enjoyed the time with my family.

LMS123124JB1-75.jpeg

We finished off the holiday week with a homemade pizza at home. I must say I like my pizza better than the all inclusive pizza at the resort. They had a nice stone pizza oven but they had the wrong ingredients. The secret is in Gregor’s (Sakurama) sauce. If you ever consider making your own pizza, find it in his post!

IMG_7612.jpeg

Thanks for following along!
 
OP
Q

quadrcr87

Well-known member
Joined
Jul 5, 2013
Messages
1,036
Location
Travelers Rest, SC
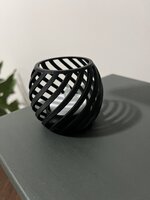
Last night’s print killed 2 birds with 1 stone. My wife got a really nice tea light holder and I was able to test the capabilities and settings of the machine.

This was printed with no supports which I felt was a risk on a bed slinger machine. That just means that the print bed itself moves during the print. This can be problematic as it relies on good bed adhesion and stability in the model as it prints. Too fast and not allowing enough time to cool it will turn into a blob. I was very happy with the finished quality. There was a very small amount of stringing that pulled right off, think spider webs. The layers were consistent.

IMG_7627.jpeg

The effect at night is pretty cool too. I left it on her desk for a little surprise when she started her work day. The printer is in her office so I am trying not to print during business hours :)


IMG_7628.jpeg

I have 5 more of the led tealights so plenty more small prints to experiment.

Thanks for following along!
 
OP
Q

quadrcr87

Well-known member
Joined
Jul 5, 2013
Messages
1,036
Location
Travelers Rest, SC
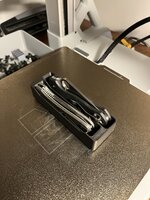
Wow your drawer is quite similar. I wasn’t that impressed with the Bambu tool kit tray. The pieces fit great but they are hard to retrieve, like it was designed for a child’s fingers.

I just bought the exact same Neiko calipers to keep with the printer. Where did you find the model for the tray?
 
OP
Q

quadrcr87

Well-known member
Joined
Jul 5, 2013
Messages
1,036
Location
Travelers Rest, SC
It’s been pretty cold in South Carolina the past couple of weeks, and I have no motivation to work in a cold garage. It has already snowed twice, which is rare!

IMG_7716.jpeg

I am finding the real beauty of the 3D printer is the satisfaction of making things while enjoying the comfort of my couch!

I have expanded my search for Gridfinity models and found several great prints on Printables and Thangs. I am also starting to learn how to use the Bambu slicer to change layouts and make small adjustments. It’s nice being able to print from the phone app but the computer can do a lot more.

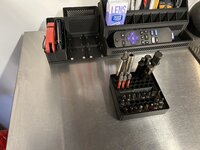
Combining several models I found online, I built an organizer for my workbench. The goal was a place to catch common use, small items and make them quick to retrieve.

I really like these knife trays. I found a collection with several size variations and I may store all my pocket knives this way in the future. I probably have close to 30 of them.


IMG_7728.jpeg

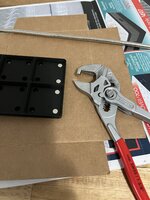
Being in the garage, I decided to use the magnet baseplates and trays. There are two benefits here, not only do the trays and bins hold secure to the baseplates, the baseplates also stick to my metal benchtop!

I found a pretty easy install method pressing the magnets in with my plier wrench. For the ones that aren’t press fit I used super glue. Keeping the polarity right takes time with these tiny 6mm magnets.


IMG_7744.jpeg

The organizer fits just below my magnet rail giving me a couple of storage options for rapid retrieval. I like that it doesn’t use a lot of counter space as my bench is pretty shallow.

IMG_7745.jpeg

I am sure the contents will change over time but that’s the beauty of Gridfinity. I can keep expanding and changing endlessly.
IMG_7747.jpeg

The removable bit holder is my favorite part. When I lift it off the baseplate, it sticks right to the bench. The magnets would also work great in a toolbox drawer.


IMG_7749.jpeg

I am off to go print some soap dishes for the Boss. Thanks for following along!
 
OP
Q

quadrcr87

Well-known member
Joined
Jul 5, 2013
Messages
1,036
Location
Travelers Rest, SC
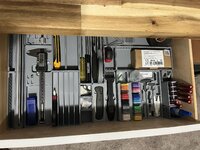
I finished up my first Gridfinity drawer. I still have a few things to buy including a mini plier set and I’m sure more tools will be added over time.


IMG_7754.jpeg
IMG_7755.jpeg

After finishing a few of my black and grey prints, I swapped all the filaments over to my wife’s color pallet.


IMG_7751.jpeg

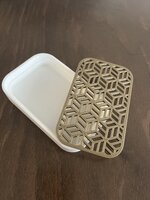
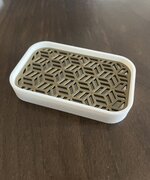
We tried out the bronze PLA for the first time with two soap dishes. I liked the design with the removable tray to clean out the dish.

IMG_7762.jpeg

IMG_7759.jpeg

It fits the soap bars my wife makes perfectly.

IMG_7760.jpeg

Heading to the mountains to hike in Pisgah, temps are starting to warm up.

Thanks for following along!
 
Last edited:
OP
Q

quadrcr87

Well-known member
Joined
Jul 5, 2013
Messages
1,036
Location
Travelers Rest, SC
The temps were in the low 50s on our hike today, but there was still a lot of ice on the mountain.

The view from the base of John Rock in Pisgah.

IMG_7782.jpeg

We saw a lot of frozen water runoff on the way up.

IMG_7779.jpeg

IMG_7774.jpeg

You definitely wouldn’t want to fall in crossing the rivers today.

IMG_7776.jpeg

Normally we would walk to the edge to get a full view, but there was no way we were risking it with the sheet of ice leading to a rock cliff!

IMG_7771.jpeg

This is a great place to stop at the top, rest and eat a snack in the summer.


IMG_7770.jpeg

We both slid a few times but thankfully we stayed on our feet! Some sections were solid ice which we don’t see here often.

IMG_7764.jpeg

IMG_7784.png

Hoping I can back on the MTB soon, it’s been close to a month.
 
OP
Q

quadrcr87

Well-known member
Joined
Jul 5, 2013
Messages
1,036
Location
Travelers Rest, SC
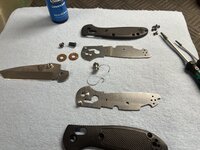
I spent some quality garage time this weekend cleaning up a couple of knives and enjoying a cold snack or two. These are my daily carry knives, and they were getting pretty packed full of dirt and pocket lint. The blades are maintained regularly buts it's been a long time since I have broke them down for a cleaning. You can oil but a deep cleaning is the only way to get rid of that gritty action.

First up is my Benchmade Mini Griptilian. This was my first high end knife purchased at least 15 years ago. It now lives in my hiking/ MTB pack and sees plenty of red clay. The thick tanto blade works well in the woods and for emergency bike repairs.

IMG_7811.jpeg

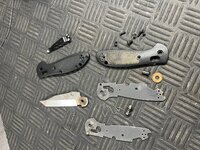
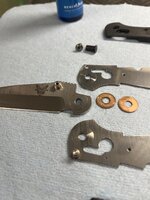
Parts cleaned and ready to assemble. I used simple green and a toothbrush on the scales and some contact cleaner on the metal parts.

IMG_7815.jpeg

A little wear on the bearings and blade but not bad for its age and use. The hardware is getting pretty beat though and I will probably replace it on next year's cleaning. It is usually available in a full kit.

IMG_7818.jpeg

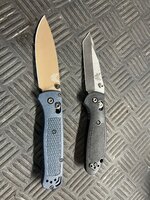
My current favorite carry knife is this Benchmade Bugout. It’s just the right size and weight to disappear in my pocket. I carry daily to work as well. It has cut many boxes.

IMG_7819.jpeg

It wasn’t as dirty as the Griptilian but still had a lot of pocket lint, dirt and grass from mowing the lawn. I find that the solid brass bushings work best for a daily carry knife. I have a few Civivi and WE knives that I like but the ball bearings tend to require a lot more maintenance. They are great when clean but that smooth action doesn't last long.

IMG_7823.jpeg

After cleaning and applying some Blue Lube, the action feels nice and smooth on both of them. There is some staining on the Griptilian's blade that will never come off. I made the mistake years ago of etching my fingerprints onto the blade while filling a battery with acid. It adds some character and makes it uniquely mine.


IMG_7830.jpeg

A lot has changed in Benchmade’s design in the 13-year gap between releasing these models. I much prefer the Bugout's frame design. It was easier to disassemble and feels solid despite its light weight. I initially bought the carbon fiber Bugout for carry but it scales don't have enough grip, it's expensive and I am nervous I will lose it. That one lives in the house now.

IMG_7831.jpeg

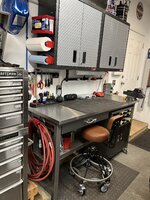
I cleared off the bench to get ready for the next project. I am not looking forward to it, but it is time to change the fuel pump on the Jeep. We went to dinner with some friends on Saturday night and the Jeep cranked for at least 30 seconds before finally starting, I was a little embarrassed. The Rockauto order arrived on Saturday, so I guess I know what I’m doing next weekend. I told the Boss to get the fuel below 1/8 tank to make dropping the tank a little less painful. At only 30,000 miles I am hopeful the hardware will come off without a struggle.


IMG_7833.jpeg

Thanks for following along!
 
Last edited:
OP
Q

quadrcr87

Well-known member
Joined
Jul 5, 2013
Messages
1,036
Location
Travelers Rest, SC
Success, the Jeep’s fuel pump is replaced, and it went pretty smoothly! I started around 10am and had it out on a test drive by 5pm. Subtract a lunch break and a dog walk, I estimate it was a 5hr job.

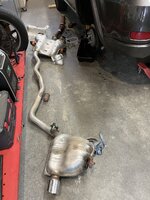
Pulling the exhaust was a challenge due its size and awkward shape. I hung one end with a strap and supported it with my feet as I worked on freeing up the other end while laying on my back. My neck, shoulders and the back of my head were all sore the next day.

IMG_7910.jpeg

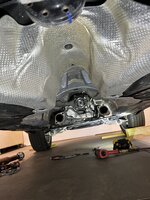
Then it was onto removing the prop shaft after the shielding and skid plate were out of the way. It was again an awkwardly long piece that I had to hang from a strap while I unbolted the ends and carrier bearing.

IMG_7911.jpeg

The design uses 6 large Allen bolts on both ends and my understanding is that the alignment is important for balancing. I didn't want to risk a vibration, so I marked both ends with paint pen and made sure to align them on reassembly. A hammer and drift were also needed to free them up after the bolts were removed.

IMG_7916.jpeg

IMG_7909.jpeg

I now had clear access to the fuel tank. Disconnecting the fuel lines, electrical and filler hose was pretty straight forward. I was pleased that no fuel poured out of the filler neck connection. The dash was displaying LOW FUEL 30 mi. to empty when I pulled it into the garage.

IMG_7908.jpeg

After some balancing on the floor jack, I managed to get the tank dropped and pulled out. Notice there are 2 fuel pumps. The driver side is primary, and the passenger size is a transfer pump that moves fuel from right to left over the hump. I was focused on the primary pump that was no longer holding line pressure.


IMG_7912.jpeg

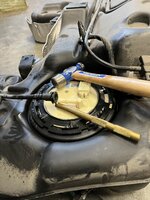
I cleared off the debris and dirt with compressed air and cleaner before removing the hold down ring. I read somewhere that you should use a brass punch to avoid sparks working around gasoline. That makes sense and I happened to have one on hand. I am almost positive that I was using a steel punch while removing these rings growing up.

IMG_7914.jpeg

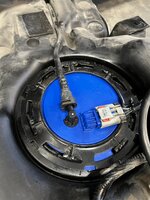
Old pump out, new pump in. In my excitement and hands covered in gas I failed to take any photos of the process. I did verify that the new replacement matched the old and hooked up the internal fuel line to the transfer pump.

IMG_7915.jpeg

At this point, reassembly was the reverse of everything I had done so far. I was able to enlist the help of the BOSS to run the floor jack as we raised the fuel tank back in place. She also held the exhaust outlet in place while I bolted the front couplings in place. I was worried about damaging the painted rear bumper. After remembering to reinstall the fuel pump fuse, the engine started right up.

So far, the Jeep has started consistently over the past 2 days. I have tried to replicate the same conditions it was failing before (hot engine, parked 2-4 hrs.) and have had zero issues.

A small glimpse at the mess I made during the project. I enjoyed putting it all away and cleaning up Saturday night.

IMG_7917.jpeg

On Sunday morning we took the Jeep up to Flat Rock, NC for a hike on Glassy Mountain and grabbed lunch in town. Yesterday's high was 79*F so I even got the Harley out for a ride.

IMG_7921.jpeg

Thanks for following along!
 
Last edited:
OP
Q

quadrcr87

Well-known member
Joined
Jul 5, 2013
Messages
1,036
Location
Travelers Rest, SC
With nice weather right around the corner, I decided it was a good time to put the Harley on the lift and do some maintenance. It’s always a good idea to do a bolt and nut check on these things with all the vibration. Yes, I have had parts fall off on the freeway... nothing critical.

I have wanted to replace the clutch last year and decided now was a good time. It may just be in my head, but I felt like it was slipping under hard acceleration (RPM climbing not gaining enough MPH). It’s the original clutch with over 40k miles and it’s survived the 10 years with a built motor.

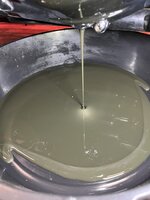
As soon as I drained the primary, I knew I would be doing more than a clutch. The fluid wasn’t terrible but there was more metal than I expected. It smelled a little burnt as well.

IMG_7969.jpeg

I found metal shavings on the magnetic drain plug as well as pieces of gear in the bottom of the cover.

IMG_8003.jpeg

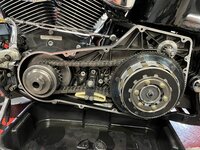
Once I pulled the primary cover I found the culprit pretty quick.

IMG_7994.jpeg

I was missing part of 8 teeth on the starter ring gear.

IMG_8004.jpeg

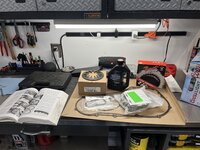
At the end of day one I hit a stopping point. I had to order the replacement gear set as well as the tools to remove the compensator and clutch drum. I guess I never had a need for 1-1/2 and a 1-13/16 sockets.

I spent the rest of Saturday enjoying some Supercross and researching parts.

IMG_8006.jpeg

The good news is the rest of the parts I ordered were still needed for the job. I decided on a Barnett extra plate clutch kit. A friend of mine installed one in his Road Glide and he wheelies and burns out often. If it survives his abuse, it will like a long and happy life in my Fatboy.

IMG_8007.jpeg

A few days later the tools arrived, and I was able to pull everything out of the primary case. The nuts were tight but came off without a fight.

The next step is to drill out the six rivets holding the gear to the clutch basket. The replacement gear bolts on with socket head cap screws. It sure beats replacing the whole assembly. I am planning to change from a 102-tooth to an 84-tooth ring gear to increase starting torque. The lower tooth count has the benefit of higher strength with larger teeth. You can go as low as a 66-tooth gear but that requires a lot of battery and starter power to work reliably. From the research I have found, the 84/10 ratio is a good middle ground between the 102/10 and 66/9 ratios.

IMG_8078.jpeg


I am also planning to check the starter, battery and cables to make sure there isn’t something else that caused this failure. A weak starting system has a tendency to allow the engine to kick back and hurt the starter gear. I need to be better about running a battery tender when the bike sits to minimize the risk.

I pulled the starter solenoid cover and it looks pretty good, the starter was replaced several years ago. I pushed in the solenoid with the battery disconnected and the pinion gear engages and disengages smoothly. The starter clutch spins free as well. The battery cable connection is buried under the oil tank so that will take some work to replace.

IMG_8056.jpeg

To be continued...

Thanks for following along!
 
Last edited:
To avoid these ads, REGISTER NOW!
Top Bottom