To avoid these ads, REGISTER NOW!

rattle_snake's random shop projects v0.1

WoodsTruck

Well-known member
Joined
Jan 12, 2013
Messages
1,023
I have a bad habit of digging through the scrap bin at work. I like to have various sizes of round stock to use in the press. Seems like I can usually make something work.
 
To avoid these ads, REGISTER NOW!

ntsqd

Well-known member
Joined
Jan 22, 2005
Messages
967
Location
Lower left coast
Sounds like a great habit and resource to me.

I see that the plasma table has Z-axis lead screw. I can't imagine contour cutting with a plasma so I'm guessing that it is mostly for setting the cutter height. AKA a 2.5 axis machine. Think you can figure out how to ramp in and out? Is it a G-code processor? Manual code editing?

School had a Bridgeport Bandit, a 2.5 axis machine. One of the Profs wrote a BASIC (!!!) program to output 3 axis steps code for a student assignment. Overall it cut a "bolt" from a block of wood and the 3 axis linear steps was how it cut the threads. 360 steps per single revolution. The bolt threads couldn't be very long or the resulting program wouldn't fit on a 5in floppy......
Maybe an approach like that (please god, not in BASIC) would get you there?
 
OP
R

rattle_snake

Well-known member
Joined
Jun 25, 2015
Messages
5,197
Location
Chandler, AZ
The Z axis is for torch height control. The material is never flat, so it adjusts Z such that arc voltage is constant. The controller SW used G code and it can be manually edited. Someone has figure this out.

The machine also has initial height sense, so it drops torch to find Z offset. This doesn't work with a moving rotary cutter, but if I gate the power to the router similar to the plasma it should work.
 
OP
R

rattle_snake

Well-known member
Joined
Jun 25, 2015
Messages
5,197
Location
Chandler, AZ
Dove into g code a bit, just enough to hack a solution. Add line to manually lower the cutter on each feature. Value can negative so can zero axis and let it go.

I could write a script in python to automatically add the code to any .nc file. There are online g code editors and decoders that can be used as well.
 

PhantomEB

Well-known member
Joined
Feb 6, 2006
Messages
6,765
Location
Medicine Hat, AB, Canuckistan
I have a bad habit of digging through the scrap bin at work. I like to have various sizes of round stock to use in the press. Seems like I can usually make something work.
I have a small surplus of anything the machinist throws out. He’s taught me to Dig out old rusted out pipe studs for when I get a small mill/lathe and make my own spacer plates, rods, whatever.
 

WoodsTruck

Well-known member
Joined
Jan 12, 2013
Messages
1,023
A mill/lathe would be a nice "add" to the shop. Maybe when I retire.
Drill, grinder, bandsaw and welder get me by for now.
I salvaged all the material for the black ramps, pedestal and bunk on my wheelbarrow out of the scrap bin.
Oh, and the white storage pouch was recycled from a big banner from when we delivered the giant Christmas tree to Portland. They wanted to reuse it but they had printed the year on it. I was asked to make it go away.
 

Attachments

  • IMG_4216.JPG
    IMG_4216.JPG
    691.9 KB · Views: 34

PhantomEB

Well-known member
Joined
Feb 6, 2006
Messages
6,765
Location
Medicine Hat, AB, Canuckistan
Now i come to this thread after adding in a Double din Alpine deck onto Amazon since I tend to want similar units as far as truck stereos (Bronco already has Alpine deck and planning JBLs for marine speakers since I gonna run a JBL pill on the cage). Now Justin’s work has me thinking a Sub box on the transmission hump in the back seat of my Dodge. Then a removable carpeted platform for the dogs so they can see out on road trips.

10” JBL sub more than enough? What Amp as long I can put it under the passenger seat….
 
OP
R

rattle_snake

Well-known member
Joined
Jun 25, 2015
Messages
5,197
Location
Chandler, AZ
Driver door was CNC for both metal and foam. Transferred the clip locations and made pockets in the back side of the lower foam layer.
fpckZgOkkxVIxb2eRPNw=w1231-h923-s-no-gm?authuser=0.jpg

The stack up.
pUrdKSxybj91WkbbjmvA=w1231-h923-s-no-gm?authuser=0.jpg

The material has a fair amount of stretch. Have to make sure there is enough adhesive to stay in concave areas.
OIxjrO51di2aD1F5BY8xQ=w692-h923-s-no-gm?authuser=0.jpg

Trim at the end makes the back side look decent.
A7kcU6b11TN1g41Idd1TQ=w692-h923-s-no-gm?authuser=0.jpg

Used a small amount of adhesive foam tape to secure the areas the armrest won't.
wOfxuWKv4CDWMZk8d1nw=w1231-h923-s-no-gm?authuser=0.jpg

The speaker location in the left door is higher up than the right, and interfered with the new thicker panel. Trimmed the top of the speaker, and moved the speaker down a bit in the hole. Between the two I was able to get things to fit.
DaMtAd6B9yEFohRxXVZrw=w692-h923-s-no-gm?authuser=0.jpg
 
To avoid these ads, REGISTER NOW!
OP
R

rattle_snake

Well-known member
Joined
Jun 25, 2015
Messages
5,197
Location
Chandler, AZ
Door panels turned out great!
Thanks Marc. Not sure why I stalled out for so long on doing them. The CNC capabilities really improve quality.
The interior is really looking nice !!
Thanks Dave. The seat was a bit out of place, now with the doors matching it's coming together.
Phenomenal job Justin. Just excellent workmanship. :bowdown: :bowdown: :bowdown:
Thanks Mike. I'm still working on slowing down, enjoying, and making a better product.
When can you start on the 4 door panels for my Wagon(eer)?
:)
Do you have a complete set of cad files to send me? haha
I am willing to jump right to the interior on my unfinished '32 if you're interested and available...😉
What type of overall design style are you going for? Key elements?
 
OP
R

rattle_snake

Well-known member
Joined
Jun 25, 2015
Messages
5,197
Location
Chandler, AZ
Pulled the dash pad out of the 72 F250. Not a fun job have to remove everything in dash to have any hope. Arms all cut up. But it's out.
Spent some time removing the silicon from the cover and the duct tape over the cracks. The pad is hammered dog ****. There is no metal base. Even the cheap repops are $500, so going to stabilize and repair this one, wrap in vinyl. The plastic cover I have doesn't fully cover the front edge and isn't really useful. Due to the amount of filler needed, thinking body filler instead of epoxy.
B9qflInUSj-sTnjWzUqw=w1231-h923-s-no-gm?authuser=0.jpg
 

WoodsTruck

Well-known member
Joined
Jan 12, 2013
Messages
1,023
Looking forward to see how you get a skin to lay down on the dash well. Been staring at a cracked dash in my Bronco for 36 years now and haven't done anything serious about it yet. I did buy an aftermarket pad from a vendor but I have to lift the top to tip the windshield out of the way to get to the screws to change it. Always wondered what could be done with the existing pad.
Can you integrate a shallow tray in the center where you have the rectangular cutout, similar to the newer F-series pickups?
 
OP
R

rattle_snake

Well-known member
Joined
Jun 25, 2015
Messages
5,197
Location
Chandler, AZ
Thanks for the idea of a tray. The rectangular 'hole' is where the speaker would have been, perforated foam but just gone now. I plan to just fill in the rectangle hole. Contemplating how to trim around the defrost vents and address the ends. On the 76 F100 dash I wish I would have sewn the ends. My plan this time is to make a painters tape template, transfer that to vinyl, test fit and go from there.
 

WoodsTruck

Well-known member
Joined
Jan 12, 2013
Messages
1,023
Can you extract the defrost ducts and make a recess for them to drop into once the cover is installed?
I did something similar with a lower panel cover in my work truck. Popped the headlight switch out and covered the panel, then popped the switch back in. Darn XL work trucks don't have a storage cubby in the arm rest like my Lariat's do so I had to improve a place to put small items.
 

Attachments

  • image1.JPG
    image1.JPG
    955.4 KB · Views: 43
  • image2.JPG
    image2.JPG
    891.9 KB · Views: 41

ntsqd

Well-known member
Joined
Jan 22, 2005
Messages
967
Location
Lower left coast
I'm also interested in how you approach the cracked dash. An old project of mine had one not that bad, but far from nice and I really didn't know what to do about it.
An idea that I'd had was to smooth it out using body filler etc, and pull a mold off of it. then lay-up a fiberglass dash "pad". Only I'm not that skilled with fiberglass and the odds of my making huge mess of it were high.

And LXCam, she's lovely, but that car......... es muy feo!
 
OP
R

rattle_snake

Well-known member
Joined
Jun 25, 2015
Messages
5,197
Location
Chandler, AZ
I had to stare at it for awhile trying to formulate a plan of attack. There were a few cracks that went all the way through. One that was too much for just filler so I used some foam to fill most of the void.
Rehab step one was to get down to a clean layer for filler to adhere to. I used a roloc scotchbite to sand the edges and remove any old adhesives. Also sanded down the ridges of foam and cracked top layer. They will need more but first need to be stabilized else it just keeps cracking.
pAD7yN24HWME-XMVsaQw=w1231-h923-s-no-gm?authuser=0.jpg

1st round of filler applied. I used a two layer sandwich of 3/16 foam board to fill in the speaker hole.
VqxE6HEzldfFV7Wf6kJA=w1231-h923-s-no-gm?authuser=0.jpg

Used some filler on back side to reinforce the thin foam areas at the cracks.
M8VmiayC87GObmCyvH4A=w1231-h923-s-no-gm?authuser=0.jpg

Started to sand down the first layer. Will have to sand down into the foam to get the ridges out. Now that it's semi-stabilized the edges can be feathered without just breaking off.
5OHCNRP0wW-Dq1jSltdw=w1231-h923-s-no-gm?authuser=0.jpg
 

larry4406

Well-known member
Joined
Jan 27, 2006
Messages
19,247
Location
Northern Virginia
You peaked my curiosity at the padded dash repair!

I am a Mopar E-body guy and they are plagued with cracked dashes.

Some links to repairs that may be useful that I have saved over the years

https://www.forebodiesonly.com/forum/attachments/the-book-of-plastic-repair-pdf.128867/ see page 8 for instructions


WoodsTruck

Well-known member
Joined
Jan 12, 2013
Messages
1,023
I had a custom seat made for my dual sport a while back. The guy built the seat up with multiple layers of various densities of foam to get the desired shape and firmness. On top of all that he applied a thin stretchable foam to cover all the seams and transistions from one from layer to the other. This also gives it that initial squishy feeling. I bought some for whatever use I'd find for it. I wonder if a skim layer of that stretchy type neoprene foam would help make a nice smooth and lightly padded feel under the vinyl cover.
I can do some digging to see where I found it. Found it.
 
OP
R

rattle_snake

Well-known member
Joined
Jun 25, 2015
Messages
5,197
Location
Chandler, AZ
I looked around at the foam at the upholstery shop. There were a few types and I didn't know what I wanted so I didn't buy any. Now I wish I had.
The foam adds some more complexity. Not sure how the foam would react to the glue, it melts the foam in the rigid boards. So plan to just do the best I can with what I have. The pad is really past saving if perfect is the goal. Would be time and money ahead to buy a new pad and cover it. but perfect is not the goal of this truck. I'll do a 90% job, as the last 10% is 90% of the effort. The end product will be much better than the wavy plastic cover, and the matching fabric should bring it all together.
 

tarbellb

Well-known member
Joined
Apr 17, 2011
Messages
5,757
Location
Oregon
Looking at a low cost laser for use on CNC table. Use would be engraving and perhaps cutting foam or fabric.
Can get a 5W air assist type for under $100. Anyone done this?
CO2 or Fiber?

No experience retro fitting, but 5w CO2 seems on the very low end of usable power? 30w gets 1/8" ply cutting ability, 100w gets you 1/4" ply cutting
 

slodat

ALLIANCE MEMBER
Joined
Feb 6, 2010
Messages
3,682
Location
Central-ish, WA
I looked around at the foam at the upholstery shop. There were a few types and I didn't know what I wanted so I didn't buy any. Now I wish I had.
The foam adds some more complexity. Not sure how the foam would react to the glue, it melts the foam in the rigid boards. So plan to just do the best I can with what I have. The pad is really past saving if perfect is the goal. Would be time and money ahead to buy a new pad and cover it. but perfect is not the goal of this truck. I'll do a 90% job, as the last 10% is 90% of the effort. The end product will be much better than the wavy plastic cover, and the matching fabric should bring it all together.
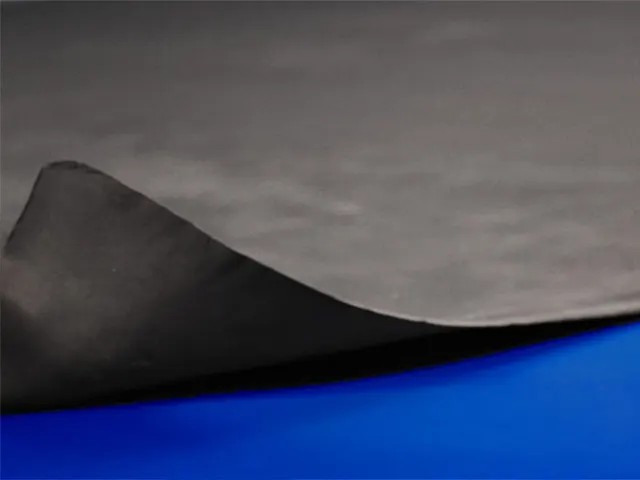
Generally speaking, foam from an upholstery supplier will work well with adhesives. For a dash pad you want either XLPE (cross linked polyethylene) or closed cell landau top foam. The later is definitely at any upholstery distributor. On the landau you want to scuff both sides with 80 grit. It has a skin on it and the adhesive won't bond to the skin. A few passes with 80 grit sanding block does the trick. Either foam can be shaped with round over router bits, sanding, etc. The denser XLPE has very little give, like an OEM dash.

Anytime the material (vinyl/leather) won't lay flat on its own you will need a seam. Materials will stretch some of course. This is a good way to sort out when and where you need seams. You can use masking tape as a pattern should you decide to add seams. Always happy to help. I don't have as much time on the forum these days, but I'm happy to help nonetheless.
 

plain2car

Well-known member
Joined
Nov 27, 2008
Messages
513
Location
Gilbert, Arizona
Justin, following along closely so YOU can do my dash as well.... LOL!!! hit me up next time you think about going to the upholstry shop, i will go as I need to get some material as well... :beer:
 
To avoid these ads, REGISTER NOW!
Top Bottom