Completed the master cylinder swap. I chose to use the MC that matches the brakes/axles that I swapped in, which is a 1994 F350 4x4. a Ford motorcraft BRMC38. Fairly confident this vehicle had rear ABS. Rear axle has tone ring, sensor, wring. pedal ratio is approximately 5:1.
So what is the mystery fitting on the rear port? Which circuit is front/rear? Took me awhile to figure it out. Unfortunately I obsessively have to figure out every aspect of every detail to convince myself I'm doing things the most best-est way. The curse of the engineer, aside from not being able to spell or socialize.
The fitting can be a 'proportioning valve', or just an adapter. It's vehicle dependent. In the case of ABS equipped vehicles, it is just an 18x1.5mm adapter. So it does nothing. I originally bought a new Cardone MC but it was missing this piece. Could have harvested a rusty one from JY, but didn't know at that time is was just an adapter. So I decided to just get a Ford unit that is specific to the 94 F350 and complete with all fittings, sensors and wire harnesses. Everything in the brake system is new and of high quality.
So which line goes where? In this case the fitting size and line connection locations were both opposite of the old MC. Given this is a disc/drum setup, the MC piston with more volume is the front. Since bore diameter is same, then one with longer stoke is the front discs. Approximate stokes are 1.75 rear and 2.25 front, so ~75% bias. So the front brakes use the front piston with big flare nut.

The fitting are also on the opposite side (towards engine) so new hard lines were needed. Front was now too short, rear to incorporate new hardware. Front is now 1/2-20 thread 3/16 inverted flare and rear is 7/16-20 threads. The fittings are clocked past 90* so tried a few line schemes in scrap wire before going to tube. I removed the cruise control pressure switch and installed a 3/16 inverted flare plug.

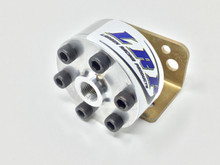
In the rear circuit I added a Willwood adjustable proportioning valve and a 10# residual valve. Supposedly the residual valve partially counteracts the drum shoe return springs and reduces the amount of travel and hence time for rear brakes to react. I farted around with placement of adjustable valve for hours trying to also incorporate windshield washer reservoir that no longer fits properly, eventually gave up and ended up making a simple mount bracket off MC.

I left distribution block and existing front brake delay device in place, to minimize changes at a time. Ran lines similar as before. They are not perfectly parallel everywhere.

I used old lines to make a short loopback line to bench bleed the MC. Hookup everything up. Amazingly no leaks. A freaking miracle! This is round 3 of these lines. Bleed and test drive.
Rear brakes lock up first so adjusted knob a few times until full decrease of pressure to rear (claimed 57%). Rear still locks up. This is major improvement to old MC without adjustable valve. Now I can apply much more pedal pressure before rear lockup and utilize the improved assist from the hydroboost. The old vacuum system would just barely lock up rear with maximum pedal effort. The hydroboost with old MC was very touchy. The new MC has a different pedal feel, softer and more movement for better braking modulation. Test drive was limited so need some more miles and higher speed stops to fully evaluate. Initial guess is 2-3x improvement in braking performance. Will make the truck MUCH safer to drive, even at 6000# with big 40" rubber.