To avoid these ads, REGISTER NOW!

rattle_snake's random shop projects v0.1

OP
R

rattle_snake

Well-known member
Joined
Jun 25, 2015
Messages
5,194
Location
Chandler, AZ
Justin, Glad to hear you may be seeing the light at the end of the tunnel on the migraines. (y)
Outdoor sink project looks interesting, will check back for updates.
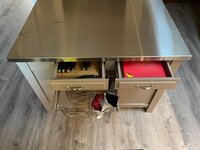
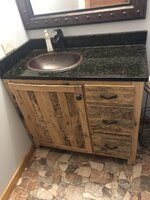
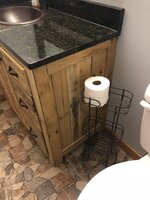
Thank 'dude, I hope so. Sink project is coming along.
A fellow migraine sufferer here, has your diet been looked at? I've learned to avoid vasal dilators like Anise, cilantro, and similar. I've never researched it, but I think that Hops might also be a vasal dilator. I do know that more than a simple sip of beer, of any type, sets off a migraine in me.
Not really. thanks for sharing I'll look into that. My headaches are present when I wake up, so I don't typically get one during the day. If I do it is from sensory overload, like driving or loud/busy environment.
Justin, just spent a bunch of time reading through your thread end to end. First off, congrats on the anniversary!! My bride and I will hit 38 this coming summer. Seems only yesterday . . . . . .
Thanks for sharing all your projects with us. I particularly impressed with all the changes you made to your Ford to get it to the shape it's in today. It just doesn't seem like you let anything get in the way of your vision!
Thanks. yes time flies. I tell her 17 short, wonderful years 😂
The old ford has been quite the project. I have learned a lot even if it may appear I know what I'm doing. The second time, haha.
As I look back over the time I built it, I had really struggled. Can't think clearly or make decisions, so progress was slow. But the work and achievements made at the time made me feel good, QST. Adapt and overcome.
 
To avoid these ads, REGISTER NOW!
OP
R

rattle_snake

Well-known member
Joined
Jun 25, 2015
Messages
5,194
Location
Chandler, AZ
Sink cabinet is underway. Design keeps changing, ECOs from OCD.
Decided to enclose the back, mostly for structural reasons but felt compelled to use more plywood. Used dados and glued, so after I found math error due to change, Can't fix. So depth is ply sheet thickness more now.
Got 2 of the legs machined with slots for plywood. Did toe relief already so choose not to cut down the plywood.
On recalculation of countertop sink cutout edging, more depth is good, perhaps needed.

EO9-GFi7aWJFk4KaBctG0EVnNr=w598-h797-no?authuser=0.jpg
 
OP
R

rattle_snake

Well-known member
Joined
Jun 25, 2015
Messages
5,194
Location
Chandler, AZ
Haha, yes adaptive parameter refactoring to streamline manufacturing process for minimization of schedule impact. Or something like that.

Machined (can this term be used for wood?) slots into the remaining legs. I like simple so ended up just using table saw and a chisel. No place to clamp fence for router.
The walnut pieces are twisted, warped, bent in all directions so have to ignore somewhat and pick a surface as a reference to move forward. My 10" table saw has max cut depth of 3.25" so was able to get away with just 2 ops for upper cut outs.
qRkQn3E_XFAw35OAIMGJnvshoh=w988-h740-no?authuser=0.jpg

Stretched out the upper plywood braces to new depth dimension and attached with triangle corner braces. I had a moment of weakness and used a brad nailer to secure while glue is drying. I don't see this piece going through a metal detector to check for illegal use of modern fasteners, but somewhere a purist woodworker is gasping.
Front upper piece is oak with a nice rough cut surface, but is twisted, tapered and curved like the others and makes it difficult to build anything square. But I accept the challenge.
The goal is to make a simple piece that appears to have been made crudely with basic tools. I refrained from building an inset facia or flush mounted doors. Even skipped a trim piece on front of bottom shelf. Test fit the all the pieces starting to look like something.
igK5i0mc3I0DJGMm_a5hwKb6fY=w788-h591-no?authuser=0.jpg
 
Last edited:

86turbodsl

Well-known member
Joined
Jul 1, 2005
Messages
6,556
Location
Michigan
Mrs rattle_snake and I took the old Ford on a horse ride for our 17th anniversary. Truck did good other than a wiring issue with trailer. Drove well with load. The big tires and 4.10 gearing didn't like the extra 5k of weight but moved things OK. Have to take it slow and gentle with animals in the trailer anyhow. We stopped for lunch and beverages, and had a nice cool ride home with A/C. Got lots of looks and thumbs up on the trip.
Goal was to still have useful truck capabilities even with 40s and flexy suspension. It does it all, although not as well as a modern truck, but I'm happy with result.
5eq6sfpIU8qd4XW9OBKB3SisB=w1050-h787-no?authuser=0.jpg
Wow! Mrs Rattlesnake is a looker! Congrats! I like the old bumpside pulling the trailer too.
 

Bigblue&Goldie

Well-known member
Joined
Mar 12, 2009
Messages
10,678
Location
AZ
That paint combo is just gorgeous on the bump side Fords!

......I'd take Justin's suspension and tire/wheel combo all day over the **** on that truck though.
 
OP
R

rattle_snake

Well-known member
Joined
Jun 25, 2015
Messages
5,194
Location
Chandler, AZ
That's an interesting use for that old walnut. Looks like it's going to turn out well.
'seasoned' wood is like a box of chocolates, you never know what your going to get
Wow! Mrs Rattlesnake is a looker! Congrats! I like the old bumpside pulling the trailer too.
Thanks. Part of my original plan was to build a truck that was 'normal' enough for her to drive, and tow horses with. :unsure:
 
OP
R

rattle_snake

Well-known member
Joined
Jun 25, 2015
Messages
5,194
Location
Chandler, AZ
yeah, that is a truck built specifically to look cool enough to sell for a high dollar and not much more.
I have to agree with that assessment. It's a show truck and isn't going to tow, (no hitch) haul or do truck stuff.
Curious to see what it sells for. 2 days left. I bet it took a lot of cash to build.

Assume it was a 2wd f100 from VIN and engine crossmember. Not a bad recipe for a resto mod, they repurposed things from the donor and used existing aftermarket parts. Not intended to leave the pavement, but build is high quality and looks nice.
 
Last edited:
OP
R

rattle_snake

Well-known member
Joined
Jun 25, 2015
Messages
5,194
Location
Chandler, AZ
Moving along with cabinet project. Working with bent/twisted material presents some challenges, so have to dry fit and modify joint areas as needed. Shim here, cut there.
4TKPg_zMKJ_IDVfLWX_YPSSck=w1063-h797-no?authuser=0.jpg

Getting legs clamped on. Given they are crooked as a politician, clamping them down with enough pressure to close gaps with ply substructure distorts it.
4mSIacPTVYioEaIkk-jgSZshH=w1063-h797-no?authuser=0.jpg

With legs on and main structure complete, I glued up some side panels. Used some re-sawn oak from old black painted fencing, left over from the Mrs' barndoor project. Could have glued into one side panel, but with everything so crooked I wanted to allow the pieces to float somewhat. Next step are door panels.
O2hkMS8bwM6nyhbxgUSQbAqx88=w598-h797-no?authuser=0.jpg
 

WoodsTruck

Well-known member
Joined
Jan 12, 2013
Messages
1,023
Very cool project.
Kind of like the kitchen island I built this fall. No blueprint just going off the napkin sketch in my head.
 

Attachments

  • 65498224147__8FE0A8DE-FA9E-46D8-94E8-915682BFF033.jpg
    65498224147__8FE0A8DE-FA9E-46D8-94E8-915682BFF033.jpg
    353.1 KB · Views: 56
  • IMG_8102.jpg
    IMG_8102.jpg
    337.6 KB · Views: 34

Ohmthis

Well-known member
Joined
Jan 20, 2013
Messages
3,009
Location
Outside of Louisville KY
Moving along with cabinet project. Working with bent/twisted material presents some challenges, so have to dry fit and modify joint areas as needed. Shim here, cut there.
4TKPg_zMKJ_IDVfLWX_YPSSck=w1063-h797-no?authuser=0.jpg

Getting legs clamped on. Given they are crooked as a politician, clamping them down with enough pressure to close gaps with ply substructure distorts it.
4mSIacPTVYioEaIkk-jgSZshH=w1063-h797-no?authuser=0.jpg

With legs on and main structure complete, I glued up some side panels. Used some re-sawn oak from old black painted fencing, left over from the Mrs' barndoor project. Could have glued into one side panel, but with everything so crooked I wanted to allow the pieces to float somewhat. Next step are door panels.
O2hkMS8bwM6nyhbxgUSQbAqx88=w598-h797-no?authuser=0.jpg
Justin, I like the contrasting colors. That will be unique. Did you have free reign on design? My Mrs. just gives me a picture and says make it look like this. I think she’s been happy so far, she keeps me around! I’m not sure how you plan to make the door, but a word of warning. I made a vanity out of rough sawn oak. The door was vertical planks with the outside boxed to trim it. The door panel curved over time. I had to go back and glue a piece of plywood to it to straighten it out. Look at the door in my picture.
 

Attachments

  • 3E14604D-0CED-4800-B8EE-EAD309ACB459.jpeg
    3E14604D-0CED-4800-B8EE-EAD309ACB459.jpeg
    364.4 KB · Views: 32
  • 2A75AD3B-A27D-4608-8754-E25A029F2192.jpeg
    2A75AD3B-A27D-4608-8754-E25A029F2192.jpeg
    310.5 KB · Views: 37
Last edited:

WoodsTruck

Well-known member
Joined
Jan 12, 2013
Messages
1,023
Very cool looking island. It looks like there is a ton of storage in there.
Thanks. Cookbooks on the first end, knives and cutting boards in the upper drawers, big sliding basket on one side for potatoes, 2 shallower sliding baskets on the opposite side for apples/citrus, then open area below for lunchboxes, then the second end has a pull out drawer for garbage and recycling bins plus a box of can liners. Virtually no wasted space.
 

Attachments

  • IMG_8104.jpg
    IMG_8104.jpg
    331.7 KB · Views: 46

ntsqd

Well-known member
Joined
Jan 22, 2005
Messages
967
Location
Lower left coast
Grandad ran into the same problem with an Oak door, only it was his 44" wide X 2" net front Entry door. It ended up with 4 hidden lengths of 1/2" B7 all-thread under rather extreme tension running horizontally thru it.
 
OP
R

rattle_snake

Well-known member
Joined
Jun 25, 2015
Messages
5,194
Location
Chandler, AZ
Very cool project.
Kind of like the kitchen island I built this fall. No blueprint just going off the napkin sketch in my head.
Very nicely executed. So, when you say no blue print, did you make any dimensioned drawings? Or just build as you go?
Justin, I like the contrasting colors. That will be unique. Did you have free reign on design? My Mrs. just gives me a picture and says make it look like this. I think she’s been happy so far, she keeps me around! I’m not sure how you plan to make the door, but a word of warning. I made a vanity out of rough sawn oak. The door was vertical planks with the outside boxed to trim it. The door panel curved over time. I had to go back and glue a piece of plywood to it to straighten it out. Look at the door in my picture.
Thanks. Yes Mrs not involved in this one. She saw it for first time yesterday and said it was going to be too nice to put outside. So I guess she approves. The doors are glued panels of 4/4 weathered pine. I had two 10' 1x10s, one has a fair amount of twist. I choose to leave them full width knowing that the panels would not be flat. Going to use overlay hinges that have some adjustment, sand high points as needed, and accept the results. The intent is old looking and non-perfect.
 
To avoid these ads, REGISTER NOW!

WoodsTruck

Well-known member
Joined
Jan 12, 2013
Messages
1,023
With the price of plywood (suitable for a cabinet) being as high as it was, plus all the hardwood boards I planned to cut up into small pieces, I did plot how to cut the sheets out. About the extent of my blueprint.
 

Attachments

  • IMG_8285.jpg
    IMG_8285.jpg
    225 KB · Views: 43

Bears Fan

Well-known member
Joined
Jan 26, 2012
Messages
3,438
Location
Indiana
o2hkms8bwm6nyhbxgusqbaqx88-w598-h797-no-authuser-0-jpg.1563546


That cabinet is awesome! Great job :cool:
 
OP
R

rattle_snake

Well-known member
Joined
Jun 25, 2015
Messages
5,194
Location
Chandler, AZ
With the price of plywood (suitable for a cabinet) being as high as it was, plus all the hardwood boards I planned to cut up into small pieces, I did plot how to cut the sheets out. About the extent of my blueprint.
That is some interesting paper with the sheet dimensions on it.

For some odd reason I can only use 5x5 engineering computation pad for everything, but make similar use of it for material $heet planning.
That cabinet is awesome! Great job :cool:
Thanks!
Got the doors glued and cut to length. Some light sanding revealed some cool saw marks on the face. I left the rough cut on the edges. Somehow I managed not to accidently cut them off while truing the other edge.
Wzet5scDhqdROKoc63o_x77Ay=w1063-h797-no?authuser=0.jpg

Door cut to length and placed for mock-up. Sink looks odd without counter top but you get the idea. Pretty happy so far with this project of using up some leftovers and remnants.
LkXP0cFfiC0gWtdxi3c8jSFur=w1063-h797-no?authuser=0.jpg
 
OP
R

rattle_snake

Well-known member
Joined
Jun 25, 2015
Messages
5,194
Location
Chandler, AZ
Made it out in the desert on 2 wheels last weekend. I ride it around the 'hood to keep carb from gumming up, but it had been a long time since bike was out. Like 6 months. With headaches I either don't want to or can't at all, so it was nice to be able to go and also enjoy the trip. Went to one of my usual places near Superior AZ.
KLhYF7e0qt9Kd8arybXQSJJ9e=w1063-h797-no?authuser=0.jpg

Weather is perfect this time of year. high of 75, extra sunny. Starting to see other members here speak of 'heater' and 'snow'. As a warm weather troll it is hard for me to refrain from comment, so I will put it here instead. 😛
Rode a new area to the east, had some gnarly, steep, narrow sections. For an old man I can still get it done. Being in good shape is key, as anything you crash into is not friendly. Did about 35 miles of various types of roads and trails. Fun to hit limiter in 5th which is 90+. Bike ran great and performed as expected.
l4wV3MXMgREdTWizOvc10IMEP=w1063-h797-no?authuser=0.jpg
 

PugetDude

ALLIANCE MEMBER
Joined
Mar 13, 2013
Messages
22,380
Location
Superstition Mountains, AZ
Made it out in the desert on 2 wheels last weekend. I ride it around the 'hood to keep carb from gumming up, but it had been a long time since bike was out. Like 6 months. With headaches I either don't want to or can't at all, so it was nice to be able to go and also enjoy the trip. Went to one of my usual places near Superior AZ.
KLhYF7e0qt9Kd8arybXQSJJ9e=w1063-h797-no?authuser=0.jpg

Weather is perfect this time of year. high of 75, extra sunny. Starting to see other members here speak of 'heater' and 'snow'. As a warm weather troll it is hard for me to refrain from comment, so I will put it here instead. 😛
Rode a new area to the east, had some gnarly, steep, narrow sections. For an old man I can still get it done. Being in good shape is key, as anything you crash into is not friendly. Did about 35 miles of various types of roads and trails. Fun to hit limiter in 5th which is 90+. Bike ran great and performed as expected.
l4wV3MXMgREdTWizOvc10IMEP=w1063-h797-no?authuser=0.jpg
Looks like fun- you're just east of my place in Gold Canyon.
 
OP
R

rattle_snake

Well-known member
Joined
Jun 25, 2015
Messages
5,194
Location
Chandler, AZ
Against better judgement I decided to start on the paint job of the 72 ford. Have some vacation time so why not knock it out? I bought a gallon of single stage paint, in the original lime green color.
The scope of the project immediate blew way out and I accepted that I don't really know what I'm doing....

Looking for some advice on primers and order of events. There are lots of holes to fill and areas that needed to be sanded to bare metal. I had planned to use bondo and rattle-can spot prime as needed, then hose down with color, like the hackery I have done so far. Then I started reading about all the types of primers, sealers and so on. There are many different ways using different products.

The goal is a 10' paint job. Going to drive this truck through the brush. There are areas that I cannot fix properly so most-best effort/perfection everywhere is a waste of my time. I want a robust result using the proper products in the right way.

So I'm not sure what type of primer I should use on bare metal, or over filler (or under?), or if a single type will do it all. I was hoping to avoid spraying primer on the entire truck, but considering all options, and willing to spend the money to get the right products.

Bottom side of hood had a battery explode. so also some surface rust to deal with also. Have plenty of disassembly and metal work to do so trying to be patient and figure out the best plan to achieve my goal thanks.
 

LXCam

ALLIANCE MEMBER
Joined
Apr 23, 2013
Messages
19,122
Location
AZ
Come on Justin. We’ve got one of the best in the world in our own back yard and on here to boot. Why don’t you reach out to Randy (timewarpf100) and ask him.
 

OutlawDrifter

Well-known member
Joined
Jan 20, 2015
Messages
3,876
Location
KS
Justin, I am no where near a professional painter, those listed above will know more than me...that's my disclaimer.

If all you're after is a solid 10 footer, I wouldn't over think it. DA the spots that you need to go to bare metal, 320ish grit. Use a DTM type primer/epoxy sealer. Personally, if I were going through the trouble of painting the whole pickup, I would maker sure to prime everything underneath to give it consistency. Block sand if necessary. Then lay down your color and buff to your desired finish when completed.

I painted a 1985 F150 with tractor store paint 10+ years ago(single stage Valspar), buffed it out really well, and it looked good from 10'. It was painted in my 24x30 detached, with an underpowered compressor and a cheapy HVLP gun.
 

zmotorsports

ALLIANCE MEMBER
Joined
Oct 20, 2009
Messages
21,381
Location
Northern Utah
Justin, I have been a PPG fanboy most of my adult life and have sprayed a **** ton of it over the past 35+ years.

That being said, I waded outside my normal stream of primers and clears last year when I repainted the rear quarter of my Jeep and was pleasantly surprised with SPI's (Southern Polyurethane Inc.) products.

I used all PPG epoxy primers, high build primers and clear up until last year and now I think PPG had better get their **** together because SPI reminds me of what PPG was 35+ years ago.

Here is the process I used when I was building street rods all the way up to a minor spot repair on my Jeep last year.

I start with epoxy primer over bare steel. I then do any body work on top of that if fillers are needed. From there I hit again with epoxy IF I exposed any bare steel. Over the epoxy primer I go to the SPI 2K high build primer. This stuff sanded exceptionally well both dry and wet.

I then spray some epoxy primer as a sealer. I just hit it with about an extra 5-10 percent of reducer to flatten out the coat when used as a sealer but this is not necessary.

For paint I still used PPG but I used DBC urethane base rather than the older DBU urethane base that I used to shoot. It sprays great and covers very well.

Lastly the SPI Universal Clear is amazing. It sprays out much like the old PPG DC2020 clear that I used many years ago. It lays down nice in the 2:1 recommended ratio and was easily cut & buffed if needs be. The shine is deep and the gloss is hard to match.
 

Ohmthis

Well-known member
Joined
Jan 20, 2013
Messages
3,009
Location
Outside of Louisville KY
Justin, Mike laid out everything exactly how I would do a top notch paint job. I agree with what was stated above, when just spot priming areas, the paint color may look blotchy. If you sand to bare metal an epoxy primer is highly recommended. You can spray the bare spots in epoxy, add any filler or spot putty needed, shoot a high build primer, block sand, spray a sealer (I like mikes suggestion), clean with a tack cloth and spray your color. Make sure to clean with a good wax and grease remover before shooting anything. I know that was a repeat of what’s been said, but I learned the hard way of painting over an unmatched base.
 
OP
R

rattle_snake

Well-known member
Joined
Jun 25, 2015
Messages
5,194
Location
Chandler, AZ
Thanks everyone for info on paint. Not looking to do go all-in, as it will get beat up and scratched. Don't want to have to park way out at the mall, haha. Going to use all the old trim and emblems. I had the paint dulled 50% aka semi gloss to hide the imperfections. What can go wrong?
 
OP
R

rattle_snake

Well-known member
Joined
Jun 25, 2015
Messages
5,194
Location
Chandler, AZ
Moving along with shop sink project. Hot tub wiring was in the way, so had to move it all again.
8ksO_DJcYs4fsOvZ1de-h58X_h=w939-h704-no?authuser=0.jpg

Lower bend not perfect but electrons will still flow the same.
K9YtHuwmmAl025EFsUCQM2ZkE0=w939-h704-no?authuser=0.jpg

Now that cement pad is gone conduit can be run under wall on foundation.
cTMcE0MpTLzZRosY0vwq3Wj6lh=w528-h704-no?authuser=0.jpg

Wider view of area. Opposite side of wall is master bath, so will tap into plumbing there.
FVkOFa6bSnCFfCvxkiU69IIZWD=w939-h704-no?authuser=0.jpg
 
OP
R

rattle_snake

Well-known member
Joined
Jun 25, 2015
Messages
5,194
Location
Chandler, AZ
Working on the concrete counter top. Made a mold out of 3/4 melamine. top side radius of slab is done with caulk bead.
5LkcxHS-6rqYbv1SgxtE4ilav1=w939-h704-no?authuser=0.jpg

put in some steel. used rebar around thin edge of sink cut out.
pVoWVg9eUz34ddkpenR2Sab7dj=w528-h704-no?authuser=0.jpg

Mixed 100# of cement and added some charcoal color. filled mold, tapped with mallet to get air bubbles out. What can go wrong?
LeRM8h-F2aCtuT_1bhmnusj7Bs=w939-h704-no?authuser=0.jpg
 
To avoid these ads, REGISTER NOW!
Top Bottom