GirlnAgarage
Well-known member
Reorganization, it's like a renovation
The Original "Reorganization"

Index of Projects
3-17-2014
-------------------------------------------------------------------
We don't have no beer. Just tequila.
What's tequila?
It's like beer.
Is it fattening?
Fattenings?
Forget it. If it's like beer,
we'll have some. Three tequilas.
Sure. Sure, amigos.
¡Three Amigos! (1986)
Ok, so the two terms really aren't the same - reorganization, renovation. Ya, big difference. Our HVAC unit really helped us understand that in this thread HERE. It was $9400 worth of ouch (DH really wanted the heat pump system). It is what it is. We'll make due.
May 25th will mark two years since we closed on this house, our first 'own' home. Prior to we rented as DH was active duty Navy.
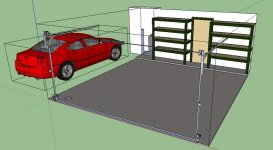
Garage Specs
Build year: 1985
Size: 370sqft (18.5’x20’)
18’4”w x 19’10¾”d x 8’3” h
Ceiling: master bedroom & bath, HVAC, guest bath, hallway, one outlet
Front wall (east): entry way door, ½ bath, laundry room, one outlet
North wall: insulated, water pipes, interior & exterior wall
South wall: non-insulated
Garage door (west): non-insulated
Floor: cement slab
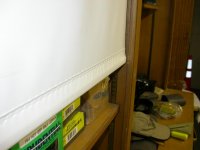
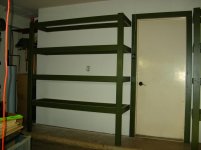
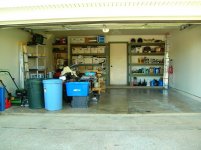
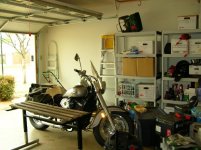
As you can see the place really needs to be spruced up. There's **** everywhere, shelves are mismatched and there's just no good flow. It's your normal garage. It is used as the primary pass through to the house. I do a variety of projects here such as woodwork, metalwork, vehicle maintenance, stationary bike workouts and general ‘fixin’ stuff’. It also serves as the only home storage area. The garage could use more outlets and more light. It was going to get new drywall and insulation but that part was chopped for cost. My husband also wants to park his car in here. Oh boy. Let's get started.
(Disclaimer: This thread is to chronicle the work, not to show off accumulated display quality stuff. It will be boring and long-winded. It will take me forever as I'm the one doing the work when I have time in my real life of a self-employed, thirty-something married gal running a house.)
The Original "Reorganization"
Index of Projects
3-17-2014
- Shelving: Beginning - Post #31
- Horizontal Wall Stripes: Post #58-59
- Welders on wheels: Post #77
- 24"x48" Workbench on wheels: #78
- 2'x10' Workbench: Post #79-
- Workbench Top: Post #544 - 48" Press Brake, 16ga: Post #111-
- Inside-the-box Jig: Post #226 - Materials - Drawers & Slides: Post #136-
- Drawer Folding: #276-
- 19" Bends 1 & 2- Drawers Installed: Post #398- Drawers Finished: Post #409 - Delta Homecraft 11-120 Drill Press: Post #350
- Overhead Materials Rack: Post #615
- Installing Additional Outlets w/ EMT: Post #622-
- Sprinkler Box: Post #672
- Truing Evolution Rage3 CSMS: Post #776
- Wall Shelf Curtain: Post #800
- Craftsman Drill Press 103.23130: Post #847
- We Moved!: Post #890
-------------------------------------------------------------------
We don't have no beer. Just tequila.
What's tequila?
It's like beer.
Is it fattening?
Fattenings?
Forget it. If it's like beer,
we'll have some. Three tequilas.
Sure. Sure, amigos.
¡Three Amigos! (1986)
GirlnAgarage's Garage Reorganization
Ok, so the two terms really aren't the same - reorganization, renovation. Ya, big difference. Our HVAC unit really helped us understand that in this thread HERE. It was $9400 worth of ouch (DH really wanted the heat pump system). It is what it is. We'll make due.
May 25th will mark two years since we closed on this house, our first 'own' home. Prior to we rented as DH was active duty Navy.
Garage Specs
Build year: 1985
Size: 370sqft (18.5’x20’)
18’4”w x 19’10¾”d x 8’3” h
Ceiling: master bedroom & bath, HVAC, guest bath, hallway, one outlet
Front wall (east): entry way door, ½ bath, laundry room, one outlet
North wall: insulated, water pipes, interior & exterior wall
South wall: non-insulated
Garage door (west): non-insulated
Floor: cement slab
As you can see the place really needs to be spruced up. There's **** everywhere, shelves are mismatched and there's just no good flow. It's your normal garage. It is used as the primary pass through to the house. I do a variety of projects here such as woodwork, metalwork, vehicle maintenance, stationary bike workouts and general ‘fixin’ stuff’. It also serves as the only home storage area. The garage could use more outlets and more light. It was going to get new drywall and insulation but that part was chopped for cost. My husband also wants to park his car in here. Oh boy. Let's get started.
(Disclaimer: This thread is to chronicle the work, not to show off accumulated display quality stuff. It will be boring and long-winded. It will take me forever as I'm the one doing the work when I have time in my real life of a self-employed, thirty-something married gal running a house.)
Attachments


Last edited:


 My laptop screen is a little smaller than my last one and I've got the setting on a high resolution. So, I'm not certain what my stuff looks like on someone else's screen.