To avoid these ads, REGISTER NOW!

Reorganization, it's like a renovation.

Status
Not open for further replies.
OP
G

GirlnAgarage

Well-known member
Joined
Jan 21, 2011
Messages
4,669
Location
Texas
Girl you can still insulate the walls just need a 2" hole at the top of the wall every 16" and use blown in insulation just like in the attic . Then simply patch the 2" holes and repaint the top portion of the walls oooor add another stripe around the top :D.

Rick


Rick that is exactly what I've been thinking. :lol: I did acquire a couple of drywall holesaws from the tool lots I picked up over summer. I gotta use them on something. I watched some video of the blown in insulation job. Looks pretty simple. Just run down to the store to rent the machine and buy bags. Logistically the job would be easy. Back the machine up the drive way and the hose reaches all three wall with ease.


That tip is lifetime warranty by the way. All the Snap on branded ones are.

That's what was thinking. But how do I go about getting it replaced? (I"ll head to SOs site and look around)


A lot but you only buy them once :)

I was going to make a joke but I realized that "buy" is the keyword when you have a lifetime warranty. :D
 
To avoid these ads, REGISTER NOW!

bimmer1980

Well-known member
Joined
Feb 5, 2009
Messages
2,104
Location
York, PA
I just finished reading through your whole thread. I must say, I'm quite impressed by your craftsmanship! Many of those projects are time consuming and challenging for anyone to tackle, let alone a person with one arm.

I think the solution of the spacer blocks on the bench brake was a slick one. I've been holding out to get a nice box and pan break, but that little solution might incline me to build a brake similar to yours. I have a 30" pexto jump shear, so that simplifies the cutting to some degree.

Keep up the great work and the energy!! It's motivation for the rest of us!
 
OP
G

GirlnAgarage

Well-known member
Joined
Jan 21, 2011
Messages
4,669
Location
Texas
Finished touching up the paint on the bench. Also sanded smooth the top. No need to be attacked by splinters. I don't think the rain will let up today. Looks like a slow burn drizzle which won't allow me to pull out and paint the last two drawers. I'm not in the mood to setup the plastic drop cloth for a temp booth so I'll wait it out.


tinbender, how did you prep your Lyon for paint? Not so much the outside skin that's easy to rough, but the innards and the drawer faces? They're very curvy and lots of edge.
 

BeachBum2012

Well-known member
Joined
Apr 7, 2009
Messages
83
Location
So Cal
I just finished reading this whole thread over the last two days. I don't post often but I must say that I'm quite impressed. Things are turning out quite well. Your ingenuity is amazing.

I also have to say that is it quite refreshing to see how you are dealing with your challenges and it makes my happy to see that you are living your life to the fullest. My dad is disabled and reading things like this make me think that I can pull him out of his pity party and motivate him to start getting out there and doing new things. I think I'm going to send him a link to this thread and have him read it.

Once again, great work.

Brian
 

tinbender 66

Well-known member
Joined
Mar 23, 2011
Messages
2,294
Location
Western Washington State
Finished touching up the paint on the bench. Also sanded smooth the top. No need to be attacked by splinters. I don't think the rain will let up today. Looks like a slow burn drizzle which won't allow me to pull out and paint the last two drawers. I'm not in the mood to setup the plastic drop cloth for a temp booth so I'll wait it out.


tinbender, how did you prep your Lyon for paint? Not so much the outside skin that's easy to rough, but the innards and the drawer faces? They're very curvy and lots of edge.

Hmmmmm........Jogging the memory. I stripped most of it with a cup brush and a 'flat' brush on my angle grinder. I just got everywhere I could and called it good. Primed it with Ace then painted the box red and the drawer fronts semi-gloss black. I didn't worry about the insides 'cuz ya can't see 'em with it together. I also didn't have any rust to deal with.

Before:

010.jpg


Primed:
005-1.jpg


Done, please excuse my language:

DSCF3103.jpg


Kinda hard to see here but I usually go over the big surfaces with 3M surfacing discs. Medium, then fine. They do a good job of taking the scratches left by the wire brushes out.
DSCF3117.jpg
 

Binrat

Well-known member
Joined
Nov 30, 2011
Messages
186
Location
Hurst, TX
as for your tip, just keep your eye out for the big SNAP ON truck when you are out and about. Usually at the big dealerships or auto shops. I usually just pop in with my broken tool and they fix it up.
 

xrdad

Well-known member
Joined
Mar 14, 2011
Messages
487
Location
Ontario Canada
:mad: :confused: :bowdown:

The smiley's tell my story..
me: I just keep tossing more stuff in my shop while drafting up lot of 'neat' plans. But nothing.. really, nothing is getting done.

You: 'Your thread is inspiring' doesn't even come close to what I'm thinking..
Great work and awesome skills, + good humour (still thinking about the football/hair dresser/welding plan post! :lol_hitti).

Glad I took the time to follow this thread.

Girl, you rock!
:beer:
 
OP
G

GirlnAgarage

Well-known member
Joined
Jan 21, 2011
Messages
4,669
Location
Texas
as for your tip, just keep your eye out for the big SNAP ON truck when you are out and about. Usually at the big dealerships or auto shops. I usually just pop in with my broken tool and they fix it up.


Might do that - thanks. I notice your just down 121/183 from me. How about that construction traffic? :eyecrazy::lol:


:mad: :confused: :bowdown:

The smiley's tell my story..
me: I just keep tossing more stuff in my shop while drafting up lot of 'neat' plans. But nothing.. really, nothing is getting done.

You: 'Your thread is inspiring' doesn't even come close to what I'm thinking..
Great work and awesome skills, + good humour (still thinking about the football/hair dresser/welding plan post! :lol_hitti).

Glad I took the time to follow this thread.

Girl, you rock!
:beer:

Thanks xrdad :)

For your garage, just jump right in. I learned a few times that I start spinning my wheels if I over think the project. The release of 'doing' helps get the ball rolling. Go get it :thumbup:
 

Binrat

Well-known member
Joined
Nov 30, 2011
Messages
186
Location
Hurst, TX
i rarely go north so i miss all that fun...

I'm very impressed with your bench and drawers...

Keep posting the updates!
 

BevoZ06

Well-known member
Joined
Nov 30, 2011
Messages
165
Location
Austin Texas
GirlnAGarage,

I just spent a LOT of time reading every one of these posts. I am impressed beyond words. I am just beginning to renovate my garage, and you have provided me with a great deal of inspiration.

I understand you are not openly publicizing your leathercraft in this thread, and I respect you for that. If you would like to send contact information or a website link to me, I would be interested in both tool rolls and firearm related leather.

Your Impressed Fellow Texan.
 
OP
G

GirlnAgarage

Well-known member
Joined
Jan 21, 2011
Messages
4,669
Location
Texas
benchbuilt.jpg


Last night and this morning I spent a little time organizing and trying to put away tools and general stuff. I think I'm making a nice dent in everything. I dare say that I think I have pulled ahead with the amount of storage vs the amount of stuff?


The stuff in these were the first things that needed to go into the tool cabinet. The yellow hand box has been my topbox since we moved in (it was my handbox in my truck in college). The three drawer unit was commandeered from the upstairs office not too long ago and has been around for years...like when DH and I were dating kind of years (10!). It has seen it's final use with this family. The mechanics tool set (a Christmas gift from Dad years ago) I wanted to stick in the drawers, but when I opened it up to put it away, I couldn't bear to break it up. So I put it on a shelf for now.


Before:
plastictoolbox.jpg


After:
The yellow box was sorted and emptied. The mechanics set was placed on the shelf. Even got that second wall shelf about cleared too. A few odds and ends left in the bottom drawer to put away but it's about ready to go away.
plastictoolbox2.jpg


First round of stuff put away. The blue tape on the wall is the max height I can reach over the bench. I'm considering a pegboard across the width of the bench. I don't want to lose the paint scheme on the wall though. Might go with white peg board so I can add the green stripe. Still thinking. Maybe I'll just stick to photos, posters and whatnot.
fillingbench.jpg


The yellow box is now my electrical box. All the stuff in it was packed in the middle & bottom plastic drawer. Plus I finally had somewhere to put the circuit tester, volt meter, stud finder, etc etc in there. The gray box is now the plumbing box. Many of the pvc fittings, sprinkler stuff and pipe stuff was stored in the second drawer of the plastic bin.
plastictoolbox3.jpg


Here's how the drawer layout is starting. I still haven't painted the top and bottom drawers. Waiting on weather and really in no hurry now.

1
1drawer.jpg


2
2drawer.jpg


3
3drawer.jpg


4 - suppose to be the mech socket set, when I get the nerve to put it away
4drawer.jpg


5
5drawer.jpg


6, 7 & 8 - empty but will get filled in as I rearrange until I'm happy with the organization
678drawer.jpg


9 - paper items, including sandpapers. I am considering putting a small file cabinet somewhere to store power tool manuals and project plans.
9drawer.jpg


10 - considering using as nut and bolt drawer. All the baggies you can see on top of the workbench now are nuts, bolts and screws that I'm struggling to find a heavy duty enough place. The AkroMils bins are a bit too small (and plastic) and the Lyon unit will be holding smaller hand tools, accessories and random things. I got the idea from the Storing Nut and Bolt thread to use plastic bottles/bins cut to height for each type of hardware. Will experiment with that soon.
10drawer.jpg


Making our way around the garage here is the "yard corner". Right off the edge of my workbench. I plan to clear and get rid of the shelf.
yardcorner.jpg


This begins the messy corner that is suppose to be in the magical shed that I hope will build itself. My wood and steel scraps are cluttering the way. DH's motorcycle is still there. Those dang cement bags (that came with the house) that I wish I could throw into the lake. The trash can and recycle bin that never seem to have a place except taking up space. The ladders...oh the ladders. Great tool, tricky to store.
messycorner.jpg


These black shelves are about ready to go away too. They held my benchtop wood for the longest time but now that they've served their purpose - goodbye. You can see my DP back there. That will go on either side of the workbench (and plug into the other magical thing, the surface mount outlets that will build themselves because this garage is lame with one wall and one ceiling outlet) :wtf:.
blackshelves.jpg


So not really too far off, least it feels that way from getting DHs car in the garage. That was the original plan :eek: A lot of moving sh...stuff around, sorting, building, moving again. I do see a light at the end of the tunnel though. Last it feels more likely now that the bench has come together. I'm thinking of adding overhead storage on the car side of the garage for pvc pipes, the long wood scraps and whatnot. That top corner has plenty of unused space. And though I'm not there yet, I'm looking forward to putting up some of the decorative touches on the wall. Lots of photos and parts I'd like to wall mount. Would be great to start that garage history of vehicles and motorcycles we had.
 

Outlawmws

Well-known member
Joined
Aug 9, 2011
Messages
39,292
Location
The Badlands
Looking good Girl! Your starting to see light! (and I don't think it's a train this time!) A usable work surface, handy tool storage, plans for unneeded or inefficient storage out the door..

A suggestion for that, if you don't want the Sack concrete, and have no plans for it, look into joining your local chapter of Freecycle. If you haven't heard of it, it's a great place to offer things you don't want, and possibly get things you can use, and it's all free.

The goal of Freecycle is to keep usable things out of land fills. I offer a lot of stuff I don't want to deal with selling on CL on freecycle, or don't want to hassle with until our next yard sale, (No more than 1X a year), and have gotten a ton of stuff I can use (in my house, in my yard, and in my garage - even some tools...) it's amazing how the "One mans junk is another man's treasure" works so well. Relatively hassle free, and you get complete strangers willing to haul your junk.. er "treasures" away, and not charge you for it. :D
 

Outlawmws

Well-known member
Joined
Aug 9, 2011
Messages
39,292
Location
The Badlands
Another thought: Screws nuts and bolts,,, what is going onto the metal bin/drawers on the right side? Just sayin...
 
OP
G

GirlnAgarage

Well-known member
Joined
Jan 21, 2011
Messages
4,669
Location
Texas
Looking good Girl! Your starting to see light! (and I don't think it's a train this time!) A usable work surface, handy tool storage, plans for unneeded or inefficient storage out the door..

A suggestion for that, if you don't want the Sack concrete, and have no plans for it, look into joining your local chapter of Freecycle. If you haven't heard of it, it's a great place to offer things you don't want, and possibly get things you can use, and it's all free.

The goal of Freecycle is to keep usable things out of land fills. I offer a lot of stuff I don't want to deal with selling on CL on freecycle, or don't want to hassle with until our next yard sale, (No more than 1X a year), and have gotten a ton of stuff I can use (in my house, in my yard, and in my garage - even some tools...) it's amazing how the "One mans junk is another man's treasure" works so well. Relatively hassle free, and you get complete strangers willing to haul your junk.. er "treasures" away, and not charge you for it. :D

:lol: Thanks Outlaw. Don't have the strength to get hit by another train just yet. I'll check and see if we've got Freecycle in the area. I should have put these on CL in the "curb alert" section when it was guaranteed not to rain.
 
OP
G

GirlnAgarage

Well-known member
Joined
Jan 21, 2011
Messages
4,669
Location
Texas
Another thought: Screws nuts and bolts,,, what is going onto the metal bin/drawers on the right side? Just sayin...

Yup, using the Lyon for hardware is not out of the question. For right now I put in all sorts of items like my solder stuff, drill bits, punches, files, tubes of glues, RTV, dremel, deck screws,zip ties and small random item. It isn't set it in stone though. Mainly this round of consolidation was to get loose stuff from the plastic storage drawers into a spot in the new area. I will definitely be resorting and doing a detailed organization on the Lyon though. It would be a sturdy storage unit for the hardware.
 

Outlawmws

Well-known member
Joined
Aug 9, 2011
Messages
39,292
Location
The Badlands
I personally don't care for the "CL curb alerts" as there is so much waste involved for the people that come later, and it's either a picked over junk pile, or the item wanted is gone. I have used CL free section on occasion, but always make arrangements for PU directly. I don't care for that either, as there are a lot more low lifes on CL than Freecycle I've found.

With FC, at least in my area, its more of a community.
 
OP
G

GirlnAgarage

Well-known member
Joined
Jan 21, 2011
Messages
4,669
Location
Texas
True, ends up being a lot of junk if you're not close. Looks like there is a Freecycle group for our area.

I use curb alert and free synonymously. Done it a time or two but I only use it for single items and usually on the day of/right before bulk pick up so it doesn't sit around looking ugly and I don't have to haul it in again.
 
To avoid these ads, REGISTER NOW!

mdbeck1

Well-known member
Joined
Mar 7, 2010
Messages
2,297
Location
Norman, OK
...
3
3drawer.jpg


4 - suppose to be the mech socket set, when I get the nerve to put it away
4drawer.jpg


5
5drawer.jpg


6, 7 & 8 - empty but will get filled in as I rearrange until I'm happy with the organization
678drawer.jpg


10 - considering using as nut and bolt drawer. All the baggies you can see on top of the workbench now are nuts, bolts and screws that I'm struggling to find a heavy duty enough place. The AkroMils bins are a bit too small (and plastic) and the Lyon unit will be holding smaller hand tools, accessories and random things. I got the idea from the Storing Nut and Bolt thread to use plastic bottles/bins cut to height for each type of hardware. Will experiment with that soon.
10drawer.jpg


... The ladders...oh the ladders. Great tool, tricky to store.
messycorner.jpg


...

1. Looking real good.
2. Drawer 3 needs some wrench racks. A while back there was a thread on using housing wire wrapped up to make a coil. You can put wrenches in the coil and it holds them standing up.
3. Drawer 4 needs some rail clips (or maybe a small metal box) to keep those sockets from rolling around the drawer.
4. Drawers 6, 7, 8, and 10 - Don't worry about them being empty. Keep watching the "hot deals" thread and you'll fill them up. I'd suggest putting the multimeters and test lights in one of the drawers.
5. The ladders.... I put my tall ones on the back of the house on brackets bolted to the wall. The shorter ones are in the garage. I'll probably end up with something on the ceiling. Maybe two bicycle hooks in the ceiling (on one end) and a pulley and rope on the other one????
 

machine_punk

Well-known member
Joined
May 14, 2011
Messages
2,540
Location
Napa Valley, California
Wow...it's really coming together now. Don't you love it, when you hit that part of a project, after working for weeks, that you finally begin to make a lot of visible progress quickly?

Looks great! I love that color of green. You've got a great looking garage and, most importantly, YOU built it all. As someone who is working on building all of his own garage fixtures, I know how nice of a feeling that is. Very good job.
 
OP
G

GirlnAgarage

Well-known member
Joined
Jan 21, 2011
Messages
4,669
Location
Texas
1. Looking real good.
2. Drawer 3 needs some wrench racks. A while back there was a thread on using housing wire wrapped up to make a coil. You can put wrenches in the coil and it holds them standing up.
3. Drawer 4 needs some rail clips (or maybe a small metal box) to keep those sockets from rolling around the drawer.
4. Drawers 6, 7, 8, and 10 - Don't worry about them being empty. Keep watching the "hot deals" thread and you'll fill them up. I'd suggest putting the multimeters and test lights in one of the drawers.
5. The ladders.... I put my tall ones on the back of the house on brackets bolted to the wall. The shorter ones are in the garage. I'll probably end up with something on the ceiling. Maybe two bicycle hooks in the ceiling (on one end) and a pulley and rope on the other one????


Thanks mdbeck :) I am planning on wrench and socket holders. Still debating exactly what kind though. I'd like to build something custom and I'm considering metal or leather. Haven't quite stumbled on an idea I've fallen in love with yet. I have seen pics on the forum on the coil spring method you mentioned. Works pretty good.

I might go ahead and put the ladders on the wall or ceiling. Both DH and I are physically capable of manhandling them. It's a little tougher for me but so long as I make the mount right I'll only need to position and lift one end at a time so it isn't cumbersome. I've googled and seen some creative ceiling mounts that could fit the bill.


That looks fantastic:thumbup:. Those drawers look professional.

I assume you made the leather dealies holding the offset wrenches together? Great idea.

Thanks tinbender. Yup, I built those wraps :) They're a little tedious to use when putting the wrenches away. But for as often as I use those two sets it isn't enough to edit the design yet. I a considering a metal version like some the older wrench sets I've seen. Maybe even a hybrid metal & leather piece.


Wow...it's really coming together now. Don't you love it, when you hit that part of a project, after working for weeks, that you finally begin to make a lot of visible progress quickly?

Looks great! I love that color of green. You've got a great looking garage and, most importantly, YOU built it all. As someone who is working on building all of his own garage fixtures, I know how nice of a feeling that is. Very good job.

Thanks!
Oh man it does feel good to get it done. And with my own sweat too. Gives a sense of pride you know, I did that. :beer: I gotta check out your fixtures. They sound like a cool project.
 

98TJ

Well-known member
Joined
May 31, 2011
Messages
1,034
Location
Honolulu, HI
Lookin' good. Seems you're filling your drawers nicely.:spit:

Seriously though - great stuff. Inspiring to read. :)
 

mdbeck1

Well-known member
Joined
Mar 7, 2010
Messages
2,297
Location
Norman, OK
Thanks mdbeck :) I am planning on wrench and socket holders. Still debating exactly what kind though. I'd like to build something custom and I'm considering metal or leather. Haven't quite stumbled on an idea I've fallen in love with yet. I have seen pics on the forum on the coil spring method you mentioned. Works pretty good.

Sounds like you have a plan. I did a little looking through my subscriptions and found this link.... http://garagejournal.com/forum/showthread.php?t=92266 It has the coil method using electrical wire.

I might go ahead and put the ladders on the wall or ceiling. Both DH and I are physically capable of manhandling them. It's a little tougher for me but so long as I make the mount right I'll only need to position and lift one end at a time so it isn't cumbersome. I've googled and seen some creative ceiling mounts that could fit the bill.

I still think the bicycle hooks and rope/pulley would work good. I'm thinking about doing that with the ladders I keep in the garage. As I get older I'm finding that manhandling things is NOT where I want to go...


You've got every right to feel proud about what you've accomplished. Keep up the good work.
 

Red Leader

Well-known member
Joined
May 15, 2011
Messages
2,689
Location
Denver, CO
Wow, VERY nice!!!

How do you like those drawer liners?

I think that is what I'm going to go with until I can build up my tool budget to afford cork liners:)
 

Omphaloskeptic

Well-known member
Joined
Oct 11, 2008
Messages
2,346
Location
Ultima Ratio, Wa.
GirlnAgarage, your shop/garage is really coming together; kudos to you for your perseverance and DIY skills.

Just a couple of thoughts:
-Those bags of concrete might come in handy for you shed supports (when it magically builds itself). lol
-The plastic shelving units would probably be very happy in their new (shed) home.
-When Santa's elves get busy building your new shed, have them build a floor-level 'pocket' with its' own exterior door to store one or more ladders. The 'horizontal cabinet' would allow easy access and storage; perhaps it could be built in the dead space beneath the shed's garden bench. Not much more work for Santa's elves to build you a custom shed.xmas
 
Last edited:
OP
G

GirlnAgarage

Well-known member
Joined
Jan 21, 2011
Messages
4,669
Location
Texas
Wow, VERY nice!!!

How do you like those drawer liners?

I think that is what I'm going to go with until I can build up my tool budget to afford cork liners:)

So far I like the liners. I got the rolls from Walmart and spent about $20 for enough to cover all the drawers. It does grip pretty decent. I can't speak for the longevity since I haven't used it before, but we'll find out.


GirlnAgarage, your shop/garage is really coming together; kudos to you for your perseverance and DIY skills.

Just a couple of thoughts:
-Those bags of concrete might come in handy for you shed supports (when it magically builds itself). lol
-The plastic shelving units would probably be very happy in their new (shed) home.
-When Santa's elves get busy building your new shed, have them build a floor-level 'pocket' with its' own exterior door to store one or more ladders. The 'horizontal cabinet' would allow easy access and storage; perhaps it could be built in the dead space beneath the shed's garden bench. Not much more work for Santa's elves to build you a custom shed.xmas


Those are some great ideas right there. I will keep them in mind. The concrete/shed supports especially. Those things add up -thanks :beer:


Merry Christmas everybody. We opened gifts and are lazing around now. I did get some garage stuff I wanted. Some big 6" C clamps that will come in handy. And the Evolution Rage 3 multipurpose miter saw. My arms feel so much better already! :bounce: Can't wait to use this. All those projects I've been wanting to do have a much better shot a getting done. And the ends of my 2x4 projects will get straight.

rage3u.jpg
 

Outlawmws

Well-known member
Joined
Aug 9, 2011
Messages
39,292
Location
The Badlands
SNIP
Merry Christmas everybody. We opened gifts and are lazing around now. I did get some garage stuff I wanted. Some big 6" C clamps that will come in handy. And the Evolution Rage 3 multipurpose miter saw. My arms feel so much better already! :bounce: Can't wait to use this. All those projects I've been wanting to do have a much better shot a getting done. And the ends of my 2x4 projects will get straight.

rage3u.jpg

This made me smile. Soon after SWMBO and I got together, the assistant manager at the retail store she worked at (also a woman) got a skill saw from her husband for Xmas. Lets just saw she was not nearly as happy about he gift as you are with yours...

:lol_hitti


As I recall that marriage did not last long after that
 
OP
G

GirlnAgarage

Well-known member
Joined
Jan 21, 2011
Messages
4,669
Location
Texas
This made me smile. Soon after SWMBO and I got together, the assistant manager at the retail store she worked at (also a woman) got a skill saw from her husband for Xmas. Lets just saw she was not nearly as happy about he gift as you are with yours...

:lol_hitti


As I recall that marriage did not last long after that

:lol:

My husband says he got a kick out of shopping/checking out with this at Lowe's.

Cashier (Male): Got yourself an early Christmas present - nice!
DH: Actually, it's for my wife
Cashier: BULL****!
DH: (pulls out my list and shows him) Look.
Cashier: You are one lucky guy.
DH: I know. You should see her truck shop :D


:eek: :rocker:
 

98TJ

Well-known member
Joined
May 31, 2011
Messages
1,034
Location
Honolulu, HI
:lol:

My husband says he got a kick out of shopping/checking out with this at Lowe's.

Cashier (Male): Got yourself an early Christmas present - nice!
DH: Actually, it's for my wife
Cashier: BULL****!
DH: (pulls out my list and shows him) Look.
Cashier: You are one lucky guy.
DH: I know. You should see her truck shop :D


:eek: :rocker:

Nice! :thumbup:
 
OP
G

GirlnAgarage

Well-known member
Joined
Jan 21, 2011
Messages
4,669
Location
Texas
Spent a little time sorting hardware that was stacked up. What a tedious task. But with as much space as this stuff would take up, it's worth it to find out how much I actually need to keep. No use storing broken/stripped out stuff.

Printing out some pitch-thread charts now to help me out. I hope I don't go blind. I'm starting the sub-1/4" things :eyecrazy:


Merry Christmas and Happy New Year. I appreciate you sharing your skills and imagination.


Merry Christmas Bob :)
 

takeiteasy

Active member
Joined
Dec 15, 2011
Messages
40
Location
WA
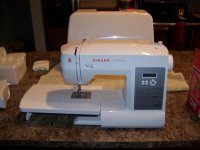
Hey, new to the Forum. Wasn't going to make this my first post, but couldn't resist after seeing your saw for Christmas. See what I got from my wife for Christmas. (I hope the pic attached.) Don't worry, I her asked for it...there's always other tasks that need doing that can't be done with a saw or wrenches.
I love the drawers you made. I've always wanted to do that, but I lack the skills, so will stick with a purchased tool chest.
Now I think I'll start my garage thread so people don't question my place on here :)
 

Attachments

  • 112_0758 (Small).JPG
    112_0758 (Small).JPG
    41.8 KB · Views: 55
Last edited:
OP
G

GirlnAgarage

Well-known member
Joined
Jan 21, 2011
Messages
4,669
Location
Texas
Hey, new to the Forum. Wasn't going to make this my first post, but couldn't resist after seeing your saw for Christmas. See what I got from my wife for Christmas. (I hope the pic attached.) Don't worry, I her asked for it...there's always other tasks that need doing that can't be done with a saw or wrenches.
I love the drawers you made. I've always wanted to do that, but I lack the skills, so will stick with a purchased tool chest.
Now I think I'll start my garage thread so people don't question my place on here :)


Welcome! And thanks for wasting a little time in my garage :D I wasn't able to see the pic on my phone when I first read your reply, but now that I do I am: :wtf::headscrat:spit::beer:

What projects do you have planned?
 

takeiteasy

Active member
Joined
Dec 15, 2011
Messages
40
Location
WA
<<What projects do you have planned?>>

Nothing interesting or garage related, but since my wife's not interested I figured I'd try my hand at it. I just found it very funny the contrast of our gifts.
I'm gonna try fixing some curtains and stuff in the house. Some things just don't fit properly and they just bother me - I want to make them right.

Curious why you made the dropped part in the middle of your bench? I didn't noticed if you mentioned it. How come you didn't just go straight across with the 2x4's and keep all the boxes the same width?
 

mdbeck1

Well-known member
Joined
Mar 7, 2010
Messages
2,297
Location
Norman, OK
...

Merry Christmas everybody. We opened gifts and are lazing around now. I did get some garage stuff I wanted. Some big 6" C clamps that will come in handy. And the Evolution Rage 3 multipurpose miter saw. My arms feel so much better already! :bounce: Can't wait to use this. All those projects I've been wanting to do have a much better shot a getting done. And the ends of my 2x4 projects will get straight.

rage3u.jpg

Okay, I've got to ask....
If you take the top drawer out... ...will the new miter saw fit? Does the new miter saw sit at the right height for the wood to be level on the top of your work bench???? :evil: Did you have that in mind when you made the bench???

You have to understand that I probably do as much woodworking as I do "garage" stuff. A LOT of the woodworkers recess their miter saws so that long stock sits across the workbench.
 
Status
Not open for further replies.
To avoid these ads, REGISTER NOW!
Top Bottom