I will have to figure out a design for a Gib, that’s a fantastic idea.
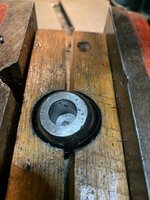
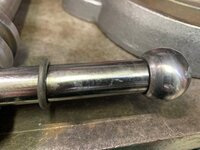
-Well......shucks. I've just had a look at your press and didn't realize that it's a round ram, unlike almost all of the manual ones I've seen for the last few decades (square ram). Yours has undeniable vintage appeal but will be more complex/difficult to create a gib for it. I understand that there's what you consider excessive movement between the ram and the housing. With a square ram it's a simple matter of dropping in an adjustable plate to reduce/remove excess play. Many of the square ram presses even have this feature built-in already. The way I see it, now that I looked, your options seem to be:
1) Buy another press with a square ram. A brand new 2 ton model is about $200 so a used one in good condition should be under $100
2) All your tooling will need to be guided with the tooling/die locating the work. Everything is contained in the die so it doesn't matter if the ram moves around or not. Guided tooling will be more complex and more expensive (maybe not very much) but you just flop the tooling in the press and you're ready to go. You wouldn't have to do anything to your existing press.
3) Create a gib for the press you have. That will be more involved/expensive with limited benefit. The gib for a round ram may contain movement in the X and Y plane but there's still rotation of the ram to consider. Either of the above two options would address movement in all three degrees of freedom.
-A lot really depends upon just what you intend to do. I know that's not an easy question to answer but tooling/dies really depend upon the particulars. Size of the press largely dictates what is possible (tonnage limits) for a given material type, thickness, and whether piercing/bending. Sometimes the intended part can't be created in just one press stroke and requires multiple "hits" to create a shape/feature. I say all this not to discourage you but rather to inform you so time/money is not wasted. Depending upon what you want to do there may be no need to alter anything at all. For example; For a simple bending operation (bent bracket) it probably wouldn't matter if the ram moved around as the tooling would tend to center/align itself with each successive stroke of the ram gradually bottoming out the stoke instead of one continuous stroke. For one or two pieces I want to make I'll just arrange the work in the vise and use a drift & hammer to carefully bend the material over a mandrel to shape. There's a lot that can be done with simple hand tools, that's what they did for centuries until the industrial revolution mechanized everything.
I took a CAD class in college 20 years ago, but haven’t touched it much since. I’ve been in Marketing/Sales for 19 years.
-There's probably not a lot of applications, other than rendering for a visual aid, at your job. It's hard to justify the time needed to mount the learning curve for proficiency when there isn't any immediate benefit to your paycheck. What CAD programs do you have?
But, I’d love to have my house all laid out in CAD especially for modifications. I’ve done some 3D rendering and animation more recently, I bet the new CAD software is excellent.
-I resisted using computers at home and only used them on the job for CNC controls until around 1999 when I had to change with a changing industry. I took a few AutoCad (2D) classes and wasn't particularly impressed, it was a nice electronic pencil. Dr. Ward encouraged us to explore 3D programs. I took a class (Pro-E) and the hook was set when I realized the capability of CAD as a design tool. The capability of the CAD and CAM programs is nothing short of incredible for an Olde Phart like me that had to program everything long hand at the machine control (MDI) or the even older NC tape feeder machines. Would CAD help you? Maybe with rendering/animation but only you can answer that question. Would it help you at home? Quite a bit but the time spent may not be worth the effort. Did/does it help me? Enormously but that's how I earned a living for the last 17 years and I'm a bit obsessive/compulsive so it fed me and my disease.
My stepdad was at the Stamping plant for a while, the whole front lawn was leased out to businesses. The big Mclouth plant on Jefferson was torn down a few years ago and sold to the family that owns the Ambassador bridge with plans for a shipping port, but not much has looked to change other than being leveled. So weird to see.
-Gee I sure hope Zug Island hasn't lost the distinct charm it exuded in the 70's.
I’m not remembering Dana, lots has changed, and a lot hasn’t.
-Probably disappeared if you haven't seen the building from King & Fort St. They used to have a large lot outside the building where they stored cast iron engine blocks exposed to the weather for "seasoning". Every now and then they come get one and take it back inside for machining. There was also a story that they stamped out helmets for the army during the Vietnam war. Dana did a lot of things back then besides gearboxes and transmissions. A lot probably has changed since I lived there.
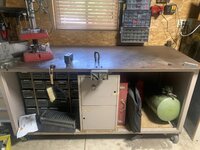
Now to clean my bench..

“If a cluttered desk is a sign of a cluttered mind, of what, then, is an empty desk a sign? – Albert Einstein
-While working under contract for Denso Automotive (Nippon Denso) that was staffed by Japanese management I was cited for having 3 paperclips out of place on my desk.....
-I would advise making a provision for clamping/mounting your press firmly to your work bench. The leverage required for using the press will have it tipping over quite easily. Just a suggestion.


.jpg")