Boosted1
Well-known member
Thanks for all the updates. Still enjoying this thread.


")


Hello Thomas
I thought I recognized your Nova in the October issue of Hemmings Muscle Machines on page 34. Then as I read the caption of the picture confirming it is you and your Nova it became even more clear, the ambassador of Center of the Universe is everywhere!
Thanks for the many hours of enjoyment from you and Chris and everyone in your thread.
Vince

 Steve, the owner of the RR, is a really great fellow that I've known for a couple years now and like me, does this all for the sheer joy of it. It just doesn't get any better than this.......'cause if you're not having fun, what's the point?

 Position the line so it's even with the step on the die. That step is shown by the red arrow on the left and the yellow arrow on the right shows the brake line positioned even with that step. Clamp the line very securely and then turn the die over, placing the blue circled tip of the die into the line...


Thomas -
Thanks for the tutorial on double flares. Love all the Gus service work. Keep it coming.
Scott W.
President, Southern Italy "Restored 1930's Auto Shop" Thread Fan Club
 It's nice to know that local chapter has such fine leadership. I take great comfort in that.
 Thomas, thanks for another informative and entertaining post. Keep 'em coming!
..... I found an unused copper brake pipe kit for my TR4A at an autojumble at half the new price, so I bought that instead. Copper has the advantage of being easy to bend to shape on the car, as well as rust resistance.
Thinking of your pre-retirement 'day job' Thomas, do you have any comments on the BA 777 that caught fire at Las Vegas?
Pete
 A catastrophic engine failure of that sort is exceptionally rare but aircrews crews train for them constantly. We always brief the cabin crew on what their respective roles will be when in case of an emergency we first meet for a flight and the cockpit crew always gives a short brief to each other before every takeoff describing what actions will be taken in case of an aborted takeoff and evacuation. All that attention to detail pays off as we saw in that incident.
The most important step in the entire process "remember to slide the appropriate threaded fittings onto the line since you can't do that once it's flared, not that I've ever forgotten to put the fitting on before flaring!"
I am guilty of forgetting it more than once!
^^^^^ you beat me to it!
me too
I'm pretty sure the Never Forgot to Put the Correctly Oriented Threaded Fitting on First Club is extremely small and exclusive. I am not a member and am permanently barred from even applying. Something to do with putting both fittings backwards on a single tube. :tard:

Don't know if anyone else has used this, but I found that a small drop of 3 in 1 oil on the final step of the double flare could guarantee a successful result.
This morning I had never heard of double flaring. Then whilst browsing in a junk store I saw and bought a Mac double flaring set. After learning about it I wish I had one earlier.
Thank you Thomas.
Sent from my LG-D801 using Tapatalk
Thank goodness I'm a professional and have, obviously, NEVER done all of these things. Nor have I ever happily made and bent the perfect pipe only to try and fit it at which point I realise I got a bit carried away and forgot I didn't need two males fittings on my pipe but a male and a female......
If a process could be done wrong I'm likely the poster child for having done so at least once. But I am trainable and try to limit the damage.............
I'm pretty sure the Never Forgot to Put the Correctly Oriented Threaded Fitting on First Club is extremely small and exclusive. I am not a member and am permanently barred from even applying. Something to do with putting both fittings backwards on a single tube. :tard:
Sorry I just had to do it. And yes, I belong to the "Missing, wrong way, tube bend to tight, fitting club".Ok Thomas, sorry to change the subject, but the "BS" is where, now?
Am I officially nagging now?
Lyndon
A magnificent early spring day in Sydney (after a run to the National Motor Racing Museum at Bathurst in the XJR....)
Dom still has it in the UK and I rather suspect, ahem......he's almost done with it. He's the last over in Europe to read it so it's coming back to me, ahem again......soon I should think. There are just a few here in the USA that are ahead of the Australian and New Zealand contingent but I expect any day now to be hearing from Dom that it's on its way, back across the pond and ultimately down under to you.Thomas
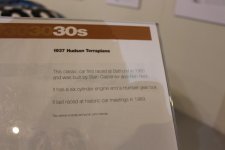
I was at our National Motor Racing Museum over weekend (a short 190 km - 118 miles - run from here in Sydney, in the XJR in convoy with about 20 other Jags), and the 1st exhibit I saw immediately reminded me of the Centre of the Universe (on your side of the world - I know where it is down here).
A Hudson Terraplane racing car version from the 1930's.... Looks a little bit better than the one you have; not a tree to be seen around it.
I thought I take a photo of it for you, and it's accompanying explanation sign.
Lyndon
A magnificent, if somewhat smoky, Sydney spring morning.


I love all of the uppdates (and how-to's) on Gus. Keep 'em comin'.
Cheers from San Francisco,
Scramboleer
Thanks, Thomas, I just bought a copy.
Now that is interesting Lyndon. I'm curious what part of that car is from a 1937 Terraplane though. It looks completely custom but is extremely cool.
Lou and I made a road trip this summer to the Hudson Museum (Terraplanes were made by Hudson Motor Corp.) located in Shipshewana, Indiana. I wanted specifically to take some pictures of a 1937 Terraplane and post them, so........
...and you'll see what it looked like back "in the day" when it was new. I bet the proud owner of it in 1937 never guessed it would wind up as yard art next to Mr Johnson's shop!
Thomas

Thanks, Thomas, I just bought a copy.
How's the racing in Stanton?
Are you planning to be there tomorrow? It looks like there is a little rain in the forecast, but I'm planning to spectate with my little boy for a bit.
Maybe we'll see you?
Phill


Clutch-less up-shifts and heel-toe down-shifts. [emoji6]Is he double clutching?
Here's a follow up to that...

"STUART JOHNSON" on one side ( I doubt any relation-but hey- who knows!!

"LAKE GENEVA" on the other. The opening in 4 1/2". The smaller wrench...

"KENOSHA WISCONSIN" (home to Snap-On Tools I might point out) and is blank, I recall, on the other side. It's opening is 2 1/2"
Thomas