
You are using an out of date browser. It may not display this or other websites correctly.
You should upgrade or use an alternative browser.
You should upgrade or use an alternative browser.
Above 1200 Sq/FT Restored 1930's Auto Shop
- Thread starter BB767
- Start date
Wokspaces above 1200 squarefeet.
Bob Heine
ALLIANCE MEMBER
Photobucket Fix: Press Ctrl + F5 to force a full refresh for the site.
DoorBreaker
Active member
Hi Joe and thanks for the kind wishes and for the heads up on Mobil 1.
I was using some older Mobil 1 that was still formulated for use in older engines that use flat tappets. I read a while back that the newer Mobil 1 doesn't provide adequate lubrication for our old flat tappet engines. That was news to me. I have since changed to using Amsoil Z-Rod for the Corvettes and have been very happy with it.
I too hope your timely reminder will save someone here from a preventable problem. Thanks again.
Thomas
The issue with "modern" oils and flat tappets is caused by a few things.
Back in the days that flat tappets were common you had leaded gas and high zinc and sulfur content in the oil along with a detergent package that was much less effective.
When the EPA started clamping down to lower the emissions levels it was found that lead in the gas, and the sulfur and zinc were causing problems.
Lead in the fuel did a couple things, one it raised the octane rating and two it served as a lubricant and heat transfer medium for the valve seats. The replacement additives brought the octane ratings back up but didn't help the valves. The factories started using induction hardened valve seats or inserts to combat the valve damages. Those of us out in the rest of the world generally let the engine wear and then had the heads cut for hardened valve seats.
However the lead additive was also discovered to cause health problems in children and it poisoned the early converters used. So it was gradually reduced and removed from gasoline.
The sulfur content also acted as a high pressure additive that formed a sulfide layer on metals in the engine in areas exposed to higher temperatures. Piston skirts and rings along with valve stems were the items that benefited from this. The OEM solution to sulfur removal = chrome rings, coated piston skirts and added silicone to the piston alloy. For the valves they altered the geometry some to reduce the side pressures on the stems and used different alloys to lower the wear. Same things were done outside the OEM world.
Sulfur burning in the engine was an issue though. It formed various corrosives compounds when it combined with the gasses in the atmosphere, the result became better known as "acid rain". So like lead the sulfur content was slowly lowered until today's oils contain very small traces.
The biggest issue for older engines with flat tappet cams was the removal of the ZDDP (zinc) This was the primary item that prevented the high pressures at the lobe/tappet interface as well as the rocker tip/valve stem from causing damage. It was burnished onto the surfaces by the extreme pressures and heat. However it also poisoned converters and caused some "harmful" compounds when exposed to the high temperatures inside the engines. The OEMs solutions were roller lifters and lowered spring pressures to reduce the pressures in the valve train.
For those folks who have older engines with flat tappets, many oil companies made specific oils higher in ZDDP, however as those engines wore out and the market demand dropped along with the EPA constantly pressuring them these oils were slowly eliminated or legislated out. Now there are only a few companies making oils for use in these older engines.
Now while all of the above was occurring, there were also many advances made to the detergent packages used in the oils to combat deposits left behind by the newer additives and lower quality fuels. This also causes problems for the owners of older engines. These newer detergents are based on calcium compounds and they work very well at cleaning those deposits. So well in fact that using a modern oil in an older flat tappet engine will remove any of the ZDDP that was left behind by the older oils, and increase the wear at an exponential rate. There are many "ZDDP" additives that claim to work with the newer oils, however they generally do not work because the new detergent packages don't allow them to bond with the metals as needed for the anti-wear properties.
For a lot of years you could get around these issues by using oils made for diesels. Those were not regulated as heavily and still had higher sulfur and zinc content, and didn't use the newer detergent packages. That all started changing in the late 90's. The EPA started to regulate the diesels to the same levels as automobiles. The sulfur was removed and then the zinc was lowered as well.
These days you are very limited in oil choices if you have an older flat tappet engine. Most of the oils sold in the stores are useless in a flat tappet application. They contain extremely low levels of ZDDP (if any) and they use the new detergents, both are bad news.
Purpose made oils are available, and there are some industrial oils that could be used as well. Or you can replace the flat tappet cams with roller units (easy in some cases and almost impossible in others).
Sorry for the long post.
Craptain
Well-known member
Sorry for the long post.
Long but very informative. Thank you.
Sent from my LG-D801 using Tapatalk
HOTFR8
Banned
Photobucket Fix: Press Ctrl + F5 to force a full refresh for the site.
Nice one Bob
 .
.Looking at the basement excavation, I;d have been lurking there with a metal detector
When you look at all the dirt that was moved and with the history of the shop and surrounding property you'd have thought we would have dredged up heaps of old "stuff" wouldn't you? In fact I made a deal with the excavation crew, "any gold bars we find, we split 50/50, deal?"

With all that digging this is the only thing I found besides a few rocks.

Once cleaned up the metal is surprisingly shinny for being buried for decades.

I've no clue what engine it was used in but it is stamped with the size and,"made in the usa".
Wonder what the backstory on that was. Anyway, the dig was surprisingly clean of any debris, automotive or otherwise. Sort of disappointing really. I was really counting on finding the remains of a Bonneville Belly Tanker that the Jerauld "Y" manifold was used on.
Thomas
..... Being in the renovation business most of my career, I mostly work with old technology.
Me too; in fact old technology is kind of a watch word around the shop don't you think? Nothing wrong with that.
Excellent work as always. How's the process organised? Do you have a contracted supervisor coordinating the different contractors and sub contractors?
I did hire a general contractor, Ray, who is making ordering various material a whole bunch easier.
Ray has recommended some subcontractors that he's worked with for the last 20 years who do great work.
In practice Ray and I are working closely together drawing on each others strengths.
I designed the house and as such I'm the go to guy to answer most questions. Nobody knows that house better than I do.
Some aspects of construction I'm totally responsible for such as HVAC, electrical, all interior doors, flooring, all cabinetry and trim, exterior brick, limestone and stone, surface concrete, the fireplace, windows.
Ray's expertise is framing, plumbing, roofing, drywall and painting.
I have certain ideas of what I want and we consult each other and come to consensus on the best approach to achieve that result. We're of a like mind both of us working to a high standard. It's a great comfort to have an extra set of eyes on everything.
I'm on site almost at all times working or supervising.
.....
I'm getting ready to put that dynaliner in my vette build so what is that tape you used ? A/C duct tape is what I have in mind
We used metal foil duct tape. That's the shinny tape you see in the pictures. It worked very well. It took a lot of time fussing to get the Dynamat installed but it made an enormous improvement on how quiet the interior is. The most notable improvement was where we used it in the doors. The doors don't sound tinny when they're shut. They thunk shut with solid authority. Mike and I love just opening and closing the doors just to listen how satisfying they sound when they close. Well worth the effort in the end and highly recommended. The Dynaliner is for thermal control so it hasn't been hot enough to gauge if it helps keep the car cooler but we have high expectations it will help.
The Chevy ll looks great. I am a little confused though. Is Mike the fourteen year old son, now in his mid sixties? Thanks for sharing , Brian
My bad Brian, I didn't make that very clear did I? Mike is the dad who is now in his mid 60's and is who I worked with on the car. His son, decided rather than get involved in power mechanics he rather be a medical doctor. He's now a surgeon practicing in the mid-west. He's blow away with how well the car turned out. Most of his memories of it are just sitting in the back of the garage gathering dust.
Thomas
PLOWJEEP
Well-known member
When do the framers start? Hopefully the weather will be as nice for that phase as it was for the foundation. Good luck, looking forward to your posts, Brian
PLOWJEEP
Well-known member
Oh, and by the way. Now that I read the post again about the Chevy ll. I realized that there was a father and a grandfather. Thanks for clearing it up. Truly a great story. You should be very proud of involvement. Brian
Ran Our first test and tune yesterday
Good for you, that's an early start. Bodes well for you this year I think. I rather doubt I'll get much if any practice prior to the race events this year. I expect I'll just show up and run what I run. I'm taking one for the team and concentrating on the house obviously, but I am racing at several events this year no mater what and going to Bonneville with Lou again. It'll be good to get away and bang some gears.

It is all coming together now, the Blackhawk Jack you posted previously was his, and this is what you have been up to. I noticed your productivity had been a little lower than what had become your norm but figured it was all due to the home sale, move, and build. I didn't realize you had been hiding in the corner restoring a car from the ground up! That is great of you Thomas and I'm very happy for the two of you to have been able to get this car on the road again.
JB
Was that an Ah Ha moment for you JB?
The Chevy II project wasn't done in the old shop so I didn't include it here until now. Yup, it kept me from several of my own projects that I have waiting, but I made the car restoration a priority. He'd been waiting 14 years and I knew how cool it is to achieve a dream so I wanted to be part of making it happen for him. Key to it all was that I was newly retired so I was able to make time for it. I'd do it all over again in a heartbeat. I enjoyed working on it as much if not more than he did. We really did enjoy each others company throughout the whole project and he's just a real cool dude. Thomas
....
I may have missed this, how are you going to get future shop tools into the basement? Will you have access for equipment after the house is complete?
Keep up the great work, and detailed posts! Thanks!
Thank you for your interest and encouragement SiGmA_X, much appreciated. Some of the lift information is buried back in the thread and I'll elaborate more about it as the house progresses. I'm incorporating a material lift that will allow me to easily move heavy material and equipment from the garage to the basement.

Here's a look at the garage, outlined in blue. The orange lines are the overhead door openings. The red square is where the material lift is located. The white arrow indicates its direction of travel.

This is the platform that was fabricated, 5' (1.5 m) square, 6' (1.8 m) tall. It's big enough and built to handle all my wood working machinery. I wanted something with 4000 lbs (1814 kg) capacity.

That platform will be lower by...

...an Ingersoll Rand...

...2 ton electric chain hoist I managed to find.

It's new...

...in the box so I shouldn't have any issues with it.
As I said, I'll get more information about the lift as I get closer to installing it. I predict some powder coating in its future.

Powder coating fool, Thomas
SiGmA_X
Well-known member
Very nice, thanks Thomas! I saw the material lift itself, but missed the rest of the details around it. I thought maybe it was for initial transport of the equipment, but I figured that had to be too permanent for a working shop!
Roman
Roman
Purpose made oils are available, and there are some industrial oils that could be used as well. Or you can replace the flat tappet cams with roller units (easy in some cases and almost impossible in others).
Sorry for the long post.
There is a turbo Buick enthusiast named Richard Clark that has come up with a supplement called ZZDP that can be used with oil off the shelf. Richard was one of the leading researchers that came up with the issues from the loss of zinc in oil.
I like what you're doing Thomas and hope to come see it in person one day.
jbmatth
Well-known member
Thomas,
Yes it was most certainly an Ah Ha moment for me.
As for the machinery lift and knowing very little background on it I'd be a little suspect of the lifting eye. If it was engineered and FEI was used you will be fine, but the rule of thumb I've used has always been to have a hole diameter distance of material from the hole O.D. With a thickness at least half of the hole diameter.
I have to mention it as I would hate to see one of those lovely machines take an abrupt stop at the end of a short fall.
JB
Yes it was most certainly an Ah Ha moment for me.
As for the machinery lift and knowing very little background on it I'd be a little suspect of the lifting eye. If it was engineered and FEI was used you will be fine, but the rule of thumb I've used has always been to have a hole diameter distance of material from the hole O.D. With a thickness at least half of the hole diameter.
I have to mention it as I would hate to see one of those lovely machines take an abrupt stop at the end of a short fall.
JB
T......
As for the machinery lift and knowing very little background on it I'd be a little suspect of the lifting eye. If it was engineered and FEI was used you will be fine, but the rule of thumb I've used has always been to have a hole diameter distance of material from the hole O.D. With a thickness at least half of the hole diameter.
I have to mention it as I would hate to see one of those lovely machines take an abrupt stop at the end of a short fall.
JB
JB, your critical eye is always appreciated. As I'd mentioned I haven't really got into the specifications for the lift but here is a little background information that should ease any misgivings.
The lift was all engineered and all stress members are high strength steel.

The top cross member consists of 2 channels facing each other which are continuously welded along all mating surfaces.

The channel was then boxed on the ends and continuously welded all around.

The lifting eye itself is 1" thick material, high strength steel that extends all the way through the channel.


This is looking underneath at the top cross member channel where the lifting eye extends through all the way through the channel. As such it is welded top and bottom. The channels face each other, are continuously welded all around and were milled to provide clearance for the lifting eye to extend all the way through.
For what the lift has to accomplish, moving slowly, straight up or down with no side load I'm comfortable it will function well. Without this additional information I can see where you might have misgivings and I thank you for the well thought out caution.
I've said it many times, I'm counting on you guys to keep me on the straight and narrow. Never hesitate to bring something like this to my attention if you have a concern. I'm always learning from everyone here. Thank you.
Thomas
Lyndon
Well-known member
Thomas
1. What are you doing up posting at that time of night?
2. JB's concern worried me, because I know he worries for you (if that makes sense)..... And I thought to myself, "Self - I'll bet Thomas has not only had the rig engineered, but ran the eye piece all the way through the beam and welded it to the bottom"....... And I was right. I knew I could count on you.
3. Just a slight aside, because I know you're busy..... Any news on BS 1.0?
Lyndon
100% confident in Thomas' ability.....
1. What are you doing up posting at that time of night?
2. JB's concern worried me, because I know he worries for you (if that makes sense).....
And I thought to myself, "Self - I'll bet Thomas has not only had the rig engineered, but ran the eye piece all the way through the beam and welded it to the bottom"....... And I was right. I knew I could count on you.3. Just a slight aside, because I know you're busy..... Any news on BS 1.0?
Lyndon
100% confident in Thomas' ability.....
Snush
Member
I'm getting sick of all this man cave stuff as well. I think of a Den when I think of man cave, its somewhere where you watch sports and display trophy's. Not a working garage.Now this is what I'm talking about. A "real" garage. None of this man cave ****. Beautiful work.
Sent from my VF-895N using Tapatalk
Snush
Member
Well hay man on the bright side at least guys like us can get more pleasure out of finding some old tools and the like for a few bucks at a garage sale or a bet up old pickup than guys with a tonne of money get out of Bluetooth powered *** wipers and Ferraris.this is possibly the best thing ive seen in a long time.
last year has been really crappy 'round here, wife's been laid off for over a year, my company has cut back severely, i work too much, dont sleep very much, and generally have a ****** attitude most of the time.
but seeing this thread, brought a smile to my face, i have a "soft spot" for all things old. i remember checking out old farmhouses with my dad's family when i was a little kid
they called it "haunted housin'" finding old stuff in an abandoned farmhouse was the highlight of my summer vacation.
i'd be like a kid in a candy store in that place, wondering what the story was behind everything that i saw....
thanks you brightened my day
Sent from my VF-895N using Tapatalk
Snush
Member
I agree, i see where these guys are coming from, but as we've all seen that shop changed with the times over its life anyway, its not like it stayed in the thirties.Good grief. It may have been "classic," but ... perfect the way it was? It was damaged, broken, non-functional, and forgotten. You couldn't even call it a shop. Certainly it's not the "same" shop anymore; it couldn't possibly be. Shops like that don't exist anymore. When they did, they relied on a team of skilled manpower to operate, not to mention a steadily incoming procession of the kind of machinery that you'd find on the type of family farms that went by the wayside 40 years ago. What good would that kind of shop -- a stiff, non-functional, musty homage to the past -- have done anyone?
Personally, I can't imagine striking a better balance between modern function and reverence for what the building was (and for the men that worked there). What would be involved with "keeping the soul" of the building besides having an overgrown, rotted, leaky work environment where you had to sort through 40 tons of steel to find what you need on a daily basis? And who wants to work in a museum? The guy did a fantastic job preserving as much of the building and equipment as was possible. I'm appreciative that he went to great pains to keep what he could (as most folks would have called in the dozers), and it's my deep appreciation for his act of preservation that leads me to bother to respond to these posts.

Sent from my VF-895N using Tapatalk
Snush
Member
My old boss had a whole yard like this, (earthmoving contractor) lots of old buildings full of so much cool stuff, we also had another yard with modern workshop which sort of justified having all the cool stuff some would call junk, as it didn't clutter up working space. When we needed almost any part, we'd go digging around and find something useful. Anyway the council took the land back and he had to move everything. Most of it ended up at the scrap yard cos we couldn't junk up the shop for stuff that may be handy one day. It sucked, even tried giving stuff away to the opposition and they wouldn't take it. Some times try as you might to save old stuff and keep it the way it was you simply can't. Unless you have gold lined pockets.Good grief. It may have been "classic," but ... perfect the way it was? It was damaged, broken, non-functional, and forgotten. You couldn't even call it a shop. Certainly it's not the "same" shop anymore; it couldn't possibly be. Shops like that don't exist anymore. When they did, they relied on a team of skilled manpower to operate, not to mention a steadily incoming procession of the kind of machinery that you'd find on the type of family farms that went by the wayside 40 years ago. What good would that kind of shop -- a stiff, non-functional, musty homage to the past -- have done anyone?
Personally, I can't imagine striking a better balance between modern function and reverence for what the building was (and for the men that worked there). What would be involved with "keeping the soul" of the building besides having an overgrown, rotted, leaky work environment where you had to sort through 40 tons of steel to find what you need on a daily basis? And who wants to work in a museum? The guy did a fantastic job preserving as much of the building and equipment as was possible. I'm appreciative that he went to great pains to keep what he could (as most folks would have called in the dozers), and it's my deep appreciation for his act of preservation that leads me to bother to respond to these posts.
Sent from my VF-895N using Tapatalk
......
Folks, yesterday my wife and I along with my brother and his soon to be wife made the 3 hour trek South to central Illinois and checked out The Restored 1930's Auto Shop.
In the 3 hours we spent there I came to the realization that it was obvious why Thomas and Chris are living in the Center of the Universe. Obviously they were put there in hopes that the generosity of this couple would radiate outward and infect others in it's path!!!......
It was pretty neat to see this place in person and get acquainted with the layout of the land and shops that you just can't get in pictures and trust me, it is very impressive and gives one a great understanding of the work that has gone in to the shop.
.........
Laine it was great to meet you and your gang. Meeting long time readers such as yourself is one of the big benefits of doing this thread. I've said it before, we're all friends here, we just haven't met....yet.

I asked Laine to back his truck up to the 2 car garage where I've been storing the last vestiges of material out of the Tool Shed and Lean-To. We sorted through most of it...

...and Laine kindly volunteered to accept some items he is going to re-purpose. He promised to post pictures of some of it once the transformation is made. Looking forward to seeing pictures of that.
My stash of "stuff" is slowly dwindling and thankfully almost all of it is finding new life elsewhere and not being relegated to the scrap heap. My plan is by the time the house is done most if not all the items I'm not keeping will have found new homes.
Mr Johnson's legacy is radiating outward.
Thomas
When do the framers start? Hopefully the weather will be as nice for that phase as it was for the foundation. Good luck, looking forward to your posts, Brian
Looky what showed up today...

...the first small load of wood arrived this afternoon. That's part of the material to be used on the base plate. We pour the basement and garage floors Monday with framing starting thereafter. Weather forecast next week is all fine and dry.
Thomas
1. What are you doing up posting at that time of night?.....
3. Just a slight aside, because I know you're busy..... Any news on BS 1.0?
Lyndon
Oh, you saw that huh Lyndon?
Well truth be told I wanted to answer a few questions that had been asked and that the only time I could fit it in. I send David a note to get a progress report on BS 1.0. I'll post what I find out. It goes to Dennis in Maryland next and then back to me and on to you. Soon, very soon. Does everyone in Australia know the person they're mailing it to and have contact information for them. Our European and UK friends set the standard on how it's to be done. No drama it went like clockwork from person to person over there. Well done gentleman.
Aaaand why in all that is baby blue is that lift platform not powder coated? I am loosing sleep over this!!!
Rest easy babaluba, the material lift definitely has powder coating in its future. Because of the uniqueness of this application I'm waiting until I actually put the lift in use to see if I might need to modify it in any way before I commit to powder coating. What I have planned is unusual enough that I very well might need to make some in the field modifications to it. Stand by.
I am going to powder coat all the window and door lintels though. Since the house is all brick and stone those lintels all need to be metal. Powder coating them is already being arranged. I've got to have some aspects of the house powder coated don't you think?
Thomas
Last edited:
I'm getting sick of all this man cave stuff as well. I think of a Den when I think of man cave, its somewhere where you watch sports and display trophy's. Not a working garage.
Sent from my VF-895N using Tapatalk
Well welcome Snush, we share a similar approach to a working space.
I have never ever referred to the old shop as a "man cave". It's a work shop, pure and simple. It's where I do projects and car "stuff".
Thomas
Radiant Floor Heat Installation
One of the key features of the house is that it will have geothermal supplemented, radiant floor heat on every floor surface including the basement and garage.

The tubing used is this orange PEX, 1/2" ID.

The PEX is installed by stapling it to the 2" high density Styrofoam.

Here the PEX has been stapled...

..using this stapler. This is a stand up, hand operated stapler so you don't have to bend over while applying hundreds of staples. It's a real back saver.


There are several zones throughout the floor that make up the whole installation.

The loops of those zones are all brought together...

..into what will eventually be a common manifold. The red chalk line on the wall is the level the concrete floor will be poured to. My concrete will be 5" thick.

This is the garage floor...

...done just like the basement floor.

Seen is a temporary set up for the garage until the floor is poured. Then a permanent manifold will be installed. Note a pressure gauge has been installed.

The loops are pressurize to ensure no leaks prior to pouring the concrete. If they hold pressure.....no leaks! All of mine held perfect pressure so we're all set to pour concrete floors Monday.

In only 13 working days time...

...we've gone from nothing...

... to having the foundation completed, installed the radiant floor heat tubing and ready to pour all the concrete flooring surfaces. That's as good as it gets I think. Everything went very smoothly.
We'll start the floor truss installation next week along with the fireplace foundation blocking. We should start to make some visible progress above ground soon.
Thank you all for your interest and support. It's making is this project even more fun for me.
Thomas
One of the key features of the house is that it will have geothermal supplemented, radiant floor heat on every floor surface including the basement and garage.

The tubing used is this orange PEX, 1/2" ID.

The PEX is installed by stapling it to the 2" high density Styrofoam.

Here the PEX has been stapled...

..using this stapler. This is a stand up, hand operated stapler so you don't have to bend over while applying hundreds of staples. It's a real back saver.


There are several zones throughout the floor that make up the whole installation.

The loops of those zones are all brought together...

..into what will eventually be a common manifold. The red chalk line on the wall is the level the concrete floor will be poured to. My concrete will be 5" thick.

This is the garage floor...

...done just like the basement floor.

Seen is a temporary set up for the garage until the floor is poured. Then a permanent manifold will be installed. Note a pressure gauge has been installed.

The loops are pressurize to ensure no leaks prior to pouring the concrete. If they hold pressure.....no leaks! All of mine held perfect pressure so we're all set to pour concrete floors Monday.

In only 13 working days time...

...we've gone from nothing...

... to having the foundation completed, installed the radiant floor heat tubing and ready to pour all the concrete flooring surfaces. That's as good as it gets I think. Everything went very smoothly.
We'll start the floor truss installation next week along with the fireplace foundation blocking. We should start to make some visible progress above ground soon.
Thank you all for your interest and support. It's making is this project even more fun for me.
Thomas
Snush
Member
Re: Radiant Floor Heat Installation
Sent from my VF-895N using Tapatalk
They say many hands makes light work, I don't believe that, but what I do believe is good teams make light work and thats what's going on there. Good stuffOne of the key features of the house is that it will have geothermal supplemented, radiant floor heat on every floor surface including the basement and garage.
The tubing used is this orange PEX, 1/2" ID.
The PEX is installed by stapling it to the 2" high density Styrofoam.
Here the PEX has been stapled...
..using this stapler. This is a stand up, hand operated stapler so you don't have to bend over while applying hundreds of staples. It's a real back saver.
There are several zones throughout the floor that make up the whole installation.
The loops of those zones are all brought together...
..into what will eventually be a common manifold. The red chalk line on the wall is the level the concrete floor will be poured to. My concrete will be 5" thick.
This is the garage floor...
...done just like the basement floor.
Seen is a temporary set up for the garage until the floor is poured. Then a permanent manifold will be installed. Note a pressure gauge has been installed.
The loops are pressurize to ensure no leaks prior to pouring the concrete. If they hold pressure.....no leaks! All of mine held perfect pressure so we're all set to pour concrete floors Monday.
In only 13 working days time...
...we've gone from nothing...
... to having the foundation completed, installed the radiant floor heat tubing and ready to pour all the concrete flooring surfaces. That's as good as it gets I think. Everything went very smoothly.
We'll start the floor truss installation next week along with the fireplace foundation blocking. We should start to make some visible progress above ground soon.
Thank you all for your interest and support. It's making is this project even more fun for me.[emoji106]
Thomas
Sent from my VF-895N using Tapatalk
rixtrix1
Well-known member
Moving ahead so well for such a large project. Congrats, Thomas!
1/2 Cup
Member Emeritus
Looking fantastic Thomas.
bhawley
Member
All are working fine here, Not a one missing!
Folks, yesterday my wife and I along with my brother and his soon to be wife made the 3 hour trek South to central Illinois and checked out The Restored 1930's Auto Shop.
In the 3 hours we spent there I came to the realization that it was obvious why Thomas and Chris are living in the Center of the Universe. Obviously they were put there in hopes that the generosity of this couple would radiate outward and infect others in it's path!!!
Never have the four of us been welcomed in a manner where you'd think we all knew each other since birth. Thomas and Chris were such great host's and took the time to show us all the awesomeness of this thread in person that most will only see in pictures. Seriously, if you are ever traveling and come within oh - say a 1000 miles of their home - make a detour and plan a visit!!
Chris even went so far as to make us a light lunch before we left! Thanks - it was perfect and very much appreciated!! Two demerits for Thomas not stocking the Pepsi machine...
It was pretty neat to see this place in person and get acquainted with the layout of the land and shops that you just can't get in pictures and trust me, it is very impressive and gives one a great understanding of the work that has gone in to the shop.
I'm really still soaking it all in and making mental notes of all the neat ideas I saw that can be incorporated into my own shop - from the aluminum airlines to the automated bleeder on his compressor to the simplest thing like the floor in the shop and his wood storage rack, the ideas are endless and I'm sure I'll forget more than I remember.
And that's really what makes The Garage Journal one of the best sites on the web - People Helping People, it's a Beautiful Thing!!


A first class post.
Looking great for just 13 days. Radiant heat is awesome. Is there a floor drain in the garage so you can wash your cars and dogs?

The house I grew up in and that we sold last fall, was built in 1910. It had old time radiators - radiant heat and I agree it's great. Radiant floor heat will be even better. Now I can't wait for next winter!
As for a drain in the garage, yup, the floor drain is right in the middle. I'll have about 2" of fall to it from the edges of the garage.

From the basement here's what it looks like. The vent pipe seen is just temporary of course until we get some walls framed up.

All floor drains connect to the ejection pit, far right.
A first class post.

I couldn't agree with you more bhawley. It was great fun having Lane and his wife along with Lane's brother and his brother's fiancee spend some time with us and visit the shop. Truly all around, first class folks.
Thomas
Boosted1
Well-known member
Wow that's a lot of tubing for the floor heat.
Qs from someone not experienced w this:
1. What sort of pump is used to circulate the fluid?
2. Is the pump rate / fluid circulation rate metered?
3. How do you know if the heat transfer will be sufficient to heat the floor as the coolant gets towards the end of the piping run?
Qs from someone not experienced w this:
1. What sort of pump is used to circulate the fluid?
2. Is the pump rate / fluid circulation rate metered?
3. How do you know if the heat transfer will be sufficient to heat the floor as the coolant gets towards the end of the piping run?
Homebody
Well-known member
Thanks again Thomas and for the compliment bhawley. It was a great day and my brain is already working overtime on what to create from the rusty relics of Johnson's Shop!
It was a great day and my brain is already working overtime on what to create from the rusty relics of Johnson's Shop!MacTexas
Well-known member
There are squares in the basement floor where there is no styrofoam insulation. Why?
Wow that's a lot of tubing for the floor heat.
Qs from someone not experienced w this:
1. What sort of pump is used to circulate the fluid?
2. Is the pump rate / fluid circulation rate metered?
3. How do you know if the heat transfer will be sufficient to heat the floor as the coolant gets towards the end of the piping run?
Excellent questions Boosted1. Might I wait to answer them until I do a comprehensive post on the geothermal/radiant floor heat complete installation? That way all the information will generally be in one spot for future reference.
Quickly though there is a general industry limit on the length of each loop to prevent it from getting too cool by the end of it's run. The fluid is recirculated back to reheat it before that happens.
There are squares in the basement floor where there is no styrofoam insulation. Why?
That's great question MacTexas.

When the footings were excavated and poured so were the footings for the piers (columns to support the metal I beams above them- not installed yet) and footings for the fireplace foundation and some interior basement walls.

Just as the footings for the basement walls are wider than the basement walls themselves, the footings for the piers, fireplace foundation and interiors basement walls are larger than the actual area needed.

The floor concrete will be poured on top of the Styrofoam and overall the floor will have little weight on it.
For the area where there are piers and fireplace foundation however, those areas will have a lot of concentrated weight bearing down upon them as the house is built.
So we want the floor concrete to be in direct contact with those various footings below the Styrofoam and not have a layer of Styrofoam between the footings and the floor concrete.
So the precise areas where support is needed was cut out of the Styrofoam so the floor concrete will be in direct contact with the footings below.
When the floor is poured, the surface will be all level, but underneath in those certain areas, are those footing we poured last week, waiting to support the projected load that will be placed on them.
Tomorrow, with the floor poured it will be all one smooth surface.
As the house is built it will become a bit more clear. We're installing areas of support that will be needed in the future as we go along. Again, an excellent question and I hope I haven't confused you......too much.
Thomas
Chevy II In The Shop
It's not all work on the house around here. Today Mike brought his Chevy II over...
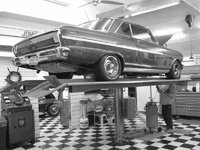
...and we got to play, er, work out in the shop.
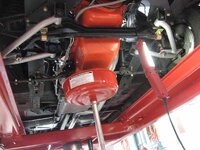
We did an oil and filter change....
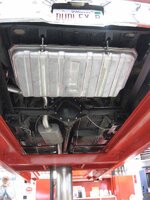
... and checked everything over.
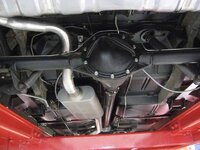
It really turned out well and is good to go.

Mike should be very proud of his ride after waiting so long for it. He tells me it was worth the wait.
It's incredibly rewarding to share the shop with friends doing work like this. We put vintage tunes on the sound system, ignore the crooked switch plate () and dive right into having fun out there.
This is what I envisioned doing with this shop all those many years ago.
Who says you can never go back in time?
Thomas
It's not all work on the house around here. Today Mike brought his Chevy II over...
...and we got to play, er, work out in the shop.
We did an oil and filter change....
... and checked everything over.
It really turned out well and is good to go.
Mike should be very proud of his ride after waiting so long for it. He tells me it was worth the wait.
It's incredibly rewarding to share the shop with friends doing work like this. We put vintage tunes on the sound system, ignore the crooked switch plate (
) and dive right into having fun out there. This is what I envisioned doing with this shop all those many years ago.
Who says you can never go back in time?
Thomas
Basement/Garage Floor Pour
We started at 0700 this morning. Setting forms and then...

...pouring the basement and garage floors.


Here you can see in the center, one of the pier areas that was cut out of the Styrofoam...

...and now it's covered with concrete.

This is the garage floor during the pour.

Once everything was poured it was troweled using power trowels on the main areas...

....and it was hand troweled around all the edges. This shows a nice contrast in height between the garage and basement floors.

This is the material lift area.

It was overcast and very humid so the concrete dried very slowly. Because of that the troweling...

... took several hours. When the troweling was finished and the concrete dry enough...

...the floors had a Kure and Seal applied to them.

The Kure and Seal slows the drying process resulting in stronger concrete and sealing the surface to minimize concrete dust.


We poured and finished 60 yards of concrete today and ended a little after 8:00 PM, a 13 hour day. It was too dark to get pictures of the garage floor sealed.
Guys I'm more than a little tired right now, I'll follow up with more details tomorrow but we got it done and I'm extremely happy with the results! Thanks everyone.
Tired Thomas
We started at 0700 this morning. Setting forms and then...

...pouring the basement and garage floors.


Here you can see in the center, one of the pier areas that was cut out of the Styrofoam...

...and now it's covered with concrete.

This is the garage floor during the pour.

Once everything was poured it was troweled using power trowels on the main areas...

....and it was hand troweled around all the edges. This shows a nice contrast in height between the garage and basement floors.

This is the material lift area.

It was overcast and very humid so the concrete dried very slowly. Because of that the troweling...

... took several hours. When the troweling was finished and the concrete dry enough...

...the floors had a Kure and Seal applied to them.

The Kure and Seal slows the drying process resulting in stronger concrete and sealing the surface to minimize concrete dust.


We poured and finished 60 yards of concrete today and ended a little after 8:00 PM, a 13 hour day. It was too dark to get pictures of the garage floor sealed.
Guys I'm more than a little tired right now, I'll follow up with more details tomorrow but we got it done and I'm extremely happy with the results!
Thanks everyone.Tired Thomas
panthersteve
Well-known member
SiGmA_X
Well-known member
It sure appears you picked a very qualified concrete crew! I probably missed this in a previous post (...I'm going to fail Chris' test...) but what type of concrete did you go with? I assumed I would see a little rebar in there. I look forward to more details when you're rested!
Roman
Roman