To avoid these ads, REGISTER NOW!

Between 705 & 1200 SQ/FT Roboto's Garage

Workspaces between 705 and 1200 squarefeet.
OP
M

Mr. Roboto

Well-known member
Joined
Dec 11, 2012
Messages
2,159
Location
New Hampshire
Worked an OT shift at work today 6-12, then drove 5 hours round trip to bring this home :) Settled on a 7x20 10k Rice car hauler, in cement gray. It should handle anything I want to put on it. My truck is probably the limiting factor now, and I’m ok with that.

Grabbing it from the dealer.

IMG_2871.jpeg

And brought it 150mi back home. I know it was empty, but it towed wonderfully. Barely felt it, and it was super easy to drive.

IMG_2872.jpeg

IMG_2875.jpeg

IMG_2873.jpeg

May or may not already be going to look at a Jeep that needs to be towed home if I decide to buy it tomorrow afternoon.
 
To avoid these ads, REGISTER NOW!

zmotorsports

ALLIANCE MEMBER
Joined
Oct 20, 2009
Messages
21,312
Location
Northern Utah
Nice looking trailer. I like that the ramps come out the rear.

I know that sounds obvious but my last open flatbed trailer (Big Tex) had the ramps stored under the rearmost section of the trailer from the sides. It usually wasn't too big of a problem except when loading or unloading from my last shop where I had to back the trailer in between the house and fence which was a relatively tight fit at about 12' wide is all. I had to plan ahead and make sure to pull the ramps before backing the trailer back to the shop or I couldn't get them out once I had backed in. There may or may not have been a couple times I forgot and had to pull the trailer back out to the street. :mad: I swore I'd never had another trailer that had the ramps stored from the sides. Never thought about that when I first purchased it but sure thought about it a lot during the 15 years I owned the trailer. :rolleyes:
 
OP
M

Mr. Roboto

Well-known member
Joined
Dec 11, 2012
Messages
2,159
Location
New Hampshire
Seems like a great hike, the notch always has its on crazy weather pattern!

It was great! The same day I did this hike, Mt. Washington received its first snowfall, and iced over at the summit! Only about 1000ft higher in elevation that where we maxed out.

Nice looking trailer. I like that the ramps come out the rear.

I know that sounds obvious but my last open flatbed trailer (Big Tex) had the ramps stored under the rearmost section of the trailer from the sides. It usually wasn't too big of a problem except when loading or unloading from my last shop where I had to back the trailer in between the house and fence which was a relatively tight fit at about 12' wide is all. I had to plan ahead and make sure to pull the ramps before backing the trailer back to the shop or I couldn't get them out once I had backed in. There may or may not have been a couple times I forgot and had to pull the trailer back out to the street. :mad: I swore I'd never had another trailer that had the ramps stored from the sides. Never thought about that when I first purchased it but sure thought about it a lot during the 15 years I owned the trailer. :rolleyes:

Thank you, appreciate that! Wow, I’ve never seen one with ramps that slide out from the sides, but I can certainly see how that would be a challenge for your situation. Live and learn haha. When you custom build your awesome trailer I bet you won’t make that mistake :)
 
OP
M

Mr. Roboto

Well-known member
Joined
Dec 11, 2012
Messages
2,159
Location
New Hampshire
Couple quick things to share. Got a new bike rack for the Jeep. Got tired of throwing the bikes up on the roof (too tall) so I got this Kuat hitch rack. It's incredibly well built!

unnamed (2).jpg

unnamed (1).jpg


Also did some work on a 2008 Camry. Valve cover gasket and power steering reservoir/return line. Forgot to take after photos but here is the old tank that was leaking pretty badly.

unnamed.jpg

And the gasket:

unnamed (4).jpgunnamed (3).jpg
 

zmotorsports

ALLIANCE MEMBER
Joined
Oct 20, 2009
Messages
21,312
Location
Northern Utah
Awesome. Thanks for the response.

I asked because I am curious as to the origin of these leaks. Most all of the valve cover gaskets I have replaced over the past several years have all been on the exhaust side of the rocker boxes. In trying to determine the reasoning, I wonder if the heat from the exhaust manifolds are contributing to the hardening of the gaskets and ultimately, the early failure of these valve cover gaskets. Seldom, if ever, have I seen one fail nearer the intake side. It could also be the exhaust side is often the lowest point and therefore where the oil pooling would expedite the leakage.

Then again, I could be thinking too much. Could just be the age and mileage resulting in a leak. Plain and simple. :unsure:
 
OP
M

Mr. Roboto

Well-known member
Joined
Dec 11, 2012
Messages
2,159
Location
New Hampshire
Awesome. Thanks for the response.

I asked because I am curious as to the origin of these leaks. Most all of the valve cover gaskets I have replaced over the past several years have all been on the exhaust side of the rocker boxes. In trying to determine the reasoning, I wonder if the heat from the exhaust manifolds are contributing to the hardening of the gaskets and ultimately, the early failure of these valve cover gaskets. Seldom, if ever, have I seen one fail nearer the intake side. It could also be the exhaust side is often the lowest point and therefore where the oil pooling would expedite the leakage.

Then again, I could be thinking too much. Could just be the age and mileage resulting in a leak. Plain and simple. :unsure:

My engineer brain tends to agree with all of what you said. I think all of those are contributing factors!

So things with the Jeep snowballed a bit. I previously mentioned the noise I was getting in the front end. I mentioned all of this to the shop who did my re gear, plus the axle leak. He was nervous that it was the front pinion bearing due to being starved of fluid after the leak. When I brought it to him, we also noticed that the noise was exponentially worse in 4hi/lo with the driveshaft installed.

Regardless, he pulled the front diff apart, replaced axle bearings/axle seals and pinion bearing just in case, no questions asked free of charge. He also made a slight adjustment to caster to lower the pinion angle. Axle was no longer leaking, but noise/vibrations were still there. We both suspected the output bearing on the transfer case, unfortunately. At this point, I started cursing myself big time because I had the TC out to do my SYE…. I should have just rebuilt it at that time. It’s such a pain to get out, we’re approaching the end of the season before I park the Jeep, and the price he gave me was truthfully very fair. So I just had him rebuild the transfer case. He sent me this photo a few days later. Better him than me haha.

IMG_3257.jpeg

Called me up when it was done, and said all is now smooth. Great….put it to the test by driving 250mi round trip for a hike yesterday. I made this drive last year before the re-gear and the Jeep was constantly hunting for the right gear through the mountain passes. Now, with the 4.10s, it’s so so much better.

IMG_3438.jpeg

IMG_3442.jpeg

It was a good one, too. Had the place to myself. Hiked up to that cliff in the background of the photo above.

IMG_3358.jpeg

IMG_3327.jpeg

IMG_3318.jpeg

Starting to ice up in places

IMG_3402.jpeg

And Mt. Washington is now snow covered!

IMG_3451.jpeg
 

BigNuge

Well-known member
Joined
Feb 23, 2015
Messages
608
Location
Live Free or Die
Well….I had some catching up to do!

XJ is looking killer dude. You make me miss mine when I see that nice rig!

You pick up that trailer? I rehabbed a 16’ 7k a little while ago, primarily so I could move my compact tractor. It is a car hauler too. The simpler the better I say, especially when you consider that you’re using it sporadically. The one pictured with a winch would be a great option.
 
OP
M

Mr. Roboto

Well-known member
Joined
Dec 11, 2012
Messages
2,159
Location
New Hampshire
Well….I had some catching up to do!

XJ is looking killer dude. You make me miss mine when I see that nice rig!

You pick up that trailer? I rehabbed a 16’ 7k a little while ago, primarily so I could move my compact tractor. It is a car hauler too. The simpler the better I say, especially when you consider that you’re using it sporadically. The one pictured with a winch would be a great option.
Thanks for the kind words!

Yup, I picked up the trailer a few weeks back. Haven’t started looking at winches yet, but it’s on the list for sure. I’ve been looking for a vehicle to buy with it, but nothing has panned out yet haha. Typical marketplace clowns, you know how it is!
 
OP
M

Mr. Roboto

Well-known member
Joined
Dec 11, 2012
Messages
2,159
Location
New Hampshire
Well, the time finally came for me to use the trailer, to drag home another XJ :) A 2 door 5 speed 1997-2001 4.0L 4x4 Cherokee is about as rare as they come, and I’ve been searching for one for quite a long time. One popped up on Facebook marketplace about 2 months ago about a hour away. I reached out to the guy, who said he was inundated with messages, and was also having second thoughts about selling it. After some back and forth he pulled the ad, and I left him my phone number for if he changed his mind. He called me the day after thanksgiving and said he’s ready to move on.

Long story short, it was a fair bit rougher than the photos showed, and I kind of lowballed him on the price. He was still waffling on it, but being the guy with “cash and a trailer to take it away now” is what sealed the deal!

Made it home

IMG_3745.jpeg

Here’s what makes it all worth it, the glorious 5 speed. Need to get the factory shift knob back on there asap.

IMG_3753.jpeg

He just put a lot of money into it, too. Old Man Emu front coils and rear leafs (same as I put in mine, $$) Bilstien shocks all the way around, advance adapters SYE, adams rear driveshaft…. The parts alone made it worth what I paid. He’s getting driveline vibes still, which is what made him throw in the towel. I need to measure the rear pinion angle and go from there.

IMG_3749.jpeg
IMG_3750.jpeg

IMG_3751.jpeg

IMG_3752.jpeg

The trailer was awesome, and the Tundra pulled/stopped it without issue. The rear did squat pretty low, though. In retrospect I maybe should have backed the Jeep up a bit to lessen the tongue weight. But I think I may get a set of air bags for the rear of the truck to help with this in the future.

Anyways, not super sure the plans for this one. The floors are in pretty rough shape. I need to gut it and replace floor plans at a minimum. But it’s worth saving whether I keep it or sell it.
 
OP
M

Mr. Roboto

Well-known member
Joined
Dec 11, 2012
Messages
2,159
Location
New Hampshire
Got started on the green XJ a bit this weekend. First up, the previous owner had to pull the drivers side headlight/bucket/adjuster etc to openthe hood, as the release cable was broken. I reinstalled all of that to put the front end back together, and ordered a new hood cable.

e.jpg

She's not half bad looking! Drove it around a bunch on Sunday.

f.jpg

Removed the center console and replaced the emergency brake handle. The ratcheting mechanism was stripped out on the old one, and the PO was nice enough to include a replacement. I also ordered a cheap $9 shift knob from Amazon for now.

c.jpg

The big question mark in all of this is the driveline vibes, which the seller fully disclosed. I honestly did not even drive it on the highway when I bought it because I wanted it either way for the price I paid. But I did this weekend finally, and it vibes pretty good after 65+. Steps he took were installed a SYE and Adams rear driveshaft (vibes still there) installed a TC drop (vibes still there) removed TC drop and installed axle shims (vibes still there). Front DS is also removed.

@zmotorsports would like your opinion on this if you don't mind! On paper, the coils and leafs used should have given about 1.5" of lift. I measured rear pinion angle. If my math is right, it's near 0 degrees. I think 2*ish is preferable so there is still some movement on u-joint caps, but would 0* cause any vibration?

DS angle = 169.1*

b.jpg

Pinion angle 79.2 + 90 = 169.2

a.jpg


169.2-169.1 = 0.1* pinion angle


Visually looks to be near zero

d.jpg

Should I go from a 6* to 4* shim? There are 2 other possible culprits as I see it. Tire vibration (It doesn't feel like this to me but I can swap the wheels/tires from the black XJ to rule this out) or some other issue internal to the rear end. This XJ has a aussie ratcheting type locker in the rear end. I hate it. I'm either going to remove it and reinstall the spider gears (which he just gave me) but I also picked up an entire 3.07 C8.25 rear end on marketplace for $50 because he wasn't sure if he was going to be able to find the old spider gears or not that I can swap in.

LAST possible culprit, maybe there is an issue inside the transfer case? I would expect to hear noise below 65PMH as well though if this were the case. Love to hear your thoughts.
 

zmotorsports

ALLIANCE MEMBER
Joined
Oct 20, 2009
Messages
21,312
Location
Northern Utah
@Mr. Roboto is the rear driveshaft a double cardan joint at the TC or just a single U-joint at TC and at pinion?

IF it's a double cardan then you actually want the pinion to driveshaft angle at the diff to be at or near zero as the double cardan at the TC will compensate. IF you have the standard single joint at both the TC and the diff, you want those angles to be as close as possible to the same.

Example: if the TC to driveshaft is 2-degrees then you want to match the same 2-degrees at the differential so they cancel each other out, otherwise you can induce vibrations. I believe the OEM spec is around 2-3 degrees but that is on stock suspension, no lift. This is why usually with lifted vehicles I push the owner to go with a double cardan style driveshaft as they are much more forgiving.

Hope that information helps.
 
To avoid these ads, REGISTER NOW!
OP
M

Mr. Roboto

Well-known member
Joined
Dec 11, 2012
Messages
2,159
Location
New Hampshire
@Mr. Roboto is the rear driveshaft a double cardan joint at the TC or just a single U-joint at TC and at pinion?

IF it's a double cardan then you actually want the pinion to driveshaft angle at the diff to be at or near zero as the double cardan at the TC will compensate. IF you have the standard single joint at both the TC and the diff, you want those angles to be as close as possible to the same.

Example: if the TC to driveshaft is 2-degrees then you want to match the same 2-degrees at the differential so they cancel each other out, otherwise you can induce vibrations. I believe the OEM spec is around 2-3 degrees but that is on stock suspension, no lift. This is why usually with lifted vehicles I push the owner to go with a double cardan style driveshaft as they are much more forgiving.

Hope that information helps.

Sorry, I left that important bit out. Yes, it is a double cardan rear shaft. With that being said, I think the rear pinion angle looks good based on your feedback, and I should at other culprits aside from pinion angle as the root cause of the vibration at highway speeds?
 

zmotorsports

ALLIANCE MEMBER
Joined
Oct 20, 2009
Messages
21,312
Location
Northern Utah
You mentioned that you have already removed the front driveshaft so that takes it out of the equation and one of the first things I do to determine whether it is front or rear where the concern is.

Also look at the yoke nut as I have seen those back off a few threads and create some vibrations, both front and rear outputs from TC as well as the pinon nut on the rear differential.

Look at engine and transmission mounts and ensure nothing is hitting a body or crossmember such as exhaust tube or hanger.

Lastly, you may try rotating tires front to rear as a last resort to make sure it is not something like a cord coming apart in a tire.

Those are just a few things off the top of my head to throw out at ya to check.
 
OP
M

Mr. Roboto

Well-known member
Joined
Dec 11, 2012
Messages
2,159
Location
New Hampshire
You mentioned that you have already removed the front driveshaft so that takes it out of the equation and one of the first things I do to determine whether it is front or rear where the concern is.

Also look at the yoke nut as I have seen those back off a few threads and create some vibrations, both front and rear outputs from TC as well as the pinon nut on the rear differential.

Look at engine and transmission mounts and ensure nothing is hitting a body or crossmember such as exhaust tube or hanger.

Lastly, you may try rotating tires front to rear as a last resort to make sure it is not something like a cord coming apart in a tire.

Those are just a few things off the top of my head to throw out at ya to check.

Thanks for the always helpful advice! The drivability issues will take a backseat for now…. I stripped the interior last night to assess the rust so I could get what was needed for floor pans on order. It was as bad as I was expecting. Full passenger side floor, and front drivers side, as well as the passenger seat riser. My black Jeep needed some floor repair, and I hired it out because I was intimidated about messing up what was supposed to be my “forever” jeep but I’m tackling this one head on. Kind of excited for the challenge.

I think my plan is to panel bond/seam seal all of the floor pans in place. I may try my hand at welding some of the smaller areas I’ll need to fabricate, like the transmission hump.

Also, there was a recall to relocate the airbag module from under the seat to the transmission hump 20 years ago… this one never got done. I wonder if that campaign is still open hahaha.

IMG_3925.jpeg

IMG_3926.jpeg

IMG_3927.jpeg
 

Kriesel

Well-known member
Joined
Mar 25, 2014
Messages
138
Location
Afton, Minnesota
I've got the pedals/shift lever/center console parts to swap an XJ from auto to manual if you think you need them ever haha

I got rid of my XJ but kept those parts because i knew how rare they were. Had a Cummins 4-cylinder in it, and kept that too, scrapped the rest of the jeep.

Putting a TDI in a wrangler JK at the moment.
 
OP
M

Mr. Roboto

Well-known member
Joined
Dec 11, 2012
Messages
2,159
Location
New Hampshire
I can't wait to see how this turns out, man. Good on you for taking this on head first. Can't wait to see the results, bud!

Thanks dude. I’m eager to see the results also haha. If things turn out well, I don’t have to be “afraid” of buying jeeps with rotten floors for future flips.

I've got the pedals/shift lever/center console parts to swap an XJ from auto to manual if you think you need them ever haha

I got rid of my XJ but kept those parts because i knew how rare they were. Had a Cummins 4-cylinder in it, and kept that too, scrapped the rest of the jeep.

Putting a TDI in a wrangler JK at the moment.

Heck yeah! I’d love to have those in my stockpile for the future. 2 things I’d like to accomplish someday are an auto to manual swap, and a 2wd to 4WD conversion.
 
OP
M

Mr. Roboto

Well-known member
Joined
Dec 11, 2012
Messages
2,159
Location
New Hampshire
Started to tackle the passenger floor on the 2 door, which is the worst area on the whole Jeep.

Cut everything back. Went through several cutting discs. Thankfully, I was able to separate most of the spot wends with a hammer and chisel.

unnamed (5).jpg

Test fit the replacement panel

unnamed (6).jpg

I am planning to panel bond the replacements in place. Still need to grind the edges down, prep metal etc, but so far so good. Need to address the drivers floor next, and those areas along the transmission tunnel. I'll either cut up some metal for those, or go to a junkyard and try to cut those pieces out of another xj so they're pre-shaped. It will all come down to time!

Also, finally unloaded the "new" rear Chrysler 8.25 differential that I will likely put into the 2 door as well. Got a little creative. It's been sitting in the back of my truck for a week since I bought it. Time to get it out of there.

unnamed (7).jpg

unnamed (8).jpg

unnamed (9).jpg
 
OP
M

Mr. Roboto

Well-known member
Joined
Dec 11, 2012
Messages
2,159
Location
New Hampshire
I did a full brake job on this Ram a few weeks ago.

dfgrefd.jpg

I noticed his rear pinion seal was completely shot, so he brought it back this weekend for me to do that as well. Pulled the cover and flushed out the diff as well.

IMG_4242.jpg

New seal in place.

IMG_4244.jpg

Dodge installed these rear pinion nut retainers as part of a recall, which you can see around the pinion nut. The pinion nuts were coming loose due to improper torque at the factory, and people were losing their driveshafts going down the road. Kind of scary. Whoever did this recall work at the dealer didn't set the pinion nut preload correctly either... the nut was completely loose inside of the retainer! I guess it did it's job at least and prevented disaster. Reassembled and torqued per the factory specs:

IMG_4288.jpg

I also picked up another set of wheels/tires for the 2 door. For the direction I'm going on this build, I was not a fan of the American Racing wheels/tires that it came with. They were also mounted with non hub centric wheel adapters, which is another no from me. I've been looking for weeks for a set of Icon or 16" TJ Moab OEM wheels for it, but have not had luck. They are rare. A set of 16" wrangler wheels with the right size tires I wanted popped up for a good deal, and were only 5 minutes from home, so I grabbed them. I think they look much better.

IMG_4308.jpg

If you recall, these are the wheels/tires that came on the Jeep. Put them up on marketplace last night, and got a ton of messages on them. Some guy from the next town over offered me $100 more than what I was asking. He should be coming tonight for them!

erferfrfe.jpg

That's it for now, thanks for following along.
 

zmotorsports

ALLIANCE MEMBER
Joined
Oct 20, 2009
Messages
21,312
Location
Northern Utah
Nice work.

Did that Dodge rear end have a crush sleeve or solid spacer for the pinion bearing preload? If it had a crush sleeve, did you check rotating torque before removal and match it to upon reassembly or just mark nut to pinion shaft location and match that upon reassembly?
 
OP
M

Mr. Roboto

Well-known member
Joined
Dec 11, 2012
Messages
2,159
Location
New Hampshire
Nice work.

Did that Dodge rear end have a crush sleeve or solid spacer for the pinion bearing preload? If it had a crush sleeve, did you check rotating torque before removal and match it to upon reassembly or just mark nut to pinion shaft location and match that upon reassembly?

Thank you! It had a crush sleeve. My original plan going into this was to mark the nut and match the position during reassembly, but the pinion nut was completely loose. I could turn it in either direction by hand, as it was sitting in that retainer. I don't think that it was set properly when the dealer performed the recall to add the retainer. So, I had to re torque it and keep checking the rotating torque as i kept tightening it. I found the service bulletin that outlined the recall work to install the pinion retainer, and it said to set rotating torque to 15-35ft-lbs, so I did that. Got it to 20ft-lbs and then I reinstalled the pinion retainer ring.

Does that sound correct? I sure hope so hahaha.
 

zmotorsports

ALLIANCE MEMBER
Joined
Oct 20, 2009
Messages
21,312
Location
Northern Utah
Thank you! It had a crush sleeve. My original plan going into this was to mark the nut and match the position during reassembly, but the pinion nut was completely loose. I could turn it in either direction by hand, as it was sitting in that retainer. I don't think that it was set properly when the dealer performed the recall to add the retainer. So, I had to re torque it and keep checking the rotating torque as i kept tightening it. I found the service bulletin that outlined the recall work to install the pinion retainer, and it said to set rotating torque to 15-35ft-lbs, so I did that. Got it to 20ft-lbs and then I reinstalled the pinion retainer ring.

Does that sound correct? I sure hope so hahaha.

Yes, that sounds about right. When setting up differentials with new bearings the pinion preload is usually set around 15-25 in/lbs. of rotating torque and used bearings around 8-12 in/lbs. Keep in mind this is with ONLY the pinion in place in the housing so only checking pinion preload or PPL. In order to get the reading for the correct carrier preload I will add another 5-7 in/lbs. of rotating torque to the pinion preload number, this gives me combined preload or CPL. That is without axle shafts or anything else so if the recall or TSB stated 15-35 in/lbs. that would be cumulative of also having the axle shafts installed which will add slightly more so that does sound to be in the ballpark.

Thanks for clarifying, I was just curious as improper pinion preload on a pinion seal replacement can be detrimental if not properly reassembled but you sound like you have it covered perfectly. :thumbup:
 
OP
M

Mr. Roboto

Well-known member
Joined
Dec 11, 2012
Messages
2,159
Location
New Hampshire
Yes, that sounds about right. When setting up differentials with new bearings the pinion preload is usually set around 15-25 in/lbs. of rotating torque and used bearings around 8-12 in/lbs. Keep in mind this is with ONLY the pinion in place in the housing so only checking pinion preload or PPL. In order to get the reading for the correct carrier preload I will add another 5-7 in/lbs. of rotating torque to the pinion preload number, this gives me combined preload or CPL. That is without axle shafts or anything else so if the recall or TSB stated 15-35 in/lbs. that would be cumulative of also having the axle shafts installed which will add slightly more so that does sound to be in the ballpark.

Thanks for clarifying, I was just curious as improper pinion preload on a pinion seal replacement can be detrimental if not properly reassembled but you sound like you have it covered perfectly. :thumbup:

Thanks for your valued insight as always!
 
OP
M

Mr. Roboto

Well-known member
Joined
Dec 11, 2012
Messages
2,159
Location
New Hampshire
Hope everyone had a great Christmas!

So in typical fashion for myself, one small thing is starting to snowball into a whole large project. Eventually my truck will need tires. Current tread still has life, maybe 5-10K miles, but the tires that came on the truck are just typical highway tires that are not the best in the snow. So, I'll replace them with some all terrains more than likely. But if I am going to replace the tires, I may as well also change the wheels. And then I'll get an alignment of course. If I'm going to get an alignment, I might as well level my truck out while I'm at it first. And if I am going to level the truck, I might as well do it with a set of adjustable Bilsteins in the front to also improve the ride quality. And if I am going to do that, I may as well replace the rear shocks to match. And while I'm back there, I should get a set of air bags to help with towing. Typical car guy logic, you know..... we've all been there!

So.... taking baby steps. Found a set of the wheels I want for a decent price. They're the standard 20" wheels on the "platinum" grade Tundra. They were about 100mi away, and my daughter was up for the trip with me, so off we went. Also stopped at a Harbor Freight on the way back to get another end cabinet... more on that in a sec.

All loaded up:

IMG_4652.JPEG

We also stopped at a cool garage themed restaurant for lunch on the way home.

IMG_4662.JPEG

IMG_4656.JPEG

Ugh.... she's growing up quick, but we have so much fun together.

Dropped the wheels off the next day to have them separated from the junk tires. A local tire shop will mount/dismount tires for free near me.... and my town dump takes 4 tires per vehicle reg per year for free, so at least this part of it cost me nothing.

IMG_4738.JPEG

I've been on quite a tool buying spree lately. If any of you follow the "show your new tool arrivals" thread, you'll notice I've been a regular in there. My box was out of space. I decided to grab another end cabinet, but I don't have any space to make my box wider, so up was my only option. A bit unconventional, but I'll make it work.

Cleared off the top of the old cabinet, and the pegboard behind it. Made a quick and dirty spacer to support the new one:

IMG_4733.JPEG

Hit it with some gloss red spray paint and stacked the new cabinet on top

IMG_4742.JPEG

My base toolbox is a series I. The lower end cabinet is a series II that I modified to fit (it's deeper than the series I) and this new box is a series III, so the colors do not match because they switched to black handles. But, they still all hold tools just the same.

IMG_4740.JPEG

I'm a bit worried about the extra weight the lower cabinet will be supporting now, but I've got an unconventional solution for that. Need to pick up one more item for it and I will update later. I previously stored all of my Milwaukee charges on top of the old cabinet. I relocated them to my work bench for now, but I am thinking about picking up one of these to clean things up:

 
OP
M

Mr. Roboto

Well-known member
Joined
Dec 11, 2012
Messages
2,159
Location
New Hampshire
You're acquiring quite the collection of tools and better yet, it's nice to see you using them skillfully.

Toolbox should be able to support the weight. I think if you were to move it about the shop on a regular basis it may struggle but otherwise I think you'll be fine.

Thank you appreciate the kind words!

I think you’re right, it just made me a bit nervous to think that the weight of 2 loaded cabinets was just sitting on the small lip that latches on to the main box. They don’t bolt together or anything… just kind of hooks on.

Here is my “better safe than sorry” solution. I made up a 3/4” piece of plywood for under the cabinet

IMG_4794.jpeg

And supported it from below with a scissor jack. Kind of silly,, but it works!

IMG_4795.jpeg
 
OP
M

Mr. Roboto

Well-known member
Joined
Dec 11, 2012
Messages
2,159
Location
New Hampshire
Kids went back to school Monday. I ended up taking this week off - what better way to start the year!

Have not touched the green 2 door in a while, so time to make some progress on it. Finally got a shot of it next to my black 99.

IMG_4965.JPEG

I really had a bunch more grinding and cutting to do on the floors. Been putting it off because it's just miserable work. Finished up on the passenger floor, and the 3 rusted sections on the transmission tunnel. Not much left over here :confused: This did make it very easy to locate all of the exhaust leaks (there are multiple)

IMG_5016.JPEG

Onto the passenger side. A much smaller section needed to be cut out. Was able to flap disc most of the rest of the rust down. Will POR-15 everything, and then bond new panels bonded in place.

IMG_5013.JPEG

I didn't have the courage to break out the panel bond just yet, so I moved onto addressing the seats. They were all pretty nasty, as you can see here. The drivers seat was the worst.

IMG_4981.JPEG

Stained, ripped, and the seat frame was broken in 2 places (common XJ issue, they break at the welds). Thankfully, I saved the entire original cloth interior out of my 99 when I did the leather swap. Only problem is that the 2 door models have the feature to tilt the back rest forwards so that you can access the back seat. I was pretty sure that the rest of the seat components were the same, though, so I began disassembly to investigate.

Thankfully, I was correct in my assumption. I was able to remove the recline mechanism from both seats. The 2 door is on the left, and the 4 door is on the right. Note the additional tilt lever.

IMG_4982.JPEG

I swapped this mech into the set of 4 door seats and bingo! The seats are a slightly different color than what came in the Jeep (charcoal vs mist) but that's A-OK in my book. I have the rear seat to swap as well so they will all match. And the mist gray XJs are a combo of gray/black throughout the interior anyways, so it all blends in.

IMG_4983.JPEG


2 seats done! Much better.

IMG_4984.JPEG

Had to make a small incision at this seam so the tilt lever cold poke though. hmm looking at this photo, it appears as tough I forgot to tighten a trim screw :LOL:

IMG_4985.JPEG

I found someone selling a parts XJ in the next town over. I've been toying with the idea of snagging a parts jeep to have on hand, so I went and checked it out. It was way to beat up for me, but it had a nice set of Husky molded floor mats in it. They sell for about $370 new for the complete set. I offered the guy $80 for them while I was there and he said sure, take 'em. They cleaned up well. I also ordered a new carpet for the passenger area of the jeep, seen in the box in the back.


IMG_4860.JPEG

Slowly but surely, it's getting there.

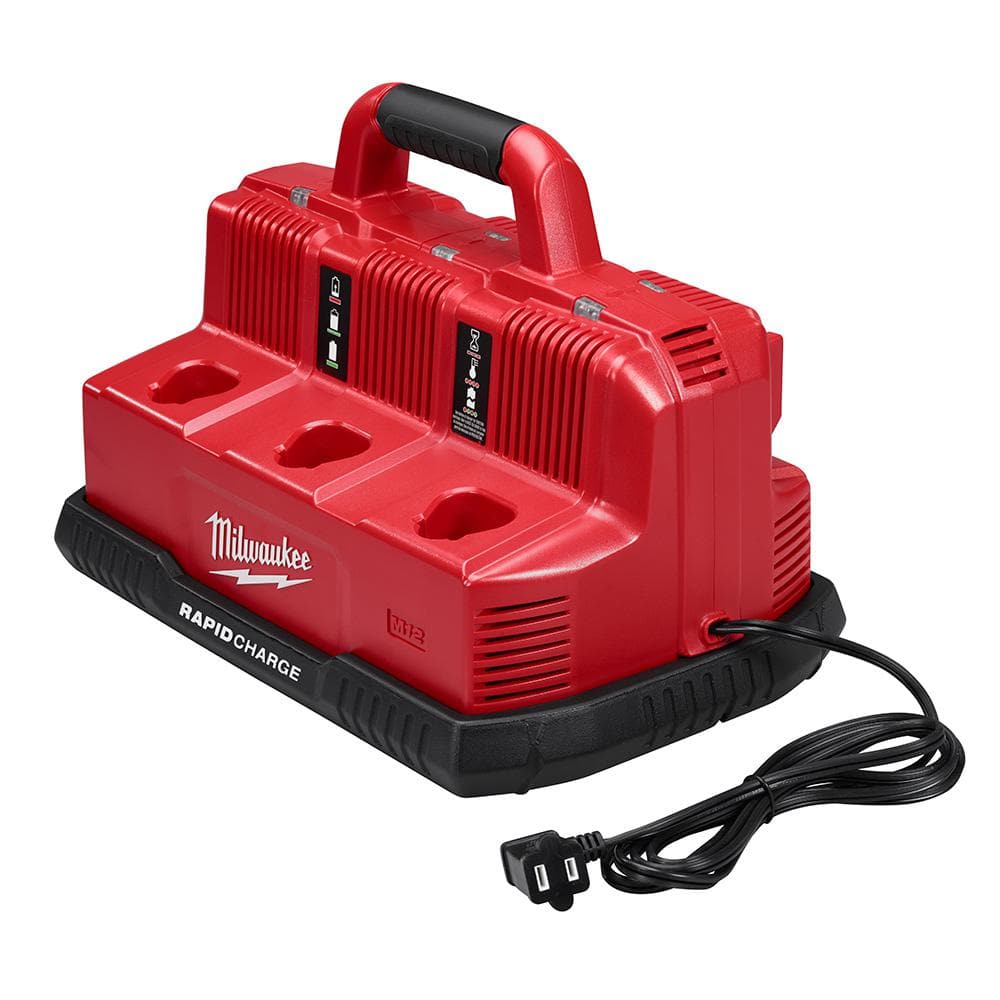
Finally, I grabbed this with the recent 25% off coupon at Harbor Freight. Primary use is to have it for winching non running vehicles up on to my trailer. I'm going to mount it on a hitch mount, and come up with a way to add a 2" receiver to the front of the trailer. This way, it doesn't stay outside all the time, and I can also mount it to the front and rear 2" receivers on my Jeep if I ever need to.

IMG_4864.JPEG


And that's it for now! Hoping to keep up the progress through the rest of the week.
 
OP
M

Mr. Roboto

Well-known member
Joined
Dec 11, 2012
Messages
2,159
Location
New Hampshire
Well I was hoping to make a bunch of progress during my time off, but I threw my back out and really had a hard time moving let alone working on stuff... very frustrating for me. It’s finally feeling ok enough to move again.

I got the Jeep outside and treated everything with rust converter.

IMG_5040.jpeg

IMG_5041.jpeg

Back into the garage. Driving a manual jeep with holes in the floor, a locked rear end, and a bad back, all while sitting on a milk crate is something I would not recommend… yet here we are!

IMG_5043.jpeg

Panel bonded all of the replacement panels in place. Put as much weight as I could on them to keep everything clamped tight. Also not advisable with a bad back. The cool part about the 3M panel bond is that it has glass beads in to, to eliminate the possibility of over clamping and squeezing out too much material.

IMG_5082.jpeg

Last but not least, bonded the seat riser down as well. I’ll also follow this up with tack welds for the tabs on either end. It also acts as a structural crossmember…. Damn unibodies.

IMG_5114.jpeg

I also pulled the front grille and headlight bezels to give them a fresh coat of paint, and installed amber corner lights… this Jeep came with clear corners that I was not a fan of. I’m going to do the same with the bumper, and caps, and rest of the trim on the Jeep too.

IMG_5132.jpeg

I also got the winch mounted to the 2” receiver plate, and test fit it on my black jeep. It doesn’t look great, but as I mentioned the main use of this winch is for my car trailer. Being able to use it on the XJ as needed is just an added perk.

IMG_5056.jpeg

Also, hosted me annual computer gaming (LAN) party with some of my friends.

IMG_1510.jpeg

That’s in for now!
 

nicholam77

Well-known member
Joined
Dec 18, 2016
Messages
2,655
Location
Minneapolis, MN
Well I was hoping to make a bunch of progress during my time off, but I threw my back out and really had a hard time moving let alone working on stuff... very frustrating for me. It’s finally feeling ok enough to move again.

Bummer. The discomfort is one thing, but not being able to do what you want to do is very frustrating. Unfortunately, I know what you mean.

That being said, you really get a lot of car projects done! New toolbox looks good. I wouldn't worry about the handles. At least the red is the same.

The garage looks like the perfect place to host a LAN party!

This guy playing the "order pizza" game?? :ROFLMAO:

IMG_1510.jpeg
 
OP
M

Mr. Roboto

Well-known member
Joined
Dec 11, 2012
Messages
2,159
Location
New Hampshire
Bummer. The discomfort is one thing, but not being able to do what you want to do is very frustrating. Unfortunately, I know what you mean.

That being said, you really get a lot of car projects done! New toolbox looks good. I wouldn't worry about the handles. At least the red is the same.

The garage looks like the perfect place to host a LAN party!

This guy playing the "order pizza" game?? :ROFLMAO:

IMG_1510.jpeg

Bahahaha good eye! He was 100% ordering the pizza!

Random shot of the XJ, looking majestic as always haha.

IMG_5141.jpeg

Tackled a little house project for a change. My attic access has always drove me nuts. Crappy little hatch. Requires me to bring my 6 foot a frame ladder up from the garage, which isn’t really a comfortable height for getting up there easily either. I wanted to buy and install a pull down set of stairs but could not find one small enough for this opening.

IMG_5177.jpeg


Here’s what I came up with.

First, I built a normal hinged hatch to open for access that I can operate without a ladder. This is not done yet so I’ll update that when it is.

IMG_5182.jpeg


I bought a telescoping ladder that I’ll leave in a closet upstairs, and built this support for upstairs for it to securely latch on to.

IMG_5179.jpeg

IMG_5178.jpeg

And the view from downstairs

IMG_5181.jpeg

Functionally I love it. Need to revise the latch system and paint the door and ceiling that was previously covered with the old trim. Will post ann update when it’s done!
 
Last edited:
To avoid these ads, REGISTER NOW!
Top Bottom