To avoid these ads, REGISTER NOW!

Salt Life Hideout

Wingnut65

Well-known member
Joined
Apr 21, 2010
Messages
3,170
Location
Tampa Bay, FL
Now its my turn...

I’ve been so busy with Life that I haven’t slowed down to start a build thread for my workshop makeover. You know Life - the stuff between work and sleep. Usually more time is available for Life on weekends, but there is never enough to go around.

Well here goes . . .

Please remain seated at all times! For your safety, keep your arms and legs inside the car! And, please, no flash photography!

Project Facts…

Project:......Attached 3-Car Garage Workshop

Size:..........26’-9” wide by 23’-7” deep

Construction:.....CMU block for two walls, Gypsum Wall Board on studs for the other two walls

Ceiling:.......9’-0” High - Drywall on bottom of trusses

Floor:.........4” concrete slab-on-grade. Was painted, now with 12” RaceDeck

Doors:........(2) 7’ high roll-up overhead doors = one 16’ double wide and one 8’ single wide
.................(2) man-doors = one to the Kitchen and one exterior door to the side yard

Electrical:....Three 110v GFI receptacles on the walls and two (2) more on the ceiling.
..................EDIT: Added (1) 30' and (1) 40' ceiling mounted cord reels

Lighting:......Two 100 watt bulbs on the ceiling and two 4’ double-bulb shop lights at the workbench.
..................EDIT: Added Eleven (11) 4' long fluorescent fixtures with daylight bulbs

Plumbing:.....None, except that the water heater is in the garage. EDIT: Hot and Cold lines and drain have been added in garage when home received second Washer & Dryer.

Goal:......…..To create an extremely functional workshop and can still park cars in
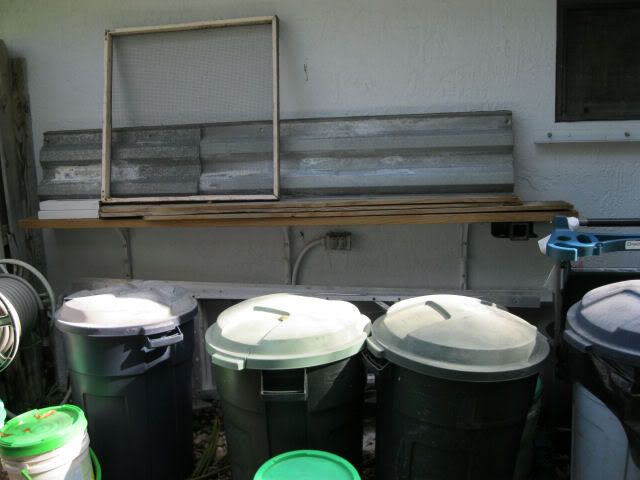
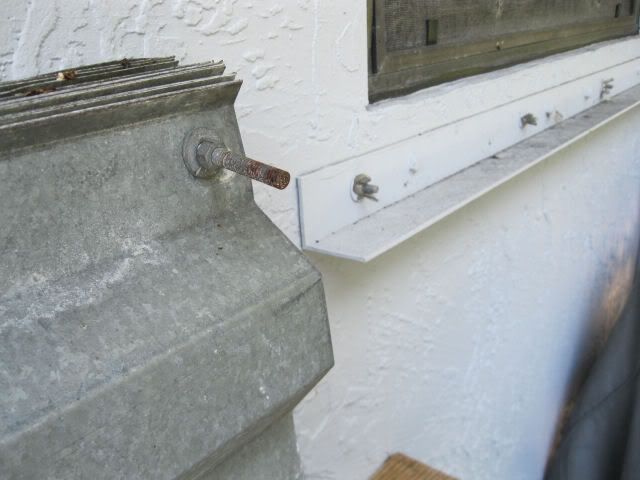
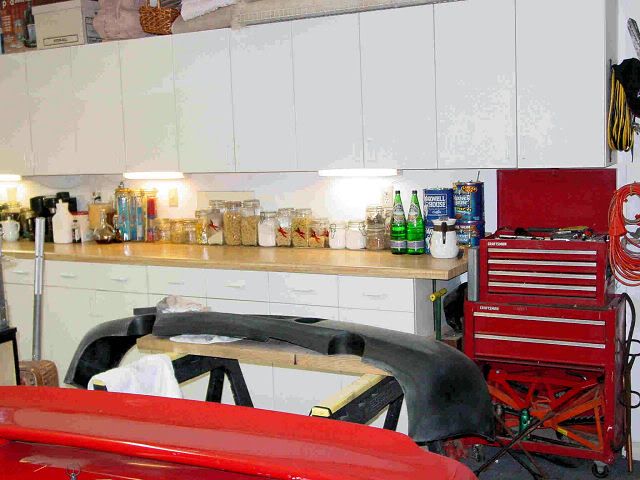


The Before Shot…

Also referred to as “Point A”

001

Current Progress Shot…

It’s somewhere past “Point A” and nowhere remotely close to “Point Z” . . .

999

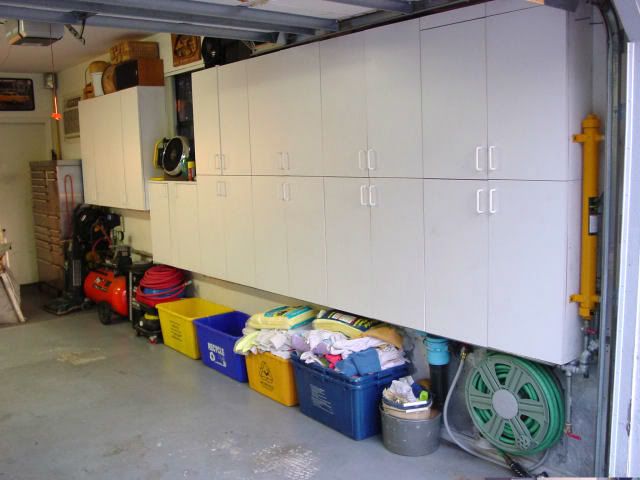
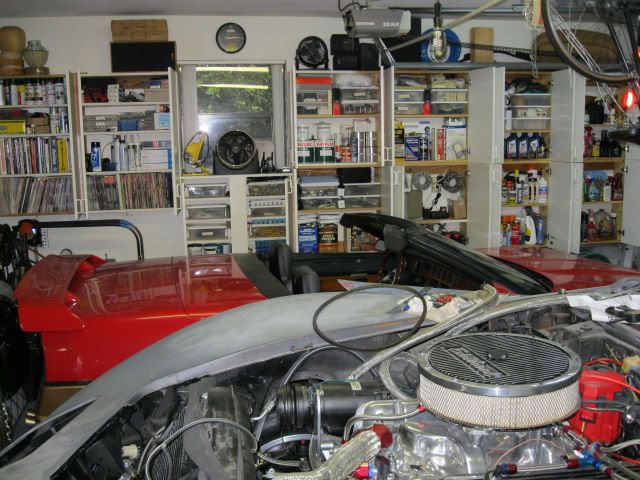
The floor is down, full height cabinets are finished on the left, spray paint cabinet is built in otherwise wasted space in front of the A/C Ductwork and new lights are installed. It is still a work in progress. Come along for the ride...

The Wish List
These are hopes and dreams to be done in no particular order:

- Finish the Floor - Epoxy? VCT? mosaic tiles? - DONE, RaceDeck Installed!
- Provide built-ins or add cabinets to get rid of clutter - DONE
- More Lighting - DONE
- More electrical receptacles
- More functional workbench
- More storage
- Ceiling mounted air hose reel between the two front doors to allow access to the driveway - Purchased. Needs to be mounted and connected to compressor
- Ceiling mounted electrical cord reels - DONE
- Remove or eliminate clutter - Constant Struggle...
- Get organized - Bucket List item...
- Win the Lottery (I have about the same chance as I do getting organized!)
- Get a bigger air compressor
- Fishing Pole Storage - DONE, Rack on Ceiling!
- To have the VW Bus rust free and running (The Lottery idea is looking pretty good now)
- Add a utility sink in the garage - Plumbing has been extended into the garage
- Finish painting garage – two-tone with stripe - 60% Complete
- Ride in a P-51 Mustang
- Ride in a 1966 Batmobile (Both these are on my Bucket List...)


And now, on to the Great Garage Makeover…
 
Last edited:
To avoid these ads, REGISTER NOW!
OP
W

Wingnut65

Well-known member
Joined
Apr 21, 2010
Messages
3,170
Location
Tampa Bay, FL
FYI, this is the boring background stuff. Feel free to scroll down and jump right down to the pictures. They are easier to read than all this text stuff. I just need to include this to help build the plot line.

The Name… Salt Life Hideout
I was going to name this thread “Blame it on the Great Garage Makeover Magazine” (2010) because that is where I started this roller coaster of an adventure, but I think having a name gives the place an identity.


“Salt Life” is an ocean-inspired clothing line that promotes anything around salt water – Fishing, Diving, Surfing and Beach. There is also a ‘Salt Life Food Shack’ on Jax Beach with more to come. (BTW, the www.saltlife.com website also has some hot beach beauty models to admire :thumbup:) For me, the “Salt Life” is more of a family thing. I was really born into it. I dive, fish and vacation on the beach, but, being a Wingnut, I’d rather hang out at the airport! I thought about naming it “Wingnut’s Hangar”, but it may be a few years before it houses a plane. And ‘Asylum’ was already taken by another garage nut.

My beautiful wife of 17 years is very supportive of this adventure. She is more than ‘tolerant’ of the project, so I'd say ‘supportive’ is appropriate. (She hasn’t denied any garage related investments, yet). We have twin 14-year old daughters who will be going into Senior High this year. With three women in the house, there are times of the day and the month that I just stay in the garage for my own sanity - too many hormones in the house. And the real boyfriends haven’t even started yet. But we’ve told the girls that they can’t date until they are engaged! That should discourage boys like me even talking to them. Not that I didn’t turn out OK, but these are MY girls.

Anyways, with all these wonderful women that I live with, I feel an appropriate name for my little piece of tranquility is it's my “Salt Life Hideout”. It’s my Hideout where I feel I can be safe from the women in my life. Except that I have been known to find nail polish on my workbench.

Disclaimer: I am not affiliated with Salt Life, Inc. of Jacksonville, FL. Although I have financially supported the entrepreneurs who created Salt Life with the purchase of many t-shirts, stickers and other branded items. I am not interested in making any money off the promotion of their product line through the naming of my workshop.”Salt Life” and its logo is copyrighted by Salt Life Inc.

Project History…
In August 2001, my family moved from Miami to the Tampa Bay Area and we had this 3-car garage with attached house built for us. Before I moved any car into the garage, I sealed the floor. I pushed all the yet-to-be-unpacked boxes into the third bay and I painted the two open bays with H&C concrete sealer in Bombay color. The intent was to unpack the boxes and then paint the third bay. Didn’t happen!

I use the garage as a workshop, but my wife (aka: Minister of Finance), has the distorted idea that a garage is to park cars. I don’t know how I can build an airplane if I have cars in the garage! In my shop, woodwork, car repairs and someday, aluminum work - possibly a Vans RV-7A or a Sonex, and I build models for a hobby and for pay. I am also the family fix-it-man for anything that breaks. I have enough space in the garage to assemble an RV-7A with both wings, tail feathers, engine, cowl AND spinner! But before I could persuade the Minister of Finance (aka, Mrs. Wingnut) to allow the purchase of the first of several kits to start building an airplane, my mother offered me our family’s 1965 VW Bus. This was a big decision I needed to make – the expense of starting a really cool and fast airplane kit or a free VW Bus. My Minister of Finance, also a CPA, agreed our family budget could accommodate a FREE VW. So, the VW is now in the workshop. :thumbup:

By the time I brought the bus home, I still had not finished painting the floor of the third bay. I didn’t want to do any work on the bus in the third bay with the chance of oil and grease staining the bare concrete. I first found Garage Journal when I was researching flooring options. I read many threads and considered epoxy floor as being my product of choice. But 9 years of working in the garage has accumulated more stuff than I can handle to move out to be able to paint the floor in one shot. Then the idea of the race flag checkerboard VCT was planned. But, it ended up being the slip concerns for our frequent rains and dripping cars and puddles, I ended up with RaceDeck. That story will be a later post.

It was April 2010 that I picked up the “Great Garage Makeover” Magazine at the check-out counter of Home Depot. Now that I think of it, this thread and my whole garage makeover project is based off an impulse buy! :shocking: (Well, at least it wasn’t another impulse tool buy this time!) I went through that magazine front to back several times. I went on-line searching for products mentioned in it and Garage Journal kept popping up in the search results. I wanted to see the pictures, so I joined GJ and jumped into the discussions. My garage renovation started to work itself out. And the ideas keep getting better.

I know, I hear you saying “enough about me and get to the pix”

Make sure your seat belts are fastened securely, here comes the time warp…
:3gears:

Before Shots…
Dateline April 2010…
Bay #1 is where my wife’s car parks. The VW is in bay # 2 with my workshop in bay #3. Notice the concrete sealer isn’t sealing any more. The clutter was just getting to me.

001

Coming down the street, this is the first view people see when the door is opened. I always hated the clutter of the yard tools and HOA says no to sheds, so they stay inside. The plywood was for Hurricane Charlie but wasn’t needed. It is now the floor to my attic.

002

I have my 6’ and 4’ step ladders on the wall next to my hurricane panels. Yes, there are several that are Lexan panels. When the house is closed up and we are hunkering down for a storm, it is dark when the power goes off. With a couple Lexan panels on the front and rear, we can have light. The cabinet was a damaged one from our last home remodel and so it hangs in the garage with storage above…

003

Storage shelf above the door. Brooms, etc hang near the door. Recycling bins on the boxes of tile. Christmas tree stand on the wall… Just too much clutter.

004

When we had our new floor tile replaced due to popping tiles, we bought extra tiles to fill in several rooms where we have carpet for the girls to play on. Until that decade comes, I have tiles to store (and not in the attic)

005

Progress on tear-down on the VW stopped and it became a storage area (and a storage unit). I’ve dug it out several times to re-start working on it, but it still gets buried.

006


007

The front wall of the garage has the A/C unit, large cabinet, old kitchen cabinets from past homes, TV, small fridge, extension cords, lots of junk and one of dad’s steel workbenches with 2x’s for the top. Another abnormality in here is that I have a 4” step that is 32” deep across the front of the garage.

008

The green cabinet is from our 1966 house in Miami and actually has yellow p-lam doors that my mom painted years ago. Some of my dad’s old RC airplane wings are stored on dowels into furring strips. My 5” no-name vise is on this bench. I’ll post more pix of it when I give it the Red Leader Once Over with Verde Green!

009

The small boxes on the workbench shelves are some of the assorted hardware and parts my dad had accumulated. The notebook is actually the preview plans for a Vans RV-7A

010

Over the back door, I have my router table on a sheet of plywood that I hook over two lag bolts

011

This is one of the storage ideas I made when I moved is used all the time. It is 4-1/2” wide plywood strips made into a shelving unit just for boxes of nails and screws. Everyone in my family knows where to find hardware. It is sized to fit on the end of the cabinet. Not sure where I will move it to if/when I move the cabinet. (The DC-3 was a freebie when I bought my Lincoln Welder. Straight edges are on a nail on the door frame,

012

Please remain seated while the ride is in motion…
 
Last edited:
OP
W

Wingnut65

Well-known member
Joined
Apr 21, 2010
Messages
3,170
Location
Tampa Bay, FL
The Workshop Side…
The right side of my garage is my workshop. I had the plywood back-board on my wall in Miami and just brought it with me. Not sure it will stay. My workbench is a counter removed from this house on cabinets from the last house.

013 (01)

The wall panel on the left holds clamps and other tools

014 (02)

Long pipe clamps are on blocks mounted up high

015 (03)

Big C-clamps are on wood blocks down low. Smaller C-clamps are on dowels to the right.

016 (04)

Below is the storage of tall, long, thin stuff, including fishing rods, etc. I’ve had the Craftsman toolbox probably 20 years. Works fine, except I have more tools than that now. The locker below was a sample that a vendor dropped off when I was designing prisons. I have misc power hand tools in there.

017 (05)

The drill press is a 3/4 horse, 16 speed ‘King Feng Fu’. I don’t know anything about it other than it was given to my dad as a rusty shell without a motor. I inherited it and it works well for my needs. It also may get the Red Leader treatment.

018 (06)

Here is the rest of my workshop. Did I mention that I hate clutter? Well it follows me in here. The band saw and planer are on the end. This also shows the extent of my lighting – two 4’ double fixtures.

019 (07)

Above the workbench is my loose hardware drawers and many tools that are used regularly.

020 (08)

The workbench is an L-shaped top that puts the miter saw or grinder out from the workbench. It is very convenient, but must go since I need the space for the walkway when the bus moves over to bay #3.

021 (09)

Below the workbench is my scrap wood box, Craftsman compressor, more boxes of loose hardware and my Lincoln 140C MIG welder. On the front of the hardware box shelf is a hand drawn ruler to be able to measure bolt lengths.

022 (10)

On the left hand side of the opening is where I keep my cordless drill. Yes, is a cheapo HF drill, but it serves my needs.

023 (11)

I keep it in place with two 2-1/2” drywall screws with clear hose over the threads. Tuck the tip under the far one and gravity keeps it there, handy and ready to go.

024 (12)

The cabinet on the wall is my spray can cabinet. I made it from some 1x6’s I found in trash piles as my neighborhood was being built.

025 (13)

The spray paint cabinet is always full of anything tall or not so tall – paints, glues, polishes, etc. The door is a single piece of plywood because I had the idea that when I do build a plane, the panel would be a perfect place to mount the 24x36” plan that I would be working on at that time. Top of the cabinet has some of my antiques. It’s a far cry from what other on GJ have for display!

026 (14)

The cabinet below the paint cabinet is just a metal shelving unit with plywood doors installed. Because of the contents, I have the doors and sides vented with screen to keep kids out.

027 (15)

This cabinet has car stuff on the top shelf, garden stuff in the middle and tall and other stuff on the bottom.

028 (16)

The band saw is a C-Man 12” and it gets a lot of use.

029 (17)

The side of the band saw has a piece of plywood and stores the extra blades. The heavy duty cart to the right I believe was the frame of an old 1970’s era copy machine.

030 (18)

The planer is a Craftsman 6-1/8” 2 HP planer. I don’t use it as much as I’d like to, but I’m use to having it available when I need it.

031 (19)

Behind all this stuff is a heavy duty steel cart with a heady duty 18” Di-Acro roller, metal brake, beader and crimper.

032 (20)

The roller has a history…

033 (21)

My dad purchased this at the liquidation sale of Eastern Air Lines. He worked for EAL for 35 years and I am thrilled to have a tool like this in my shop. The handle was broken before it was repainted. But the EAL inventory label is still there.

034 (22)

To the right is the workbench that I almost live on. It’s a 2’x5’ counter top from my first house, clamped into a shop mate. The $2 yard sale stools are a comfortable height. TV is in easy to see from here. (Notice the VW storage unit?)

035 (23)

Lastly, the ceiling… I have two 100-watt bulbs on a switch, fluorescent shop lights on a power strip and two hanging storage racks with wood on this one and hurricane panels on the other. I also have my extension ladder on the ceiling.

036 (24)

And that concludes our broadcast for today.
Good night and May the good news be yours!
 
Last edited:
OP
W

Wingnut65

Well-known member
Joined
Apr 21, 2010
Messages
3,170
Location
Tampa Bay, FL
News Flash!
Here is a teaser of things yet to come…


The Concept…
This is the beginnings of the original plan. I originally had power tools all over the garage and ran extension cords to power them. Now, I am planning on putting all the power tools across the front of the garage and add more outlets up there. I also want to change the small refrigerator to a full-size one.

037

To reduce the look of being cluttered, I want to add doors or panels in front of the Water Heater, the A/C Unit and the ductwork. This also shows the power tools, a killer clock!, the existing wall cabinets and a larger flat screen TV! Ideas are still working on much of this.

038

The side walls show a concept where I was planning on buying cabinets. The ones next to the kitchen door is now a built-in. The ones between the hurricane shutters may not be needed. I had to keep the wall space opened for a portion of the wall as that is where the car doors open. If I can keep that area clear, then the car can pull in closer to the wall. Otherwise we may have issues getting the third car in the garage. The workbench side shows a HF 13-drawer toolbox with my C-Man on top. The lawn mower and garden tools will remain at the front by the roll-up door. But the rest is up in the air. There are too many ideas here on GJ for me to nail down my workbench yet. Thanks to jimbob1’s pictures and Red Leader’s sketches, I’m back at square 1.

039

I apologize on the quality of how these sketches came out. These were done in AutoCAD, but I really need to slow down and learn Sketch-Up to get these to look nicer.


The Wish List
These are some things still to be done in no particular order:

- Provide built-ins or add cabinets to get rid of clutter
- More Lighting
- More electrical receptacles
- More functional workbench
- More storage
- Ceiling mounted air hose reel between the two front doors to allow access to the driveway.
- Ceiling mounted electrical cord reels.
- Remove or eliminate clutter
- Get organized
- Win the Lottery (I have about the same chance as I do getting organized!)
- Get a bigger air compressor
- To have the VW Bus rust free and running (The Lottery idea is looking pretty good now)
- Add a utility sink in the garage
- Finish painting garage – two-tone with stripe (it will be the first one in this neighborhood)
- Ride in a P-51 Mustang
- Ride in a 1966 Batmobile (Both these are on my Bucket List...)

After all, isn't that what a Wish List is for?
 
Last edited:

flybefree

Well-known member
Joined
May 18, 2008
Messages
1,111
Location
Ohio/Kentucky
Jeff,

You have a good plan and your work shop is crowded but not cluttered...clutter is beer cans and two yearold happy meal boxes full of Christmas stuff.

Building a plane and flying a Mustang are on my bucket list too.

Subscribed.

Shaun

I always wondered what the Salt Life thing was about...
 

shopnut

Well-known member
Joined
Feb 22, 2006
Messages
4,237
Location
Florida
Man Wingnut65, I step away from GJ to grab another beer and BAM, you got your thread up! Great job documenting AS IS! It will be fun for you to look back at it and compare to the new improved future version. It seems as though you have a tool for just about every job that comes along (and some that haven't yet!). I love that metal roller, BTW. Be glad that VW isn't a low-profile sports car or your bulk storage space would be cut in half :)

You have a lot of stuff there to find permanant homes for in the new improved version, but it sounds like you have a great plan to take care of it. Any plans for a dust collection system to keep the woodworking dust off of the project VW? Or maybe just some type of temporary curtain separating the two? I suggest you spread those new receptacles around in case you end up re-arranging the power tools a couple of times before you figure out their best placement for your working habits. And no one ever says "I have too many outlets".

I would like to hear about the garage floor tiles someday if you get a chance. How are they holding up? Ease of installation? How easy was it to take them apart and rearrange? How do they clean up? Have they faded at all in the FL sun? I may do that in my city garage in a few years when I get sick of looking at the concrete.

Now go get those ceramic tiles installed in the house so you don't have to move them 5 times during the garage redo :)
 

Red Leader

Well-known member
Joined
May 15, 2011
Messages
2,688
Location
Denver, CO
Alright!!!!

I've been waiting for this thread!

When I have some dedicated time I'll sit down and read though the entire thing in detail.
 
OP
W

Wingnut65

Well-known member
Joined
Apr 21, 2010
Messages
3,170
Location
Tampa Bay, FL
Thanks guys. The VW Storage is actually packed right now since I had to get everything off the floor for the tiles to go down. Now I need to figure out if the stuff will be stored in the garage, in the attic, or in my Goodwill trailer at Wally World.

930 dreamer, I'd like a bus with a sunroof, but this is what I have to work with. Wish I could afford a running double-cab while I work on this, but the budget isn't there.

shopnut, I saw how you posts all your's in a few minutes, so I worked in Word and posted when it was ready. Now I've got to make posts for the other milestones completed so far. And the RD tiles are great. The checkerboard was installed in less than an hour and my daughter was the one who took it apart so I could lay the whole thing over the 4th. Not hard. A post will tell all. And for the outlets, I bought a HF 4' power strip that I will start with. If it works, I will have it hard wired and add more on other walls too. Maybe on the front of the workbench as others have suggested.

RL, I hear ya. Try the beach. Its great for catching up on pages of posts :)
 
Last edited:

Coyote Red

Well-known member
Joined
Jul 9, 2011
Messages
130
Location
Gold Country, CA
You know I took the time to read the message, resisting the urge to jump to the pretty pictures. And thought I might have made a wise decision when I came across a link for Salt Life with the promise of pretty models... Ah ha, I said, no one else will know about these... It'll be my secret stash... I can oogle these virgin pics and maybe even occassionally post these rarities for my other internet buds, where I'll receive massive congratulations on my unique and beautiful harrom...

But alas the link is dead.

Good luck on the reno.
 

wolflrv

Well-known member
Joined
Jun 7, 2011
Messages
304
Location
Savannah, TN
Definitely gonna be watching this thread!! I applaud your ability to see the tree in the midst of the forest!! I'm kinda dealing with the same currently, but on a smaller scale! Will be very interested in your storage and organization ideas!!
 
OP
W

Wingnut65

Well-known member
Joined
Apr 21, 2010
Messages
3,170
Location
Tampa Bay, FL
But alas the link is dead.

Good luck on the reno.

Thanks Coyote Red. Thanks for resisting the urge. BTW, Link is fixed. Spell check missed that one. (here it is so you don't have to scroll back up 4' or so... http://www.saltlife.com/. There's a tab at the top of the page.)

wolflrv, I hadn't thought about it being a forest, but it sure seems like stuff just appears in the garage that I have to put somewhere. Someone else said that the size of a workbench should be based on how much stuff you want to pile on it. I think the same goes with the size of a garage.
 

iatros

Well-known member
Joined
Jan 25, 2011
Messages
51
Location
Tampa Bay, FL
Good luck my fellow SaltLifian... You have your work cut out for you, but there is a tremendous amount of potential hiding there!

Cya in the Bay!
 

flybefree

Well-known member
Joined
May 18, 2008
Messages
1,111
Location
Ohio/Kentucky
Oh...I won't tell you what I thought the "SaltLife" window sticker said the first time I saw one down on the redneck rivera (which means, of course, I'm "fixin" to tell you even though you did not ask). There was a 30 something woman driving a truck, she looked pretty rough and I may have confused the sytlized "a" for a "u".

I thought..."that is an odd sticker for a woman to have on her car...but it's a free country." I slay me.
 

shopnut

Well-known member
Joined
Feb 22, 2006
Messages
4,237
Location
Florida
And ‘Asylum’ was already taken by another garage nut.
Sorry buddy - arriving first sometimes has it's privileges :)

BTW, I like how you put the roller coaster spin on the thread. It's obvious what part of the country you live in - Theme Park Central! It should be a wild and twisty ride.
 

couchmechanic

Well-known member
Joined
Jul 29, 2011
Messages
104
Location
Bakersfield
On your entry #4 I saw that you had enterred remove and get riid of clutter. Shouldn't that be #1? I am the same way. My wife has told me to get rid of all my junk then cleaning the garage would be easy. Priorites! Women just don't understand us men. Your project is looking great can't wait to see the finished project.
 
OP
W

Wingnut65

Well-known member
Joined
Apr 21, 2010
Messages
3,170
Location
Tampa Bay, FL
On your entry #4 I saw that you had enterred remove and get riid of clutter. Shouldn't that be #1?

I think I had it listed there a couple times as it's what I keep on combatting. I think if I list it enough times, I may actually read it and try to do something about it.

Women just don't understand us men.

Amen! And I've given up trying to understand them. :headscrat Two pair of shoes works fine for me.

Your project is looking great can't wait to see the finished project.

Thanks. So do I. :beer:
 

D.J.

Well-known member
Joined
Sep 16, 2009
Messages
1,116
Location
New Haven IL
Dude I have those same cabinets in my kitchen, and it's nice to see some folks still use bobbers to fish with! Looks pretty slick to me!
 

SnyperBob

Active member
Joined
Apr 29, 2008
Messages
33
Location
Illinois, USA
That ***** you can't have a storage shed. What about one of those short storage 'tubs' with the swing out door, so you can store your mower, and all your yard tools. Kind of just looks like a seat. Hide that in your back yard and no one would even know... Put some seals on it to keep weather and bugs out, and you're set.

This one is a little taller with swing out doors on the front so you can put your mower inside:
cb805f7e-c2ab-4b0e-9c83-c03ecf9571fe_300.jpg


Here's a smaller one that would be great for holding your yard tools. I guess this one is called a 'deck box', you can sit on this one:
63dab359-b4a4-4130-9037-b8b8be41aef5_300.jpg
 
Last edited:
To avoid these ads, REGISTER NOW!

mpire

Well-known member
Joined
Nov 21, 2008
Messages
1,837
Location
Florida
This one is a little taller with swing out doors on the front so you can put your mower inside:
cb805f7e-c2ab-4b0e-9c83-c03ecf9571fe_300.jpg

This is the one I have. Its just about perfect.

45232_422477690754_508220754_5348128_1288422_n.jpg


Now I keep the mower, trimmer, gas, fertilizers, and insecticides in it. Its very versatile.

284885_10150245156350755_508220754_7803232_1347065_n.jpg
 

fullthrottle24

Well-known member
Joined
Oct 22, 2010
Messages
367
Location
Ohio
Wow, it's great to see a real life garage on here. I would love to have a garage like BB 767 and some of the others here. Problem is you either have the time to work out there but not the money or you have the money but not the time. I have 3 little ones with all the bikes, power wheels and "general stuff" I find my garage in various states of "clutter". Keep up the good work! One day I'll try and post some before and after work.
 

Red Leader

Well-known member
Joined
May 15, 2011
Messages
2,688
Location
Denver, CO
How are you liking the race deck? It is one of the running considerations for my project. It seems that daily I am flip-flopping between porcelain tile, race deck, and just saying screw it and making a floating wood plank floor out there.
 
OP
W

Wingnut65

Well-known member
Joined
Apr 21, 2010
Messages
3,170
Location
Tampa Bay, FL
iatros: This is a work in progress and will take time. Job and family keep taking my time, which make the Hideout completion further away. So, how's the 3T Garage coming?

flybefree: Shaun, there are many take off's on the 'Salt Life' theme. I've seen 'Salt Wife' and 'Swamp Life' (UF) stickers too. There probably are stickers like what you thought you read.

shopnut: Theme Park Central. Well, when in Rome... I figure that I have to have fun writing this to keep it from becoming a burden to write and even worse to read it. Besides, my girls were probably five before they realized that 'Cuzzin Goofy' really wasn't related to their dad's side of the family. Although he should be!

Dittle Fart Around: I still love your 58 Single and enjoy your posts. At this point, I'd like anything air cooled that actually runs - bus, bug, gia, 911 - anything would be great!
 
OP
W

Wingnut65

Well-known member
Joined
Apr 21, 2010
Messages
3,170
Location
Tampa Bay, FL
D.J.: Cabinets can have a life of their own. They just keep going from one wall to another. Just look in a Habitat Restore and how they just keep on living. And for the bobbers, it took me a while to find the pic with them. They are easy to use when teaching little ones to fish. Also helps so I don't spill my drink.

SnyperBob and Mpire: I've thought about the storage sheds you mentioned, but not sure I could get one large enough that I would need past the HOA. I have the mower, blower, trimmers and wheelbarrow and hopefully, the hand tools. And, sheds are out. BUT, if I build one attached to the wall with stucco on the outside and shingles on the roof to match the house, I'd be good. That is a consideration down the road. But I do like the simplicity of the one Mpire posted.

fullthrottle24: Thanks for the comments. I've been drooling over other GJ garages for a while, but have to accept that this is where I live now. I am just blessed that I was able to purchase a 3-car garage with the house. We do have plenty of 'general stuff' out there too - garbage cans, recycling, 2 bikes and 2 scooters. Hopefully I will figure out how to fit it all in and still have room to work.

Red Leader: Feel free to use the quote. The girls haven't tested me on it yet, but they are going into sr high soon.

I love the RaceDeck floor. I was impressed with with the customer service Jorgen, Kia and the others at RD provided. The product is great and fits my need - slip resistant floor that I can put down in sections while I moved workbenches, shutters, a VW and lawn stuff. Its only taken me 3 months and 12 hours so far to put it down. I still have 10 sf at the back door and some pieces to finish.

As for the durability and ease of installation that shopnut asked about, no problems with either. When I received the order, I was anxious to see how they worked. So I opened the boxes and installed the 2'x2' sections (packed that way for shipping) in the one bay actually used for a garage. I put them in the standard checkerboard pattern and added the yellow roll-up trim across the front. We used it that way for 11 months and had no slips, stains or fading. A rubber mallet is all that I used to install. To take them apart, I'll post pictures in my flooring post how my daughter took the checkerboard pattern apart by herself so we could do the whole floor. I got a gallon of RD All Purpose cleaner with my floor. Mixed up a spray bottle and hit the bad spots with either a damp mop or towel. No problems.

Vernmotor: Thanks. I don't even want to think about what's in the attic... Another 3-4 pounds up there, too.
 
OP
W

Wingnut65

Well-known member
Joined
Apr 21, 2010
Messages
3,170
Location
Tampa Bay, FL
Space Creates Vacuum!

I’m not sure when I discovered this or when I started using this phrase, but it is true. Buy a house bigger than you currently have and when you move in, you don’t have enough room to put everything because stuff just multiplies. Clear off a table and the next day it will have stuff on it. And the workbench… I’ve never had it all clean at once. By the time I am halfway done cleaning it, the other half starts to gather stuff again.

This post will explain how a 6 cubic foot cabinet has been replaced with a 40 cubic foot cabinet and it is now full to overflowing. The space created with the new cabinet created a vacuum stronger than the cubic volume available… It just happens.

Sliding Door Storage Cabinet Build…

As I was surfing GJ one day, member ChristopherLutz asked how much weight some cabinets shown in the Family Handyman magazine would hold. The cabinets were about 10’ wide by 4’ tall 24“ deep with sliding door. There was even a picture of two people standing in the built cabinet. Here are the Family Handyman cabinets. (Thanks Christopher. If you had not posted that, I would not have this thread or my handy cabinets.)

I was impressed with the simplicity of the cabinets and how flexible the design could be. I kept this design in the back of my mind as being an option.

The Concept…

In planning my makeover and get rid of clutter, I decided I wanted cabinets to store items. I had to determine what I wanted to be stored in the attic for the occasional or seasonal use and what to keep in the garage for more readily accessible. Our folding sports chairs are used frequently by all family members and my goal for cabinets was to put them in and close the door. That may change in the future, but that was the goal on the size of cabinets I would need. The tallest chair is about 39” tall, so I feel they should be able to fit in a standard 42” tall cabinet with no shelves.

I must always remember that while I remodel my garage to make the ‘Salt Life Hideout’, I must also keep the Minister of Finance satisfied with her garage needs as well. One thing she wants is to be able to actually park her car in the garage. :headscrat I never did understand that concept, but it is working on me. So, the layout I have come up with allows for her car in the left bay with both driver's side doors able to be opened. So, the cabinets can only be 60” wide, starting from the Kitchen door to allow room for my hurricane panels before the clearance needed for her open car door.


039

The top view of the cad sketch that I started with shows 42” tall upper cabinets and 36” lowers. I started shopping to see if I could get off-the-shelf cabinets that would fit the need. Both Lowes and HD did not have 42” tall cabinets in stock. Everything would have to be a special order and more expensive than the unfinished cabinets in stock. Also, any cabinet I purchase would most likely have swing doors that would open into a parked car. Not the best solution.

That’s when I came back to the Family Handyman cabinet concept. This is the inspiration and basic plan that I started with.

040

But, here is where my path changes to make things more complicated. To get the storage space I need, it needs both upper and lower cabinets. . I am building two of these at the same time, one over the other. To this sketch, I will have another set of doors and another bottom frame added below this frame. And, mine will only be two bays wide.

By making my own, I could go all the way to the ceiling. An 8’ tall cabinet (standard lumber size) starting from the ceiling would leave me 12” below it for my jack storage. The spacing of the verticals was loosely based on the existing studs in the wall. This gave me uneven cabinet widths, but that would allow more flexibility with the stuff I have to store in there. Since the spacing has the left side narrower, it became the storage for the chairs.

Always Plan Ahead…

The overall cabinet is 5’ wide by 8’ tall (1.54 meters by 2.43 m) and extends 12” from the wall. The spacing of the shelves was carefully calculated based on the size of existing bottles, cans and stuff that needs to be stored in it. This resulted in the top section being 45” tall and the bottom 51” tall. Bottom shelves were 12-1/2”, 11-1/2”, 11-1/2” and 11” clear. These sizes allowed the storage I needed. The vertical brace is 22” from the left and 38” from the right.

Since there is a vertical brace is a solid plywood panel, it made sense for me to split the doors into 1/3rds and allow about a 1/2” for overlap. The actual door widths were tested with cardboard samples before cutting the plywood. I also learned what direction NOT to cut thin plywood.

If you read though my current garage photos, you will realize that I don’t have a table saw. It is a luxury I just don’t have space for right now. So, for my woodworking projects are built with just a miter saw, a circular saw, a cordless drill and various hand tools. Maybe a little primitive, but its functional with adequate results. OK, these cabinets Rock! Or at least they will be when I replace the OOPS doors I made!


The Build…

Borrowed a pick-up to make a Lowes run. Went there because they had the Iso board I wanted to insulate my garage doors. That will be another story. All plywood for the sides and shelves is 5/8” thick and the doors are 1/4".

041 (01)

This is the wall that I started with. The space between the panels and the garden tools is the clearance for car doors. The 6 square foot cabinet on right will be replaced with a new 40 s.f. cabinet. That should be plenty for a while. NOT!

042 (02)

Old cabinet and shelf over door are removed and studs are located. There are 4 studs on the right at the edge of the door and then 16” on center.

043 (03)

Because the drywall will be the back of the cabinet, I wanted to paint the wall before I started. The stud line was transferred to the top of the wall and nails were put in to mark them. I realize now I should have painted the wall and THEN locate the studs. Oh, well…

044 (04)

The whole wall is painted the lighter color tan that will be the upper wall color.

045 (05)

Then the 2x2 frame members were attached to the wall studs using lag bolts. Since I wanted to maximize the amount of storage, I moved the left side over 6” from the blue tape at the stud. I used a total of seven 3/16” Toggler brand heavy Duty Toggle Bolts (each with 238 lb load capacity) bolted into the drywall for the left side framing.

046 (06)

The top, middle and bottom horizontal braces will be pre-built frames that I insert and attach to the wall. Therefore I left a space in the verticals for a horizontal 2x where the frame will go.

047 (07)

Here is my very elaborate substitute table saw. I use 2x lumber as spacers off the concrete slab. The plywood to be cut is placed down first. I use another sheet of plywood as my straight edge that I clamped to the cut-ee piece of wood. I made sure my saw blade was deep enough to go through the plywood and not the lumber below in case they get turned and in the way.

048 (08)

By having two blocks below the cut-ee, when the saw breaks through the final inch, it is fully supported and doesn’t fall.

049 (09)

I got so excited at the way the cabinet was turning out that I forgot to take any pictures until the frame was up. This shows the top, middle and bottom frames in place with the outer two sides in place. The top and middle frames are all 2x2. For the bottom frame, I used a 2x4 for the front piece just for the added strength. If anybody would stand in it to reach higher, this could be a good idea.

050 (10)

Hold that thought... Be right back
 
Last edited:
OP
W

Wingnut65

Well-known member
Joined
Apr 21, 2010
Messages
3,170
Location
Tampa Bay, FL
OK, On with the build...

The top frame is mounted to the back wall and to the ceiling. BUT, this first had to be perfectly level to get the sliding doors to work.

051 (11)

Likewise, the middle and bottom also had to be measured off the top frame and be perfectly horizontal.

052 (12)

Here is the 2x4 on the bottom

053 (13)

Here is a close up of the bottom frame and how I cut the 2x4. This also shows that the left most vertical frame is actually off of the stud were the lag bolt is in the bottom. I figured that a cantilever that much shouldn’t be anything to worry about.

054 (14)

The side panels are just 12” wide, cut, glued and fastened. For fastening, I countersunk #10 wood screws.

055 (15)

The center panel is only 10-1/2” wide to allow the doors to pass in front. It had to be notched on the back at the top, middle and bottom frames. BUT, I realized at this point that the front horizontal 2x2 that the middle panel is leaning on had to be removed so I could get the middle panel into the frame. Luckily I screwed it in from the front and it came off easily.

056 (16)

See, it really does fit.

057 (17)

Here’s how it fits in at the top. The 10-1/2” panel also clears the 2x2’s.

058 (18)

I actually had to notch both corners on the bottom. This also shows that a 2x2 piece will need to fill in on the face of the bottom panel to support the shelf.

058a (19)

To get the bottom frame level, I had to use an old floor jack to get it level before attaching to the center plywood panel.

059 (20)

Here is where my OOPS occurred for the doors. When measuring the door sizes I needed and then estimating how to get the most out of the two sheets of 1/4” plywood that I purchased. If I could be creative in the cutting, I could save pieces for another project. BUT, it wasn’t until I installed the doors and let them sit that they started to warp on the grain line. See how the little voices in my head told me to cut the wood ACROSS THE GRAIN??? Well, actually I did cut two doors

060 (21)

Doors and shelves were painted on the floor on cardboard and some old 1x shelves. I actually used a 5” roller for all the major painting and a brush for cutting in.

061 (22)

Missed a couple photos along the way again, but this shows that there are 2x2’s added for the shelves to sit on. Shelves are not secured in place. In fact this top shelf was removed to fit my paints up there.

062 (23)

Here the doors are starting to be installed. The Front door MUST be in the front track in my setup. The two sides are in the back track. Forgot to mention that the door tracks are from our local Woodcraft store (http://www.woodcraft.com/Product/2001067/10134/Wood-Door-Track-for-14-Doors.aspx, item 27Q02)

063 (24)

This shows that the shelves are 11” deep to allow the doors space to slide past. This also shows the 1x birch face frame that I installed to cover the door tracks

064 (25)

For the door pulls, I used 3/4” sliding closet door finger pulls. Please Note that the 1” pulls were too deep to fit in a 1/4” thick door.

065 (26)

Before I installed the doors, I rubbed the top and bottom edges of the door panels with wax from an old candle. This helps the doors slide easier.

Here’s how the 3-panel doors are able to work. The right door will slide behind the center one and the front door can slide left or right. It looks better with the face frame installed.

066 (27)

Here is the finished product. See how the doors are warped. They rub as they open now. BUT, I bought some 1/4” hardboard (Masonite) sheets to make new doors, someday.

067 (28)

And this is how the ‘Space-Creates-Vacuum’ concept works… Build it and it will get filled. Quickly! Space for everything. Except there is no space for future purchases. I NEED MORE STORAGE…

068 (29)

To keep the chairs in place and not fall out, I installed a 1/4” rope with an S-Hook hooked on an eye bolt on the side panel

069 (30)

If anyone wants to build one like this, let me know if there is anything else that may be of assistance.
 
Last edited:

shopnut

Well-known member
Joined
Feb 22, 2006
Messages
4,237
Location
Florida
Very nice headway, Wingnut65. You'll have that garage ship-shape in no time if you keep that up! Great idea to build the cabinet off of the floor. Florida's humidity can play havoc with wood - could some aluminum angle or channel edging be added to straighten those doors without having to redo them someday?

I was trying to find a good source for the sliding door tracks - thanks for sharing the link.
 

iatros

Well-known member
Joined
Jan 25, 2011
Messages
51
Location
Tampa Bay, FL
Wingnut, bonus points for the Bucs chair! :)

And nice handiwork with the cabinet build. Looks great.

I had a similar problem with storing those hurricane shutters. Before finding some room in an outside closet behind my place, I was contemplating building a rack above my garagedoor to store them, like the one below that's used for pieces of wood. Perhaps something to consider?

I am determined to get everything OFF the floor, so a simple blower can keep the place clean!

garagerack3.jpg


And thanks for asking about my place... the struggle continues to get it emptied out and get things out of sight. I'm about to put an order in for some racedeck as well, maybe that will get me moving faster :thumbup:
 
Last edited:

flybefree

Well-known member
Joined
May 18, 2008
Messages
1,111
Location
Ohio/Kentucky
Wingnut Oh how I hate the humid air in Florida that warps your new cabinet doors! The air in Ohio would never have been so cruel. Neat build, like that the cabinet "floats"... good Salt Life tie in....
 
OP
W

Wingnut65

Well-known member
Joined
Apr 21, 2010
Messages
3,170
Location
Tampa Bay, FL
Very nice headway, Wingnut65. You'll have that garage ship-shape in no time if you keep that up! Great idea to build the cabinet off of the floor. Florida's humidity can play havoc with wood - could some aluminum angle or channel edging be added to straighten those doors without having to redo them someday?

Thanks shopnut. I don't think aluminum angles would work as the tolerance between the doors and the shelves behind are tight. Anything added to the doors would need to be so thin to fit that they would be too thin for any structural improvements. Someone else on GJ did the same doors with Masonite and had no warpage.

flybefree: Not sure if the warp wacs beacause I temporarily leaned all the plywood against the wall until I could get around to building it, painting the thin doors with latex paint, or maybe our famous humidity. I know its a lot less in Ohio. Do you need some sliding doors in this size?? Maybe they would straighten out up there...

Wingnut, bonus points for the Bucs chair! :)
I am determined to get everything OFF the floor, so a simple blower can keep the place clean!

And thanks for asking about my place... the struggle continues to get it emptied out and get things out of sight. I'm about to put an order in for some racedeck as well, maybe that will get me moving faster :thumbup:

iatros: Go Bucs! I'd love to get everything off the floor, but my wall and ceiling space are getting filled up pretty quickly. My hurricane panels are big and heavy. I have a couple 10'+ panels on the ceiling. The rest are so big that each one is heavy and 1) I would need to strengthen the trusses to add a thousand pounds concentrated loads on the ceiling, and 2) it would take more than 1 person to get the panels up there and back down. With them against the wall, its a 1 person job with a hand truck and a cordless drill to get the panels installed. Work on a garage project is always a struggle. Let me know if you would like to see some RD installed.
 

Bob Heine

ALLIANCE MEMBER
Joined
Oct 24, 2009
Messages
10,703
Location
Boca Raton, Florida
Because you live in a gated community, I suspect outside storage is not an option. Being a fellow Floridian, I have the storm shutter storage problem as well. I started out standing them up against the wall in the garage, just like you. I wanted more wall cabinets so I stacked them flat on the floor on some concrete pavers. Walking past those razor sharp corners was too much of a safety hazard so I moved them outside.

I originally stacked them on concrete blocks on the ground next to the garage. Unfortunately water collected between the panels and they started to corrode. Now I have them stacked on their sides on a shelf mounted with heavy-duty tubular storage brackets (ladder and patio floor channels for the shutters store below the shelf). The sprinkler system and house water maiin are also down there.
ShutterStorage3.jpg


I used all-thread screwed into the wall to keep the panels from falling off the shelf.
ShutterStorage4.jpg


If I had to store the shutters inside the garage, I'd probably hang them under my wall of cabinets where I now keep the recycle bins and garage rags.
GarageWall.jpg
 
OP
W

Wingnut65

Well-known member
Joined
Apr 21, 2010
Messages
3,170
Location
Tampa Bay, FL
ChristopherLutz: Leveling the frame was not a problem. Before I tightened the frame to the ceiling, I leveled it out and jammed some popsicle/craft sticks to fill the gap. Tightened it up carefully and it was level. The lower level front to back, but I wanted to make sure it had the same space vertically to the upper frame, before I secured it with screws in the side panel. Bottom was not a real problem either, but by being a 2x4, and 12" off the floor, it was easier to use a jack than to manually persuade it level. The main point of those pictures were to make others aware that one frame relates to the others by having the doors slide between them. They wouldn't slide well if they weren't the same distance apart. BTW, thanks for your post to get me to build this one-off Family Handyman cabinet!

Bob Heine: I hadn't really thought about storing the panels outside. They would probably be safe out back, but I wouldn't want to buy them again if they walked. Your idea of a shelf with all the channels nearby keeps them out of the way and make them handy. Looks like you have them bolted to the wall. That way they won't blow away in a storm... Wait, never mind, They won't be on the shelf in a storm. Thanks for taking the pix for me. And those cabinets look great. I'd love to have a wall of cabinets, but my garage is about 2' too narrow. I should have made the builder widen the garage instead of the dining room, but I like to eat too.
 

mdbeck1

Well-known member
Joined
Mar 7, 2010
Messages
2,297
Location
Norman, OK
OK, On with the build...

And this is how the ‘Space-Creates-Vacuum’ concept works… Build it and it will get filled. Quickly! Space for everything. Except there is no space for future purchases. I NEED MORE STORAGE…
29
DSCN3187.jpg

Did you remove the handle to your floor jack?

To keep the chairs in place and not fall out, I installed a 1/4” rope with an S-Hook hooked on an eye bolt on the side panel
30
DSCN3191.jpg

You might think about using bungee cords instead of rope. They are easier to put up and remove.

...and no matter what you do you will ALWAYS need more storage space.
 

Bob Heine

ALLIANCE MEMBER
Joined
Oct 24, 2009
Messages
10,703
Location
Boca Raton, Florida
And those cabinets look great. I'd love to have a wall of cabinets, but my garage is about 2' too narrow. I should have made the builder widen the garage instead of the dining room, but I like to eat too.
Wingnut65:
Actually, I have the same problem. Space between the overhead door track and the wall is only 7.5". I made eight cabinets from poor grade 1"x8" pine with 1"x3" nailers in the back. Each cabinet is 30"x30" so I was able to cut 16 identical sides, 16 tops/bottoms and 16 nailers. Home Depot used to sell door packs for their standard Mills Pride cabinets so I used those. Came with european hinges and plastic handles. Made shelves to fit inside the cabinets and mounted them on the same kind of pegs you see inside kitchen cabinets. Just drilled four 1/4-inch holes for each shelf position. A gallon paint can is 6.75" diameter and fits perfectly inside the cabinet, even with the nailer taking up some of the depth. I would use 1"x6" or even 1"x4" pine if the space was shallower. Deep shelves are like black holes in my garage -- once my stuff is more than one item deep, it's invisible (that's why I have a lot of duplicate stuff).

I realized that some of my stuff wouldn't fit in the 7.75" deep cabinets so there are two slightly deeper and taller (42") cabinets. Used 1"x10" pine for those and they are the perfect depth for shop manuals, catalogs and magazines. Home Depot carried door packs for the taller (42"hx30"w) Mills Pride cabinets so I avoided having to make those doors as well. The shelves in those cabinets are permanently screwed in place (they're ripped-down scraps from a dumpster expedition). The garage looks a lot neater with the doors closed -- I'm a hoarder trying to become a hider....
CabinetsOpen.jpg


The original owner of this house had the builder make the garage a bit deeper so I have room at the back for some additional standard base and upper cabinets, Like most guys, my stuff expands to fill available storage space. By the time the counter top went on, I had to start on the wall of shallow cabinets.
BaseUpperCabinetsS.jpg
 

couchmechanic

Well-known member
Joined
Jul 29, 2011
Messages
104
Location
Bakersfield
If you ever win a partial lottery you could install a tankless hot water heater? You and I share the same problem too much stuff too little space. Love the metal roller also, have some DiArco equip at my work. Really can't wait to see your next steps. Thanks
 
Last edited:
To avoid these ads, REGISTER NOW!
Top Bottom