
You are using an out of date browser. It may not display this or other websites correctly.
You should upgrade or use an alternative browser.
You should upgrade or use an alternative browser.
Saving a Craftsman Tool Chest
- Thread starter Zeeman
- Start date
thehorse13
Well-known member
Your welder likely can also run flux core wire but make sure you follow the directions on how to install, use and configure your welder for such wire. This allows you to weld without a bottle and in outdoor/windy conditions.
I did a little dirt dobber-ing on some of the holes on the front of the chest. I'm not a very good welder of holes. I have the amps set as low as they will go, and messed with the speed, but not much different results. After the front is done, I think I have about 15 more holes to fix. I might resort to some JB Weld!


I read about using some copper as a sink, so I did. It worked better than without using it.


I read about using some copper as a sink, so I did. It worked better than without using it.

thin old metal is not easy and needs mig with lower than 30amp and experience.
Just keep at it, any patches are going be series of spot welds rather than bead as only way really, some filler and high build primer should help smooth it out when get to that stage, nice to see you trying salvage this chest rather. Look forward to future progress.
Just keep at it, any patches are going be series of spot welds rather than bead as only way really, some filler and high build primer should help smooth it out when get to that stage, nice to see you trying salvage this chest rather. Look forward to future progress.
Mr. B. I'm planning on using a lot of body filler. I'm taking a little break from the body, and I'm working on the handles. They had been painted over, and underneath was a lot of pitting and rust. I'm in the process of fixing them up. Pictures to come a little later. Thanks.
Here are some pictures of the handles, and what the screws will look like/ before and after.
I used my monster Wizzard drill with a buffing wheel attached to buff. The handles were pretty pitted, and the one I polished could have used some more sanding. I may or may not do it over.


I used my monster Wizzard drill with a buffing wheel attached to buff. The handles were pretty pitted, and the one I polished could have used some more sanding. I may or may not do it over.


Tynee
Well-known member
Wonder if the handles might have benefitted from a shot with the sand blaster, too?
I know some of you thought I bit off more than I could chew with this chest, and I might have thought about it several times. Mostly when I was starting the body work. I don't really do body filler well, but here are some pictures of my progress so far. I concentrated on the really bad side, and that side got even worse than this first picture shows. I welded a couple more holes, and tacked the patch in a couple more places. This distorted the metal, and made it quite wavy, therefore the whole side had to get the filler. Not too much fun for someone who does not do this very often on such a large, flat surface. Anyway......


It took two attempts with the filler, then I sanded and used glazing/spot putty.


It took two attempts with the filler, then I sanded and used glazing/spot putty.

555
Well-known member
You are making great progress. A lot of work, but it will be worth it when you are finished.
Regards,
John
Regards,
John
413dan
Well-known member
i tip my cap to you sir, nice job. a lot of work as 555 mentioned, but satisfying nevertheless.
thehorse13
Well-known member
Get yourself a good mask and a fan. You've got a lot of sanding to do. lol.
You're moving along quicker than I thought you would. I look forward to the next batch of pictures.
Nice job!
You're moving along quicker than I thought you would. I look forward to the next batch of pictures.
Nice job!
Looking good, for the rough spots bondo glass will work. It is green filler with fiberglass in it. It is tough as nails to sand if it kicks before you knock it down though.
Thanks for the tip. I think I have the metal OK for regular filler. I do wish I had gotten some premium filler instead of the Bondo cheap stuff I had on hand. This stuff is way too thick.
Thanks guys. I have only been able to work on it for about an hour a day, but I'll have two weeks off soon, and I hope to at least get it ready for paint. We'll see.
Horse, you are right. my pile of sanding dust was almost as big as the mixed up filler. I am using a 3M respirator, and I know my lungs will be happy for it. I'm going to have to crank up the leaf blower in the garage after it's all done!
Horse, you are right. my pile of sanding dust was almost as big as the mixed up filler. I am using a 3M respirator, and I know my lungs will be happy for it. I'm going to have to crank up the leaf blower in the garage after it's all done!
Lookin4'67Galaxieconv
Well-known member
Zeeman, I actually saw that box on CL and contacted the guy about it, but it was a good way from me and I ended up chasing down a different one. It's a very cool design and I suspected some issues with this one but wow!
I'm glad you got it and are putting the time and effort into it and learning along the way. There's nothing more addictive than cool old toolboxes like these!
I'm glad you got it and are putting the time and effort into it and learning along the way. There's nothing more addictive than cool old toolboxes like these!
Hey Lookin4, It was well over an hour for me in 5:00 Atlanta traffic, plus a very shady neighborhood. I had driven all that way, and wanted a top chest bad, so I went for it. I knew it was likely to be ugly under the galvanized metal riveted on, and I was right. Somewhere there is a Home Depot that is completely out of stock on rivets! This thing still smells like a taco stand too. Anyway, I'm determined to get it done. Did you get the one in Huntsville CL? The guy wrote me back and said he sold it within the first hour. Crazy. The Craftsman chests are all over the CL's in other areas, but we are not as lucky. Feel free to post a picture of yours here. I'd like to see what I missed out on.
Lookin4'67Galaxieconv
Well-known member

Very nice combo. I dig it, and nowhere near the problems mine had. I already have two rolling cabinets, one has been restored so far, so I wanted a top chest pretty bad. Thanks for posting the picture. Let me know if you hear of any top chests similar to what I'm working on that might be for sale. Let me know what you might be looking for, and I'll keep my eyes out for you.
Lookin4'67Galaxieconv
Well-known member
Sounds good. I'll shoot you a PM soon.
RodneyW
Well-known member
It's been a while since I checked this thread.
You're making good progress.
Rodney
You're making good progress.
Rodney
Here are some before, during and after pictures of my progress. I have the body work just about complete. I had to stop somewhere, or I could have spent weeks trying to get it perfect. I'm hoping that with some filler primer and the hammered finish it will look OK.
The weather does not look too good for painting anytime soon, so I hope I can get the drawers blasted, and start body work on them.
Left side and front left corner


My first time flux core welding, so I know it *****!


The weather does not look too good for painting anytime soon, so I hope I can get the drawers blasted, and start body work on them.
Left side and front left corner


My first time flux core welding, so I know it *****!


The front left mess
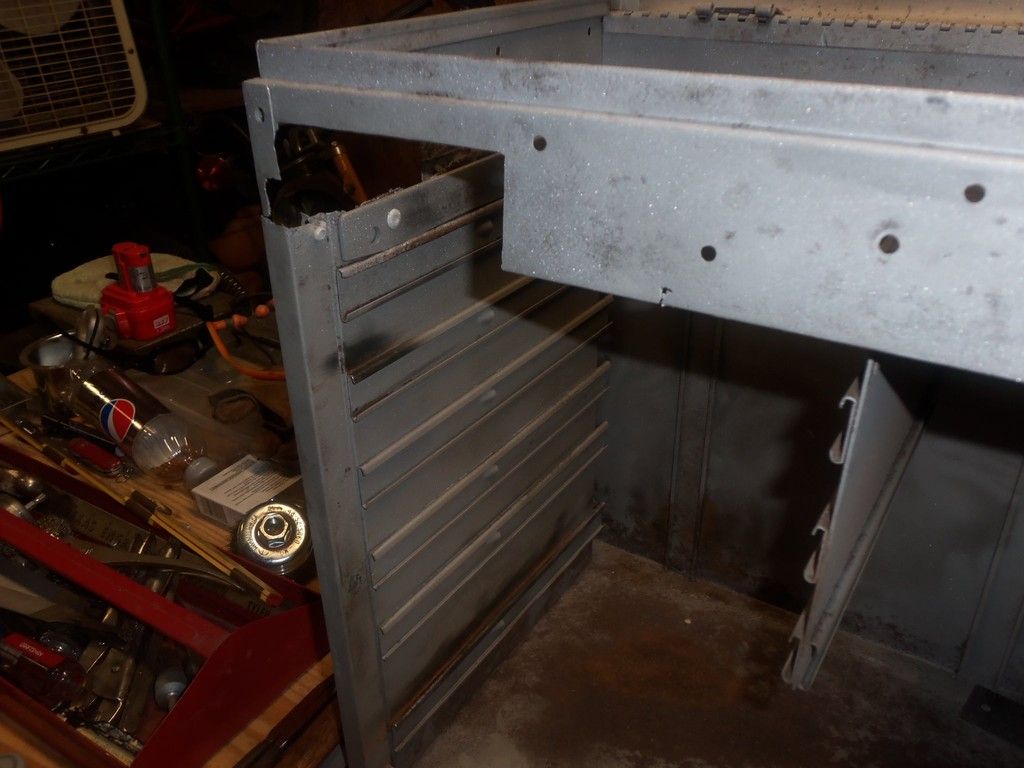
This shows the inside bottom in place. I used that as a backer to weld the patch in.

This spot was completely loose, and caused me some grief. I ended up welding it a little too tight, and it made the top left drawer fit very snug. I'm working on that problem now.


I skipped a bunch of steps in between the last photo and this, but I'll try to post them later.

thehorse13
Well-known member
So far you've put a ton of work into this box. Excellent effort.
Take your time on the prep work because it will pay you back in spades when you lay paint on the box.
Take your time on the prep work because it will pay you back in spades when you lay paint on the box.
PelicanPines
ALLIANCE MEMBER
Zeeman, You have some serious skills and vision. Be proud... great job.
I found a crappy 1 drawer, 1 door cart years ago... dragged it home in the bed of my trailer on my tractor... my wife and friends thought I was nuts... it was in a similar state as your find... I did NOT do as nearly a full restore as you but it's functional for my angle grinder storage.
Don't worry about any imperfections that show... so much has been fixed and reclaimed.
Lookin4'67Galaxieconv
Well-known member


Here's the inside bottom where I pieced in the left side. The lid on the inside has had most of the major dents filled in.


Sorry, those got out of order.
This is pretty ugly. I have it cleaned up a bit, but will have to take more pictures tomorrow. The dark gray stuff is JB Weld that I tried to use as filler for some smoothing out. A nice drawer liner will fix it I believe.


The JB Weld on the socket tray is where I had to cut it and bend it down to get the bottom in place. The shiny part of the socket tray is new, and tacked into place.
555
Well-known member
Incredible job you are doing. Most people would have sent it to the scrap yard.
Regards,
John
Regards,
John
Lookin4'67Galaxieconv
Well-known member
You've done wonders with that box so far. Really curious to see how it will turn out.
Attached is a pic of a combo I bought a few years back, boxes are '72 and '74. The seller's uncle repainted it at some point. Not a bad job though the prep work wasn't the greatest.
Attached is a pic of a combo I bought a few years back, boxes are '72 and '74. The seller's uncle repainted it at some point. Not a bad job though the prep work wasn't the greatest.
Attachments

555
Well-known member
45 cases. There were 3 sets in the box 41, 53, and 57, a springer fork, some cylinders, heads, transmission bits and assorted small parts.Thanks John. Is that an old Harley behind that AR license plate?
OK. I'm finished with the body work. I have about had enough of that for a while. I still have the drawers to do, but here is the chest all in primer. It's not perfect, but I had to stop somewhere.


All of those are pictures with just one light coat of primer. I put 3 coats on total.


All of those are pictures with just one light coat of primer. I put 3 coats on total.


