Todd.Brock
Well-known member
We are all rooting for Jonathan 75. We were all teased with a OCD level 5 install last year of a minisplit in the garage. Hope all is well and will be the year it gets up and running!


Couldn’t wait any longer, finished it for ya!


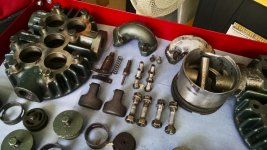
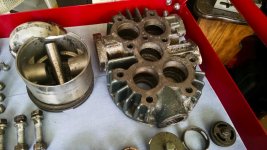
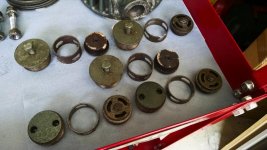


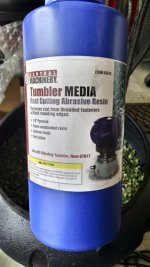


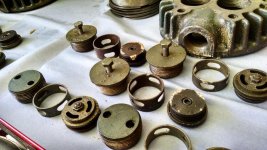
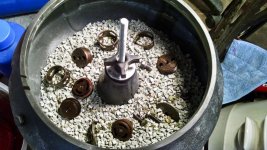
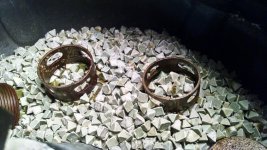
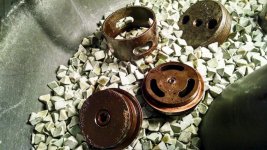
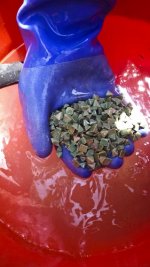
Wow, I think I need to invest in the tumbler, instead of wasting time brushing or soaking or picking things out of threads etc!
Always add water to acid. Never acid to water.
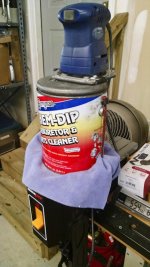
Go to the store and buy a gallon of muriatic acid used to etch concrete floors. It's technically hydrochloric acid renamed to make it more consumer friendly.
Wear personal protective gear, goggles and gloves. Take the acid and which is typically only 18% acid and 82% water (still VERY VERY STRONG) and make a mix of 2 parts water to one part acid. Always add water to acid. Never acid to water. Dunk your metal parts in the bath for 30 minutes to an hour. Pull them out and enjoy sparkling clean parts courtesy of hydrochloric acid. Zero effort other than taking personal care and safety.
People freak when they hear ACID! OMG HYDROCHLORIC Acid!
Yea so. It's rebagged muratic acid, its the same solution you put in your pool to lower the ph. It's a VERY common chemical. Just use common sense.
I use it all the time. It's effortless and great on parts with nooks and crannies which my sand blaster will likely destroy. I coulda saved you a ton of time and money on crappy harborfreight stuff. Sorry i i'm late to the game.
Good luck
Forgot to say, when done, dunk parts in baking soda solution to neutralize acid. And once done with solution, store in a sealed plastic container to use again, or VERY SLOWLY add common baking soda to the acid u til it stops foaming and pour it down the drain or out in a ditch on your property.

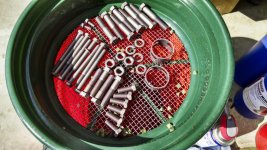


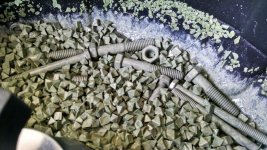
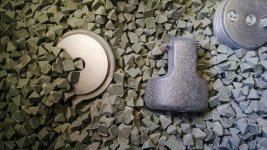
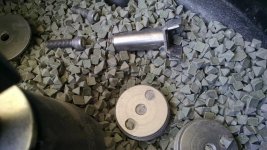
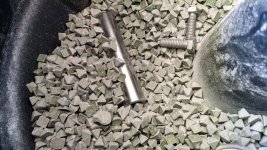
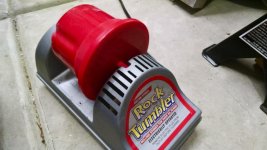
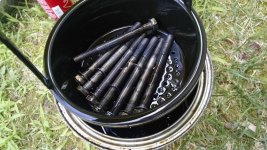
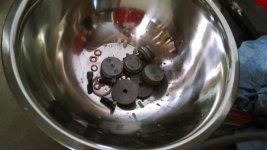
Did you end up with the 5 lb or 18 lb tumbler? That rust removal media sure seems to work.
For shits and giggles, I browsed my local classifieds and found this:
http://www.kijiji.ca/v-power-tool/o...er/1074759719?enableSearchNavigationFlag=true
May have to get myself that!


Glad to see you back at it. Welcome back! Did your travel schedule finally ease up?
I would be interested in the method to allow the motor to idle when full pressure is realized. I have to run my shop from a generator which will not allow me to use the original electric motor , and am running a 13HP gas engine from P.R.
Either post here or P.M. me. Thanks
To racer John, I wish mine with the 13hp honda engine would have that control mechanism. I've seen them on the small 2 tank gas powered portable compressors like you see running nail guns. Maybe find a builders supply that sells and repairs those, I know they can rig it up.
Hey thanks Redmondjp, also on the Saylor Beall website they have one with the honda engine running the compressor with auto on/off.