To avoid these ads, REGISTER NOW!

Scale Model Dozer Ride On For My Son

dozerbuilder01

Well-known member
Joined
Jun 20, 2011
Messages
180
Location
Far Northwest Burbs of Chicago
See a recap of the entire build in one place. Visit www.minidozerbuild.com

Not sure if this is the best forum for this but I've been hanging around here for a few months getting ideas for my garage. I currently have a 2 car (21x20). I make it work but it's tight. Moved in about a year and a half ago. It's our first house. You can see pictures in the 2 car garage gallery. And since it's going to be a while until I expand, I figured I might as well start a project.

I've had this idea for a couple of years now ever since I saw a Struck dozer on ebay. It was pretty expensive and I still wasn't crazy about the way it looked but I liked the idea. And my wife and I had a little boy about 7 months ago so I figured I need to start on something soon so by the time I get it done, he'll be old enough to ride it.

I knew I wanted it to be hydraulic drive. So I looked for a while to find a used zero turn mower. I couldn't really design much until I had something since all of it was going to be built around these. A couple months ago, my brothers neighbor sold this to me real cheap.

DSC06604.jpg


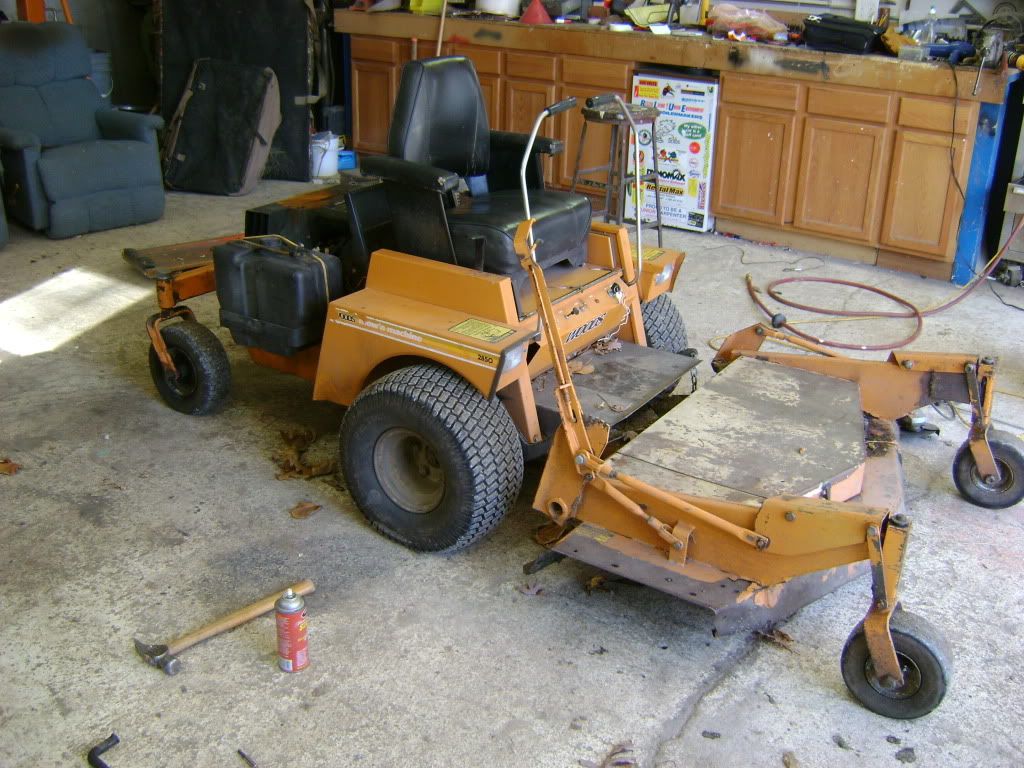
The engine leaked oil real bad but it ran enough to test ride it. I planned to use a smaller engine anyways so it was fine.

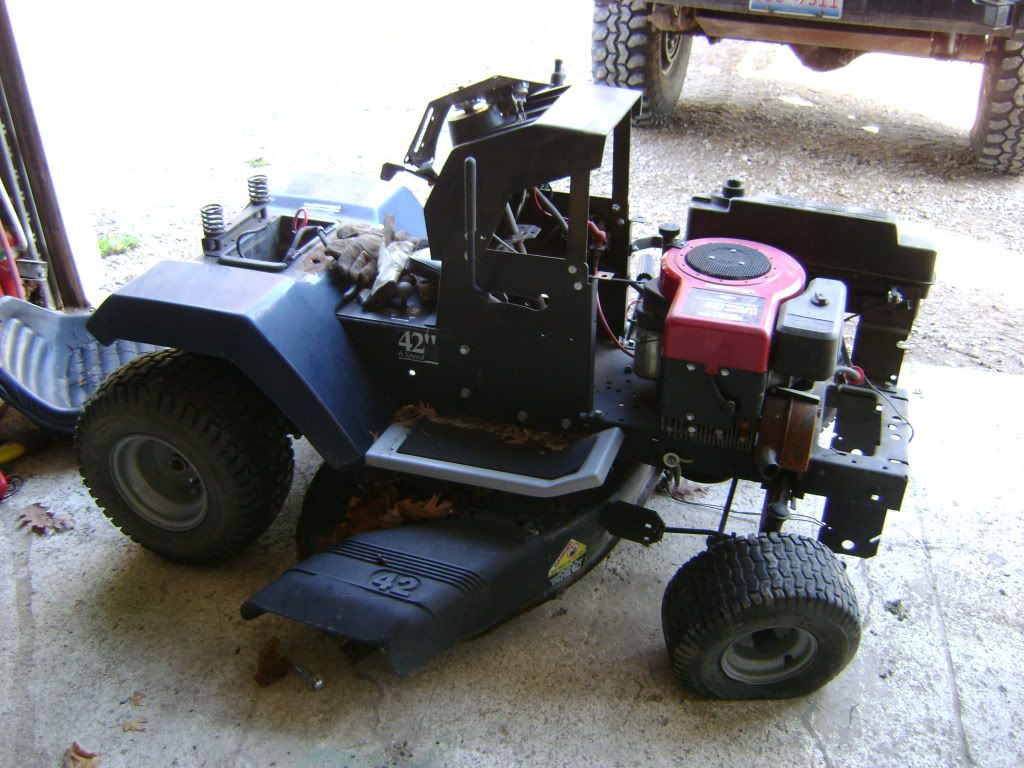
Stripped it down at my brothers place to get to the transmissions.

DSC06605.jpg

DSC06606.jpg

DSC06617.jpg


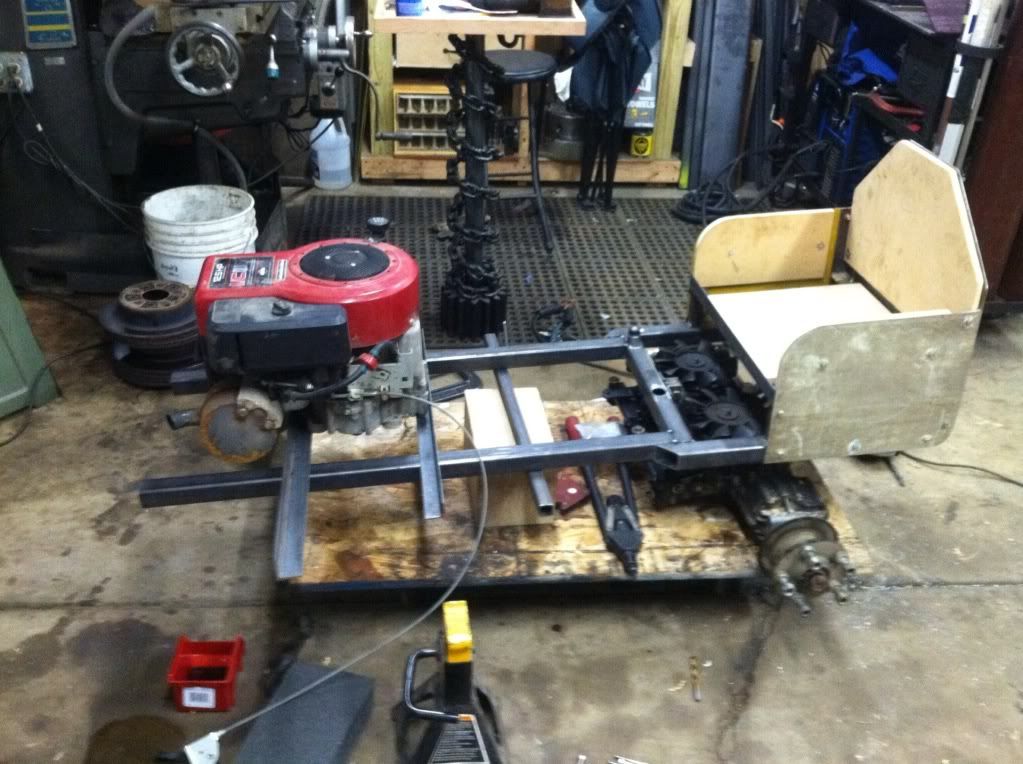
Also picked this up from the same guy for real cheap for the smaller 12.5hp engine.

DSC06607.jpg


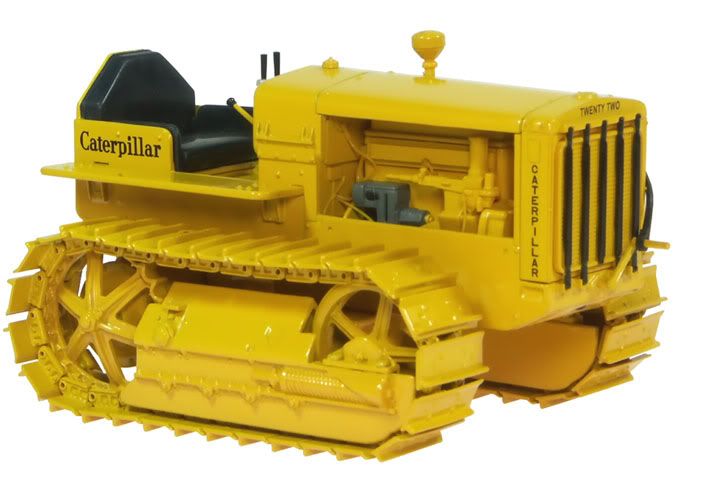
I always liked the way the older Caterpillar dozers looked so I decided to model it (loosely) after a Model 22. I will have rubber tracks so I don't chew up my yard and drive way. And it will be easier to do.

NOR55154.jpg


So this is where I am at with it after about a month of working on it in cad. I still have a little bit more work to do, but since I don't have exact models of the transmissions and engine, I need to start building to see how some things will lay out. What I have definitely gave me a shape to start with.

Update model 12/9/12
Model007.jpg


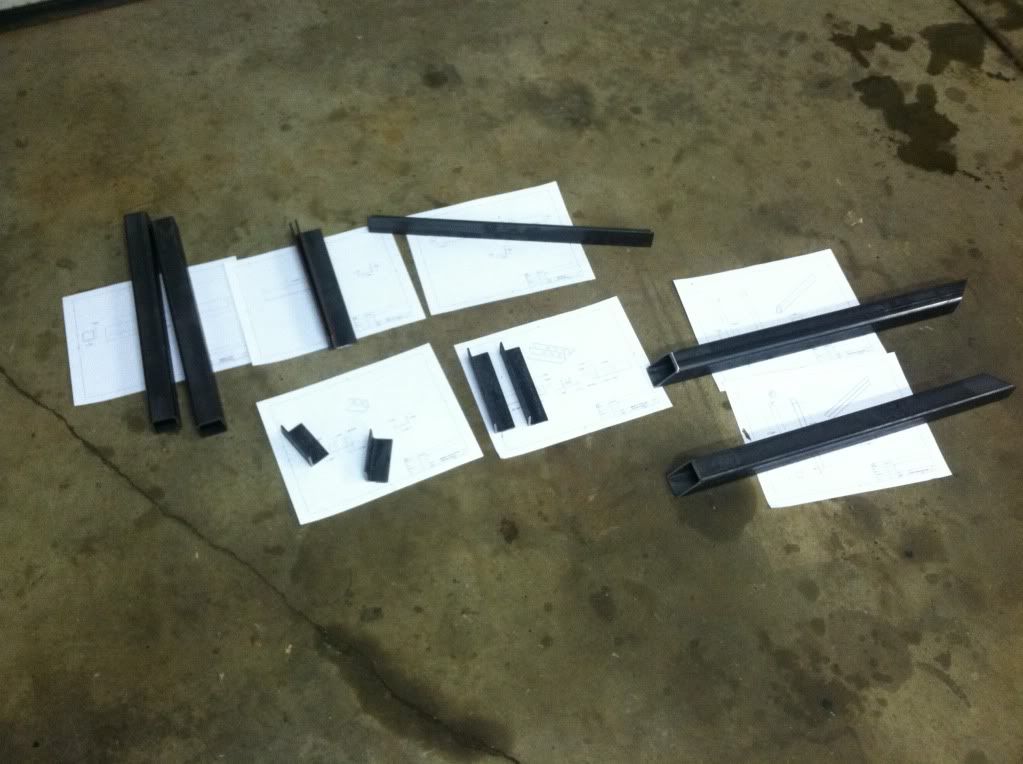
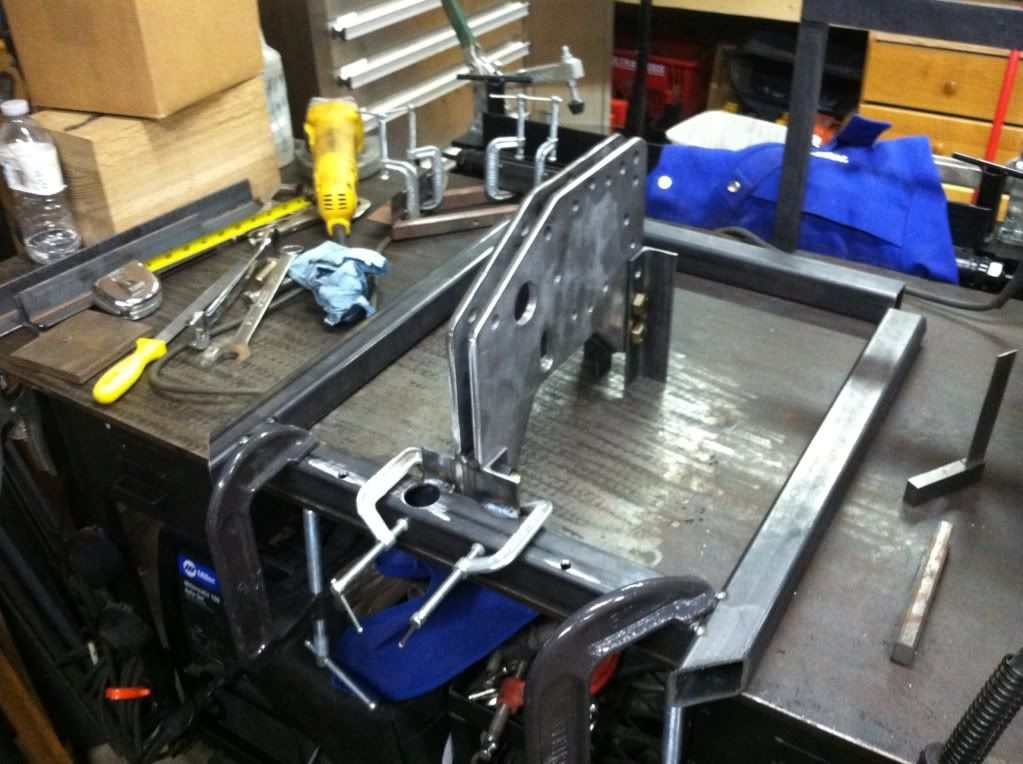
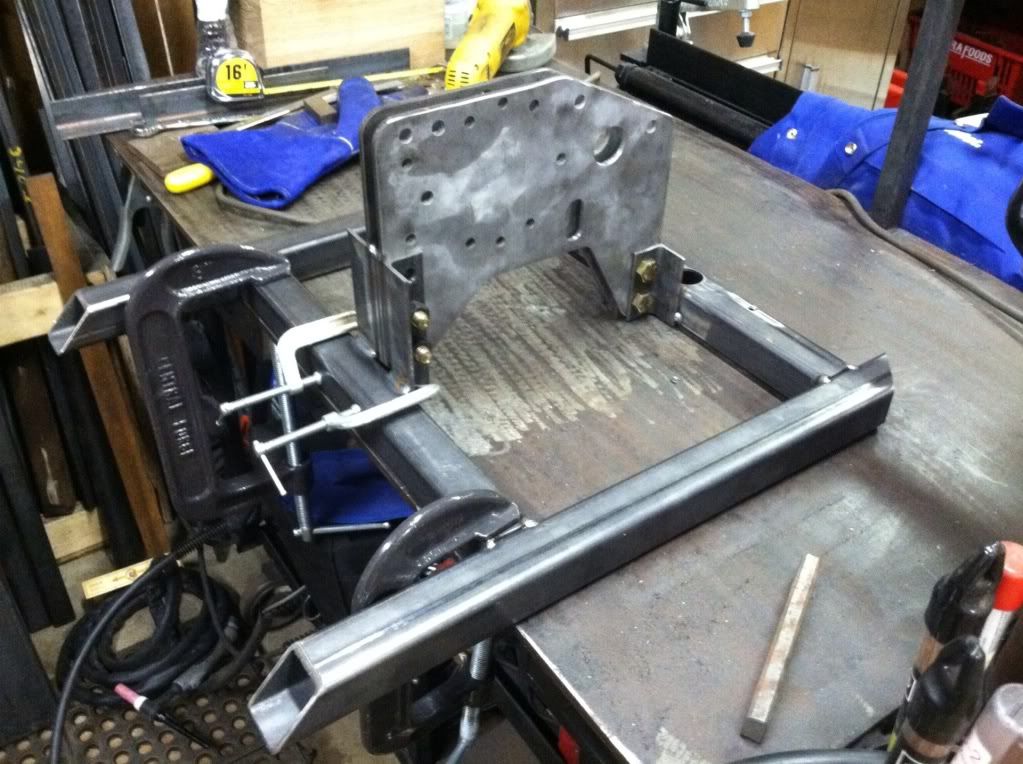
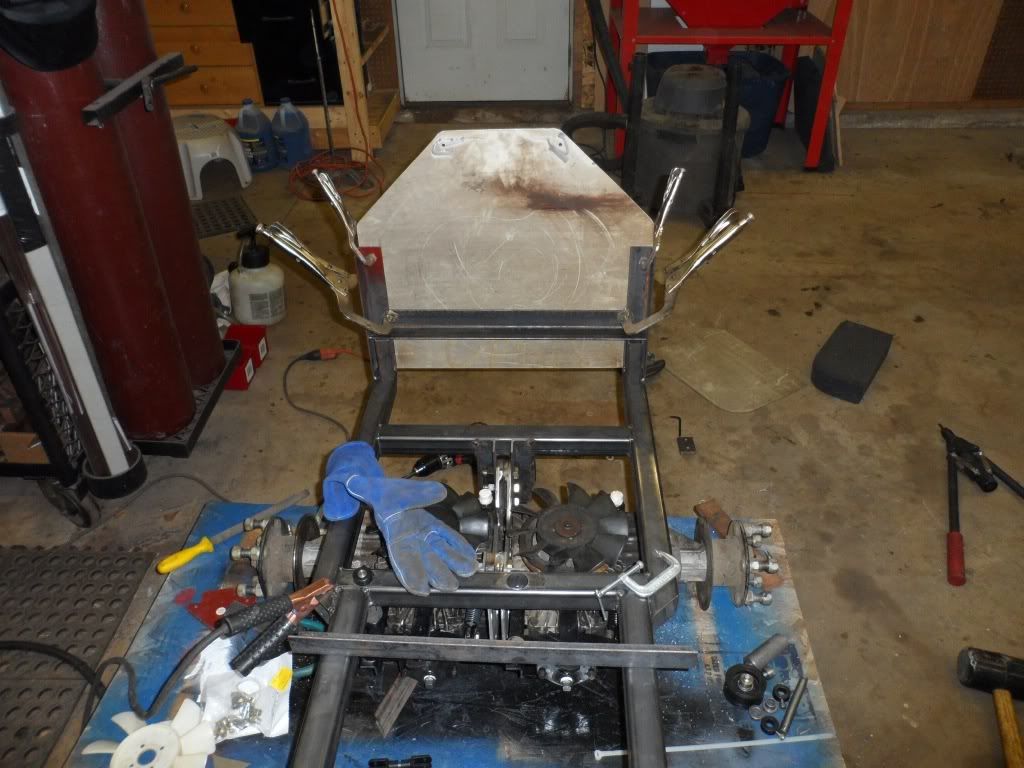
And here is where I'm at with the real thing.

download.jpg

IMG_0045.jpg

IMG_0046.jpg

IMG_0047.jpg

IMG_0058.jpg

IMG_0060.jpg


That is all for now.
 
Last edited:
To avoid these ads, REGISTER NOW!

Brad54

Well-known member
Joined
Jun 13, 2006
Messages
4,646
That is going to be awesome!

I wanna be a 7 year old again.
Aw hell, I'm 41 and would drive that thing all over the yard.

-Brad
 

Omphaloskeptic

Well-known member
Joined
Oct 11, 2008
Messages
2,346
Location
Ultima Ratio, Wa.
Does your 7 month old son realize how cool his Dad is? :rocker:

You build this for him, you will earn 'Papa Points' big time!

Okay, now that you have the operator's seat built, you've just got to prop him up in the seat wearing his 'Oshgosh'by'Gosh' bib coverall Onesies and his Cat hat, take numerous pictures for posterity, and of course, post them here for all us GJ kids to see and admire. :beer:
 
OP
D

dozerbuilder01

Well-known member
Joined
Jun 20, 2011
Messages
180
Location
Far Northwest Burbs of Chicago
Oh my! This is very cool. Did you have some of these parts cut for you on a CNC plasma cutter?

I did. Just the trans brackets so far. I have a friend that has a table. I plan to get a few more things cut. It just saves so much time than sitting there with a grinder cleaning up free hand cuts and drilling all of the holes. Time is an issue with a new born and I don't want to be building this forever.

That is going to be awesome!

I wanna be a 7 year old again.
Aw hell, I'm 41 and would drive that thing all over the yard.

-Brad

I'm building it just big enough so I can ride it too

And thank you all for the compliments. This is my first thread. And my first major project. Everything else leading up to this as been small.
 
Last edited:
OP
D

dozerbuilder01

Well-known member
Joined
Jun 20, 2011
Messages
180
Location
Far Northwest Burbs of Chicago
Since this is a garage forum, I figured I'd post about a tool I made for this project. Several months ago, before I had any parts to start designing, I knew I was going to need a way to bend metal for the hood, tank and front grill. Since I'm fortunate to have access to a decent amount of scrap steel (including the 14 gauge that I will use for the body pieces), I was able to make this tool for about $5. I had to buy the bolts. The rest is 3/8" plate, 3/4" black pipe, and 2" x 1/8 wall tubing.

Since I painted it black, these picture aren't the best.

SAM_0628.jpg


SAM_0630.jpg


The pins are removable to the crossbar can be removed to get the piece out.
SAM_0631.jpg


SAM_0632-1.jpg


SAM_0636.jpg


I still need to make handle extensions for wider pieces. I'm not sure how it will do yet. I think I made it to roll up to a 30" piece since I wasn't sure how long the hood was going to be. So if I have to apply a little bit of heat, oh well. On the smaller pieces, it turned out pretty good and works really well. I kinda designed it as I built it. So the toggle clamps really aren't needed since the angle iron holds the piece down. Oh well, I had them laying around. And the nuts aren't needed because those pieces are all welded now. This is the main reason why I'm spending a lot more time actually doing some design work so I'm not out in the garage either standing there thinking, or constantly cutting pieces off any doing it over. Having a plan is already making this go faster than I had expected.

Next up is to start working on some of the linkage. I built the seat fairly soon in the build because I can draw stuff all day long, but I need to see how it's going to feel. So I want to get the linkage set up before I move forward. Here's a little preview.
2.jpg

1.jpg


Thanks for looking.
 
Last edited:

machine_punk

Well-known member
Joined
May 14, 2011
Messages
2,540
Location
Napa Valley, California
Great project! That will be in the family for generations. In a hundred years, someone is going to be posting a project on GJ of how he is restoring the mini dozer his great-great grandad built for his great grandad (and wondering where a good source is for ________).

Great job on building your own tools too. It must be nice to have access to scrap metal and cutoffs to work with.

Looking forward to seeing where this project ends up!
 

Furious D

Well-known member
Joined
Sep 27, 2009
Messages
191
Location
Central, IL
This is going to be good.


There was a fellow around here that built a 1/4 scale Cat D-2 and would bring it to the local farm shows. I wish I had a pic, It was entirely hand made and the detail was amazing.
 

ambenz

Well-known member
Joined
Dec 12, 2010
Messages
4,236
Location
NW Chicago Suburbs
Subscribed!!!
That boy of your should be able to keep the driveway free of snow, if you get that in your area.
Very cool build!
 

Nighttrain

Well-known member
Joined
Aug 6, 2009
Messages
2,682
Location
Dripping Springs, Tx
When they say "they don't build them like that anymore" they are not going to be talking about this dozer. Very cool toy for your kid and very cool for us to be able to watch the build. Thanks for the details on the build.

I am just waiting for the pictures of your kid bulldozing his momma's flower garden for her.
 
To avoid these ads, REGISTER NOW!

dwaynerz

Well-known member
Joined
Jun 18, 2011
Messages
66
Location
bethalto il
I am just waiting for the pictures of your kid bulldozing his momma's flower garden for her.

or the side of your house or car :willy_nil

seriously tho, that is one lucky kid whose dad would be cool enough to build the neatest toy on the block :thumbup:
 

NUTTSGT

Super Moderator
Staff member
Joined
Sep 14, 2009
Messages
50,904
Location
Northern Central Ohio
Looks like an awesome little project.


Just one warning please. If you're welding that up in your garage, watch those reliners. The foam in those things will take off with a spark from the welder.
 
OP
D

dozerbuilder01

Well-known member
Joined
Jun 20, 2011
Messages
180
Location
Far Northwest Burbs of Chicago
ROPS? Seatbelt?

Your kids are priceless....

I have been thinking a lot about safety. So no to ROPS and to get it out the way, because it won't look like what I'm modeling. I know that's dumb. However, the mower that the transmission came off of went about 6mph. I have smaller drive sprockets which drops the speed to about 4mph. Which is still a little fast. I'll leave the same pulleys on the engine for now but I am going to have a pin to lock the engine throttle in low speed. Lower engine speed=lower pump speed=lower drive speed. I'm shooting for less than 1mph. That was one of the main reasons for building a bulldozer as opposed to something else; bulldozers are meant to go slow.
Also, according to my CAD model, the CG is about a foot from the ground and the overall width is 34". I live in Northern Il where it is extremely flat. I mean flat. My brothers property (where we will mostly ride it) has no hills or anything. He'll just set out a few small dirt piles for him to push around.
And last but not least, I will be using the seat kill switch from the mower to kill the engine when he gets up. And the linkage automatically returns to center so if he lets go, it stops.
Thank you for the advice though. It's nice to hear feedback while I'm building to make sure I haven't missed something.

Looks like an awesome little project.


Just one warning please. If you're welding that up in your garage, watch those reliners. The foam in those things will take off with a spark from the welder.

I will, thank you.

This is going to be good.


There was a fellow around here that built a 1/4 scale Cat D-2 and would bring it to the local farm shows. I wish I had a pic, It was entirely hand made and the detail was amazing.

There is a guy building a scale model of a Sixty. It's sick. All cnc. Very detailed. http://scalecaterpillar.blogspot.com/ I don't have the time or machinery for something like that. It would be very cool though. That's why I say mine is "loosely" modeled off a Twenty Two. :)

Great project! That will be in the family for generations. In a hundred years, someone is going to be posting a project on GJ of how he is restoring the mini dozer his great-great grandad built for his great grandad (and wondering where a good source is for ________).

That's is actually one thing that worries me. I bought a used mower and the transmissions are probably 20 years old (the design I mean). I did find a service manual and parts catalog on line but a quick search for some random parts found nothing. So if something does fail, I may have a hard time finding it or end up costing more than if I just bought new ones from the beginning from a place like surplus center. Oh well.

As always, thanks for all of the compliments. I will have another update soon.
 
Last edited:

mitusa

Well-known member
Joined
Dec 24, 2011
Messages
1,992
Location
SW Oklahoma
Re: Scale Model Dozer Ride On For My Son

--------------------------------------------------------------------------------

Quote:
Originally Posted by mitusa
ROPS? Seatbelt?

Your kids are priceless....

I have been thinking a lot about safety. So no to ROPS and to get it out the way, because it won't look like what I'm modeling. I know that's dumb. However, the mower that the transmission came off of went about 6mph. I have smaller drive sprockets which drops the speed to about 4mph. Which is still a little fast. I'll leave the same pulleys on the engine for now but I am going to have a pin to lock the engine throttle in low speed. Lower engine speed=lower pump speed=lower drive speed. I'm shooting for less than 1mph. That was one of the main reasons for building a bulldozer as opposed to something else; bulldozers are meant to go slow.
Also, according to my CAD model, the CG is about a foot from the ground and the overall width is 34". I live in Northern Il where it is extremely flat. I mean flat. My brothers property (where we will mostly ride it) has no hills or anything. He'll just set out a few small dirt piles for him to push around.
And last but not least, I will be using the seat kill switch from the mower to kill the engine when he gets up. And the linkage automatically returns to center so if he lets go, it stops.
Thank you for the advice though. It's nice to hear feedback while I'm building to make sure I haven't missed something.


I'm glad to hear that you have thought about the safety of your kids. I have learned that when it comes to kids, you can't be too safe. It sounds like you think you have it "bulletproof". That's great.... and thanks for the reply.

Good luck on your build; I know your kids will love it.
 
OP
D

dozerbuilder01

Well-known member
Joined
Jun 20, 2011
Messages
180
Location
Far Northwest Burbs of Chicago
Got some more work done. Warning, lots of pictures.

I need the linkage to pass through the frame. I knew that ahead of time so I drilled the 1-1/8" holes before I welded the frame together.
IMG_0044.jpg

Then I had to drill out the tubes.
IMG_0051.jpg

The upper and lower arms had to be at 90 degrees. I know this is all a clap trap but I'm bounded by the transmissions that I have. So I made a jig to get that perfect 90 by drilling the holes on the mill and then it clocks the collar correctly.
SAM_0609.jpg

SAM_0616.jpg

SAM_0617.jpg

And these are all of the parts for one side (except for the upper arm which I haven't made yet).
SAM_0679.jpg

Now I was going to buy a keyed shaft along with split lock collars that have the keyway already cut in it. But at $12 a piece and I think $16 for 9 inches of the keyed shaft, forget it. I had 1/2" round stock and $0.80 one piece lock collars. Then I milled a 1/4" diameter hole a 1/4" deep into the shaft and moved the table the correct distance and did it again. And combined with the jig, I got what I was looking for for a lot less $$.
This is partially installed.
SAM_0681.jpg


I also started making the upper link support bracket.
SAM_0666.jpg

SAM_0674.jpg

SAM_0625.jpg

SAM_0626.jpg

SAM_0675.jpg

SAM_0677.jpg


It will eventually go here.
Arm.jpg


And the nice thing about actually having a plan for once, if I get frustrated with something (which happens often), I can move on to something else. So the other night I felt like making the battery box. Made out of scrap, made by a tool made out of scrap.

SAM_0643.jpg

SAM_0644.jpg

SAM_0645.jpg

SAM_0649.jpg

SAM_0652.jpg

SAM_0653.jpg

SAM_0655.jpg

SAM_0658.jpg

SAM_0660.jpg

SAM_0662.jpg


I made that press a few years ago when I was doing some axle upgrades to my Jeep. It worked out really well in my little 12 ton HF shop press. It was just wide enough for the battery box.

And also, I'm not an expert welder. I get advise from my brother but I have no formal training and I don't do it for a living. I like projects like this because I can get practice. I hate to waste metal, gas, and filler rod/wire to just throw it out. Any advise will always be appreciated.

So that is all for tonight.
 

geotek

Well-known member
Joined
Oct 4, 2011
Messages
158
Location
Troy, NY
Its a briliant idea, best of luck, I can't wait to see how it progresses and finishes.
 
To avoid these ads, REGISTER NOW!
Top Bottom