To avoid these ads, REGISTER NOW!

Scepter's Shop Build and Projects

ScepterToad

Well-known member
Joined
Nov 9, 2023
Messages
340
Hi folks! I followed Mike ( @zmotorsports ) over here from the RV forum and have been reading threads ever since. Took me a while to get through his thread and now I'm on to others, reading them start to finish. Y'all have some cool stuff going on and really some VERY nice work going on!

I finally acquired a shop to use and am looking at building one a little closer to my house as this one is closer to the office, and in the opposite direction. This facility will be multi-use, so I can't just have it all to myself, but I'm OK with that. This is a 60x60 space with two man doors and two 14x16 garage doors. Firstly, it will house my coach and my buddy's 5er (I've worked for him for over 20 years now in various startups and consulting). Secondly, it will house some light manufacturing (assembly) for a business we started not long ago that's ramping up. Thirdly, it will be used as a shop space for anything that I'm working on at the time and maintenance of the coach and vehicles in the fleet. I'll be working over the next month to fit everything out and we plan on putting in a 2 post lift and possibly a little gym space. Lot's going on.

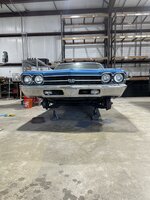
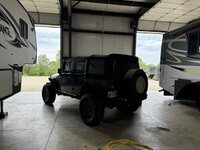
First up, my buddy's 69 Chevelle. He acquired this car probably 10 years ago and during one cold snap we had (-20F), he ended up with a le3ak in the carb. Not being a car person and being super busy with life, he let it lie for about 6 years. Not good. This is the year she gets back on the road. It's not a show car by any means, but he does like to run it around town occasionally. Brake lines are gone, carb and fuel pump/filter have been replaced and the car does run. However, I've noticed that the transmission is not set right in the car at the crossmember, which makes the engine tilt back and the driveshaft on a bad angle. So, first up will be correcting some issues and getting the brakes redone. From there, we'll probably tinker and drive it. I also have my Jeep making a pretty good clunk recently, so need to investigate that.

Mods, if this belongs somewhere else, please let me know.

I won't ever be able to do the level of work some folks here do, but hopefully I'll also learn a few things as I go along. On to the pics!

IMG_3917.jpg

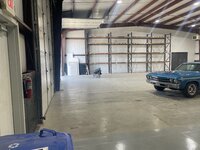
We have a fair amount of pallet racking also, which will be used for storage.
IMG_3918.jpg
IMG_3919.jpg
She's got some leaks and some problems, but should be fairly short order to get her back on the road.

IMG_3920.jpg
Area planned for the shop space. Pretty sure this will fit the majority of my tools with a little organization.
 
To avoid these ads, REGISTER NOW!
OP
S

ScepterToad

Well-known member
Joined
Nov 9, 2023
Messages
340
I only got part of Saturday to work on setup of the shop, unfortunately. I got serious about the pallet rack move, gathered up some rigging with which to move the uprights by myself, had a plan, and it all went to ****. I climbed up the second section and started disassembly. I figured out very quickly that moving this by myself would be a LOT of work and a bad idea. Put it back together and resigned to take another look at the layout of the facility. So, decided to go ahead and move the coach in and see where I was.

I was originally thinking I'd only have about 18" along the road side between the coach and shelving. Even though I'm in control of this facility and no one would put stuff on that shelf without my approval, I worry about something falling off and into the side of the coach. In any case, I really have almost 3' of space (I didn't actually measure it) and I'm much more comfortable with that. There's also a natural gas heater just in front of the coach, which I'm not super keen on blowing hot air directly onto the roof. I'm not sure how hot the air actually is, so may just be my overthinking. Good news is, I can stay a bit away from it and still have almost 6' of space behind. I should be able to wheel a pallet through and if I crowd the front (pull the coach up a bit), I might even sneak a car in behind. We shall see.

Getting it through the door was a bit nerve wracking. I have to pull into the parking lot, back up right next to another tenants truck, then swing the front in. Not ideal, but with practice I should be able to get in no problem.

This week I'll wire the 50amp service for the coach and start piling in pallets from storage to go up on the rack.

IMG_3992.jpg
 

zmotorsports

ALLIANCE MEMBER
Joined
Oct 20, 2009
Messages
21,441
Location
Northern Utah
Keith, I just ran across your thread.

Looks like a nice space to work in. The coach is looking good and I'm sure you are going to enjoy having it indoors.

Love the buddy's Chevelle, but then I have a soft spot for Chevelle's. I had a '71 Malibu that I raced and showed for a while after a frame up build.
 
OP
S

ScepterToad

Well-known member
Joined
Nov 9, 2023
Messages
340
Thanks Mike! Having the coach in a storage building was great, except for the fact that I tend to do the larger projects in the winter and it gets dang cold laying on the concrete floor with no heat. I'm excited, more than anything, to have all of my tools in one spot. Seems like they get scattered between anything I'm hauling around to do stuff for friends/family in the Jeep or Excursion, stuff in my tiny garage at home, or stuff at the (old) coach storage. Inevitably, I'd have something somewhere other than where I needed it.

I dig the Chevelle as well and I'll be happy to get working on it so it can get back on the road. It won't ever be a race car, and certainly not a show car, but it's got good bones (mostly).
 

WoodsTruck

Well-known member
Joined
Jan 12, 2013
Messages
1,025
Should be a fun thread to follow.
At first, I was curious how you were going to get anything up on that roofrack on the coach...
 
OP
S

ScepterToad

Well-known member
Joined
Nov 9, 2023
Messages
340
Should be a fun thread to follow.
At first, I was curious how you were going to get anything up on that roofrack on the coach...
Ha! Yeah, you won't catch me lifting too much up the rear ladder, that's for sure.

Which reminds me, I forgot to grab the 4' LED shop lights I hung (from the coach roof) in the old storage place. Guess I'll have to take the extension ladder down and grab them when I clean the old place out. Ugh.
 

zmotorsports

ALLIANCE MEMBER
Joined
Oct 20, 2009
Messages
21,441
Location
Northern Utah
Should be a fun thread to follow.
At first, I was curious how you were going to get anything up on that roofrack on the coach...

I had to go back and look at the picture again as I missed it at first. Sure enough, the pallet racking on the far side sure looks like it is a roof rack on the coach. :ROFLMAO:
 
OP
S

ScepterToad

Well-known member
Joined
Nov 9, 2023
Messages
340
Over the weekend I started the process of moving out of my tiny garage, old coach storage unit, and the business storage unit to the new shop. I got most of the old coach storage cleaned out and most of the bigger stuff from the home garage. The business storage unit is a different story. I managed to move all of our old office artwork, several shelving units, the rig, and built and moved several pallets. Hope is to be done with that by end of month, but I think it may spill into next month as work is busy these days.

I'm still mulling over in my mind as to how to set up the small area I get for a shop area. I still have an air compressor to move from my folks' house, which will likely go into the corner, and I have a side cabinet that I didn't get to move this weekend that goes on the toolbox. Once that's moved and attached, I'll level up the box and start setting things up a little better. I may have to commandeer one 8' section of floor space under the pallet rack for misc. items. We'll see.
IMG_4014.jpg
Start of the load in the trailer from the house garage. That old Miller I purchased from an old family friend's estate when he passed. Super nice guy and that little machine still works like a charm. That cart under it was the original wood cart it sat on in his shop. I scabbed together the metal frame on top when I pickup up the multiprocess machine a few years back. One of the things I hope to learn (start to learn) in the near future is TIG. The OXY/ACE setup I purchased from another family friend when he moved out of his farm. IT works, but I think I may have a leaky pressure relief valve on one of the regulators, so I haven't messed with it much lately.
IMG_4016.jpg
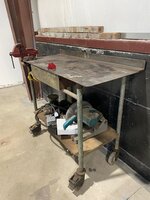
This old workbench was built by my grandpa probably in the 60s. I put the casters on it as it's fairly heavy and awkward to move otherwise. It'll serve as a welding table for the most part until I can build a "proper" table that's shorter. For now I'll stand or get a taller chair.
IMG_4017.jpg
Side cabinet still needs moved and it'll go on the left side there next to the engine stand. That area of the floor isn't super level, so I'll have to level the box up once I get everything put together.
IMG_4020.jpg

This old drill press and stand (cabinet?) it sits on was purchased from the same guy I got the torch set from. I love the little steel trays that pull out and some of them have stickers from way back that are still readable. Those stay for sure. I need to do some cleaning on the drill press though as she's pretty dirty. Most of that dirt is from the old man that used to use it all the time, so I may decide to keep it. I'm a bit nostalgic like that. That vice that's on there was used by him to actually mill parts he needed around the farm for old tractors and such. There were a TON of end mills and other tooling he used with it. Unfortunately, his grandson decided at the last minute he wanted all that stuff, even though I already had a price worked out with his dad. I wasn't happy, but luckily I managed the press and stand. The sandblaster stand was my first stand I made. Don't zoom in on the welds.

IMG_4023.jpg
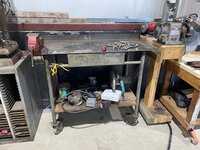
Another shot of grandpas old bench and the bench grinder stand I threw together one day when I needed it. Craftsman grinder came from the same place as the press and torch set.
IMG_4021.jpg
Closeup of the old drill press. She's a heavy girl.

I also got the 50amp service wired into the box for the coach. Last week I went over and the GFCI had tripped that I had the coach plugged into. Not sure what happened, but I think possibly the coach EMS thought I had 30 amp plugged in and the allowed amp draw was set as such. In any case, it's wired correctly now and no worries. However, it seems that the outlets in the basement are dead on the coach. None of the breakers are tripped, so I have a bit more investigating to do. Couldn't do it yesterday and I needed to run and put a new microwave in for my better half's mother and then go check out a sunk deck for her brother. Micro in and I think I have a plan for the deck.

Anyway, back to work....I need a day off from moving all that stuff over the weekend!
 
OP
S

ScepterToad

Well-known member
Joined
Nov 9, 2023
Messages
340
Well, All I managed to do last weekend in the shop was make a bigger mess, get the old coach storage cleaned out, and secure the air compressor my dad has been sitting on for a while.

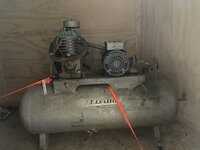
He offered this compressor to me a year or so ago and it's been sitting in his barn for at least 10 years. It's an old single stage with a 5hp motor on it. I expect it to sound like an old John Deere tractor from back in the day. The ones with two cylinders. I had made some plates with 1/2" bolts welded in them, turned some spacers down and scrounged some bolts to connect the 5" casters I got to move it around. However, once we got it pulled out of the barn, I noticed that the bolts were not long enough by about 3/8". Not enough to get a full nut with lock washer. So, I scrounged some small casters out of the barn, made up spacers with square nuts, and bolted them on for the short term. I'll remake the plates in the shop at some point. Add it to the list.

In any case, it'll suffice for my needs. In the short term, I'll just clean it up, give it a good once over, change the oil, and run with it. Longer term, I'll probably clean it up and paint it. Or not, I do like the look and feel of old tools.

Have to move one of the kids back home from school this Friday, so hopefully I'll get some time in the shop this weekend to get a bit more organized, move some more stuff, and maybe kick off a project or two.

IMG_4042.jpg
If anyone knows the company name, I'd be interested. I may be able to get the paint off the label, but I'm not hold my breath.
 
OP
S

ScepterToad

Well-known member
Joined
Nov 9, 2023
Messages
340
Hope everyone had a great weekend! I was able to get a little more done at the shop after a VERY long day moving one of the kids back from school on Friday. Got the remainder of the house garage cleaned out and moved to the shop on Saturday and started organizing. Then on Sunday my buddy brought his 5er over to see if we could get in into the door. I was convinced that he would be able to pull in, swing left, and get it straight in the length of the parking lot. I measured from the building to the edge of the lot and it was right around 60'. Measured from the rear of his rig to the front tire, and it's right around 56'. Plenty of room! Not. The problem is that it takes too long for the trailer to actually turn, the toolbox in the back of the bed is about 1" from the bottom of the trailer, and he can't quite get 90 degrees because he'd crash into the rear of the truck cab. If he had a different hitch platform, it might work, but with the Anderson hitch, which is basically a raised gooseneck ball, it just wouldn't work. So, we backed back out of the lot, pulled into the opposite driveway, backed into the lot and was able to make a large enough arc to get it through the door. With practice, he'll be able the slap it in there super easy.

Still on the hunt for a forklift. I'll get a well used one that's cheap and possible doesn't run. Most folks are super proud of their beat up, trashed, no brakes, no seat forklifts, which is frustrating. The plan is to get one large enough to be able to move that 5er in and out, which will make things easier when other people are in the lot. With a bunch of cars in there, we'd never have gotten it in the door. Plus, they're useful for all sorts of things.

I still have a fair amount of organizing of things to do. I've spent the last 10+ years in a tiny one car garage in which I admittedly was not a great organizer of things. The worst part has been the small things ending up in random containers, the wrong containers, mixed up, and ultimately lost. Additionally, when I did the Cummins swap on my X, I saved a bunch of the old 6.0 Powerstroke parts that were sort of useful, along with a bunch of other Cummins parts from the donor engine and misc stuff. I saved that stuff thinking I might be able to use is somehow or would at least have a spare if needed. Also, I have lots of hoses, old wiring from the harnesses I pulled form the X, fittings, and just a bunch of small parts. For now, I put most of that in boxes, containers, 5 gallon buckets, etc. and threw them on the shelves. Eventually, I'll get a bunch of parts bins and get everything separated and labelled. Not everything is done, but it's a good start.

In the coming weeks, I'll be transitioning over to getting things ready for the Moab trip in June. Still lots to do on the coach and the Jeep before we make the trek across the country.

IMG_4085.jpg

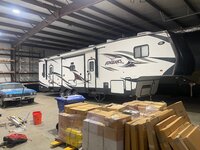
Toy hauler made it in the door finally.

IMG_4086.jpg
This corner is a little tight, so may need to re-org a bit. You can see a few new chain come-a-longs hanging in the corner. My dad has a great long time friend that is (like him) getting up in years. He worked concrete his whole life and did well for himself. He's also an animal when it comes to tools and working on stuff (or was in his prime). Those laid outside in the dirt for who knows how long and my dad picked them up last time he was out for a Sunday visit. One is a Jet brand and the other, not sure. I'll eventually get them serviceable.

IMG_4087.jpg

Got the side cabinet put on the box and rolled it into the corner. It's not exactly level, but all the drawers work and it's close enough for now. That creeper you see hiding is a super old one I bought from the same guy that I got the Miller from. It works fairly well but the casters need a bit of lubrication.


IMG_4088.jpg
The corner of misfits. That floor jack is an old 1.5 ton Hein-Warner (spelling?) that the wheels are frozen up on and the cylinder doesn't work right. Resto project for some point. The can has the window shades from the coach that are suction cup applied (not Magneshade). My plan is to convert them over to Magneshade style. Magnets are super cheap these days, so I ought to be able to figure that out. Next up is the HF 1 ton engine stand I used for the Cummins rebuild. It worked fine, but turning it over by myself was tough. On the pallet is some random metal, a 12V Cummins head, and the dual disk clutch and flywheel that came with the G56 I put in the X. I'll never use it, but can't seem to price it well enough for someone to buy it. I'll probably sell both. But, then again, what if I happen to need a new head for my motor??

IMG_4089.jpg
This shelf has some future projects, buckets of bolts, and good oil, among other things.

IMG_4090.jpg
Boxes-O-Parts top and bottom, lubricants, paints, other fluids in the middle. Most exciting thing on this shelf is the brand spankin new bottle of Sil-Glyde that should come to good use in the near future.

That's it for now. Next weekend is mostly filled with Family stuff, but I may be able to sneak over to the shop and get a few projects going. We shall see.
 
OP
S

ScepterToad

Well-known member
Joined
Nov 9, 2023
Messages
340
Wrote all this and came back to apologize for the long post. Lots happened over the weekend, and lots going on these days seems like. I'll post up the pics in the next few responses.

Got some quality time in the shop this weekend, along with a LOT of work at the house getting the yard cleanup moved along in prep for the first yard party of the summer. Generally, we host the family/friends parties in the summer as we have a relatively large back yard with a huge tulip tree for a lot of shade, a stone patio we put in and a ~18 person picnic table I build years ago. The dogs tear the ever loving **** out of the yard over winter as we normally only get a few days freezing and for the most part, it's muddy and wet. They churn it up pretty good. Anyway, on to the shop work.

I have (had) 21 projects on the whiteboard, of which I got a few complete. I wanted to check the issues with the coach building air, get the Jeep LOF done, check the clunk in the suspension of the Jeep, get to cleaning on the coach exterior, and get the fuel filters changed on my buddy's 17 Ram 3500.

Saturday I didn't get to take the Jeep as my better half's car is in the shop. Little side story. She has a "company car" which is really just a lease through her company and at the end she can buy the car out for pennies on the dollar. She's done this before, and was able to pick up a 15 Altima for $3500 at the end. All the maintenance, gas, insurance, etc is covered by the company for the 5 year lease. It's a decent deal, but at the inception of the program (which she runs), they specified Nissan cars. So, second car (current one) is a Sentra she's had for I think 3 years. A while back, Nissan did a recall on a tie rod, which we took to the local dealer (who I despise, for good reason). They looked at it, called it good, said they don't have the parts, and that they'd call when they did. No parts ever came. Just after that, we started having a severe vibration issue after turning. As soon as the wheel came back straight after a 90 degree turn, lots of vibration. Finally took it to the local shop to have the oil changed, and inspection done. They refused to let her drive it back home stating that the steering system is ruined. Long story short, it's at a different Nissan dealer waiting on parts. Apparently the recall can't be fulfilled and they (Nissan) are just replacing the entire system. No cost to us, which is nice, but she's driving the Jeep for the time being.
Back on track, couldn't take the Jeep Saturday, so the plan was to swap fuel filters on the 17 Ram and start trip prep on the coach. Ram fell through for Saturday, so I focused on the coach.

It's been struggling to build air (for the brakes) for a while, but it's intermittent. Changed the dryer filter before the last trip and it aired up quick the first time and then took a while the second time. Weird. Worked fine after that. So, two options I see: 1. the dryer needs rebuilt; and 2. the compressor is going out. The compressor should last a LONG time I would think, but they do have pistons in them with rings that can fail and pass oil. And, I had oil in the filter when I changed it. A bit is apparently normal, and it wasn't a lot, but it's a data point. So, I got the part number off of the dryer and I need to do a bit pr research on the rebuild kit vs replacing it (which may be just as cost effective). More to come on that as I figure it out. So, I started cleaning and remembered that the entry step was inop. So, dug into that. It wasn't on my list.

Right after we got the coach from the original owner, the step motor spit the bit. Plastic planetary gears had warped over the years and I tried to fix it, but didn't work. Right after we got the coach, I was on the waiting list for indoor storage so I had it at a lot, which is gravel. Replacing the step motor in the parking lot wasn't fun and in the process, I broke on of the 3 mounting bolts off. I put it back together with the new motor and 2 bolts and it worked for several years. Just long enough for me to forget that it only had 2 bolts. Over time, the motor shaft worked loose from the plate on the bottom (held on with the 3 bolts) and the motor shifted just enough to bind the gears. Took the step off, removed the motor, and realized I probably didn't have a bolt that would fit. Looking at it, they made it with a tab in the steel that was tapped. I bent that up and found a bolt that would work. Now for the spacers. I really wanted to have the lathe at the shop as I could have just made some. No dice. I found the spacer I made for the plates to hold the air compressor casters on and they were close enough. Scrounged two of those to use. I'll make some more when the time comes. Put it all back together, cleaned up the brass bushings on the step and the bolts (which have a shoulder on them) lubed it all up and reinstalled. Works great now.

Proceeded to clean on the coach. Front gets bugs, lots of bugs. Wiped that all down and headed down the curb side. Got all the doors cleaned and one wheel polished. In the process, I also noted that the most used door is sagging a bit, which may explain the fact that the door doesn't latch great. The other thing I noticed is that the battery box is FILTHY and that I had one loose clamp in the rear electrical bay. I didn't clean the batteries yet as I haven't quite figured that piece out with not having a water hose. May use a rag and bucket after some air to blow it out. Didn't get the rear wheel polished on that side, but it's halfway clean to the top. More next weekend.

Other small thing was the outlets. No breakers tripped and the fuses are impossible to look at unless you pull each one out. And there are a LOT of them. So, next most probably was the GFCI outlet. That did the trick!

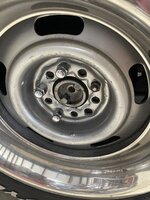
To finish out Saturday, I got the Chevelle up on jack stands and the wheels off. Two of the wheels had missing lug nuts, and one has a broken stud. Ugh. Crawled under it and the dang flywheel cover is missing. It does appear to have a new starter on it from the shop, but they clearly didn't test it very well as it makes a BUNCH of noise and needs shimmed. I'll get to that as well. Back home to do more yard work in the evening.

Sunday I got the Jeep into the building past the 5er, which was nice. Dropped the oil and let that drain while I cleaned more on the coach while waiting on the 17 Ram. That rolled in, so I got to work on the fuel filters. Of course, the real water separator is directly above the driveshaft and right next to the muffler, so getting your arm in there to pull the connector and the filter is not fun. the last shop torqued the filter on there pretty good, so getting it off was a challenge. They also torqued the sensor on the bottom pretty good, so over to the vice and a large pair of channel locks spun it right off. However, the plastic part is starting to deform, so I may recommend they get a new sensor in the next change or the one after. Wouldn't want to break that thing off. The front is pretty straightforward. Put a piece of tubing on the drain, opened the valve and loosened the cap. Again, on there pretty good as I couldn't break it loose with a 3/8 ratchet and extension. 1/2 got it fine.

Shout out to Mike (@zmotorsports) for turning me on to the Sil-Glide for o-rings. Used it on all of the o-rings this weekend and I'm convinced it's better than using oil or diesel fuel for fuel filters and oil filters. I even put some on the filler cap for the oil on the Jeep when I put it back. and the 8oz tub should last a good long time. Thanks Mike!

Put the Jeep up on jack stands and tried to move the ball joints with a long prybar under the tires. No play. Pulled the tires, and again hit all joints with a prybar to chase down my clunk. Nothing. One thing I did notice was that the upper control arm on the drivers side (front) sits to one side of the bracket. It's almost as if the busing is pushed to one side. There's no up and down play, but there is a slight movement side to side. It just doesn't look normal. If anyone could weigh in, I'd appreciate it. Lubed the ball joints as it's been a year since I put them in.

Put the tires back on, which is a royal pain in the you know what. I'm pretty sure these tires and wheels are heavier that the 37s I have on the X. Coupled with the thick rim where the lugs are, they are just difficult to put on. Those will go on the list for a change at some point. I also have spacers, which I don't like, but I'll live with until I get a set of properly backspaced wheels.
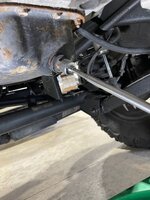
Moved to the rear, same story. Nothing loose. I did rotate the tires while I was at it (side to side). All lugs torqued properly.

All in, good weekend of work. Looking forward to some more next weekend with the holiday. I should be able to get over there Saturday and Monday. Sunday, we'll have the first party of the summer.
 
OP
S

ScepterToad

Well-known member
Joined
Nov 9, 2023
Messages
340
Starting in no particular order, the Chevelle. Lugs missing, open flywheel, and lots of work yet to do.
 

Attachments

  • F80A49AE-62E0-4B01-9162-4B7A8D40C26E.jpeg
    F80A49AE-62E0-4B01-9162-4B7A8D40C26E.jpeg
    768.6 KB · Views: 28
  • 9156D6F2-478A-49AF-84E1-BCA2A402C55E.jpeg
    9156D6F2-478A-49AF-84E1-BCA2A402C55E.jpeg
    997.3 KB · Views: 21
  • B337838E-780E-433A-96DD-63FA3953330C.jpeg
    B337838E-780E-433A-96DD-63FA3953330C.jpeg
    801.4 KB · Views: 26
  • CF124336-A941-455F-86F5-141568FD8D95.jpeg
    CF124336-A941-455F-86F5-141568FD8D95.jpeg
    810 KB · Views: 28
OP
S

ScepterToad

Well-known member
Joined
Nov 9, 2023
Messages
340
Last post I used my mobile device, but I like the pictures in line better. So, here we go.

Next up, coach cleaning.

IMG_4238.jpg
Before polish. I spent a LOT of time last year getting these back from the dead. they look better now, even dirty.

IMG_4239.jpg
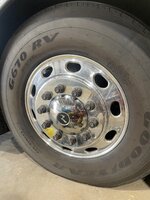
About 15 minutes work. Not bad and if I hit it again, it'll be that much better. Looking forward to when I can take these off to polish. Will be much better, especially around the lug nuts.

IMG_4242.jpg
Front shows pretty well, but you can see the rock chips, which I want to take care of. Seems there a LOT more than when I got the coach just a few years ago. Not a fan of the diamond shield, and hopefully I can learn a bit more in the way of paint work to get these fixed.

IMG_4240.jpg
How it started. The Mothers bug remover is great.

IMG_4244.jpg
This type of gouge needs fixed, just not sure how just yet.

IMG_4245.jpg
An example of the original owners fix. OK, but not great and it doesn't match very well.

IMG_4247.jpg
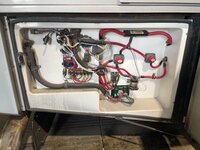
My VERY dirty battery compartment. You can see the original owners paper drawing for the terminal connections.

IMG_4253.jpg
Dirty electrical bay before I cleaned it. Turned out ok, but not fantastic.

IMG_4257.jpg
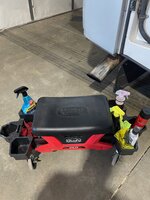
This seat from Harbor Freight is awesome for rolling around on doing detail work.
 
OP
S

ScepterToad

Well-known member
Joined
Nov 9, 2023
Messages
340
The coach step is up next. Overall not a hard fix, and it was time to remove the bolts holding the step on and clean them up and lube them. I did find a loose one, which has caused a crack to start in one of the bushings. I'll have to keep an eye on that for the future.
IMG_4215.jpg
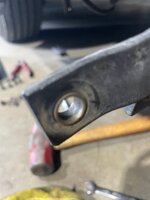
You can see the broken (and rusted bolt) here.

IMG_4221.jpg
OE spacer on the right, spacer made for the casters on the left. I need some chamfering in my life.

IMG_4218.jpg
Found a square head bolt and nut to do the job.
IMG_4223.jpg
Closeup of the bushing. Not a great pic. Cleaned them all up with a brass brush prior to putting it back together with some marine wheel bearing grease.
 
OP
S

ScepterToad

Well-known member
Joined
Nov 9, 2023
Messages
340
On to the Jeep suspension. It clunks when turning a corner. Almost like the front axle is shifting sideways. The track bar is solid and I don't see any wear or shifting/scrapes anywhere. This is the only anomaly I could find.
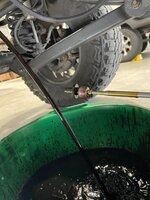
IMG_4275.jpg
this control arm seems shifted to one side.

IMG_4277.jpg
Another angle

IMG_4278.jpg


IMG_4279.jpg
Any input on this would be appreciated.
 
OP
S

ScepterToad

Well-known member
Joined
Nov 9, 2023
Messages
340
Jeep oil change.

IMG_4260.jpg
Finally got smart and used a magnet to spin the drain plug out. Need to change out that plug or at least get a new washer on there.

IMG_4261.jpg
No oil on my hands....and not hot.

IMG_4262.jpg
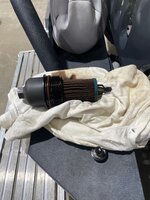
Old filter. Used the Sil-Glide on the new o-ring.
IMG_4273.jpg
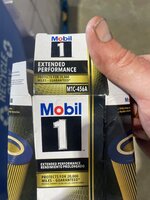
Keeping with the Mobil 1 oil and filters on the gassers, especially given the recent change to NAPA Gold filters.
 
OP
S

ScepterToad

Well-known member
Joined
Nov 9, 2023
Messages
340
And finally, the 17 Ram. They placed the rear filter in a terrible spot.
IMG_4268.jpg
Water sensor. You can see how the plastic nut is starting to deform. Probably recommend a new one after this.


IMG_4269.jpg
New filter back on in the rear.

IMG_4271.jpg
Old rear filter. Salt eats everything.
IMG_4270.jpg
The drain for the front. this one you can at least get to and add a piece of tubing to for the drain into a pan.

That's it for now. Back to work....
 
To avoid these ads, REGISTER NOW!
OP
S

ScepterToad

Well-known member
Joined
Nov 9, 2023
Messages
340
I hope everyone had a great Memorial Day Weekend! I (we) had a fairly busy weekend. I was able to finish out the home stuff for our annual party and the back yard is looking as good as it can with 3 very active dogs who can't seem to get enough of running after a ball.

Before the party Saturday, I went with my folks to look at a new to them car they found. They are getting up in years and the health isn't so great, especially after my dad got t-boned twice in one accident last year. So, they wanted to get my mom a bit better car than what she's been driving. They ended up with a 2011 Ford Escape Limited with just 51K on the odometer. the old guy who bought it new has recently had to stop driving and had to sell. He took great care of the car and it shows. Glad to be able to help them out on that and get my mom into something a bit nicer.

Sunday I ran over to the shop in the afternoon to see if I could get the air dryer off the coach. I was doing a bit of research last week on rebuilding the air dryer and found a family owned and operated local truck spring and brake shop. Great folks over there and they had the parts in stock (more on that later). I'll definitely be revisiting their shop any time I need parts for the coach and possibly to do the shocks on it when I get that going. I can change the shocks, but it would be WAY easier to do with the tires and wheels off and I'm not quite set up for that yet. We'll see. Anyway, I couldn't get the tank supply line out of the push lock connector on the air dryer on Sunday. I cleaned it up good and sprayed it down with PB blaster in an efforts to get it to move better, without much luck. The fitting is brass and the push lock portion wouldn't push in. So, I tried to just spin the fitting off. It's so tight that I was flexing the line (flare) wrench I had in 1". It's a cheapy wrench, so I'm not super surprised by that. So, frustrated and a bit defeated, I headed home to think on it.

Monday, I went over intending to get that dang thing loose, no matter what. So, I dug out a small pair of vice grips and a needle nose pair, squeezed the push portion in and held it there. Then tried to get the line out. No dice. I worked and worked on it and it finally popped out. I knew right then it probably wouldn't seal back up as I'd mucked up the fitting a bit and the air lines are motorious for not sealing once they've been stuck and pulled apart like that. Unfortunately, I don't have a lot of slack in the line at that end, so cutting it is not ideal.

From there, I moved to the fitting for the air supply from the compressor. Back in a hole a bit (but not bad), and my large wrench selection is lacking. So, I tried large crescent wrenches. Couldn't break it loose. Moved to a 24" and 18" pipe wrench, thinking that for sure it would come loose. Nope. Backed the fitting up with the 18" and pulled like crazy on the 24" and it didn't budge. What did move was the fitting where it threads into the body of the air dryer. So, that's what I did. Pulled it from there. Three bolts, one small air line, and a connector and it's out.

Took it over to the bench and unboxed the replacement parts. Took the purge valve out, keeping track of the sequence of parts, and laid out the new ones. They didn't match. However, they were close and they fit in the bore and seemed to work, so I figured they are just updated parts. They aren't Wabco parts (aftermarket), so that may have something to do with it. In any case, I replaced all the parts and then moved on to the heater, which was identical. Changed that out. All within 2 hours of getting there. Sweet!

I put it back together and used pipe thread sealant on the air line I had to screw out. Also worked the push lock a bunch in an effort to free that up. Put it all back together and moved on to cleaning the coach while the thread sealant set up a bit.


Got a bunch of cleaning done on the road side of the coach and found a few more projects to deal with. Namely, the bay door under the fridge I noticed that the seal was a bit wonky across the top. Peeled it back and it looked like a bunch of rocks in there seal. I thought that was pretty odd. However, once I pulled it apart, it was clear to me that the metal in the seal where it pinches the seam had rusted and started to come apart. So, I'll clean that up and get a new piece of seal for that door. I may replace others while I'm at it. I think what happened is that the original fridge water line had burst and leaked down and the water sat in there. When I changed out the fridge, I noticed that the line was split. I didn't plan on connecting up the water for the ice maker, so I left it be. I also noticed some areas where I need to address the sealant along the body lines of the coach. Still have one wheel to polish and I've noticed that the stainless hub covers have started to rust a bit under the lug nuts. The ability to get this coach off the ground and the tires and wheels off is quickly moving up the list.

Back to the air dryer. It had been an hour or so, so I fired it up and immediately heard the PSHT...PSHT...PSHT coming from the rear. Went back there and the purge valve was bleeding air at every stroke of the compressor. So, off the air dryer came and I put the old purge valve back in. Back on, and it builds air just fine and blew off as designed. Shut it back down, and the supply line to the tank was leaking. I tried to get the line more fully seated into the push lock, and nothing worked. So, I'll get a new fitting, cut the end off the line (once I've determined I can get adequate slack to do so), and put it back together. The fitting is VERY tight, so we'll see how that goes.
IMG_4359.jpg
We'll start with the rust and move from there...noticed all this junk in the seal when cleaning the area.
IMG_4360.jpg
Pulled the seal and you can see where the retaining steel is rusted and coming apart.


IMG_4361.jpg
And all of this needs cleaned up.

More to come.
 
OP
S

ScepterToad

Well-known member
Joined
Nov 9, 2023
Messages
340
On to the heater. Pretty straightforward replacement. The only real difficulty is the tiny screw in the back that holds the electronics and the ceramic heater.
IMG_4319.jpg
Heater electrical connection in the coach.

IMG_4321.jpg
Part number. This one was an exact match to the Wabco 4324130010 that the coach has installed.
IMG_4331.jpg
Old heater removed. That o-ring is the one I ended up using as the new one that came with the unit didn't want to stay on the part long enough for me to get it installed into the hole.
IMG_4354.jpg
Old vs new
IMG_4355.jpg
Fully installed.

IMG_4330.jpg
That little screw in there is really the only hard part.
 

Attachments

  • IMG_4330.jpg
    IMG_4330.jpg
    546.5 KB · Views: 18
OP
S

ScepterToad

Well-known member
Joined
Nov 9, 2023
Messages
340
Some new vs old parts comparisons. The washers, used as shims, all matched up thickness wise within 0.1 mm, but the spring is definitely longer and the purge valve exterior is shaped the same but didn't have what I can only assume is a diffuser of some sort on the end.

IMG_4323.jpg
New parts. That washer looking thing is very different from the stock version, which uses an o-ring. This one has rubber around the outside much like a seal for a crank or the like. This setup didn't end up working for my air dryer.
IMG_4343.jpg
New on the left, old on the right. The old one also had an o-ring for the seal and the new used the rubber of the washer in the previous picture.

IMG_4344.jpg
No o-ring for the new one. I did try to put that in the new setup after the leak, but there wasn't enough room to get the snap ring back in.
IMG_4345.jpg
Overall height of the spring was different (new on the left).

IMG_4346.jpg
Difference in the washers. New on the left.

IMG_4347.jpg
This is the bottom of the new internal piece. Same diameter and seal as the old, so it seemed to fit fine. I suspect that this is the part that was allowing air past in some way.
 
OP
S

ScepterToad

Well-known member
Joined
Nov 9, 2023
Messages
340
Tearing the dryer apart...
IMG_4328.jpg
Purge valve was pretty caked with oil and dirt. I also pulled the valve to the left and cleaned it up and reinstalled.

IMG_4329.jpg
You can see here the push lock is a bit mangled.

IMG_4333.jpg
Old purge valve coming out. You can see a fair amount of dirt and grime in there. I suspect that wasn't allowing it to function very well.

IMG_4335.jpg
More grime....

IMG_4336.jpg
I thought this was caked up oil at first, but it's actually grease.
IMG_4337.jpg
And more grease stuck in the bottom.

IMG_4338.jpg
First pass at cleaning the inside.
 
OP
S

ScepterToad

Well-known member
Joined
Nov 9, 2023
Messages
340
Lastly, putting it all back together...
IMG_4339.jpg
The other valve out and ready to be cleaned. I'm really liking the pig mats for this type of activity.

IMG_4340.jpg
Cleaned, Sil-Glyde, ready to go back in.

IMG_4341.jpg
Back in...those snap rings are a bit tricky.

IMG_4349.jpg
New washer and plunger (that's what I'll call it).

IMG_4350.jpg
There were two washers at the base of the spring, and one at the top.

IMG_4351.jpg
Washers added
IMG_4352.jpg
Complete purge valve installed.
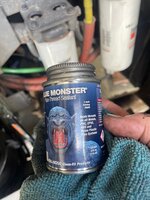
IMG_4356.jpgI like this stuff for pipe thread. I contemplated using the aircraft gasket maker, but decided this would work just fine and probably be more appropriate. It didn't seem to have any sort of sealant on it from the factory.


IMG_4357.jpg
This is the guy I could NOT get loose. Worked out though.

All in this isn't a terrible project. I'm not 100% convinced that this is my air building problem. The two times I've had the hoses off and the air compressor running, it seems to push air just fine. I'm not aware of a test I can do on the air compressor hanging on the side of the Cummins, so if anyone knows of one, I'm all ears. I'll keep an eye on it. If nothing else, this was an exercise in becoming more familiar with the system on the coach. And for that, it was not a wasted effort, even with the fact that the $12 purge valve kit didn't seem to work correctly.
 
Last edited:

zmotorsports

ALLIANCE MEMBER
Joined
Oct 20, 2009
Messages
21,441
Location
Northern Utah
Nice job on the purge valve rebuild Keith. That will provide you with a lot of peace of mind knowing you'll be good for a while without it failing mid-trip somewhere. An ounce of prevention. :thumbup:
 
OP
S

ScepterToad

Well-known member
Joined
Nov 9, 2023
Messages
340
Nice job on the purge valve rebuild Keith. That will provide you with a lot of peace of mind knowing you'll be good for a while without it failing mid-trip somewhere. An ounce of prevention. :thumbup:
Thanks Mike!

I try to keep up with things and learn as much as I can. Heck, I think I've read the manual 3 times now cover to cover.

One thing is for sure though, I need more tools! Well, bigger tools.... :cool: Working on these rigs is definitely heavier work than I'm used to.
 
OP
S

ScepterToad

Well-known member
Joined
Nov 9, 2023
Messages
340
Only had Sunday in the shop this weekend as we had a 1 year old birthday party on Saturday. Hard to believe she's 1 already as she's been hanging out at the office since birth following maternity leave for a husband and wife that I work with. She always swings by my office and says hi and has been babbling at me for a while now. She'll be talking soon and I can't wait to start having conversations with her.

Sunday, by BIL brought his '20 Raptor over for a brake job. He normally takes his truck to the local dealer for any service, but they quoted him $1300 for the job and then turned around and changed it saying they quoted the wrong parts. That didn't instill much confidence in him, and I told him to grab the parts and swing by and we'd knock it out. Now, there's an online ministry church right next door and they do their services on Sunday mornings, which they record to post on the internet. I spoke with the pastor and told him I'd try to keep quiet while they were over there on Sundays. So, aside from pulling the tires and wheels, we didn't use an impact at all for the brake job. Overall, it was pretty easy pads and rotors. His rotors were stuck on pretty good, especially the rears. The rears took the BFH (12 pound sledge) to get them to break loose.

During removal of the passenger front, I was using an 18" breaker to get the caliper bracket bolts loose and the socket slipped and I banged my elbow in the wheel well. Said some choice words, and was paid back immediately. I had move to the 1/2" ratchet and because I had just banged my elbow, I was out of position on the ratchet. As I'm sure all of you know, those bolts have locktite on them from the factory and they come out hard most of the way. Slipped again and the end of the ratchet handle smacked me right in the eyebrow. That hurt. Split it open pretty good too. Probably could have used a couple of stitches. We put some steri strips on it and they held long enough to get the bleeding to mostly stop and I went on about my business. I then proceeded to put the metal clips on the brackets and slipped on one and sliced my dang thumb open. It was not a great day for injuries. I haven't hurt myself in a LONG time working on stuff. Cuts and scrapes here and there, but nothing like splitting my head open since I don't know when. Last time I can remember really hurting myself was in 1999 working on an F-16 gun install. There's a panel in the airframe right next to the gun that has something like 100 bolts holding it in. I was putting the bolts in while my crew chief was spinning the gun with dummy rounds (by hand). Stuck my hand in, dropped a bolt, went to grab it and the skin on the back of my hand went right into the gears. Still have the scar from that.

Anyhow, back brakes were also easy. He does have the electric parking brake, so had to put that into service mode, which is super easy as well. You do still have to push the piston back into the caliper though. There's a plastic housing on the back of the rear caliper, which prohibits my normal c-clamp and old brake pad method. And, since I don't have a tool specific to calipers, I ended up using a gear puller. The kind that has the flat plate that you put bolts through and the center press. Worked like a charm.

Cleaned everything up, put it all back together with the appropriate antisieze on the hubs and locktite on the bolts. Torqued the caliper bracket bolts and pin bolts (185 and 25) and then the wheels (125) and he drove away a happy man with no more vibration or pulling.

I will say that the dealer told him he had 1mm left on the pad spec so he didn't need to change them yet. Looking at the cracks in the pads, I say that 1mm left over the spec is time to change. Maybe even before time to change. In any case, job done and I taught him how to change his brakes. Makes the injuries worth it in my book.

On to the coach. I had struggled with understanding how the air compressor/purge valve works from the standpoint of having the compressor compress air constantly. I figured there HAD to be a way to cut that compressor "off" as it seems like it would wear out quickly if it were compressing air constantly. So, did a bit more research and realized there's a governor attached to the air compressor. And they're cheap. And, it's highly likely the reason my coach would build air to 40psi and stop (sometimes) or not build air at all (sometimes) or work perfectly (sometimes). So, found it attached to the side of the compressor with two small air lines attached to it. It's held on with two bolts and has a gasket between it and the compressor. I'd recommend pulling the two lines first, as they are push lock and getting them apart with the governor loose and not bolted down is hard. I'll order one up and get it put in. The only downside is, the new ones have a range they can be set at. It appears that once I put it on, I'll have to adjust it in order to get to the 120psi cutoff I need.

Which, now that I think about it, doesn't make sense. If the purge valve goes off at 120, do I set the governor at 120? Or does it need to go to some other higher number?

Two weeks to go before we head west to Moab for 2 weeks for some (hopefully) downtime, relaxation, and wheeling.

In any case, I didn't get any pictures of the work because I smacked myself in the head. Sorry about that. I did manage to think of getting a picture of the governor. And here it is.
IMG_4368.jpg
 

zmotorsports

ALLIANCE MEMBER
Joined
Oct 20, 2009
Messages
21,441
Location
Northern Utah
Keith, the purge valve purges air WHEN the governor reaches the preset pressure value, which in most cases is around 120-125 PSI. That is when the compressor quits compressing until the pressure drops to the cut-in pressure which is usually around 100 PSI.

I have not seen a governor work intermittently like you described. I have however, seen many purge valves cause failure to build pressure intermittently. Mainly because the disc to seat gets carbon build up or debris under them and they don't seal properly causing air to leak past at a rapid rate. The supply line to the purge valve and the governor purge pressure line are two separate lines going to the air dryer.
 
OP
S

ScepterToad

Well-known member
Joined
Nov 9, 2023
Messages
340
Keith, the purge valve purges air WHEN the governor reaches the preset pressure value, which in most cases is around 120-125 PSI. That is when the compressor quits compressing until the pressure drops to the cut-in pressure which is usually around 100 PSI.

I have not seen a governor work intermittently like you described. I have however, seen many purge valves cause failure to build pressure intermittently. Mainly because the disc to seat gets carbon build up or debris under them and they don't seal properly causing air to leak past at a rapid rate. The supply line to the purge valve and the governor purge pressure line are two separate lines going to the air dryer.
Thanks for the clarification Mike! So, the line going from the governor to the air dryer must be the "signal" to blow off. And the other line must be from the tank to the governor letting it know how much pressure is in the tank itself. Now that makes sense to me.

You wouldn't happen to know where I could find some sort of functional test of this system would you? I don't like throwing parts at things and I do like knowing how stuff works. The purge valve rebuild kit was cheap ($12) and a new governor is not expensive at $25-40 depending on where you source one from. So, I'm not out a ton of money, but I also don't like it when I replace something thinking that was the problem and turns out it wasn't.
 

zmotorsports

ALLIANCE MEMBER
Joined
Oct 20, 2009
Messages
21,441
Location
Northern Utah
Keith, a quick google search returned this short video of how the dryer system works, including the governor and purge valve functionality.

Hope this is helpful.

 
OP
S

ScepterToad

Well-known member
Joined
Nov 9, 2023
Messages
340
Keith, a quick google search returned this short video of how the dryer system works, including the governor and purge valve functionality.

Hope this is helpful.

Thanks Mike!

The guy that did that video also did a 90 minute video on the whole system as part of an air supply system training video. Guess I'll have to pause your video that you did on the rear quarter hole fill and repaint you did a while back on the Jeep until I can get through the training video.
 
OP
S

ScepterToad

Well-known member
Joined
Nov 9, 2023
Messages
340
Hope everyone had a nice weekend! We've had some spectacular weather here lately with low humidity, so it's been nice in the shop, even with no AC. I'll have to get a bigger fan though as it's warming up.

Prep for the Moab trip is in full swing and there's never enough time to get everything done that I want to. Work has been crazy and is only getting crazier the closer I get to the trip. This week should be fun.

Saturday I got over to the shop with the intention of getting quite a few things done. I only got part of them done, but the stuff I did manage to get was required for the trip. I've been having issues with the air in the coach not building correctly. I won't go through what it's doing as I've already done that here, but I got down to the governor possibly not working correctly. At $25, it's not a huge expense to put a new part on, save the old one, and go down the road. Picked one up from the local shop on Friday, along with two compression fittings. I like the push lock for the ability to take things back apart, but these are original to the coach, typically stuck, and they don't seal well unless you cut a piece off of the line to get to a clean surface. There's also not a lot of slack in the lines and I don't want to have to try and replace one as they are ******* in bundles and routed through the chassis. It doesn't look fun to replace one, that's for sure. I dislike the compression, because once you put it together, you can't reattach if there's a problem. Well, you can, but there may be a leak and you can't get that ferrule off once it's compressed. I'll grab a few extra just in case as they're common for the size of air line in the coach.

So, got all my parts, put the plugs in the governor in the places where needed, along with the thread sealant I like. Got it all put together and installed with the two bolts and gasket. The only real challenge here is that the orientation of the governor on the side of the compressor is blocked by the reservoir for the hydraulic system. Just enough room to fit my head between that and the front engine cover to just barely see what I was doing. Once that was bolted securely, I got to play twister with my arms to secure the compression fittings on the tank pressure line and the air dryer signal line. Fired her up, built air up to around 120 and the purge valve blew off. Good deal, but not quite there yet. I stepped on the service brake pedal and pulled it all the way down to 65 psi on the gauge. Hit the high idle again and it just sate there. When watching the gauge before, it didn't look like the pressure went all the way to 120. It's kind of hard to tell because the gauge reads 0, 40, 65, 115, and 180. 120 is a bit tough to gauge. Pun intended.

So, these governors are adjustable. There's a set screw with a jamb nut. Counter clockwise adjusts the purge pressure upwards and according to the internets, 1/4 turn is approximately 4 psi. So, that's what I did. Fired it back up, built to the high side of what I think is 120, purge. Stepped on the brake a few times, and it built back up and purged again. Put the cover back on and went to the next thing. I have to pull the coach out on Thursday and move it to the local FMCA campground for loading. It's a bit risky but I have the old one just in case and enough tools to swap it out on the side of the road. Though, that's never fun.


One other project I wanted to get done was to polish the last wheel and clean off the rear of the coach. That area certainly gets really dirty driving down the road. Got that done easy peasy. On to the fridge.


I put a residential fridge a while back and it went pretty well at that time. However, it wasn't exactly level in the space even though the base was in fact level with the slide out (I built the base). It appeared that the rear of the fridge was about 1/4 low. So, I removed the bracket holding it in place and pushed it partially out of the hole. Placed two 6x12 pieced of 1/4 ply down and screwed it in place.

From there, I had the insulating board fall down out of the top on the last trip. the propane fridge needed venting, whereas the residential fridge does not. So, I pulled the cover, retrieved the insulating board and came up with a better plan of securement. Previously, I had used the high temp foil tape, which works well, but it didn't stick to the plastic. I think probably I didn't clean it well enough when I did it the first time. So, cleaned the plastic with brake clean and taped the insulation board in place on the door itself. Then I used the tape to just cover the side holes. We'll see how that works. Slide the fridge back in and secured with the L bracket. I don't have more securement than that, but it seems to stay in place pretty good. I do keep an eye on it and the fridge cabinet flexes a bit when the slide moves out, so there needs to be a small amount of play in the fridge.

Moving on to the Jeep. I wanted to get a new set of rock sliders as the ones that came with the Jeep when I bought it last year were into the paint below the doors. That, and mud and rocks get in between and wear the paint. But, time didn't allow for that, so I put the old ones back on. I'll deal with it until I can get new ones. 4 nuts each and they're' back on. Moving on to the exhaust sytem. The Jeep has an aftermarket exhaust pipe in the back in place of the factory muffler. It also has a smaller muffler following the cats. I don't like the drone of the aftermarket muffler. So, I loosened the band clamp holding it, removed the rubber hangers, and proceeded to break the rusty bolts holding the flanges just after the cats. I knew they were rusty, what I hadn't taken into account is their condition. I hadn't looked at them since last year, and apparently I didn't look at them hard enough. Now I have a gnarly exhaust leak, which I'll work on tonight after work.

Sunday I went to see my folks so no work in the shop. I did tee up the next project for while we're sitting around the campground. I have a set of shades for the window of the coach. They're the same material as the Mageneshade, but they're held on with suction cups. They don't work well, as you could imagine. So, I had this bright idea to change them over to magnets. I got some heavy duty thread, a couple of needles, and some black fabric. Plan is to place the magnets inside the windshield with adhesive, put the shade up, place the magnets on the outside, and sew pockets over them with the fabric. I'll do the front windshield and the drivers side window to start and go from there.

In any case, on to the few pics I managed to get.

IMG_0024.jpg
1/4" ply for the rear wheels to ride up on, leveling the fridge.

IMG_0025.jpg

Top vent for the fridge cabinet.

IMG_0026.jpg

Insulation board attached. This should stay pretty secure.

IMG_0027.jpg

Tape over the side holes.

IMG_0028.jpg

Had to pull the fridge partially out.

IMG_0029.jpg

And back to pretty level.

IMG_0030.jpg
This L bracket is tough to get to as there's just not much space.

IMG_0031.jpg

The bottom insulation fits pretty tight and tends to stay in place. If not, I'll secure it

More pics in the next post.
 
OP
S

ScepterToad

Well-known member
Joined
Nov 9, 2023
Messages
340
On to the governor install.

IMG_0013.jpg

Old and new.
IMG_0014.jpg

Plugs and fittings installed.


IMG_0015.jpg
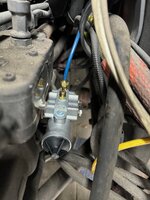
Partially installed in the coach. That black cap is where you adjust the settings. One thing I forgot in the previous post is the soft top on the Jeep. I really like the hard top for it's quieter ride and less flapping. However, I plan on putting the top down and wheeling with the doors off in Moab. We aren't doing anything crazy this trip, so I think it'll be fine. I may hate it, but I'll take the chance.

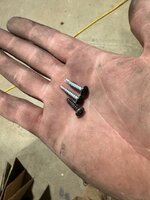
One thing I noticed after pulling it last year, was that one of the retaining brackets had fallen off because the screws came out. Put that back on while I was at it.


IMG_0018.jpg


IMG_0019.jpg

These sheet metal screws did the trick.

IMG_0020.jpgIMG_0021.jpg

It's a bit tight getting vehicles into the shop, but I can sneak them past the door and 5er.

IMG_0022.jpg
This is the dumb exhaust I wanted to take off. It'll also give me a bit better departure once it's gone.

IMG_0023.jpg

That's it for now.
 
OP
S

ScepterToad

Well-known member
Joined
Nov 9, 2023
Messages
340
Got the exhaust flanges put back together last night. Had to break out the oxy/acetylene to get it done. Unfortunately, my oxygen regulator was bad. The pressure was cranked up so high that the blowoff valve was purging. And it wouldn't adjust down. So, grabbed a new regulator from HF and threw that on. Works great. I was having a bit of an issue with the regular torch head, so I switched to a brazing tip. That worked well. The dang pressed in inserts were rusted real bad and the bolts basically gone. So, no getting those out and there's not enough room to get a drill up in there anyway. So, got them cherry red and drove them out. Well, two didn't want to come, so they got heated several times and I used a chisel to break away the pieces. Bolted them back together and the Jeep is nice and quiet now. Well, I guess that's relative too with the aftermarket pipe installed. Quieter than it was.

No good pictures as I was steaming mad over the placement of the flanges and the orientation of those. Getting a torch up there was not fun, especially on the passenger side as the transmission cooler line is right there. I nearly melted the rubber gasket on one of the lines. If I had the Jeep engineer there that did the exhaust routing and flange selection, I probably would have smacked them in the face. I'm over it now, but wasn't happy last night.
 
OP
S

ScepterToad

Well-known member
Joined
Nov 9, 2023
Messages
340
Whew! Finally back from our Moab trip. This will be the longest trip we take this year at 2 weeks. I have a lot to go over between the trip and various issues that happened, so I'll break this up into multiple posts that I hope to get through today. So, here goes:

~3100 miles in the coach over 4 total days of driving
~500 miles of wheeling in the Jeep (including getting to some trails/places)
3 families (2 of us related), 6 adults, 5 kids (my 2 of which are in their 20's)
2 monsoons in the desert
1 VERY sick puppy (he's fine now)

Overall impressions of Moab are that the place is beautiful and seems to go on forever. The people that live there are pretty nice and some of the tourists, idiots. The landscape is massive and doesn't look like anything I've ever seen. I did spend three and a half years in Phoenix stationed at Luke AFB, which is desert, but it's flat compared to Moab and southeastern UT in general. Most of the vegetation is scrub brush with a few small cacti here and there and in some areas we went to, some larger trees. The rock formations are amazing. When we were out at night, the stars are unbelievable.

So, the purpose of this trip for the folks that had been before (this was their 4th year) is wheeling. Well, not really, as they have SBS machines. One is a RZR and the other a Canam. The SBS folks get a lot of heat from the Jeep community and most places are banning them, even in their street legal form. The two I was with are titled and registered/plated, have all of the turn signals and lights and are street legal. Their owners are also responsible owners and therefore don't understand the restrictions. But, I get it, sort of. As an example, particular to Moab. Along 191, which is the main drag through town, there's a sandy road off to the side. This road was put in place as a road for the offroad vehicles so they wouldn't be on the main road. So, the folks I was with were using it. Following the rules as they had been told (last year). One was stopped by a police officer. Apparently, there have been incidents with that road and a local who has horses along the road has been complaining to the local authorities. It's now an $800 ticket if you get caught using the path for offroad vehicles. The officer was cool, didn't give him a ticket, but told him to stay on the road as he was street legal and had a plate. So, things are changing in these communities that are centered around wheeling and non-local folks have to make sure they follow the rules (and keep up with them year to year). Unfortunately, there's not really any way for local communities to know whether or not the folks on SBS machines are responsible adults. Therefore, they have to categorize them all together when some are not in fact, idiots. I did find it interesting that in Moab there seems to be more SBS rentals than Jeep rentals. So, it must not be too much of an issue.

In any case, if I can remember them all, here are the trails we did (I think in order):

Onion creek
Kokopelli
La Sal Pass (these in one day ~85 miles, super fun)
Arches National Park (this is just street driving)
Fins and Things
Hells Revenge
Sand Flats (at night)
Picture Frame Arch (this was combined with Sand Flats and at sunset)
White Rim (Canyonlands, Shafer Trail entry, Potash exit)
Gemini Bridges
Newspaper Rock
Needles Overlook (twice, once at night)
Flat Iron Mesa

There were others I'm sure, but I cant remember just now. I'll put some pictures up to go along with everything, but they do NOT do this place justice.

On the monsoon side, we had two while there. First one, we had scooted off of Hells Revenge as the weather was rolling in. We didn't do the whole trail, but did manage most of it. Got back to the campground and got 2 doors put back on the Jeep. That's when it hit. Nickel size hail drove me into the coach. From there we got 80mph straight line winds and around 2" of rain. 15 minutes later, it was over. Next one was more north of town, but I had gotten about 25% into Flat Iron Mesa and got a call (this was a guys only trail, everyone else went to the pool) to get off the trail. That wasn't possible where we were and the storm was not headed directly towards us. So, we stuck it out. I was thankful in the end to have a windshield and roof over my head. The other two guys weren't having a great time in the rain that hit us. We watched as the storm moved and stopped a few times when the rain hit in high areas to make sure we didn't get caught in a flash flood. Overall, a really great trail but probably the most difficult one we did. I accomplished more than 75% of the obstacles and we completed the 15 miles in just over 3 hours. In a Jeep, that was making VERY good time. RZR could probably do it much faster. Anyway, I'm off track.

On to the puppy. He's the oldest kids' dog and the third in our house after she moved back to save some cash. 90 pound Staffordshire terrier (pit bull essentially) with a heart of gold. He's an impressive dog. He's also a big baby and has food allergies, needs special food, has chronic ear infections, and skin problems. We keep him dialed in at home with plenty of exercise (he can't stop chasing a ball) and a (mostly) strict food regimen. However, with as many people as we had, he ended up getting too much human food (pork) which normally doesn't bother him in moderation. Combined with what I believe was dehydration, he developed what ended up being a GI infection. He started having blood coming out of both ends so we got him to the local vet. Can't say enough good about them. We got him in, they took his temperature and asked when we were leaving. We said Friday AM and they said we'll try to have him back by then. That was a bit shocking. He spent two and half days on an IV with fluids and antibiotics and was sent home with pills to help clear his GI tract. And it didn't cost an arm and a leg. Unfortunately for me, that meant he also had to go to the bathroom a lot on the way home, extending the total drive time.

Speaking of driving, the hardest part of this trip for us is going over the Rockies west of Denver. Going out was slow, but not terrible. Mostly just dealing with drivers who want to run 80 down Loveland and Vail pass. It's a bit nerve wracking, but I just stayed in the right lane, kept my speed comfortable up and down, and let the coach do it's job. Coming back however, we lost 3 hours to a vehicle fire just east of Loveland pass. Turned out to be the trailer of a semi which had a load of carrots. Completely burned out except for the rear doors. It must have been bad and hopefully the driver and everyone involved is OK.

Enough commentary on generalities. Let's get into specifics. But first, a picture of the Good Boy.


IMG_2689.JPG
 
OP
S

ScepterToad

Well-known member
Joined
Nov 9, 2023
Messages
340
Alright, some specifics. The shop is around 40 minutes from the house. Since I live within 10 minutes of the FMCA campground, I pulled the coach before the trip so my better half could load up while I spent the last day before we left working. The day before that, I was getting on the highway in the Jeep going to the office and the temperature jumped up to 245. Too hot. Backed out of it, and managed the drive to and from the office with no further incidents. Loading up the coach the night before, it spiked again a few times to 250. Bad news, but nothing to do but drag it out to Moab and fix it there. I carry quite a lot of tools with me when we do trips, but it weighed on my mind the whole way out. First day there, I went to the local auto parts store and picked up a pan and a thermostat. Put that in at the campground, bled it out half a dozen times, and hit the trail after a road test. That was the ticket. Temps stayed (at that time) around 220 on the road and 215-219 on the trail in the slow going. Not bad. However, the weather (temperature) was pretty mild for the first week. Moving into the second week, and the temps were rising. Driving some of the longer grades to places, I was hitting 230 pretty consistently. Still within safe range, but higher than I like. Overall, the thermostat worked and took care of the issue. I'll continue to monitor it and will possibly go back at it later with an OEM thermostat. O'Reilly just had their house brand in stock. Next Jeep issue was the front driveshaft CV joint. I heard a weird noise on the first trip out (Onion Creek, etc.) and didn't know quite what it was. And, since I had just changed the CV joint just last year, I didn't think about it. Should have been good to go as it's the RZeppa joint. Next day, we go out to Fins and Things and then Hells Revenge. About halfway through Hells Revenge, it was clear to me that the joint was popping. So, next day, I went and got some grease and tore it down, again at the campground. Pulled the skid plates, and looked up and all of the grease had slung out of it. Ugh. Pulled the shaft, cleaned up the joint, and started working grease back in through the end. I didn't actually have snap ring pliers, so I originally wasn't going to fully remove the joint. However, once I got into putting grease in it, I decided I should take it completely off of the driveshaft to work grease into the other side. I was able to use a flathead screwdriver and a pick to get the snap right off (and back on). No further issues out of the driveshaft.

More Jeep stuff....Overall, I'm pretty happy with it as far as wheeling goes. It'll crawl anything I'm willing to go up or down (I'm not into breaking things) and in the flats at speed, I can manage. The front Fox shocks managed very well, and the rears left a bit to be desired (Icon). Things I want to change are the springs to a 2 stage front and rear, rear shocks (probably match the Fox up front), new brakes, gears, possibly lockers, and tires. I already knew that I needed and wanted gears and tires. I'll go with 4.56 gears and have yet to decide on which tire I'll go with. When I do that, I'll probably also put new wheels on as the ones I have require spacers and I just don't like it. I'll never understand why folks just don't buy wheels that are properly backspaced for the application. Anyhow, that's the list. In addition, I was a bit worried about the flat tow points and the overall clearance I have. I did touch the flat tow points once on Flat Iron Mesa headed up an obstacle. Nothing bad happened there. I also (on that same trail) smacked the rear bumper from sliding down a rock (trailer hitch). I looked at it, and it was a bit bent, but nothing bad. I didn't think anything of it at the time as it really wasn't a big ding. Unfortunately for me, I didn't realize that the bumper actually had rotated upwards in the back. I found out when I went to open the tailgate. Not a good feeling to hear the sound of the bottom of the tailgate scraping across the top of the bumper. Paint on the tailgate is messed up now. :(

I'll also look at bigger brakes for the future. Brakes did fine for what they are, but I definitely think a big brake kit would work much better for those slow rolls down obstacles in the future. That's pretty much it for the Jeep. It follows along behind the coach VERY well and I'm super happy with how easy it is to flat tow. Oh! I just remembered....it'll need a DEEP clean as the sand and dirt is everywhere and one of my rear side panels for the top somehow got a hole in it on the way home. Hazards of flat towing with a soft top I suppose. I did manage to vac it out yesterday and give it a quick wash. I'll need to pull the seats and carpets to get all the dirt out though. A project for another time.

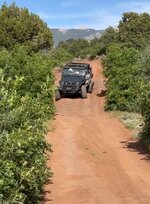
Here are a few pics of the Jeep in action, along with a few repair pics.

IMG_0086.jpg

IMG_0090.jpg

IMG_0396.PNG

IMG_0397.PNG

IMG_0398.jpg
Above in this picture you can see that the Jeep flexes pretty well. I do have the sway bars connected on all trails.

IMG_0198.jpg
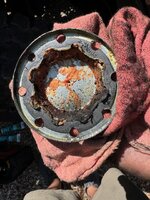
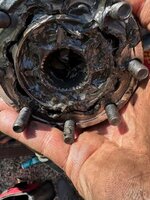
Cap on the RZeppa. You can see the lack of grease and what appears to be some grit or grime.

IMG_0199.jpg
Basically devoid of grease. It does have a bit of wear as a result, but nothing appeared damaged and I think it'll be fine. I'll keep an eye on it.

IMG_0200.jpg

This is the grease I picked up for use.

IMG_0206.jpg
Filled. I squirted a little at a time and moved the joint in all directions to try and work it in.

IMG_0207.jpg
Also took some emery cloth to the transfer case side to try and clean it up.

More to come.
 
OP
S

ScepterToad

Well-known member
Joined
Nov 9, 2023
Messages
340
Moving along to the coach. I will say that she performed about as good as can be expected. No major mechanical issues to speak of, but it's not all good. During the monsoons of Moab, the large slide topper came loose both times. It took me a while to figure out how to get the cover off. I have carefree slide toppers with fabric toppers. I looked online and every single video and instruction set said that the topper has two bolts that you can take off and the metal cover comes off. On mine, it's pinned at the bottom and at the top it has spring loaded pins. There's also a slide lock in the middle. Push the lock over, push each pin in, and flip the cover outboard. I think I still need to tighten the spring tension on 3 of the 4 slide toppers, most notably the large one (street side). With it loose, the wind pushed it up and off of it's track. There's a support roller in the middle that's a half circle and has rollers top and bottom. Pull the tube up and over the rollers, and the topper is back in place. Had to do that twice.
IMG_0192.jpg
Loose fabric at the end of the topper

IMG_0194.jpg
You can see the bow in the tube where it popped out of the rollers.

IMG_0196.jpg
Back in with the cover flipped down.

IMG_0195.jpg

The lock, which slides into place, locking with the pin and the bottom set of rollers.

IMG_0193.jpg
Here it is will no tension before I got the cover flipped down.


Second thing that happened with the coach is the curb side mirror. I had repaired it previously with some 3M 5200, thinking that would hold. Nope. The screws just didn't have enough to hold onto and there's too much vibration out there with the giant mirror hanging off the front of the coach. About halfway home, I looked over and the top screws had come loose and the mirror was hanging a bit. Stopped and removed it. I'm thinking I'll use some all thread or some long bolts in each hole if I can get them to stay. The original install at the factory consisted of long wood screws going through the body of the coach into a piece of 2X. The wood had rotted and broken, which caused the original failure. Since I either have to take the entire dash out or reach 5' up from the bottom and get a piece of wood up there to screw into in order to get it back installed the original way. I think I can possibly come up from the bottom and slide bolts through and put a piece of tape on them to hold them in place while I get nuts and washers on them to hold the mirror. We'll see how that goes.

IMG_0391.jpg
Holes where the mirror was attached. Thankfully it didn't fall all the way off. They're expensive.

Lastly, the most horrific. In my view, there are 3 things that are the most expensive things that can happen to a coach: Major engine problem, major transmission problem, and:

IMG_0389.jpg


IMG_0390.jpg
...Sidewall delamination. I noticed this as I was doing a walkaround once back at home at the FMCA campground for unloading.

It appears that at one point, the window in the toilet room leaked or possibly another leak from above at the roofline. I went inside and the toilet room has a crack in the wallpaper in that area right below the window. This coach did not have this apparent when I bought it, but I think with all the miles on this trip, it finally let go as it was rotted from the inside. So, I told my better half to get her interior design hat on and look at what she might want to go back with in that room. Tentatively, the plan is to remove the cabinetry from that room and pull the wall covering off. From there, I'll have to cut out anything that's damaged all the way to the outside fiberglass, and build it back, epoxying the fiberglass to the new wood along the way. Then I'll have to finish out the interior walls.

This is a project that would be perfect for winter, but it's summer. And I want to take more trips. So, over the next few days, I'll decide whether I want to tackle this before I take the next trip. My gut is telling me to fix it now so it doesn't get any worse. That's probably what I'll do.

More to come.
 

zmotorsports

ALLIANCE MEMBER
Joined
Oct 20, 2009
Messages
21,441
Location
Northern Utah
Whew Keith. I was hoping for a report of an uneventful trip. Doesn't sound like it was uneventful at all. Not bad, but sounds like you had a few issues to contend with, weather being the least of them, and the storms were bad down there. :oops:

I hate to say it but being your first time to Moab, you haven't really experienced the Moab I know, before the SXS issues that have crept into the area over the past decade or two. That is why they are so looked down on now. Like in most other things, the few ruin it for the many. That being said, we have been on many of trails with our RV/Jeep group and have tried to help educate the new SXS owners and have only been met with obstinance and hostility amongst them, so I am less forgiving when it comes to the SXS crowd than some. Before I get beat up on, yes, there are Jeep people that can be just as bad.

I think the off-road community as a whole has a lot of work ahead of it to repair damage to the reputation of our sport.


As for your cooling issues, I noticed that your winch and lights are blocking much of the surface area of your grille and radiator. I did a full video on my YouTube channel where I went into detail as to the negative effects of not sinking winches down in between the frame rails and moving lights outward away from the airflow. I would like to recommend watching it as I think it could aid you in your cooling issue.
 
OP
S

ScepterToad

Well-known member
Joined
Nov 9, 2023
Messages
340
Whew Keith. I was hoping for a report of an uneventful trip. Doesn't sound like it was uneventful at all. Not bad, but sounds like you had a few issues to contend with, weather being the least of them, and the storms were bad down there. :oops:

I hate to say it but being your first time to Moab, you haven't really experienced the Moab I know, before the SXS issues that have crept into the area over the past decade or two. That is why they are so looked down on now. Like in most other things, the few ruin it for the many. That being said, we have been on many of trails with our RV/Jeep group and have tried to help educate the new SXS owners and have only been met with obstinance and hostility amongst them, so I am less forgiving when it comes to the SXS crowd than some. Before I get beat up on, yes, there are Jeep people that can be just as bad.

I think the off-road community as a whole has a lot of work ahead of it to repair damage to the reputation of our sport.


As for your cooling issues, I noticed that your winch and lights are blocking much of the surface area of your grille and radiator. I did a full video on my YouTube channel where I went into detail as to the negative effects of not sinking winches down in between the frame rails and moving lights outward away from the airflow. I would like to recommend watching it as I think it could aid you in your cooling issue.
Thanks Mike!

We did have a few snafu's but aside from the delamination, I wasn't too upset. That one is not gonna be fun.
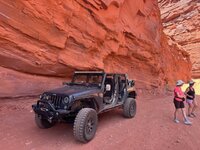
Funny you should mention that video. I've watched it already and I actually used your idea when describing what I would do with the winch to my BIL on the trip. He looked at it and asked me how I'd move the winch down when it's clear that the mount for it is the top of the bumper. I described how you made the center section on the front bumper you did in one of your videos. That's what I'll try, though my welding skills aren't on the same planet as yours. If it works and I get good welds, I'll do that. Otherwise, I'm not emotionally attached to that bumper. In fact, I'm not really attached to the front or the back bumper. They're relatively cheap made as Jeep bumpers go and I have plans to do some other mods anyway. I'm not one to throw money away, but in the interest of learning something along the way, I'll sacrifice those if I have to. I want to get rid of the receiver on the rear so I get a little more clearance, but I also like the stinger you made for yours. However, with 35's, I don't think I'll hang down/out much (I don't now). The test will be when I do a swing away carrier on the rear.

All of these projects are in my mind right now, so I don't really talk about anything past what I have directly on the plate at a given point in time. Heck, I can't even get through the projects currently on the board.

As to the SXS issue, even as a new wheeler, I think I have an idea as to how you might feel. The problem with them is they are extremely capable out of the box. So much so that about any idiot can go about anywhere are do about anything. That leaves a significant portion of the population with a little bit of credit (not money) access to a machine that can kill people. And they are unleashed on terrain or places that they have ZERO respect for. And because they are able to access these areas easily, they just tear the heck out of everything in their path (including the machines themselves). A few years of that, and anyone with an ounce of respect can get real pissed, real quick. I don't think I detailed it above, but I had a kid (in a rental) with his girlfriend cut two of us off on an obstacle on Hells Revenge. And he just sat there and grinned like an idiot when I threw my hands up in disgust. He even had the nerve to catch us on the way back and ask if he had seen us earlier that day. I let him go on both times as I'd rather an idiot I can see in front of me than behind. We had another person in a Land Rover on White Rim coming down the hill right in the middle of the road. Stopped to do nothing but sit there, and wondered why we told them they needed to pay attention (so it's not just the SXS people). If you haven't ridden White Rim, it's 1000' cliffs on a two way, one lane road. To your point, a few can ruin it for everyone and unfortunately getting the respect back from the communities that do provide access won't be easy. I can see, even in one visit, that there are places in Moab that will probably close soon. One is the end of Flat Iron Mesa. They're building houses towards the end of that trail and it wouldn't take much for those folks to not want idiots on their road (I suspect).

I also have a small boat (19' open bow) that I've used extensively on both local lakes and the Ohio River in Cincinnati. Boating community is the same. The "rules of the road" on the water are very specific and designed to keep people safe and alive at the end of the day. All I'll say is, at least most of the wheelers (and SXS people) are sober.

I learned respect for machines at a very early age, driving tractors and dozers starting around age 5 (by myself). Most folks haven't had that luxury I suspect.

I'll get some more pictures up tomorrow of the good that happened on this trip. For sure one of the most beautiful places we've been.
 
To avoid these ads, REGISTER NOW!
Top Bottom