To avoid these ads, REGISTER NOW!

Scepter's Shop Build and Projects

zmotorsports

ALLIANCE MEMBER
Joined
Oct 20, 2009
Messages
21,441
Location
Northern Utah
So much so that about any idiot can go about anywhere are do about anything. That leaves a significant portion of the population with a little bit of credit (not money) access to a machine that can kill people. And they are unleashed on terrain or places that they have ZERO respect for. And because they are able to access these areas easily, they just tear the heck out of everything in their path (including the machines themselves).


^^Bingo Keith. I think therein lies the problem, or source that is.

Years ago, in order to get to the backcountry you had to build a pretty capable machine and nowadays, you can sign on the dotted line with no off-road experience at all and have a reliable and capable machine to go hit the off-road trails with no training nor even any knowledge of trail etiquette at all.

And don't even get me started on trail etiquette. That's a topic (or rant) all on its own.
 
To avoid these ads, REGISTER NOW!
OP
S

ScepterToad

Well-known member
Joined
Nov 9, 2023
Messages
340
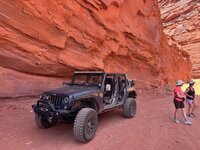
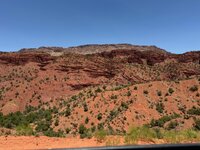
Ok, let's show some good stuff. I'll probably post several times of different areas or at least common themes. First up, my very first wheeling adventure. 85 miles starting at Onion Creek, moving in to Kokopelli, and finishing by going up the La Sal Pass (and back down to town).

Pretty good day and everyone had a great time. There were a few places where there were small obstacles, but this is mostly dirt/gravel road. Onion Creek is just like it sounds...a creek crosses the trail something like 17 times. I thought it was more, but probably not. There are massive cliffs and some really great pull offs where you can stand at the bottom or top of these cliffs. Super cool. From there, we picked up Kokopelli, which (and I didn't know this at the time) actually runs from Loma CO to Moab UT. It's around 140 miles total. We obviously didn't do that. This is the one that had a few obstacles on it, but they were very small and not really an issue. We stayed on that for a bit, and ended up on La Sal Pass. This runs up the Manti-La Sal which climbs to just over 10K feet of elevation. Probably the highest elevation we did during the trip. We ended up at Bull Canyon Dinosaur Tracks Overlook as sort of a cap on the trip that day. Super cool area and there are actual dinosaur tracks in the rock on top of this cliff face. Super cool way to start out the trip.

IMG_0087.jpg
IMG_0089.jpg
IMG_0090.jpg
IMG_0102.jpg
IMG_0104.jpg
IMG_0106.jpg
IMG_0114.jpg
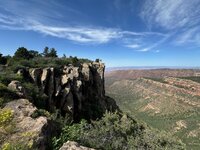
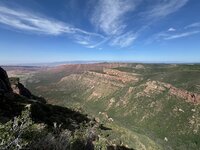
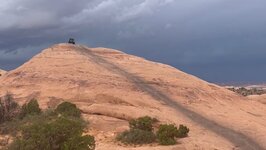
Bull Canyon above. The place is massive. We climbed all over these rocks. Super quite up there (when the kids weren't near :ROFLMAO: )

IMG_0117.jpg

IMG_0120.jpg
IMG_0128.jpg
Really cool trees up there as well. More in the next post.
 

zmotorsports

ALLIANCE MEMBER
Joined
Oct 20, 2009
Messages
21,441
Location
Northern Utah
Awesome pictures Keith.

Love that area and Bull Canyon is always a fun and scenic drive, unless it's a torrential downpour that is.... :oops: Then it gets a bit spooky with all the water running off the canyon walls.

Both Fins & Things as well as Hell's Revenge are great trails if you've never done them. They are both "iconic" Moab and are must-do's.

Unfortunately, I am now to where I don't care for them because I have led so many times on these trails as it seems we always have people who are new to Moab in our group and they want to run these trails. Now I cringe when someone asks if we can run Hell's Revenge or Fins & Things. :rolleyes: Scenic and awesome trails, at least for the first few times but after a couple dozen times they lose something. :bounce:
 
OP
S

ScepterToad

Well-known member
Joined
Nov 9, 2023
Messages
340
Actually, I need to take a step back....we did Arches and Picture Frame Arch before we did Fins and Things and Hells Revenge. Also, looking at the pictures, there are more videos that pictures and I wasn't taking hardly any being that I was driving. I'll see what I have, but let's move to Arches and Picture Frame.

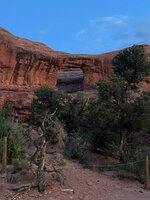
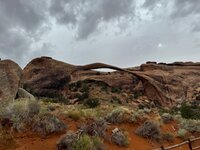
Arches was super cool and we were able to see most things from the road. However, we did walk up to a few of the more prominent parts and take pictures. The formations are pretty large and some of these giant rocks seem to defy gravity in their position on top of spires. IT's really super cool and the pictures do NOT do it justice. In the evening we went out to Picture Frame arch, which looks just like that, a picture frame. It's square. We did this at sunset, which was really cool. After that, we went and played around in the sand flats with the SXS machines. I did try the larger hill in the Jeep, but it wasn't a great result. I parked it after that in order to rip around on the Canam.

One very interesting thing about the Canam. It has automatic adjustable suspension at the push of a button. It also has an Eco mode, which the owner was in most of the time. These machines are super light, very powerful, and easily broken, even when the owner tries not to break it. More on that later.

On to the pics! These aren't necessarily in any order.
IMG_4923.JPG
IMG_4924.JPG
Picture Frame Arch
IMG_4940.JPG
Arches NP

IMG_4942.JPG
Not sure how this rock sits up there. Seems like a strong wind would topple it over.
IMG_4946.JPG
IMG_4948.JPG
IMG_4959.JPG
More Arches NP

IMG_4973.JPG


IMG_4986.JPG
More on this momentarily.
 

Attachments

  • IMG_0188.jpg
    IMG_0188.jpg
    64.3 KB · Views: 17
OP
S

ScepterToad

Well-known member
Joined
Nov 9, 2023
Messages
340
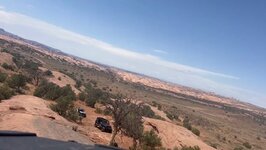
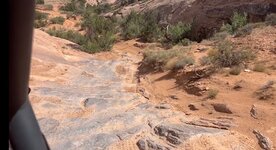
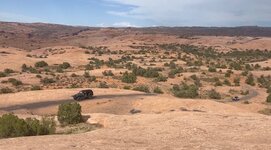
To Mike's point above, Hells Revenge and Fins and Things are super cool the first time you ride them. I'm not sure that a person would need to do them more than that unless they update their rig to do more at either of these. Things like the bathtubs up on HR. Then again, even if my Jeep could do a bathtub, I'm not sure I ever would. There's just too much risk of severe damage or injury. And I'm willing to put money on the tow bill wouldn't be cheap. Most of what I have from this part of the trip are videos, so I'll get some screen captures and post those up.

IMG_0400.jpg
IMG_0401.jpg
IMG_0402.jpg
IMG_0403.jpg
IMG_0404.jpg
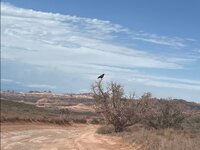
Ravens everywhere....more to come.
 
OP
S

ScepterToad

Well-known member
Joined
Nov 9, 2023
Messages
340
A few more from HR and Fins.
IMG_0405.jpg
IMG_0406.jpg
IMG_0407.jpg
IMG_0408.jpg
IMG_0409.jpg
IMG_0410.jpg
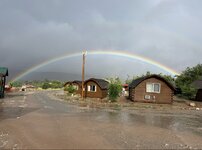
Rainbow after the first monsoon at the campground. We saw more rainbows than I think I've ever seen in one place. Super cool.

I'll get more posted up later today or tomorrow.
 
OP
S

ScepterToad

Well-known member
Joined
Nov 9, 2023
Messages
340
Awesome pictures Keith.

Love that area and Bull Canyon is always a fun and scenic drive, unless it's a torrential downpour that is.... :oops: Then it gets a bit spooky with all the water running off the canyon walls.

Both Fins & Things as well as Hell's Revenge are great trails if you've never done them. They are both "iconic" Moab and are must-do's.

Unfortunately, I am now to where I don't care for them because I have led so many times on these trails as it seems we always have people who are new to Moab in our group and they want to run these trails. Now I cringe when someone asks if we can run Hell's Revenge or Fins & Things. :rolleyes: Scenic and awesome trails, at least for the first few times but after a couple dozen times they lose something. :bounce:
Totally agree Mike. One and done would be fine for me. There are so many other places to see in the area, you could spend several years there and not see it all. Heck, the people I was with hadn't ever done Flat Iron Mesa and this was their 4th year in a row. Certainly no shortage of things to do!

One thing I did forget to mention in all my ramblings. We only did the first two miles on Fins and Things. According to the folks I was with, the ending is super rocky and they didn't want to break their stuff, which I totally get. I was happy to end where we did as the first part was pretty fun.
 
OP
S

ScepterToad

Well-known member
Joined
Nov 9, 2023
Messages
340
I hope everyone had a great July 4th spent with friends and family!

I went over to the shop yesterday to do some inventory stuff for the business side of things as we had a bunch of parts ship in while I was away in Moab. Intention was also to get my mirror put back on in preparation of backing the coach in so I can start taking the toilet room wall out and fix my delamination.

I prepped two pieces of 2x6 to screw in the wood screws that held the mirror previously. I cut and painted them to hopefully keep the rot down a bit and make them last longer. I realized that if I opened the generator tray and slid in there, I could reach the screw locations. So, I figured that I could use some gorilla tape on them and get them to stick to the back side of the front cap enough to get a drill bit in there to pre-drill and get the screws in. Nope. I was able to get the mirror wiring loose so that I can snake it out enough to make getting the mount back on easier.

So, back to the drawing board. Then I had a random thought...I wonder how the other mirror is attached. Looked and it's through bolted. Duh! So, I looked around for 4 bolts that would work and what I had in stock wasn't really what I wanted. So, I'll grab some at the store before I head over there tomorrow. That, and some sealant to use around the mount.

Also, I wanted to investigate the sidewall delimitation a bit more. Turns out, it wasn't bowed out as much as the other day. So, I pulled it out a bit and shined a light up there. Couldn't see much. That got me thinking. Maybe I could slow play this thing and not rip my whole toilet room out. Finished up at the shop and headed home deep in thought. Got cleaned up and in that process I decided the only really way to fix it (the right way), is to rip out all the rot, and put it back right. So, that's what I'll do.
IMG_0414.jpg
My fancy wood blocking that I won't use.
 
OP
S

ScepterToad

Well-known member
Joined
Nov 9, 2023
Messages
340
Moving on to more Moab. Let's get into Newspaper Rock and Needles Overlook. These are regular roads (blacktop) south of Moab. We initially went down to see Newspaper Rock and decided when we were down there that we would make the stop on the way back out to Needles Overlook. The interesting part of this trip is (and I kind of wish we would have done it) is that the route to Newspaper is the lower viewing point to Needles. When you go up to the overlook, you're looking down to Newspaper Rock. I think it would be neat to go on from Newspaper to see the "bottom" of Needles now that I've seen it from above. Anyway.

Super cool to see the petroglyphs put there by someone at some point in history. I'm convinced that some of these pictures are of the aliens. Probably not, but I like to think that. We did walk around a bit there, but there's not much else to see other than the petroglyphs.
IMG_0284.jpg

IMG_0286.jpg
This is the area above the petroglyphs.

IMG_0287.jpg
More to come.
 
OP
S

ScepterToad

Well-known member
Joined
Nov 9, 2023
Messages
340
On to Needles Overlook. There's a road off of 191 that you turn down and travel a little over 20 miles to get there. Off to one side along the road, we did see a bunch of houses/structures up against a giant rock formation. It's WAY off of the road. We did a bit of research when we got back to the campground it turns out to be an LDS community out there in the desert.

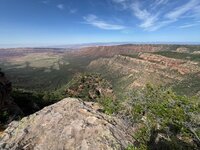
Needles Overlook is massive. You can see BLM roads down in the valley if you dare to look over the 1000+ foot cliff. There's also a random airstrip down there you can see. Interestingly, the other two guys I was with are airline pilots. They looked it up and there's no designation for it. Not sure what, if anything, that actually means, but it is pretty random. In any case, it's a pretty cool view and we talked a little about figuring out a way to make the run from town into that area on trails. That would be a pretty long trip out and back, but probably would be pretty cool. Maybe someday. In any case, here are a few pics. And again, they do NOT do this place justice.

IMG_0295.jpg
IMG_0301.jpg
IMG_0303.jpg
IMG_0302.jpg
IMG_0305.jpg
IMG_0306.jpg
IMG_0307.jpg
IMG_0308.jpg
IMG_0310.jpg
 

WoodsTruck

Well-known member
Joined
Jan 12, 2013
Messages
1,025
What is the minimum vehicle requirements you would suggest to get into these areas to see what you are sharing?
 
OP
S

ScepterToad

Well-known member
Joined
Nov 9, 2023
Messages
340
What is the minimum vehicle requirements you would suggest to get into these areas to see what you are sharing?
That’s kind of a tough question to answer.

Everything I’ve shown with the exception of: Hells Revenge, Fins and things, and Flat Iron Mesa are accessible with a standard 4x4 about anything. Heck we even saw some cars on White Rim (though I wouldn’t). I think there were even some FWD cars on Onion Creek/Kokopelli but again you’d want a truck or SUV to be comfortable. The Hells/Fins/Flat require some low range 4x4 and some ground clearance. I did smack my rear bumper on a ledge on Flat Iron Mesa, mostly by mistake, but it was a tall ledge compared to others.

The nice thing about the rock trails is that most all obstacles have bypasses so if you don’t want to or can’t, you just go around.

I’ll measure my ground clearance tomorrow and post it up, but the Jeep is on 35” tires and has a 3.5” lift. Differentials are the low point. Having said that, the SXS’s that I was with have less clearance than I do and didn’t scrape much more than I did (not at all for me, but some they did).

Other vehicles I saw were a Land Rover discovery 2, Ranger Raptor (no lift), Lexus 470 (I think, no lift), Subaru (outback type, no lift). The Ranger and Lexus did Hells Revenge.

Suffice it to say there were folks out there doing things I was a bit shocked by. The caveat to that is, I have next to zero experience. Therefore, I wouldn’t go out there in anything less than a 4x4 with 35” tires. Short wheel base of the Jeep helps too.

I’d be willing to bet Mike (@zmotorsports ) could school all of us on what the minimums would be as he has a heck of a lot more experience both wheeling and the specific area we’re talking about.
 
OP
S

ScepterToad

Well-known member
Joined
Nov 9, 2023
Messages
340
To add, the approach and departure angle are important for the rock trails, probably more so than ground clearance. So, you need to be able to get to and off of the obstacle. I’m not sure how one actually quantifies that, but it’s important.
 
OP
S

ScepterToad

Well-known member
Joined
Nov 9, 2023
Messages
340
Rear differential is about 9.5”. That’s the low point on the Jeep. The body clearance is 14” to the low point at the trans skid plate (factory).
 
OP
S

ScepterToad

Well-known member
Joined
Nov 9, 2023
Messages
340
Another HOT weekend in the shop and there never seems to be enough hours in the day. My weeks are pretty busy at work these days as we've started a newco, so I've been hammering it pretty good during the week and some on weekends. I guess if it were easy, everyone would do it.

Anyhow, I tackled several small projects this weekend and started a large one. Seems like these moved to the top of the list pretty quick, but I need to re-prioritize the whiteboard at the shop this week and get back on track.

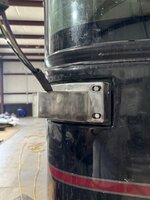
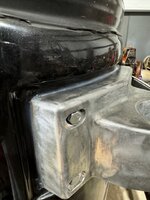
First up, the mirror on the coach. I had decided that backing plates would be nice once I got the bolts in place last weekend, so I found some small drops of Al bar I had laying around. Pulled the bracket back off of the coach, lined up the plates and marked them off. Drille a few holes, ground the edges a bit to make them fairly smooth, and hit the holes with a countersink. Put the bolts back through the bracket, and shimmied up in the hole and put them on. Pretty straightforward and I don't think that mirror will have issues for a good long time.
IMG_0448.jpg
The Al bracket was a bit corroded.


IMG_0449.jpg
A little wire wheel action and it cleaned up nice.

IMG_0450.jpg
Drilling the holes. I love this old drill press.

IMG_0451.jpg
Finished and the edges taken down a bit.
IMG_0452.jpg

I did get a little over zealous with the counter sink bit on a few of them.


IMG_0453.jpg
This is a reach to get up there, but I was able to fit in the opening of the generator enough to get up there and get the nuts tight.

IMG_0455.jpg
Mounted

IMG_0457.jpg
I also ran a small bead of silicone around the top and sides. The bottom has a weep hole, so if any water gets in there, it should drain out.

More to come.
 
OP
S

ScepterToad

Well-known member
Joined
Nov 9, 2023
Messages
340
Next up, the Jeep. I've been having cooling issues ever since the thermostat died right before Moab. It's no longer overheating, but she's running a bit hotter than I like. We have been having ~95 degree days with high humidity lately and I still have 3.21 gears and 35" tires. That makes for a high load on highway trying to maintain 65 mph on even small grades. In any case though, the winch and light bar block the front of the Jeep where the air flows into the radiator. So, I decided to knock the winch off as I don't use it and there's really no need for it to be sitting there in the way. I'll get to the light bar later as that will require a more significant change to the bumper itself. I'm also contemplating the Rock Hard bumper as it may be more efficient for me to swap to that setup anyway. Haven't looked too hard at them, but I'm thinking it might be an option.
IMG_0458.jpg
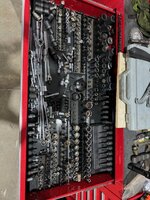
But first, I needed to organize a bit more in the tool box. I had a BUNCH of tools in the coach and put them back over the weekend. My socket drawer needs help, as you can see. Need to look at some other options for storage. I guess I realize now how folks end up with multiple boxes or very large boxes.


IMG_0459.jpg

You can see how little free space there is for air flow.
IMG_0461.jpg
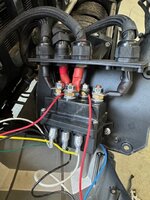
This is the breaker for the winch. I thought I'd just pull this apart, but ended up just disconnecting it from the battery. No need to have the wire sitting there connected.


IMG_0462.jpg
This is the connection at the winch. Had to take that block out of the mount all the way to get the nut off. Kind of a silly design if you ask me. Totally a pain to get to and take apart.

IMG_0463.jpg

And a lot more air flow ability. The light bar goes through the bumper, so I'll have to grind out the weld and then fill the holes in. Not sure how I'll end up on that just yet. I porbably have enough height to set the winch down into the bumper, but it'll take a lot of fab work and may be more efficient to just get a different bumper. This picture doesn't show it, but there's also the flat tow bracket below it, which might be better off connected to the bumper instead. More decisions to be made on that.

Up next....the big project started with the sidewall delam on the coach. Not even a little bit fun.
 
OP
S

ScepterToad

Well-known member
Joined
Nov 9, 2023
Messages
340
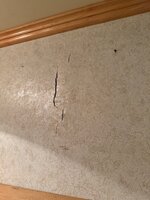
So, the sidewall delamination on the coach. I've been poking around on this since it happened and I can't really come up with where the water actually came from . I think the original owner had a leak, and fixed it. But, the damage was done and the luan rotted and separated. The wall construction is (out to in): Gel coated fiberglass, luan, Dow Structure Foam (really just dense styrofoam), luan, wallpaper. I also had cracks in the toilet room which split the wallpaper. So, I figured I'd rip it all out, replace from the outside in, and put more wallpaper up. Not an easy just, but fairly straightforward. That did not turn out to be the case. First of all, the delamination is not in the same area exactly as the cracks in the wallpaper. It's more to the rear and down the wall. During the deconstruction, I also noted that the luan was not completely rotten all the way through. So, getting it off of the styrofoam is a problem. In any case, it needs fixed. So, I set about removing the cabinets and wall paper. I was able to scrape the luan and wallpaper off in some big chunks and it was clearly very dry and very rotten. Got that basically done. Pulled out the wood cabinet cover over the water/electrical chase next to the toilet on the floor and removed the window as well. I also pulled the piece of plywood with wallpaper covering from behind the toilet, and in one piece. That uncovered a very nice wood wall, which I may not cover up again. I'll have to get my better half to weigh in on that once I get it ready to close back up. I also got up on top of the coach and didn't see any obvious places where the water would have come in at. But, I did see over the skylight where I should put some more dicor down as it's getting a bit long in the tooth.
IMG_0468.jpg
Crack in the wallpaper hidden by a picture frame/art piece that used to hang here.


IMG_0469.jpg
Screw that I pulled. Obviously had water there at some point.

IMG_0471.jpg
Inside a cabinet. More evidence of water in the past.

IMG_0474.jpg
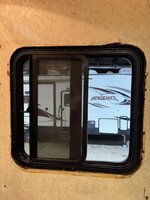
This is the only place on the window where the silicone sealant was questionable. Just a small area there where water might have gotten in.


IMG_0475.jpg
Interior ring of window removed.

IMG_0478.jpg
Starting to pull the easy stuff off (the most rotten). This problem clearly came from above.

IMG_0480.jpg
Nice wood wall behind the toilet.

IMG_0481.jpg
Wallpaper and most of the thickness of the luan removed.

IMG_0482.jpg
This skylight needs some work.

IMG_0483.jpg
Area directly above on the roof.

I think what I'm going to end up doing is repair in the bathroom, and then remove the rear fender on the coach and pull the exterior wall out enough to get a flat bar up there and dig out the rotten wood. From there, I think I'll use 3M panel bond and squirt it up there and then press the panel back on with wood blocking and let it cure. Aside from pulling the washer, dryer, cabinet, and the slide out on that side, there's no other access point. I'll sleep on it a bit more, so that plan may change.

That's all I had the energy for. Buy an RV they said....it'll be fun!!
 

zmotorsports

ALLIANCE MEMBER
Joined
Oct 20, 2009
Messages
21,441
Location
Northern Utah
Keith, Arches is always a fun and scenic side trip while in the Moab area. We walked up to Delicate Arch several years ago and it was well worth the hike as it was breathtaking.

I don't know that I would be without a winch for anything other than fire roads to be honest. Recovery gear in my opinion is a must, long before suspension and lights actually.

I know mine is unique in the fact that I built the bumper with the intent to keep the winch low and between the frame rails, but I know there are some manufacturers that also offer this style of bumper. Just seems the cheap and more readily available ones usually have the winch mounting provision high up above the frame horns and right in the path of the airflow.

Another thing I would reconsider is the bull bar, that 2+ inch tube deflects a lot of airflow up and over the hood and therefore missing the cooling stack. I installed a low and smaller crossover bull bar to mine, but it will be getting cut off and removed when I decide to have my bumper recoated.

That’s kind of a tough question to answer.

Everything I’ve shown with the exception of: Hells Revenge, Fins and things, and Flat Iron Mesa are accessible with a standard 4x4 about anything. Heck we even saw some cars on White Rim (though I wouldn’t). I think there were even some FWD cars on Onion Creek/Kokopelli but again you’d want a truck or SUV to be comfortable. The Hells/Fins/Flat require some low range 4x4 and some ground clearance. I did smack my rear bumper on a ledge on Flat Iron Mesa, mostly by mistake, but it was a tall ledge compared to others.

The nice thing about the rock trails is that most all obstacles have bypasses so if you don’t want to or can’t, you just go around.

I’ll measure my ground clearance tomorrow and post it up, but the Jeep is on 35” tires and has a 3.5” lift. Differentials are the low point. Having said that, the SXS’s that I was with have less clearance than I do and didn’t scrape much more than I did (not at all for me, but some they did).

Other vehicles I saw were a Land Rover discovery 2, Ranger Raptor (no lift), Lexus 470 (I think, no lift), Subaru (outback type, no lift). The Ranger and Lexus did Hells Revenge.

Suffice it to say there were folks out there doing things I was a bit shocked by. The caveat to that is, I have next to zero experience. Therefore, I wouldn’t go out there in anything less than a 4x4 with 35” tires. Short wheel base of the Jeep helps too.

I’d be willing to bet Mike (@zmotorsports ) could school all of us on what the minimums would be as he has a heck of a lot more experience both wheeling and the specific area we’re talking about.

I concur with above.

I usually tell people when they first buy their Jeep to get out and use it and get a feel for how it reacts to various terrain and obstacles BEFORE doing anything to it suspension wise. This allows a person to get to know first hand what it can and can't do as well as improves the driver's ability with spotting over obstacles and through various conditions.

Once a person has developed a good feel for how the stock vehicle handles, then they can decide on what to modify and how far around what trails they want to do.

One of the reasons I got out of our local Jeep club is because people were joining and being new to off-roading having other members telling them that before they went and did the "big boy" trails they needed to be on tons and running 40's. Personally, I think this is terrible advise because what I witnessed was people on large axles and tires that still had no idea how to drive off-road and all that does is put them in a bigger and more top heavy rig to learn in. :rolleyes:

Many of the trails in the Moab area can be run with a stock Jeep as long as there is a capable and skilled driver behind the wheel. I actually quite enjoy spotting people over obstacles and showing them what to look for and how to anticipate the way the vehicle will respond to various changes in the terrain. I find it rewarding to watch a new driver go over an obstacle successfully after their initial impression of the obstacle thinking there's no way over it. To see the person's face when they have conquered the obstacle with only a little guidance and direction is awesome.

The larger tires and increased height from the suspension just keeps the belly up off the rocks a bit more and makes the ride a little smoother for the passengers, but not something that must be done before going to Moab.

I ran most of the trails around Moab for many years on 3.5" of suspension and 35's without too much drama, and that was doing some of the obstacles. Now with 4.5" suspension and 37's, I really don't to any more trails than before, they are just smoother for the wife and I with less banging on the rocks.

Not sure if that helps or answers anything or not, but my .02 worth of insight.
 
To avoid these ads, REGISTER NOW!

zmotorsports

ALLIANCE MEMBER
Joined
Oct 20, 2009
Messages
21,441
Location
Northern Utah
So, the sidewall delamination on the coach. I've been poking around on this since it happened and I can't really come up with where the water actually came from . I think the original owner had a leak, and fixed it. But, the damage was done and the luan rotted and separated. The wall construction is (out to in): Gel coated fiberglass, luan, Dow Structure Foam (really just dense styrofoam), luan, wallpaper. I also had cracks in the toilet room which split the wallpaper. So, I figured I'd rip it all out, replace from the outside in, and put more wallpaper up. Not an easy just, but fairly straightforward. That did not turn out to be the case. First of all, the delamination is not in the same area exactly as the cracks in the wallpaper. It's more to the rear and down the wall. During the deconstruction, I also noted that the luan was not completely rotten all the way through. So, getting it off of the styrofoam is a problem. In any case, it needs fixed. So, I set about removing the cabinets and wall paper. I was able to scrape the luan and wallpaper off in some big chunks and it was clearly very dry and very rotten. Got that basically done. Pulled out the wood cabinet cover over the water/electrical chase next to the toilet on the floor and removed the window as well. I also pulled the piece of plywood with wallpaper covering from behind the toilet, and in one piece. That uncovered a very nice wood wall, which I may not cover up again. I'll have to get my better half to weigh in on that once I get it ready to close back up. I also got up on top of the coach and didn't see any obvious places where the water would have come in at. But, I did see over the skylight where I should put some more dicor down as it's getting a bit long in the tooth.


IMG_0478.jpg


I think what I'm going to end up doing is repair in the bathroom, and then remove the rear fender on the coach and pull the exterior wall out enough to get a flat bar up there and dig out the rotten wood. From there, I think I'll use 3M panel bond and squirt it up there and then press the panel back on with wood blocking and let it cure. Aside from pulling the washer, dryer, cabinet, and the slide out on that side, there's no other access point. I'll sleep on it a bit more, so that plan may change.

That's all I had the energy for. Buy an RV they said....it'll be fun!!


That ***** Keith. Water intrusion in an RV can be a death sentence and one of my biggest fears. Glad to see you are able to get to it and pull it all apart to repair it properly. Looking forward to the progress pictures.
 
OP
S

ScepterToad

Well-known member
Joined
Nov 9, 2023
Messages
340
That ***** Keith. Water intrusion in an RV can be a death sentence and one of my biggest fears. Glad to see you are able to get to it and pull it all apart to repair it properly. Looking forward to the progress pictures.
Sure does Mike. The pucker factor is real on this one.
 
OP
S

ScepterToad

Well-known member
Joined
Nov 9, 2023
Messages
340
Got a few things done over the weekend at the shop. It never seems like enough, but I'll take what I can get.

So, I've been munging on this delamination fix over and over again and I finally settled on rebuilding the inside with luan (1/8" plywood) and wallpaper. On the outside, I settled on the 3M panel bond. I decided this after poking around again in the area where the delamination happened, which is under the washer and dryer. There's an access panel below that I pulled off that exposes the bottom of the washer cabinet and one of the heat exchangers for the aquahot (furnace). I poked the wall with a screwdriver and there doesn't appear to be any rot other than what I knew about, which is in the bottom of the bathroom, linked to that wall, which I already knew about. Can't find anything else. So, panel bond it is.

Other indicators of water intrusion are the spray patterns on the side of the coach from the trip back. The entire passenger side is covered in spray. Also, looking up at the bottom of the sidewall with the basement doors open, I can see the luan that the sidewall is bonded to. The bottom edge has signs of water/rot all along it. I suspect this problem is a combination of a bunch of things. Age, water from driving, and water damage from whatever leak happened. I'll be doing a full reseal as part of this fix (top and bottom).

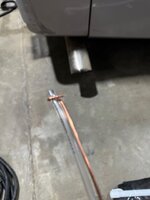
So, I pulled the rear fender, which required removal of the rear door covering the battery. The rear fender was found to be missing one fastener on the side (rear). It also had spray foam along the inside (front) and some sort of black caulking along the front edge. I'll be replacing those as I put it back together. There are also several areas under the coach that have a piece of thin wall tubing, around.25 diameter that is flat on both ends and they screw into the fenders. This keeps the bottom free edge of the fender from flapping around in the wind. They also like to go missing from time to time. The front one is on, but there's not one on the rear half of the fender. I'll source something for that as well. I've seen folks use all sorts of stuff for those, but I'll try to find some tubing close to what the factory installed.

Moving inside, in the toilet room, I needed to remove a few more bits on the outside wall, which I did, in preparation for the new luan and wallpaper. Did you all know that wallpaper isn't really sold in stores any more??? Home Depot, Lowes, Menards, etc don't carry it in stock. You can get it on Amazon and places like that, mostly in the form of peel and stick. My BIL has a '17 Thor with peel and stick, and you can guess what's happening to him. It's peeling in all the corners. So, not what I'd rather use. I'd rather use a pasted wallpaper, which I feel will stand the heat cycle better. And wouldn't you know it, the paste type is about 4X the cost of peel and stick. Dumb all around. What I did find out is that the coach manufacturers glue the vinyl "wallpaper" to the luan and then use those panels to build out the coach walls. Some use vacuum to seal it all together, though I don't think Monaco did that in 2007. In any case, the course of action from this point is to glue 1/8 plywood sheets to the walls that I've removed, smooth out the joints, and then wallpaper with real wallpaper and paste. Unfortunately, I need to wallpaper over the small areas that I'm not removing and I don't like that. I dislike wallpaper so much that I swore after removing it from homes so many times that I lost count. Heck, It's one of those house projects I never learned how to do because I dislike it so much. That and carpet. Anyhow, I'll be putting it in the coach and learning along the way how to do it.


The other thing that I got accomplished was to swap out the starter on the Excursion. I generally buy auto parts at Autozone. I know, I know. However, a lot of their parts carry lifetime warranties and they have locations about everywhere. If I'm ever traveling, and something breaks, many times I can just pull it off and go get a new one. The X has been starting a little slow lately (turning over slow) and finally the started just didn't have the oomph to turn over the 12V. So, I pulled it off and took it in to go warranty it. They hooked it up to their tester and it spun. Said it was fine. I told them I'd check other potential problems and get back to them. Next day, I went back and the same person was there. After some conversation, she gave me the new started and sent me on my way. Put it on, and she spins fast again. Bottom line, the starter was just weak enough and on it's way out to not spin the motor over. And now for some pictures...
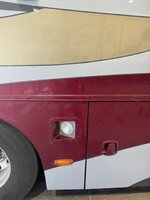


IMG_0505.jpg
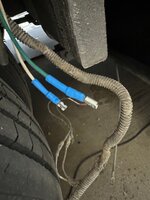
Needed to remove the dock light and clearance light. I ended up cutting the clearance light wiring as there's about 3' of extra wire behind the fender.

IMG_0506.jpg
Screws holding the fender on. There are 3 at each end and one at the top.
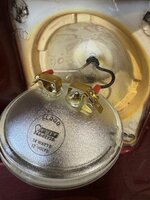
IMG_0507.jpg
Wires went out the back of the housing once disconnected from the dock light.

IMG_0510.jpg
You can see the grime and dirt on this fender from driving in the rain. It's crazy how dirty it gets. The tubing support can be seen in the background. Connected to the bottom of the fender with one screw.
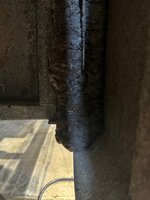
IMG_0511.jpg
Spray foam on the back side of the fender.
IMG_0513.jpg
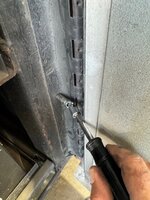
Removal of the bolts holding the battery compartment door.
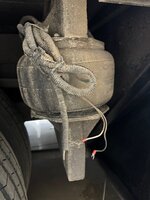
IMG_0515.jpg
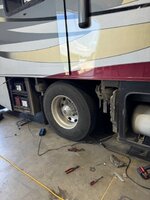
Fender and door removed. When I change the shocks on the coach, this is what I'll do. Also can see the air bags and part number for when those need replaced. You can also see the wad of wire bundled up for the clearance light.
IMG_0519.jpg
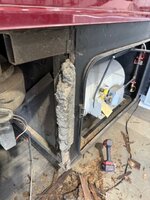
Here you can see the start of digging out the damaged luan from under the exterior of the coach, and some foam still stuck on.

IMG_0521.jpg
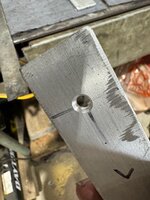
That angle is what the fender screws onto. The bottom screw had broken off, so I drilled that out so I can replace it.

IMG_0522.jpg
All this got cleaned up as well and I used some bed liner on it. I could spend weeks under the coach scraping all the old bed liner off and repainting. A project for another time.

More to come.
 
OP
S

ScepterToad

Well-known member
Joined
Nov 9, 2023
Messages
340
More pictures from the weekend.

IMG_0525.jpg
The total pile after hogging it out under the sidewall. I used a flat bar to get up in there and dig it all out.

IMG_0527.jpg
Air bag part number

IMG_0528.jpg
Area cleaned and ready for bed liner.

IMG_0529.jpg
I was able to drill the old screw out a bit and then drive it out with a nail set.
IMG_0530.jpg
Painted up. I also cleaned up and painted the piece of angle. Regular enamel on the back side and I'll hit it with bed liner on the exposed area when I put it back on.

That's it for the first bit. Moving inside next, and then the panel bond debacle.
 
OP
S

ScepterToad

Well-known member
Joined
Nov 9, 2023
Messages
340
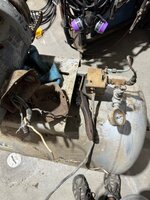
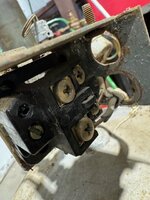
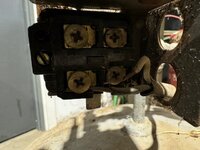
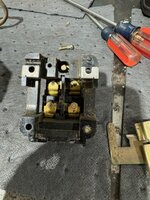
But first! A lesson in taking **** apart that you don't know how it works. Most times I get by because I've always done that, and I tend to be able to get things back together. We'll leave it at that. I decided to try and get my big Speedaire compressor going to see if it'll go and be usable. I think it will, but I don't like it just sitting there looking at me every time I walk by it. The wiring is the first part, so I dug into that. The switch was wired to a piece of romex, and the wiring from the motor was just hanging out. So, I needed to figure out which side of the switch was motor and which side was line voltage. It was clocked 90 degrees, and I couldn't see the writing even after I got the cover off. So, I decided to remove it. If I'd been smart, I would have just spun it off of the air fitting. But, I'm not smart. So, I took the screws out that held the wiring connector in place. Wrong move. It's spring loaded and when I got it off, all the parts fell off in my hand. Then I got smart and spun the remainder off of the air line. I tried twice to put it back together, but I just don't have enough fingers or hands. They aren't super expensive, and I'm not 100% certain the old one worked anyway. So, I'll put a ne one on (unless someone has a trick I can use to get it back together). Pictures of my shame.
IMG_0531.jpg
Where it started.

IMG_0532.jpg
Now that I look at this picture, I can clearly see the word "line".

IMG_0533.jpg
Really, this needed cleaned up anyway.

IMG_0534.jpg
And there's the pieces....

IMG_0535.jpg
Starting to get back together. I figured out where the little tabs go and their orientation.

IMG_0536.jpg
I can hold it together, but then can't get it back on the mounting plate without that flat piece coming loose.

Now I'll get into the interior and the panel bond.
 
OP
S

ScepterToad

Well-known member
Joined
Nov 9, 2023
Messages
340
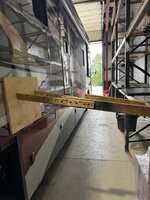
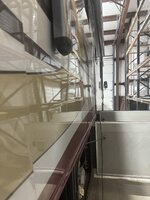
So, interior just cleaned up and I removed the part of the wall next to the sink base and medicine cabinet. That needed to come off so I can start nice and flat. Unfortunately, this means that I'll have to **** the plywood up against the medicine cabinet, so it won't look "factory", but it'll be close. On the panel bond, I mocked up the plywood on the side of the coach and braced it against the pallet racking (after turning the coach around). Looked OK, so I broke it down. Next problem was that the mixing nozzle wasn't long enough to get to the top of the delamination. SO, I took a piece of clear tubing and stuck it on the end of the nozzle. I then took a piece of wire and secured it to the end of the hose so I could shove the floppy hose up in the wall cavity. I thought to myself, I should clamp that hose onto the end of that nozzle so it doesn't fly off. Did I do it? Nope. :dunno:

So, I shot a bunch of panel bond up into the cavity, after fighting the hose on the end (and eventually clamping it) to the point that it started to drip out a bit. Then I removed the extension hose and put a nice bead at the bottom where the sidewall sits on the metal frame. Stuck my plywood and blocking back in, and took a look. Needed more plywood. Grabbed another piece quickly and set it up as well. Then I added more to the bottom seam where the metal frame and trim piece on the sidewall sit together and the smoothed it out a bit. I think that will get it back together and hopefully it's as flat as it can be. One thing is for sure, that 3M panel bond is pretty permanent and won't likely be able to be removed or modified without significant removal of the sidewall. I'm still all puckered up over it. By far the most risky fix I've ever done to a camper, RV, boat, or car. Everyone cross their fingers.
All in, I think I made the right decision to fix it this way. As much as it freaks me out, this is the only way I could think of to make the best fix possible without removal of the entire sidewall of the coach. I'll also be looking at adding a bead of silicone along the bottom of the entire coach to keep any water out from the bottom of the sidewalls. Hopefully I never have this problem again.
IMG_0524.jpg
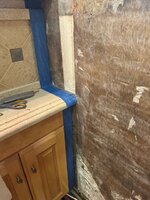
Had to remove this small piece of trim for the counter.
IMG_0539.jpg
I re-used this old piece of wood I drilled holes into when I rebuilt the 12V Cummins that's in the Excursion. I knew I saved it for a reason!
IMG_0540.jpg
Mockup of the blocking
IMG_0541.jpg
Terrible picture of my tubing control wire

IMG_0542.jpg
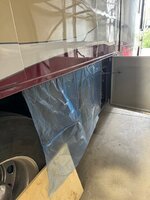
Glad I put up this plastic as the panel bond drips and gets everywhere.
IMG_0543.jpg
Final blocking. You can see the drips on the floor and the hose sitting there.

IMG_0544.jpg
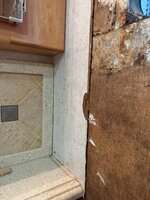
This is the last little bit of wall I had to remove. No way I was gonna try and get that backsplash out. Probably never get it off without breaking it.

Those are the weekend escapades. At least the humidity wasn't too bad over the weekend.
 
OP
S

ScepterToad

Well-known member
Joined
Nov 9, 2023
Messages
340
Had to go over to the shop today and grab a few things. Went ahead and pulled the blocking off the side of the coach and checked it out. It’s not perfect, but it’s pretty darn solid. There is one small wave in it at the bottom but I’m fairly happy with it overall. And it’s solid as a rock now.
 

Attachments

  • IMG_0556.jpeg
    IMG_0556.jpeg
    560.3 KB · Views: 18
OP
S

ScepterToad

Well-known member
Joined
Nov 9, 2023
Messages
340
Good job Keith. Looks like you have avoided having to do any paint work, which is always a plus on these large canvas'.
Thanks Mike! No paint work at this point, but as I'm sure you're aware, these coaches get imperfections in them over time. Someday I'll be headed down the paint rabbit hole. There are a ton of rock picks in the front that will need addressed.

Hopefully this weekend I can get some significant traction on the interior and finish this project up. Still plenty of time left in the year to do a few more trips.
 

zmotorsports

ALLIANCE MEMBER
Joined
Oct 20, 2009
Messages
21,441
Location
Northern Utah
Yeah, mine has a few rock chips on the nose as well over the past 7 years and about 45k miles since I had it painted. I can live with them for now as they are few and minor. What I am really most pleased about is the fact that I don't have any on the rear of the coach, even in those miles. The rock guards that I fabricated and installed on my Jeep completely eliminated the rock chips on the back of the coach and front of the Jeep that I was getting previously.

I do have a chip in one of the compartment doors that bugs me. I touched it up with a small detail brush for the time being because I don't want to sand the entire storage bay door down to paint and clear but I see that needing to be done in the future. 🤬
 
OP
S

ScepterToad

Well-known member
Joined
Nov 9, 2023
Messages
340
Didn't get much time in the shop this weekend. Lots going on these days and I needed a bit of downtime on Saturday and the yard needed some attention as well. Coupled with an evening out to watch a movie and grab dinner, Saturday was gone. Hit it Sunday for a bit and managed to get one wall put back up with luan. First up, we settled on a wallpaper to put up. And the bonus is that it's a big enough roll to to the entire bathroom if we decide to. We ordered from the local Sherwin Williams, which is the only place in town left who seems to have actual samples you can touch and feel. The roll comes 54" wide and 30 yards long, which a LOT of wallpaper for this small bathroom. It's a pasted wallpaper, which is what I wanted because I think it'll stay in place for way longer. Plus, it's a pretty darn nice wallpaper.

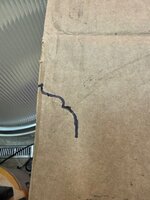
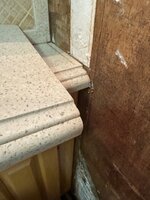
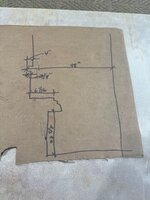
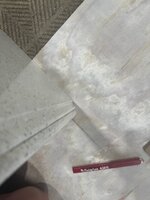
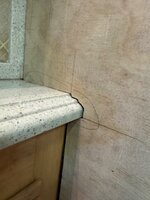
I had purchased 4 pieces of 1/8" luan (plywood) that were 4'x4'. They were not square. Not a shocker. I found one that was at least square on two sides and worked from there for the first piece. The hardest one. The total width of the bathroom was 48", which was nice, but that was only in one small place, about 7/8" tall. From there, the shape was a bit wonky and the hardest part was the profile of the countertop. Being that I didn't pull the sink base and countertop and backsplash, I had to go around. I lost a bit of depth in the bathroom, but overall it's not too bad. I tried to scribe the profile, first with a pen taped to a set of dividers and that didn't really work. Then I just used the sharp point of the divers and tried to score the cardboard. That only worked a little bit. Searching around for an alternative, I realized that the perfect profile was just under my nose....or on top of the stove at least. We have a corian cover on the stove (as most RVs do), which I used as a profile. Worked out pretty good, once I worked out the orientation of everything. I measured and drew up a template that I could use to transfer to the luan. After a couple of iterations, I got it pretty darn close and went to cut it. Unfortunately, my jigsaw was at home. It's one of those "home" tools that I really wouldn't use on a normal basis at the shop, so it never made the trip. Not to worry though, I managed to cut it all out by hand. And not terribly difficult either. Any of the hard parts (like the counter profile) were easily cut with a razor knife. Once I got that set into place as best as I could (after several iterations), I sprayed the wall and then the luan and stuck it in. I had prepped several clamps in the reverse orientation with some blocking, but I didn't end up needing it. I did have to split that first piece in half as it wouldn't fit in the door being just as wide as the bathroom itself. So, it went in in two pieces. From there, I measured and cut the top piece and finally the other wall (which I didn't get put in yet).

I have a brad nailer that I'll use to get the back wall put up. From there, I'll fill in cracks with caulking so I get a smooth transition to all of the wall corners and the cabinets. There are a few minor gaps which shouldn't be a problem. From there, I should be able to sand it smooth if necessary and then apply the wallpaper. I will have to rough up the vinyl wall covering that exists from the factory on the other two walls, but I'll have to find a method by which to do that. I have read somewhere that the luan needs sealed prior to applying the wallpaper, but the guy at SW said that it needs a porous surface. Not sure the sealer would keep that. More research is needed.

Next weekend, hopefully I can get some more traction on this. I still need to reinstall the rear fender and battery compartment door. The coach also needs a thorough washing. I may grab a small electric pressure washer and just pull the coach out to the parking lot and give it a good wash. Would like to check all the exterior seals before I go spraying water everywhere. I don't need a leak after all this.

Other projects that came up this week already is my buddy's 17 Ram. I drove it a few weeks ago and the steering felt a bit weird a couple of times. Quick and it went away. However, he's got some noises when turning left. I suspect that he's got some parts wearing as it has ~118K on it. We'll have to pull that in the shop and get it up on jack stands and see what's going on.
IMG_0567.jpg
First cut at a template. Didn't work very well.
IMG_0570.jpg
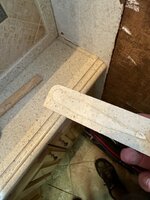
Stove cover works well as a template. Though, I figured out later that it was not quite as think.
IMG_0571.jpg
My makeshift drawing.
IMG_0572.jpg
Easily traced the stove cover once I figured out how to place it and get it square.


IMG_0576.jpg
First fitup. Had to trim a few small areas to get it right.

IMG_0577.jpg
I'll live with that. Any gaps will be filled with caulk to make a nice even transition. Once I get the trim piece back on, it'll look like it's always been there.

IMG_0579.jpg
Nothing is square. This will get filled in, and there's a wood cover for the wiring/plumbing along the bottom of the wall.

IMG_0580.jpg
That'll cover up the bottom of the new luan and be installed after I get the wallpaper up.

IMG_0585.jpg
Taped all of the counters and woodwork up. That white haze is the contact adhseive.
IMG_0587.jpg
First wall finished out. I'll add the other wall next weekend.
 
OP
S

ScepterToad

Well-known member
Joined
Nov 9, 2023
Messages
340
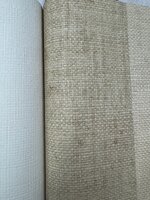
This is the wallpaper we decided on. It matches the woodwork and the corian counters (at least on comparison to a picture). If I get it and don't like it, I can return it. It's the brownish one here. Certainly a quality paper. We'll see how my hand at hanging it is. Lots of little corners to go around, so if anyone has pointers, I'm all ears.

IMG_0559.jpg
 
OP
S

ScepterToad

Well-known member
Joined
Nov 9, 2023
Messages
340
Not a lot going at the shop this weekend as I took some time to have some fun. Friday night we went and saw Luke Combs down at the stadium here in town. He puts on a really good show. Found a guy I've been friends with for forever down there, so we go to hang out for the evening. Saturday night, we had dinner with a friend and went to a comedy show. In between, I worked on the coach a bit and then swapped out the two front bearings on my buddy's 17 Ram 3500.

First up, the coach. I managed to get the wallpaper in Saturday morning and picked that up. Headed out to the shop for a few hours and monkeyed around with the luan and didn't get very far because I forgot a few tools and forgot to stop and grab some caulking for the joints in the luan. So, I prepped a few things for the next day. Sunday, I managed to remember everything along the way.

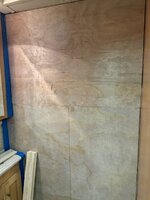
First up, the fender install. I painted the rear frame where the door and fender connect after some love from the wire wheel. Put the piece of angle back on which the fender screws to and hit that with some bed liner on the inside. While that was drying, I worked on the clearance light wiring. I didn't want to fight **** connectors while trying to hang the fender, so I opted for some blade connectors. Put those on each wire and hit it with some shrink tubing as well. From there, I pushed the dock light wires back through the hole and hung the fender. Three screws on each end and one at the top, then the tubing that attaches at the bottom to keep it from flopping around. All of that went fine. I did have to source a new screw as one was missing. After I got everything lined up with the top of the other door, I tightened up all of the screws. From there, I used exterior caulking (in black) to fill in the gaps at the front and rear of the fender. After that, I connected the clearance light wiring and taped that up. In hindsight, I probably should have used another piece of heat shrink on it to seal it up good. I may still do that. Then I used spray foam and sprayed the angle along the inside of the fender as it was from the factory. I suspect that's for vibration and to keep everything sealed up and stable. I don't need the fender flexing and cracking the exterior finish. Once all that was in place, I put the battery tray door back on. Unfortunately for me, when they put it on at the factory, someone must have screwed up and drilled the holes in the wrong spot. So, it took me a second try to get in on there and in the right holes. Since I had painted it, I couldn't' see which holes were previously used. From there, I moved inside to put the last bit of luan up on the back wall. Had to take one small piece of trim off at the bottom to get it to seat down properly. I used brads to secure it. After that, I filled in the small gaps with caulking. The only thing left is the window opening. I tried to use a drywall cutting tool (rotary) and I think either the bit is too dull from use (not likely) or the bit just won't run in the luan. So, I tried a hand saw, which worked somewhat, but I need to go around the rounder window corners, so I'll get the jigsaw next weekend when I go to hang the wallpaper. I didn't manage to get very many pictures of the install, but here are a few. More on the Ram up next.


IMG_0628.jpg
I think this wallpaper will look pretty good once it's all up and installed.

IMG_0629.jpg
Seems to match the woodwork as well.

IMG_0631.jpg

Wad of wiring. Once I took it apart, I realized that most of it is for the docking light.
IMG_0635.jpg
Spade connections installed coach side.

IMG_0643.jpg
Rear of fender with paint and caulking.

IMG_0646.jpg
Final install complete.
 
OP
S

ScepterToad

Well-known member
Joined
Nov 9, 2023
Messages
340
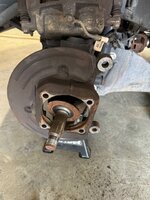
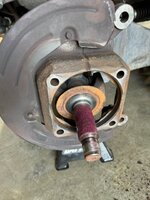
On to the 17 RAM. My buddy had me ride in it last week and we heard what sounded like a brake dragging or a squealer on the pad just touching. He had the brakes done last year at the dealer after they scared the **** out of his wife with the "you're gonna not have brakes" speech. Several thousand dollars later, they had new brakes. Unfortunately, I didn't get to them before they pulled the trigger. So, it kind of sounded like a brake. But, it wasn't. I jacked it up in the office parking lot and the passenger wheel was walking around all over the place. That explained why the truck wouldn't coast and you had to stay in the throttle all the time. Bearing was shot. So, I hit the other side and while not as bad, it was still loose. We ran to NAPA and picked up two of their unit bearings in the fleet product. He brought it over to the shop Sunday and we tore into it. I'll admit, I don't normally ask for help working on **** and would just as soon do it myself. However, it was nice to have an extra set of hands to get these changed out. We put the truck up on jack stands, stripped the wheels off, and got to it. The caliper bracket bolts were pretty tight, but other than that, the bolts came off fairly easily. Pulled the caliper/bracket and all and wired it up. The passenger side rotor got the BFH treatment as it did NOT want to come off. I guess when you pay $2K for brakes, that doesn't include cleaning up the bearing surface or any anti seize between the two. :bitchslap

From there, we ran the axle nut off and then pulled the 4 rear bolts holding the unit bearing in place. The unit bearings came out fairly easily (again with the BFH). We cleaned everything up with a wire wheel. greased up the splines of the axle shafts, applied high temp anti seize to all of the surfaces, and bolted it back together. Unit bearings came with new ABS lines as well. No hiccups in the install and everything works much better. Truck coasts easily, no more small wobble in the wheel, and no more noise. He says it's smooth as glass. Took about 3 hours all in, which wasn't too bad. All fasteners torqued to spec and blue loctite used where applicable.

IMG_0647.jpg
NAPA unit bearings
IMG_0649.jpg
This side took some serious persuasion from the 12lb sledge.

IMG_0650.jpg
Picture of the ABS sensor wire routing. I have an adapter to grease this type of "non-serviceable" bearing, so I'll hit it once a year with a little grease and hopefully these will last a good long time. Factory set made it ~120K, which isn't terrible. Much easier to pop the sendor and grease the dang thing though.

IMG_0651.jpg
More wiring routing.
IMG_0652.jpg
And again.


IMG_0653.jpg
Cleaned all this up before install.

IMG_0654.jpg
I do love a good wire wheel on parts.

IMG_0655.jpg
All back together and ready for brake install.

Next weekend, wallpaper! I think we'll go ahead and do the other half of the bathroom while we're at it, so it all matches. I do need to order the paste and primer. They wanted $60 a gallon for it at Sherwin-Williams. X3, that's more than the wallpaper costs. Amazon has smaller quantities for less money, so I'll go that route. Then I can relax for a while.
 
Last edited:
OP
S

ScepterToad

Well-known member
Joined
Nov 9, 2023
Messages
340
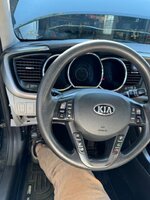
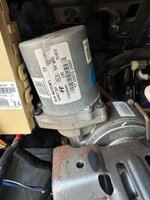
Hope everyone had a great weekend! I took a bit of time off from the shop this weekend to get some stuff around the house completed that I've been slacking on. We started with some yard work and getting the flower beds cleaned up a bit. From there, I moved to one of the kids cars. '13 Kia Optima that had the steering wheel shake that they all basically got early on. Kia was fixing them under warranty at that time, but that's long since run out. Essentially, the steering is electric motor assist and there's a small rubber(ish) bushing between the motor and the steering mechanism. She had someone look at it and he told her it would take 4 hours to swap the part and that the dealer would charge her ~$2500 to fix it. I did a bit of research and realized that the fix wasn't really that hard. So, I dug in.

Essentially, the steps are easy. Pull the lower dash, remove the metal safety plate, remove all the wiring from the column, two bolts and two nuts, and the column comes down, exposing the motor. 3 T30 screws holding it on, remove and clean, place the busing, put it all back in reverse order. Overall, the hardest part of this was two things: 1. Making sure the wiring was in the correct place and/or removed and pushed out of the way so that the column could come down;. and, 2. There's a pesky hook on top of the column that needs to be pushed into a slot when installing. If you don't get it in there, the column will not go into place.

I took a bunch of pictures of the wiring so that I wouldn't forget how to put it back together. A word of caution, the air bag must be disconnected during the process, so get that battery disconnected as soon as possible. You will have to turn the wheel side to side to get two screws out of the plastic column enclosure, so I did that first and last. I took a ton of pics on this one.

IMG_0673.jpg
IMG_0675.jpg
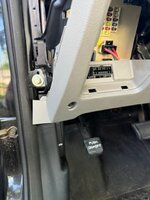
Lower dash is pretty straightforward. There's a side panel and front panel that just pop off.
IMG_0676.jpg
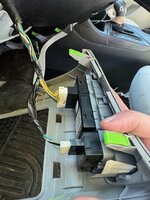
Remove the plugs on the back of the panel.
IMG_0677.jpg
The OBD port also has to come out.
IMG_0678.jpg
The steering shroud also has I think 4 screws. Two on the bottom and two behind the steering wheel itself.
IMG_0679.jpg
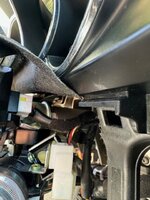
From there, you can remove the steel panel. Just 4 10mm bolts.

IMG_0680.jpg
After that, you can pop the shroud into two pieces and remove the bottom. The top doesn't come off, so a small bungee helps keep it out of the way while working.
IMG_0681.jpg
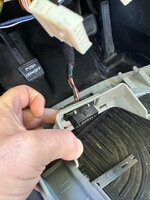
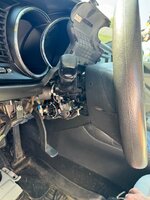
That ********* plug needs to come apart, along with the other wiring around the wheel for the two stalks, key, airbag, etc.
IMG_0682.jpg
More pictures of the wiring so I didn't forget how it goes. More to come.
 
OP
S

ScepterToad

Well-known member
Joined
Nov 9, 2023
Messages
340
Moving along to the rest of the disassembly.


IMG_0683.jpg

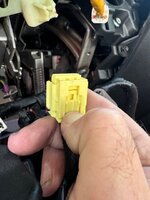
That yellow connector there is the airbag. It has a different mechanism for unlocking that I wasn't familiar with. Took me a few minutes to figure it out.

IMG_0684.jpg
Each layer of connectors seemed to expose more connectors.

IMG_0685.jpg

IMG_0686.jpg

Right side of the column. I did save the airbag for last.

IMG_0687.jpg
IMG_0688.jpg
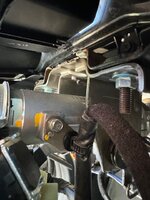
I couldn't get this standoff to come loose, so I just removed the screw with an 8mm wrench. No room to get a screwdriver up there.

IMG_0689.jpg
Airbag connector had to be pushed in....

IMG_0690.jpg

And then slide down and it came right out.

IMG_0691.jpg

More wiring disconnected.

IMG_0692.jpg

After the wiring, I pulled the 2 bolts and 2 nuts out and the column laid down and the motor was exposed.

More yet.
 
OP
S

ScepterToad

Well-known member
Joined
Nov 9, 2023
Messages
340
Last bit. The screws to get the motor off were pretty straightforward. The one in the back was a bit of a pain, but I was still able to use a 3/8" ratchet and short extension to get it removed.

IMG_0695.jpg

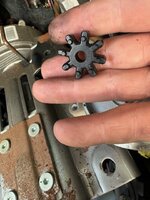
This is the small bushing that goes between the motor and the column mechanism.

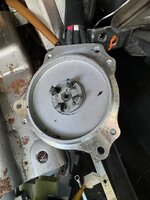
IMG_0696.jpg
It just sits in there and the motor goes in the open spaces.

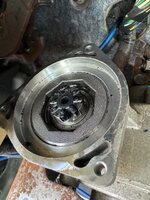
IMG_0697.jpg
This is the motor side. Had to clean all that rubbery mess out before putting it back together.

IMG_0698.jpg

This is the hook. Once I figured out that it needed to get up into the frame under the dash, it was just a matter of sliding it in. After that, I could rest a bit as it just hung there in position. I did have to remove the connector of the ECM (I think that's what it is) to get it all back in there.

All in, not a hard job and I did it in just under 2 hours taking my time. So, in my vie, a dealer should get this done in at least that time, if not shorter. Not sure why they charge so much, but that's the way it is.

No more clicking back and forth on the steering and most of her vibration is gone. I'll need to check up on her brakes as she still has a small shudder when braking so she may have a warped rotor. 130K on the car and for being the car of a teenager and now early 20 something it does pretty well. She paid for it with her own money, so I can't complain.

More to come from the weekend as we managed to get the wallpaper back up in the coach. Super excited that project is about complete.
 
OP
S

ScepterToad

Well-known member
Joined
Nov 9, 2023
Messages
340
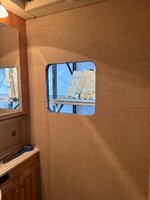
On to the coach. I spent some time Sunday morning relaxing and drinking coffee before we headed over to the shop. We gathered up some relevant house tools to get the job done and secured a few new razor knives to cut the wallpaper with. You want to make sure that you have nice sharp tools for this as you need to work fast and be very accurate with cuts. This was the first time I've hung wallpaper and I'm not sure (outside of the coach) that I'd ever do it again. I had caulked and primed the surfaces using a porous specific and non-porous specific primer for the luan and the wallpaper. The one roll was just barely enough to do the toilet room in the coach. I also didn't get very many pictures as we really had to work quickly. The high tack paste dries pretty quick. When hanging a solid piece, it's not bad, but we had to cut around the counter, sink base, and medicine cabinet on two pieces, which took some time. The extra set of hands from my better half really worked out well and she was a great help. Without that, I wouldn't have gotten it done nearly as easily, if at all. All in, I think that the wallpaper matches up pretty good and we're happy with how it looks. Next weekend, I'll reinstall the window, trim , and cabinet. Then it's to the outside to make sure this old girl is sealed up tight. I've got a few more trips planned for the rest of this year and fall is one of our favorite seasons to camp in. Rain is common and I don't want any leaks.

IMG_0704.jpg
First piece up and cut in.

IMG_0705.jpg
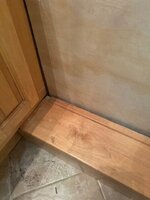
Around the countertop was a bit of a challenge, but it turned out pretty good.

IMG_0706.jpg
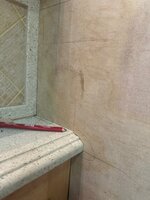
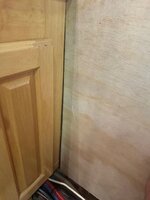
Can't see the seam unless you really look for it. Lighting is terrible, but you get the idea.

IMG_0708.jpg
A little better lighting on this one. I'd say it matches up pretty nice. That white you see on the cabinet is the caulking, which I'll take care of when I get it all put back together.
 
To avoid these ads, REGISTER NOW!
Top Bottom