To avoid these ads, REGISTER NOW!

Scepter's Shop Build and Projects

OP
S

ScepterToad

Well-known member
Joined
Nov 9, 2023
Messages
340
Been a crazy few weeks at work, so I haven't been doing much shop style projects at the shop. I did manage to get the oil changed int he Jeep last weekend. It was about 500 miles over.

This past week and weekend, I've been loading up the box trailer at the main office so we can move some things to the secondary (shop) space. We have an office there too now, which will get outfitted at some point from stuff here. You can accumulate a LOT of stuff in an office if you've been there since 2002. So, we loaded the trailer last week and I unloaded at the shop on Saturday and put it all into storage on the pallet racks. 4 full pallets worth. Not having a forklift meant being up on the ladder and loading by hand, but it wasn't too bad as I had a bit of help.

On the shop front, I've been looking for bins or other storage solutions for the growing amount of stuff I have over there. Most recently, I've acquired several more buckets of bolts from my dad's collection. So, I need a place to store that stuff. I've look on FB marketplace about every day and something came up last week that caught my eye. A set of steel cabinets with 5 drawers each. 33" deep and 45" wide. $150. Score!

Messaged the lady and they were pending. ****. But, she had another set that was smaller. So, on Saturday I picked those up. $100 bill later, and they were loaded in the Excursion. I got to looking at them and looking past the dumb blue paint on the front, I realized they were really close in color to anything I would have seen in the AF. Green. And heavy. There was also a stencil in yellow on the side of one. As I pulled them outside, I realized that the base has "Property Air Force United States Army". I'm awful close to Wright Patterson AFB and there was also a sticker on the top indicating Dayton, Ohio. The Air Force and Army split in 1947 so I figure this set is at least that old. Pretty cool! I haven't set them up yet as they need a small amount of work. One or two if the drawers need some straightening and I want to clean up the slides as well.
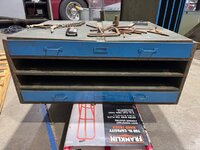
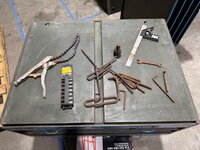
IMG_1364.jpg
IMG_1365.jpg


Also, these tools were floating around inside. That's a set of Craftsman torx sockets there. The look to be unused.

Anyone know how to get that blue paint off and not ruin the green underneath???

IMG_1366.jpg
The base they sit on.


IMG_1367.jpg
This is the top that sits, well, on top.

IMG_1369.jpg
All in, a really good score.

But wait!!

She messaged me yesterday and said the guy who had these didn't communicate with her. So, next Saturday I get to go get the bigger set! I stopped by her house and gave her a deposit. I'll need an extra set of hands to get these out of her basement.

IMG_1384.PNG

I'll also start noodling on a base for both sets. And an actual use for them. I'll want them on wheels for sure.

More to come!
 
To avoid these ads, REGISTER NOW!
OP
S

ScepterToad

Well-known member
Joined
Nov 9, 2023
Messages
340
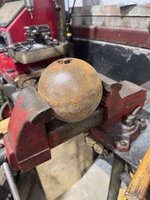
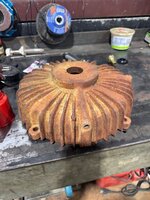
Another project I have goin on in my little brain is an armorers anvil for my friend. He's taken to making leather armor sets as a hobby and built a helmet as a surprise for his nephew. He needed to smooth out a seam and didn't have anything he could use to back the round shape up with. We talked about it and I then asked my parents if they happened to have a round ball, around 6" in diameter. Have UI mentioned that my folks like to scrap stuff and collect things? Turns out, they had a weight ball off of a metal brake that was used as a counterweight. 5.5" in diameter. So, I got that from them and an end off of an electric motor my mom surely scrapped the copper out of. I'll turn a post to fit the ball and the base and fix it up. On Sunday, I took a bit of time and started cleaning up the ball.
IMG_1374.jpg
This is the base I'll use for the armorers anvil build.


IMG_1375.jpg
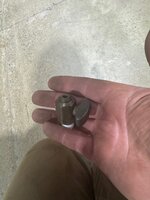
The ball had a set screw in it that was siezed. I didn't want to break it off, so I put some acetone/ATF in it and 5 minutes later, it spun out.

IMG_1376.jpg
IMG_1383.jpg
Ball cleaned up. To really get it looking good, I'll have to hit it with the sandblasting cabinet. Next project!
 
OP
S

ScepterToad

Well-known member
Joined
Nov 9, 2023
Messages
340
And the final project I monkeyed with was the air compressor. I've had the parts for this for a while, but I've been putting it off. Sometimes I just need a weekend.
IMG_1377.jpg
Plates cleaned up fairly well. I did do a bit more cleaning on these.


IMG_1378.jpg
Reed gasket oriented.

IMG_1379.jpg
Gasket placed on the jug.

IMG_1380.jpg

I used the head bolts to assist keeping everything together to put the stack on the head. Then I screwed the bolts in the top that hold it all together.

IMG_1381.jpg
Also put this back together. I used a bit of black RTV as I didn't have a new gasket. If it leaks I'll get a gasket and redo it.

I didn't get a picture of the head on, but that's where I left it. I torqued the head bolts to 20 ft/lbs. I didn't really have a source for that, but it felt about right. We'll see how it goes.
 
OP
S

ScepterToad

Well-known member
Joined
Nov 9, 2023
Messages
340
Well, life has been such lately that shop time is few and far between. Unfortunately. I managed to get out there for a bit this weekend for part of Sunday and take care of a few items for our upcoming trip to Destin for the first week in April.

This past winter, I didn't winterize or otherwise "lay up" the coach. Perks of having a heated shop, but it also kept me from going over the coach at the end of the year. It's not unheard of us taking an impromptu winter camping trip to get away for the weekend, so I wasn't too worried about it. However, with life and work, none of that happened. I don't suspect anything wrong with the coach, but it's a risk to put these things off.

So, at a minimum to make this trip, I needed to make sure things are serviceable and as ready to roll. To that end, I did a chassis inspection, making sure that I get eyes on all components possible and grease all fittings under the coach. I had noticed that the small air tank for the air suspension leaked, causing the pump to run off and on. The brass drain valve was not holding pressure.

I pulled it off and cleaned it up. I had repaired the tank a while back from a pinhole caused by rust (condensation that didn't get drained). Apparently, the PO forgot to do that regularly. When I pulled the valve out, a bunch of crusty metal was stuck in the valve body. I suspect that the rusty metal scored the soft brass. I tried to squirt some PB blaster in there and work it back and forth, reinstall, and air it back up. Valve still leaked. So, off to the parts bin, where I knew I had one for an air compressor I had gotten late last year. Worked like a charm.

From there, I got under the coach and checked everything out while greasing all the zerks. No issues noted and got everything greased. One thing I do want to do is tear the steering column cover out at the drivers seat and check that out. I'll probably do that as a rainy day project on vacation.

Moving on to the Jeep. I've had a nagging "clunk" for a while now. I've been under there 3 times with a prybar poking around on suspension parts to see if something is loose. I could never find anything. To make matters worse, the noise was never from the same place. Sometimes, it sounded like passenger side middle of the Jeep, sometimes from the front, sometimes from the back. I never found anything, until now. The ball joints I put in when I got the Jeep 2 years ago are starting to go. Specifically the bottom. I jacked up the front and put a prybar under the tire. Sure enough, a small amount of movement.

Here's where I admit to my own screwup. I used to have a tow dolly that used a special grease in the bearings. I rebuilt those before selling it and used the special grease in one of my grease guns. I used that grease on the ball joints. However, that particular grease is more like grease mixed with motor oil. So, I suspect that it leaked out and the lower ball joints took the brunt. The drivers side had definite evidence that the grease had leaked out.

I went back at it with a proper grease and we'll see if they are too far gone. Certainly less noise this morning driving to work, but time will tell. Regardless, when I get time, I'll have to replace them. If anyone has a favorite brand, I'm all ears. I'm also looking at the ball joint deletes that are available and some Jeep folks like.


IMG_1453.jpg
New valve installed. Coach is in serious need of an undercarriage wash. This area is right up front and gets beat on pretty good.

IMG_1454.jpg
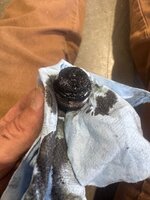
Old brass valve. I may get another of this type for a spare as all of the other water vents are this type. Overall, they're a really good quality valve. I think this one just got junked up too much.

More to come.
 
OP
S

ScepterToad

Well-known member
Joined
Nov 9, 2023
Messages
340
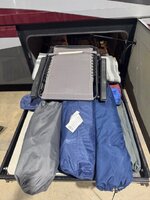
I also needed to switch out some of the outdoor furniture/accessories in the basement. This prompted a cleaning of the slide out tray, a chair fixed, and a weird thing investigated.
IMG_1455.jpg
We keep a LOT of stuff in this slide tray. Too much for my taste, but my better half wants it, so we take it. She's really in charge anyway, so I don't know why I complain.


IMG_1456.jpg
Lots of leaves and junk in the tray.

IMG_1458.jpg
Nice and clean. New ladder replaced the older fold up step ladder.
IMG_1459.jpg
This chair has seen better days....luckily, I don't throw things away and I had the old bolts...


IMG_1460.jpg
And I cut down some M4 machine screws to replace the ones that went missing.

IMG_1457.jpg
Screw cut and ground

IMG_1461.jpg
Chair functional again.

On to the weird. The slide tray has locks that you push down to open it. On the side, I had noticed before that the roll pin sticks out quite far. I tried to drive it in with the lock in place, but there just wasn't great room in there. So, I took it out and apart. Turns out, it's just a really long roll pin. And both ends are like that.

I didn't cut it down, but in hindsight, I probably will. That way I have a spare or two.

IMG_1462.jpg
Weird that they both stick out this far. I figure it had worked out of the plastic.

IMG_1463.jpg
Removed

IMG_1464.jpg

And that's just the way they made it. I pulled it all apart and the hole is about 3/8" deep.


That should mostly get me ready to make the trek down to Destin. I'll do some more checking next weekend just to be sure. Thanks for looking.
 
OP
S

ScepterToad

Well-known member
Joined
Nov 9, 2023
Messages
340
Aaaahhh. The joys of Jeep and RV ownership Keith. I'm getting ready to go over the coach myself and perform a little routine maintenance before our first trip in April.
I wouldn't trade it for anything though Mike. My only complaint at this point is that I don't have MORE time to get over there and get more done. I could scrape and paint on the chassis for weeks.
 
OP
S

ScepterToad

Well-known member
Joined
Nov 9, 2023
Messages
340
I almost forgot....another project to add to the list. I got the drawer sets in place at the shop. I'll put these both on frames with casters so they can be moved around once I fill them up. Haven't quite figured out how to get the blue paint off of the one on the right. I'd like to take it back down to the green color. The larger ones on the left will likely get painted to match my toolbox (red).

Should be a fun project.
IMG_1419.jpg
 
OP
S

ScepterToad

Well-known member
Joined
Nov 9, 2023
Messages
340
Nice looking drawer sets Keith. What is the drawer configuration like? Small, medium or large dividers, or are they selectable?
Thanks Mike!
The one on the let came out of a card factory in Norwood, Ohio. So, it doesn't have any dividers at all. I suspect it was used for artwork as there was a playing card factory here in town for a LOT of years.

The one on the right came out of (I'm sort of guessing here) Wright Patterson AFB. The tag on the top is from a company called Systems Research Laboratories, Inc out of Dayton, Ohio. I haven't found much from them, but I did find a complaint lodged through the USAF related to SRL's work with the Energetics Research Lab out of Wright Patt. What little I could find relates to pictures taken by SRL and submitted to Energetics.

The Energetics lab is (was) related to the study of ordinance and munitions (best I can tell).

In any case, the drawers on this wone are also absent of any sort of dividers. I think they alos may have been used to house large scale pictures or drawings.

My plan is (once I get them cleaned up and a little more functional) is to make dividers by either 3D printing or coroplast. Coroplast might be "easier", but if I can get a little more knowledge on 3D printing, I can make a much more versatile (and probably stronger) system for dividers. I'll mostly use these for nuts, bolts, and other supplies I use around the shop that will fit into the small drawers. Plan is to separate the buckets of bolts I have into thread sizes and lengths.

Sorry for the long winded reply to a simple question...
 
OP
S

ScepterToad

Well-known member
Joined
Nov 9, 2023
Messages
340
Just got back from a week down in Destin, FL. While my kids are grown, my in-laws have younger kids that get a spring break each year. They've been to Destin 3 years in a row now and this was our second time. The campground is nice and the sites we get are on the water and mostly private.

IMG_1490.jpg

IMG_1491.jpg
Views from the campsite. Not all at the RV park have this, and they are hard to get (at least a year in advance.

We're not sure we'll continue here as we like to hit other places. Also, the weather is hit an miss this time of year. Most days were warm (mid 70's) and about half were sunny with the other half cloudy. One day of storms, during which I flew a kite on the beach for the first time in years. I also learned that if there's lighting in the area that you can get a pretty good static shock while flying a plastic kite. That was fun.

No issues with my coach down or during the week. My BIL had a battery **** out (chassis battery) and start emitting sulphur smell. He was able to get it warrantied at the local Ford dealer (F550 based super C).

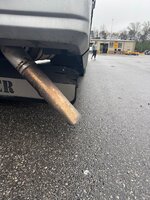
On the way back, at a fuel stop walk around, I noticed that my tailpipe was hanging down. I had already figured out that because I set it too far forward when I replaced it last year that the mudflap was contacting it and melting it a bit (wind pushing the flap back). At the fuel stop, it was hanging down.


IMG_1505.jpg
I pulled it up (with difficulty) and figured that would be that. Wrong. About 45 minutes form home, my BIL calls me on the radio and says "your bumper just fell off". WHAT?!? No, your tailpipe came off and it went right under my coach. Right down the middle.

We pulled off a the next exit and checked everything out. No damage, thankfully. Hopefully it went off the road and didn't cause any other issues. I have half a mind to try and find it on the side of the road. That tip is expensive. The 90 elbow was bad enough.

So, lessons:

1. Weld your pipes. Don't rely on a band clamp (VERY widely used on semi exhaust systems).

2. Keep your pipes away from flaps.

Then, when we got back to the shop the dang step is flopping. So, two projects added to the top of the list for the coach.
 

zmotorsports

ALLIANCE MEMBER
Joined
Oct 20, 2009
Messages
21,441
Location
Northern Utah
Glad to hear you were able to get away and enjoy the coach Keith.

As for the exhaust, if you remember back on my thread when I installed the Banks exhaust system on an LB7 Duramax a couple of years ago, I showed adding a couple of small stitch welds to the joints after getting everything clamped in place. It prevents this exact issue from happening, yet in the even the exhaust needs to be either removed or "tweaked" the stitch welds can be easily cut with a .035" cutoff disc.

I add a couple of strategically placed stitch welds to any exhaust joint for this very reason. I think it is just a good overall practice.
 
OP
S

ScepterToad

Well-known member
Joined
Nov 9, 2023
Messages
340
Hope everyone had a great weekend! We took the weekend to head up to Catawba Island with a friend and his wife as they prepare for the summer season up there. Plus, the Catawba Island Boat show was this past weekend, and at $10 entry fee to step foot on some really nice boats, eat some great lobster bisque, and have some fun we couldn't pass it up.
I also helped my buddy get some maintenance items done on his boat while up there. He's been piddling with it all winter as he has inside heated storage and had a few items left to get going on. While he crawled around doing the "outside" spark plugs are wires, I pulled each of the raw water pumps off and replaced the impellers. Overall, not a bad job except you're sitting in a bilge bent over trying to fish bolts out the back side of the pumps with a box end wrench. Not even enough room to get a ratchet wrench in there. 1/4 turn at a time. But, I can't complain. I'm happy to help out a buddy and as much of a pain as it is, it's still fun to me to sit in a boat and wrench. Other projects included pulling the house batteries and servicing them and cleaning up the bilge. Plus, with a view like this, you can never go wrong.

IMG_1529.jpg

IMG_1528.jpg
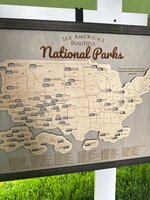
I'm not normally one to buy stuff at shows, but we finally found a National Park picture with each park on it and this one has a little camper that goes in each one. Pretty cool and we'll hang this in the house and load up the ones we've been to.


76738454070__5BA82795-0522-48D1-9C13-CB530789A19E.jpeg
It also has the date at the bottom that each park was founded.

Thanks for looking.
 
OP
S

ScepterToad

Well-known member
Joined
Nov 9, 2023
Messages
340
Hope everyone had a great weekend! Summer seems to be right around the corner, but we've had relentless rain for what seems like 2 weeks now. Sod that I put down in the back yard is loving it, but it's a pain for everything else. I shouldn't complain.

Spent a few hours in the shop over the weekend but didn't get too much done. More of a planning session. Since I lost my tailpipe, I had two options: 1. Build my own; or, 2. Buy another 90 and a chrome tip.

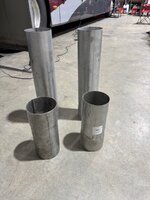
Since most of what I do in the shop is try to learn new things, I figure I'll build my own first and see what happens. Worst case, I end up buying one. So, off to FB Marketplace I went and found a guy that had a bunch of 5" exhaust drops from his business. Picked up 4 pieces from him for less than I could buy the 90 and set down to try and figure out how to make it work. I did some internet digging and realized that in order to make pie cuts, I needed to figure out what the overall angle would be (assembly angle), then determine a trans angle and cut angle. Once I understood the terms, it was pretty simple. Seems like the internet says that most folks use either 9 or 4.5 degrees as a common starting point. It's easily divisible for 90 degree turns. Most if not all of you probably already know that. So, I first took a look at what position I might want to be in for a finished product.
IMG_1533.jpg
Here are the 4 pieces I got. The longer ones are around 22" long.
IMG_1534.jpg
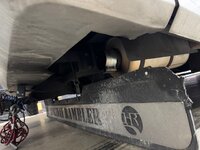
Muffler with the old band clamp still on there. And you can see where the last pipe melted a bit of the sweep. So, I know I don't want it all the way over there any more.

IMG_1536.jpg
Straight back would probably be the "easiest" method as the angle would be pretty small, so less welding on my part.

IMG_1537.jpg
Slight turn to the outside. Probably about the same as the previous, just turned out a bit.
IMG_1538.jpg
Midway to 90 degrees from a visual standpoint, and still out of the way of the sweep.


IMG_1539.jpg
This is the original location (from before I messed it up the first time) as you can see the area above on the rear cap where the original pipe sat.

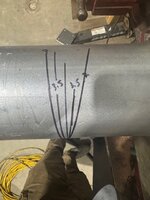
I decided to use the one that's about halfway. From there, I got out my angle finder and put a pipe in the muffler and the held up the other piece. Best I can do is 70 degree bend in the pipe. Off to figure out what angles I want to cut the pie pieces.
IMG_1541.jpg
I picked up this pipe template maker a while back and have yet to use it before. It works pretty well for catching an angle, but I couldn't figure out how to make it work well to wrap around and trace the angle I wanted. More on that later.

IMG_1543.jpg
So, I did some figuring and made up some options for angles and pieces. At the "standard" 9 and 4.5, I'd need 7.78 pieces. That's well beyond my skill for obvious reasons. So, at 7/3.5 and 14/7, I get full pieces. I think that using only 5 pieces at the 14/7 might be "easier" from a welding standpoint. However, I decided on 7/3.5. I guess I'm a glutton for punishment.

IMG_1542.jpg
Here I marked a few angles just to try and visualize what it might look like. Since I couldn't get the pipe wrap to work right, I won't be using a cutoff wheel to cut these out. I'll need all the fitment help I can get and a bandsaw is the only way to go. I have an upright saw at home, but I really felt like a horizontal bandsaw would work much better for this application. So, I'll head out to my folks next weekend and cut a bunch of pieces. Should make short work of it. Stinks that I have to wait that long, but such is life.

Only other project I got underway was the small leak I have in my air suspension system on the coach. The drain valve was leaking and after I replaced that, it still loses pressure overnight. So, a bit of soapy water found the culprit. I'll replace this push lock with a compression fitting as I get supplies for that. I'll have to hit the local truck place as they have a pretty good parts selection.

IMG_1532.jpg
That's as far as I got. Turns out the step issue I had was not an issue at all. It was "stuck" halfway out. I think possibly with the rain we were having during the last trip, it got a bit confused. I'll check the wiring and put some dielectric grease in there, but once I cycled the step switch, it worked just fine. Nice to have something fix itself once in a while.

Thanks for looking.
 

zmotorsports

ALLIANCE MEMBER
Joined
Oct 20, 2009
Messages
21,441
Location
Northern Utah
Keith, I think turning the exhaust pipe/tip out at an angle will look much better than straight back. I did mine very similar back in 2007 when I first purchased our coach and replaced the muffler. Then a few years ago I replaced the old chrome tip that was showing signs of wear and corrosion with a polished stainless steel one. It has now taken on a nice gold tinge to it from the heat and looks pretty cool.
 
OP
S

ScepterToad

Well-known member
Joined
Nov 9, 2023
Messages
340
Keith, I think turning the exhaust pipe/tip out at an angle will look much better than straight back. I did mine very similar back in 2007 when I first purchased our coach and replaced the muffler. Then a few years ago I replaced the old chrome tip that was showing signs of wear and corrosion with a polished stainless steel one. It has now taken on a nice gold tinge to it from the heat and looks pretty cool.
I think so as well Mike, not to mention the soot getting on the Jeep. The old girl runs pretty clean, but grades and getting on the highway will produce smoke. Once I get it set on there good, I'll probably run it til winter and then cut it back out and add a polished stainless tip. For now, I'll accept the aluminized version to get back to camping for the season.
 
OP
S

ScepterToad

Well-known member
Joined
Nov 9, 2023
Messages
340
Hi all, I hope you're having a great start to your summer. We've been super busy with both work and house projects, so I haven't been able to get to the shop much these days.

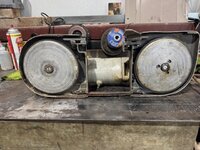
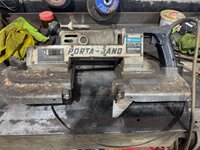
Last I went over there, I tried to get some stuff done on the coach tailpipe. I had gotten this Porta-Band from my dad that I wanted to try to use to cut the pie cuts. I fired it up just to see how it ran, and while a bit slower than modern porta-bands, I think it'll be a nice addition to my shop tool cabinet. One day. I purchased some new blades prior to trying to get it working, and went about getting it started.

IMG_1577.jpg
As you can see, it started out pretty dirty, so I used a combination of a scraper and red brillo pad to clean up the housings.

IMG_1578.jpg
I think probably a mouse was involved on one end of the housings.

IMG_1579.jpg
The underside wasn't too terrible, but there's some rust along the back side of the blade.
IMG_1580.jpg
I'll look into getting new bearings for where the blade runs through, but these will work for now.

IMG_1581.jpg
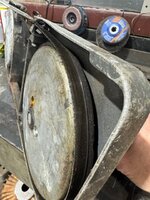
Here you can start to see the main problem. The wheels are hard and worn, not allowing the blade to stay on the saw.
IMG_1582.jpg
Pulling the wheels off, the tightening mechanism seems to be in decent shape and does move freely. It just needs cleaned up a bit.

IMG_1583.jpg
Drive wheel removed. I lubed this chain up before putting it back toegether.

IMG_1584.jpg
Another shot of the tightening mechanism.

IMG_1585.jpg
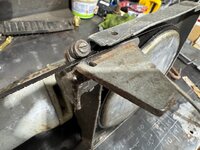
After a full inspection, it turns out that the blade had cut this piece off at some point and someone welded it back on.

I put this back on the shelf as it will take me some time to find the wheels and get them in. This is a fairly old model, but there are some aftermarket wheels out there.

More to come from this weekends activities.
 
OP
S

ScepterToad

Well-known member
Joined
Nov 9, 2023
Messages
340
Moving along.

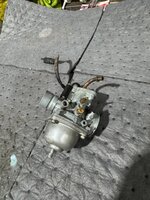
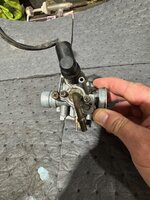
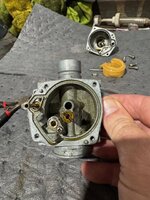
Generally speaking, in the summer we host the family parties at our house as we have a pretty decent size back yard. Every single time, my nephew (who is right around 5) wants me to get my "bad *** motorcycle" out and take a few spins around the yard. This past Memorial Day was no exception. I've been searching FB marketplace for a little dirt bike for him for a while. Unfortunately for me, even non running 50cc bikes seem to be made of gold. Folks want stupid money for them. His dad happened across a 100cc 2 stroke quad that's been sitting for who knows how long and the lady gave it to him for almost nothing. It's a Chinese model (off brand). So, he took to tearing it apart to see what was going on with it. Everything seemed pretty ok except for a hole in the belt cover (it's an auto) and the carb. He asked if I could tear the carb down and clean it, so I was happy to oblige.
IMG_1599.jpg

IMG_1600.jpg
He was able to remove the cable from the carb after a bit of phone instruction.


IMG_1601.jpg
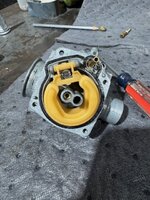
Bowl removed and you can see the sludge. Also the gasket is pretty jacked up.
IMG_1602.jpg
IMG_1603.jpg
Float removed so I can pull the screws and get to cleaning. Most of these pictures are just my referent for screw orientation. I also counted revolutions so I could at least get them close enough for it to run afterwards (Assuming it was right on the first place).

IMG_1604.jpg
All parts removed for cleaning.
IMG_1605.jpg
Fuel shutoff solenoid.


IMG_1606.jpg
Cleaned up and going back together. I used a small amount of sil-glyde on all the gaskets (o-rings).

IMG_1607.jpg

All back together.

He put the quad all back together and it fired up on the second kick. The nephew got to go for a few rides around the yard and had a great time.

More to come.
 
OP
S

ScepterToad

Well-known member
Joined
Nov 9, 2023
Messages
340
Last bit of work this past weekend.

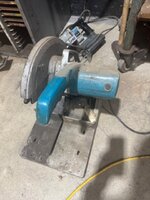
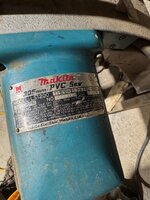
Having failed at the Porta-Band, I turned my attention to the two metal saws I have sitting on the shelf. Both Makita, and one is actually a PVC saw. Both of these came from people who gave them to me. The PVC saw I've used before for random stuff with an abrasive wheel. It works ok, but it's old and a little slow.
IMG_1608.jpg
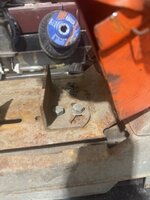
I really like this one as it has the adjustable back fence and clamp which I can cut angles with. However, it's in dire need of a new cord. I plugged it in and it does run, but fire flies from the motor and it tripped my GFCI in the shop. So, back on the shelf.

IMG_1610.jpg

IMG_1611.jpg
Needs cleaned up, but overall it's in decent shape.

Hopefully I can pull the motor apart and make it not spit fire.
IMG_1613.jpg
Here's the PVC saw, which has the fixed fence.


IMG_1614.jpg

All that, to say that I went back to basics and figured out how to cut these on the big Carolina horizontal saw that my dad has. We changed out the blade for a new one and it ran through really well.


IMG_1618.jpg
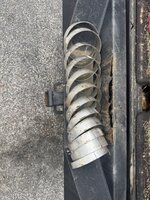
10 overall pie cuts at 7 degrees for a 70 degree bend (planned). I eyeballed these so they aren't all exactly the same size, but I think they'll work.

That's about all I got done over the weekend. I'll get going on welding the pipe up to get the coach back up a running.
 
Last edited:
OP
S

ScepterToad

Well-known member
Joined
Nov 9, 2023
Messages
340
I hope everyone had a great Father's Day! We had a pretty good weekend and I was able to spend a few hours in the shop working on work. Had a welding project for one of the businesses as we're preparing for a trade show next week. Essentially, I modified a square frame to make it sort of octagonal so we could round the corners of the front face of the project. Other than the amount of space I needed it went fairly well. I have a few more of these to do, but now that I have a bit of a system, I should be able to knock them out a little faster.

IMG_1636.jpg
Cut the 45s with a cutoff wheel on the angle grinder. Worked out fairly well once I had them all cleaned up. I tried to save as much powder coat during this process as possible. This all gets covered up, so going back with paint was OK for this purpose.

IMG_1637.jpg

IMG_1638.jpg
These are around 4' square, so without a large welding table, this is what I could come up with. Not really worried too much about flatness as I welded the angles in prior to cutting off the ends. Nonetheless, I tried to go easy on the welds.

IMG_1639.jpg
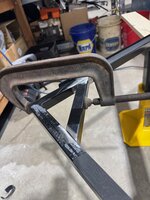
Here's how I clamped them in place.


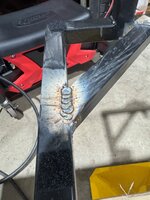
IMG_1642.jpg
This was about the best I could do. Got a little close with the powder coat, which didn't help my chances, but since they had to be ground smooth, it worked out.

That's it for shop work that I can show. Crappy turn of events late Sunday night, which I'll show in the next post.
 
To avoid these ads, REGISTER NOW!
OP
S

ScepterToad

Well-known member
Joined
Nov 9, 2023
Messages
340
Moving on to Sunday night and into Monday morning. We awoke at 5:45am to police knocking. Look out and our very large, very old maple had lost a major branch. With 4 cars in the driveway, it wasn't pretty. Jeep got pretty tore up. Excursion is likely totaled due to age and mileage (even though I built it from the ground up in 2019). Other two cars were more lightly damaged. Also, ripped the mast off of our meter box on the side of the house. Surprisingly, we still had power to the house even though the line arced on the meter box. Luckily it didn't catch fire.

IMG_1662.jpg

Hard Top smashed.

IMG_1667.jpg

These back windows are NLA outside of a junkyard. Bad part is the roof was creased pretty good along with the rear pillar.

IMG_1686.jpg

And the Jeep hood, cowl on the other side, and part of the A pillar is creased a slight bit. We'll see what the insurance company comes back with.

Inspection was quick and easy this morning, now just waiting for the power company to come connect us back up.
 
OP
S

ScepterToad

Well-known member
Joined
Nov 9, 2023
Messages
340
Dayum Keith. That *****. Sorry to see that, especially the Jeep, but even the Ford. :oops: I know those Excursions are rare and have very bespoke parts and components.
Yeah, the Excursion is getting more and more rare these days. Most of them are sadly rusting away in areas where snow is prevalent. They also have a bit of a cult following which makes valuing them a chore. I suspect my insurance company will use the lowest possible.

Out of curiosity, I looked at those for sale within 500 miles of me. Asking prices range from $6500 to $54000. It's a wide range.

This area is probably what'll total it. Unfortunately, they don't care about the fact that the engine, transmission, axles hub to hub and suspension are only 50K miles old. Next one I do may get an agreed value policy.
IMG_1716.jpg


IMG_1717.jpg
 
OP
S

ScepterToad

Well-known member
Joined
Nov 9, 2023
Messages
340
Hope everyone had a great Fourth of July Weekend! We spent some time with family on Friday, did a few fireworks, and spent some time hanging out with the younger nieces and nephews.

On Saturday, hot as it was, I spent the day at the shop getting a few things done. I finally was able to get the exhaust pipe welded up and fitted to the coach. I'll weld it in place next weekend as I make final preparations for our summer trip.

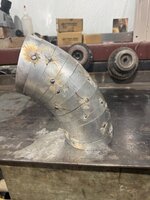
I didn't get as many pictures as I thought, but the process was fairly simple. Tack weld each pipe piece in place, and then weld it out. I had a few issues blowing through the pipe, but overall it wasn't bad. I think if I had gas, it might be a bit easier than flux core, but flux core worked. Thinner wire may be an advantage, but that's just me thinking I might know something. The welds themselves show I only know enough to get by and that I clearly have not learned enough patience.

IMG_1906.jpg
Segments all cleaned up on the wire wheel just before wiping down with acetone.

IMG_1908.jpg
First 3 (middle) sections tacked.
IMG_1909.jpg
I ended up using 11 sections, not the 10 that I originally planned. That decision was just based on how the pipe sat under to coach.


IMG_1910.jpg
Still mostly round. I will say that by the time I was done, I did have a bit of deformation, which made it difficult to slip into the muffler on the coach.

IMG_1912.jpg
Another shot of the complete tack-up.

IMG_1914.jpg
Hazards of flux core wire.

IMG_1916.jpg
Generally, I was able to work my way around 1-2" at a time. Each time I did this cycle, I set the pipe in front of the fan to cool completely before moving on.

IMG_1917.jpg
This should give me a decent side dump, while keeping away from the mudflap.

IMG_1918.jpg
Another shot. I have a piece of chrome 5" exhaust pipe as well. In the future, I may cut this back a bit, and weld a piece of that on to make it look a bit nicer.


That's about it for work over the weekend. I drove the Excursion out to my folks place for storage while I decide what to do with that. I just love driving that old truck.

As to the Jeep, I'm still fighting with the insurance company. They want to total it out, and I have half a mind to let them. But, then I have to find another one, buy it, put all my flat tow stuff on, etc, etc. And, I know what I have,. If I buy another one, it'll take time and effort to figure out that one. Their estimate is all over the place and several thousand dollars too high. So, I really disagree with it. I hope to get that sorted out today as I have 2 weeks until our next trip.
 
OP
S

ScepterToad

Well-known member
Joined
Nov 9, 2023
Messages
340
Just about final prep for our upcoming trip. This year, we intended to head west again to southwest CO, through MN, AZ, and then up to UT and back. That plan fell through a few months ago as work and life keep getting in the way. So, we decided to head to the Finger Lakes area of NY. Should be a good trip in the final half of this month. All that's left is to pack up the coach and kick (check) the tires.

So, this weekend, I changed the oil in the coach and the generator, along with the generator oil filter. It's super hot here and humid, so working in the shop is borderline miserable these days, so that's about all I got done. Oh, and I finally washed the coach. The old girl is shiny again.
IMG_1944.jpg
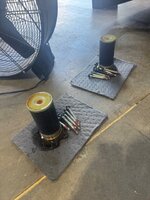
Can't really tell how dirty the filter is, but it was super dirty (on the left).

IMG_1945.jpg
Pretty straightforward. Plastic cover comes off with a wing nut, then the metal plate with another wing nut, swap it out, and done.

IMG_1946.jpg
One of these days, I need to do a deep clean under the coach as the dirt and dust is everywhere.

That's about all I got done. I did take the light bar off of the Jeep that got smashed and swapped to the soft top. Still no word from the insurance company on what they want to do. They tried to just total it out over $400 difference between estimate and 70% value, which I called bull*#&^%# on. Estimate was NOT accurate at all. Got my own and now their excuse is they don't want the lower (in line) estimate to go over with incidentals. Still a work in progress.
 
OP
S

ScepterToad

Well-known member
Joined
Nov 9, 2023
Messages
340
Too bad about your plans to come out west Keith. Hope you're able to enjoy your Plan B though.
Next year for sure Mike.

Finger Lakes should be a good time. It's been a wild year so far for us and we're looking forward to some down time. I'm looking forward to exploring and relaxing and hopefully getting in some swimming holes.
 
OP
S

ScepterToad

Well-known member
Joined
Nov 9, 2023
Messages
340
Hope everyone had a great weekend and that your weather has been as nice as ours here in the western Ohio River Valley. Temps have been warm, but we've had some less than normal humidity. We got a fair amount of yard work done on Saturday and on Sunday I went a visited my folks and help my dad get some old farm equipment out of a field out by his house. Part of a deal he worked out with a guy on several tractors.

We got back from our vacation to Finger Lakes last Thursday and got everything packed out of the coach. Overall, a relaxing trip that was much needed. The Finger Lakes Region is pretty nice overall. Lots of wineries, lots of swimming holes and different hikes. We didn't really push for many activities each day and just kind of took them as they came.
IMG_1966.jpg
Here's our campsite for the almost two weeks. They were sort of weird pull throughs such that each camper/coach was "facing" each other curb side but offset. So, out firepit and chairs were behind the person next to us and theirs behind us.


IMG_1967.jpg
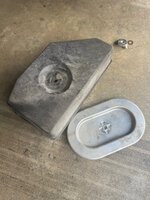
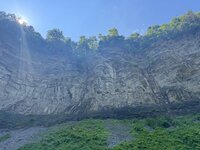
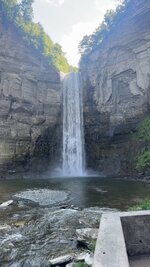
This is the first hike we did. Taughannock Falls. This is the bottom near the entrance to the park. First day we did the rim trail, which was just about 4 miles total.

IMG_1968.jpg
Our dog Maggie. She never saw a body of water she didn't want to lay down in. Probably could have left her there all day and she would have been in the same spot when we got back.
IMG_1969.jpg
Here you can start to see the large canyon we were hiking around.


IMG_1974.jpg
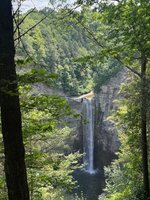
The falls from the top of the rim.

More to come.
 
OP
S

ScepterToad

Well-known member
Joined
Nov 9, 2023
Messages
340
Next up, we made our way to Watkins Glen. They have a pretty neat downtown (if you're into that sort of thing) and a gorge hike. This one was a bit more challenging because to get in there, you had to go up around 1800 steps to get into the main trail.

IMG_1985.jpg

IMG_1990.jpg
Other than the steps, it was a paved trail.

IMG_1993.jpg
Loots of little holes around.

IMG_1994.jpg

IMG_1996.jpg

IMG_1998.jpg

IMG_2004.jpg

IMG_2007.jpg

IMG_2010.jpg
IMG_2014.JPG
Also had a nice dinner at a cider house the next day after hitting several local wineries.

One more set.
 
OP
S

ScepterToad

Well-known member
Joined
Nov 9, 2023
Messages
340
Other than the more "on trail" places we went, we did manage to find a local swimming hole off of the side of the road. I didn't get any pictures of that, but you get the idea based on the pictures above. Dogs had a great time.

Since we didn't get to see Taughannock Falls from the bottom, we decided to hit that again.

IMG_2029.jpg

IMG_2030.jpg

IMG_2033.jpg

IMG_2036.JPG

Pictures don't do it justice.

Overall, a pretty good trip. We did have a few issues, which is not really normal for us.

Folks who know me and how much time I spend with the coach and cars know that it's a lot. I don't mind because I love working on stuff. Typically, this results in trouble free miles and trips. However, on this trip, we did have a few snafus.

First, one of the kids came out of the toilet room and asked if there was supposed to be water all over the floor. Of course not! Took a look and the toilet flush valve on the back of the toilet was dripping when the pedal was pushed all the way down. So, I ordered a replacement up from Amazon. Still have to put that in as the drip wasn't too bad. I used an old towel to take up any water that dripped for the rest of the trip.

Second, we were coming back from Watkins Glen, and things smelled "hot" in the Jeep. Got back to the campground and put my hand at each wheel. Sure enough, passenger front wheel was hot. Caliper stuck. Hit up the local Autozone and grabbed a caliper and brake fluid. Swapped that out at the campsite pretty easy. During that time, I noticed the brake fluid was pretty dark. That'll get changed soon and I figure I'll swap out the other front caliper.

Third, we came back from somewhere and the coach power was out. Weird. Went to the pedestal and the 50 amp breaker had tripped and the breaker was hot to the touch. Went up to the office and told them about it. They came right out to check it out. Replaced the breaker, but I noticed that the prongs on my now ~18 year old factory molded plug were loose. So, back to the camp store and grabbed a new 50 amp plug and swapped that out. Back in business. I don't care too much for the giant yellow plug end, but it works.

Overall, still a great trip. Coach ran flawlessly so I can't complain too much. **** happens sometimes.
 
OP
S

ScepterToad

Well-known member
Joined
Nov 9, 2023
Messages
340
Well, I finally got all the insurance stuff sorted on the Jeep. They ended up paying the claim and now I'm working on getting everything fixed up. Called the body shop that I got a second quote from and they guy had told me that he'd work with me on ways to save a bit of money on parts. So, I talked to him and turns out, he won't work on it without them buying the parts so they can warranty the work. I get it, but they charge almost double for the same parts. So, I went down the painting it myself rabbit hole. Watched a few videos and figured I could do it without much issue. Still didn't want to though because well, I'm no expert and it's a large area to paint and not match when I'm done. Chatted with my dad and realized that he knows a guy out in the country that's been painting and doing body work for the better part of 40 years. So, right now the plan is to buy the parts and put them on and then take it to him and have him work it over. While I'm at it, I'll see what it would take to have him paint the rockers where the PO put on the rock sliders and they wore the paint off. Also, hopefully I can have him paint the hinges that are starting to rust.

Before all that, I need to flush my brake fluid and get that drivers side front caliper replaced. So, I picked up a vacuum brake bleeder last night to give a try to that. I went with the HF version as I don't need anything fancy. It just needs to work. I'll do some details on that this weekend and we'll see how it goes.

EDIT: Also ordered up a set of Teraflex Ball Joints yesterday. The Rough Country HD joints I put in when I first got the Jeep a few years ago haven't held up. Consequently, I didn't know that the factory ball joints are not fluted. The ones I bought were, and that's why I had a tough time driving them in. And, from now on, I have to use fluted ball joints, so that's what I got. The Teraflex ball joints are about twice what normal ball joints are, but they have good reviews and seem to last. So, we'll see. I'll change those out this weekend as well as I'll have the brakes torn down on one side anyway.
 
Last edited:
OP
S

ScepterToad

Well-known member
Joined
Nov 9, 2023
Messages
340
I hope everyone had a great weekend! It was a hot one here. When I build a shop sometime ion the future, it's gonna have dang AC.

Saturday was spent helping out my better half and just generally spending time. Sunday, I had to get one of the frames restructured that I've been working on (5 to go) and ball joints and front caliper on the Jeep. And flushing the brake fluid while I was at it.

Starting with the frames, I've been using a cutoff wheel to cut the 1x1 tubing. It works, but it's kind of a pain. One, there are a ton of sparks and the work area is directly in front of the coach. I can "steer" them, but it's just sort of a pain. We've been looking at tools for this company and we picked up this portaband from a local guy we know. So, I opened it up after charging the battery and put it together. Turns out, it has a lockout built in such that you have to download an app and sign up in order to use the tool. I was NOT happy....at the time. The more I thought about it, the more it actually works in my head. Once I'm not building things, or while I have younger interns around, I can control who and when it gets used. It's actually a pretty darn good idea. And once I figured out that you have to depress the front button and then the back one (two handed operation), it worked like a charm. So good in fact that I noticed right away the quality of the tool. It's a far cry form a hand-me-down portaband (though I will still restore that and use it).

Before I get to the pictures, the portaband and other events may have changed my mind on a few things. I'm not a professional wrencher. Heck, I'm only about half a hobbyist. When I need a tool, I'm not shamed to admit, that I go to Harbor Freight to get it. 99% of the time they have what I need right there on the shelf. And in the case of things like sockets, the Pittsburgh brand has a lifetime warranty. Can't beat it for the price. And, the thought always was, it's not likely I'll break a socket doing what I'm doing. If I worked more heavy equipment (bulldozers and tractors) on a more regular basis, maybe. But normal car stuff? Not likely. (the coach is an exception). After the successful use of the portaband and being thoroughly impressed with it, I tackled the Jeep. What I immediately noticed was, the shallow impact sockets don't fit the bolt heads just right. I kept having trouble with them fitting all the way on. I don't know if it was the heat or what, but I had a harder time yesterday than I've had in a long time working on a car. So, there's something to be said for having the more expensive tool brands. The other thing I'll replace sometime soon is my ball joint press for one of the 18100 presses. It definitely works. It's just in the dang way of itself all the time, as you'll see in the pictures.

IMG_2086.jpg
Portaband we got. This thing is AWESOME, even if I didn't like the idea of an app at first.

IMG_2092.jpg
I didn't get pictures of the drivers side, but ball joints are ball joints. brakes removed for access and the steering components loosened for removal.
IMG_2093.jpg
Unit bearing removed and ready for the axle to come out.

IMG_2094.jpg
Upper ball joint removal. As you can see, the threads are into the spring perch and there's definitely no room to put the impact up there to run it down. So, Had to press it out by hand with a breaker bar. It's not fun.

IMG_2095.jpg
Lower installed. This one I can use the impact on. These Teraflex Ball joints seem like they're worth the money. Time will tell.

IMG_2096.jpg
I did find it a bit odd that they have two lower grease fittings. I suspect it'll make it easier to service in the future. I did hit all 4 new joints with a shot of grease when installing.

IMG_2097.jpg
Upper installed.

IMG_2098.jpg
Copper antiseize on everything.

IMG_2099.jpg
And back together.

A bit more to come.
 
OP
S

ScepterToad

Well-known member
Joined
Nov 9, 2023
Messages
340
So, flushing the brake fluid. I've had an ongoing issue with the Jeep pulling to the left under hard braking. And while swapping out the caliper on that side and flushing the brake fluid has helped tremendously, it's still a bit wonky. First, the HF Holt Industries brake bleeder worked very well on the rear brakes, it didn't work very well on the front. Just wouldn't pull the fluid through. I finally got it by pressing the brake pedal through and got the brakes bled well enough. However, the pedal is a little bit mushy. After thinking about it, I suspect that my front soft lines are partially collapsed. Who knows how old they are. So, that's next on the list. If anyone has recommendations on new soft lines, I'm all ears. I'll look at Crown lines first as that's about the best as far as I know.

I guess that's it. Didn't have pictures of the brake bleeder in action after all.
 
OP
S

ScepterToad

Well-known member
Joined
Nov 9, 2023
Messages
340
I hope everyone had a great weekend! Last weekend, we went up to Port Clinton to a buddy of mine's condo and boat with a group of friends. Pretty fun weekend away from it all. Lake Erie is gorgeous and the weather was really nice. We basically just hung out for some nice down time. Did some boating, Put In Bay, and Kelley's Island.
IMG_2159.jpg

IMG_2173.jpg
IMG_2180.jpg

It's cooling down here in Ohio, a bit early in my estimation. This morning we're in the low 50s and it'll get to 74 ish today with clear skies. Last weekend was much the same. So, working in the shop yesterday was a joy. Nice to have the doors open and cool air coming in.

We've got at least one more trip on the books for this year in a few weeks and I've been putting off the transmission and differential service on the coach for far too long. I ordered up the parts last week and I should have everything in by tomorrow, so I decided to go ahead and get things draining so it can sit and drip for the week. Before that though, HF had their 22 ton jack stands on sale again so I picked up a final (3rd) set for the coach. I've been crawling around under the coach for a while now "unprotected". Figured it's high time I get something under there for a bit of safety. So, I located two frame rails at the rear where the engine is mounted. I needed a bit more, so I looked toward the front a bit more and there's some really heavy frame just to the rear of the tires. So, that's where I went at it. I needed around 3" of extra height after I raised the coach up to ride height and then leveled in manually. So, I had some 2x4 scrap and 3/4" plywood scrap laying around that I made into 2 blocks to go under the jack stands. Worked out fairly well.

From there, I pulled the drain plug on the diff and got that draining and then went at the transmission. Pulled the plug on that and got it draining and then went after the two filter housings. The bolts on the filter housings were TIGHT. What I realized after the fact was that they had never been removed. I kind of thought that was the case just looking at the records I got with the coach as they don't contain any service records related to the transmission. The service interval is quite long, so I'm not super surprised by that.

IMG_2196.jpg
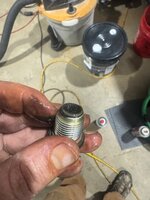
Drain plug from the differential. It had a fair amount of sludge and some larger particles. According to the service records I have and the fact that the sealant was still on the plugs, I'd say this hasn't been changed either. As I was deciding where to get the 15 odd quarts of synthetic gear lube, I found a website that had them for just over half of what they were everywhere else. Partzilla. The down side is they are the hard bottles, which will be more of a pain to deal with.

IMG_2197.jpg
Just a small amount of sludge on the transmission drain plug. Fairly happy with that given the number of miles.

IMG_2198.jpg
Filters and housings out.....

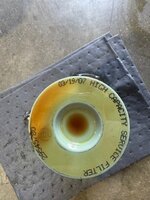
IMG_2199.jpg
From 2007.

IMG_2201.jpg
Jack stand placement. A bit more to come.
 
OP
S

ScepterToad

Well-known member
Joined
Nov 9, 2023
Messages
340
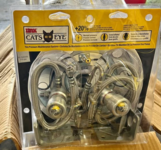
Along the way of the last few weeks, I've scored a few things on FB Marketplace. First up, a set of Cat's Eye's for the rear duals. These are normally in the ~$275 per pair range and I found a guy that had multiple sets for $100. He only had 95 psi and 110 psi. Since I run 100 psi in my rear duals, I opted for the 95s.

cat eye.png

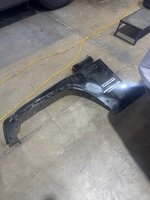
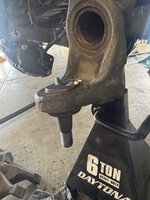
The other thing I've scored recently is a fender for the Jeep. I ordered up the cowl and hood hinges last week and I'm still on the hunt for a hood. I thought I had a hood but the guy wanted stupid money for it (same as new). That saves me shipping, but I like a good deal when buying used stuff. The fender was $50 and is in good condition. The body shops I've tried are either too busy or don't want to do the job unless they buy all the parts.
IMG_2200.jpg
It's in good shape with just a touch of surface rust on the back. I guess I get to try my hand at painting a car. Sounds like a good fall project.

Next weekend I'll get the coach put back together and the Cat Eye's put on and give a test drive before our trip the North GA at the end of the month.
 
OP
S

ScepterToad

Well-known member
Joined
Nov 9, 2023
Messages
340
I hope everyone had a great weekend! I spent what felt like way too many hours on what I expected to be a quicker job (than it turned out to be). It was good shop time though, so I guess I can't complain.

We have a trip coming up last week of September to north GA, and I wanted to get the coach transmission service complete and the differential service done and a few other misc. items.

Weekend before, everything drained out went really well with no issues. This weekend, the plan was to get everything back together. I started by setting up the transmission filters. IMG_2202.jpg

Overall, I just cleaned everything really good with brake clean. The Allison kit came with extra o-rings (I suppose for different applications). On one of the housings, I noticed what I believe to be a casting defect.

IMG_2203.jpg
IMG_2205.jpg
Since there wasn't any metal shavings or chunks on the drain plug or anything obvious in the fluid, I figure this defect isn't a problem. It's also not on a sealing surface, though it is very close. You can see the o-ring groove above. I may source a new one and swap it out in the near future. I'd be interested in what folks think about it.

IMG_2206.jpg
All put back together and ready for install.

That's about the end of the pictures. I installed the filters and drain plug and filled with 5 gallon of the Castrol Trans-Synd 668. In order to fill a bit easier, I had sourced a 2 gallon pour jug with a spout. It made it quite easy to pour into a funnel inside the coach.

From there, I went about getting the rear diff filled back up. According to the manual, the diff is supposed to hold ~15 quarts. So, I bought 16. I tried all manner of pouring as the bottles I purchased were the hard bottles (at about half price). Unfortunately for me, there is a slack adjuster right near the fill hole. So, using the hard bottles was impossible. I grabbed a short piece of hose and a hose clamp. I figured I'd be able to squeeze into the diff. That worked for about 1 quart. Then I ended up with a beard full of gear lube, which took not one, but two washings with dawn dish soap to get the smell out. My better half was NOT amused.

After several more attempts, I got back out from under the coach and found one of my old transfer pumps (harbor freight). I ran a bit of clean gear lube through it, got back under, and filled. The hose slipped out of the hole several times with more gear lube to the chest. That shirt went straight to the trash.

I got nearly 12 quarts back in and it started running out of the fill hole. Installed the plug. By then, it was late in the day and I was dirty enough to not sit in the drivers seat to run and get fuel so that I could get the trans up to temp to check fluid level. So, I decided to change the fuel filters.

Now, if you have a Cummins engine, you can sign up on Quickserve and you can get all the manuals and information for your particular engine, including service procedures. Cummins specifically states to NOT prefill your fuel filters. I have always prefilled filters, fuel and oil. But, I figured, what the heck. Not really supposed to do it, lot's of people on the internet swear that you don't need to, just do one at a time, cycle the key, start, let run, shut down, repeat. I'm over it now, but I could have chewed up 16 penny nails on Saturday. Let's leave it at, I'll always prefill my fuel filters on diesel engines. And I'm smart enough to use fresh clean diesel fuel and a clean fill can.

Moving on to Sunday, I pulled the brand new filter I had changed, chucked it, and started over. Filled both, installed, fired up and it sat there idling. Finished cleaning up the shop and backed the coach out. Checked everything over and ran to the fuel station. I checked the transmission fluid at the station and all was good. When I got back to the shop, I checked it again, and all was good.

Did a few other things like changing out the water filter, putting some water on for the trip, loading in some bedding we had taken home to wash, etc. I also installed the dash cam I've had sitting in the coach for several years. I think we're ready to go.


Two things I didn't get done. One, I didn't get to install the Cat Eys's on the rear duals. I was thinking I'd be able to reach the inner valve stems, but looking at them, I couldn't see a way in. I'll have to remove at least the outer dual to get to it as I have centramatics installed. Another time. Second, the toilet flush valve I had spring a leak on the last trip. I totally forgot about it. I'll do that during this next trip.

All in, easy work, it just took a bit more time getting the diff filled back up than I thought it would.
 

zmotorsports

ALLIANCE MEMBER
Joined
Oct 20, 2009
Messages
21,441
Location
Northern Utah
Keith, I'm not a water person, but those pictures of being out on the water are amazing, so calm and tranquil appearing.

Out of curiosity, how many miles are on your coach? I just turned over 148k on our trip last week and I have service both my rear end and transmission three times now, even though Allison and Eaton state 75k mile intervals, I'd rather be a little overzealous than not on service intervals. Allison also states a 4-year interval in there but after speaking with a rep. several years ago he led me to believe that the time interval, while still recommended, was more for off-highway or stationary equipment that was running for longer durations and at higher loads.

Looks like you've already completed yours, but I do have a video showing the Allison service as well as the rear diff. service thrown in for good measure. The key points on the Allison are to not over-torque the filter housing bolts. Specs are 38-43 ft/lbs. and anything more can pull the threads in the case which will turn into a bad day. I've had to repair a few from other's misfortune and so I highly recommend sticking to the OEM torque specifications.

As for the oil filter, I prefill mine because they hold nearly a gallon and that is a long time to go with no oil pressure, even though Cummins states not to. I think they recommend against it is solely because of the possibility of introducing contaminants into the oil, but if you're clean and take care in what you are doing, I see no downside. Fuel filters, I do follow their recommendation and do not prefill, because the orifices are so much smaller in the injectors, plus they have a method of cycling the key to prime the system. Now with my FASS fuel pump, filling filters is even more simple.
 
To avoid these ads, REGISTER NOW!
Top Bottom