To avoid these ads, REGISTER NOW!

Scott's Garage Stories

OP
S

signcrafter

Well-known member
Joined
May 9, 2012
Messages
12,493
Wow, guess I kind of forgot about this thread and just been too busy to post updates. Still chugging away with all sorts of stuff and still trying to set up the new shop. Still going back and forth between two states. Had a few big projects come up so the move and work on house to sell got paused for those. Been working on it when I can.

Keep trying to organize and arrange the shop to fit everything I need in it and also keep it usable. It's a really challenge and I do what I can as some extra funds are available. Been spending a lot of time on Facebook marketplace searching for deals on shop stuff I need or want.

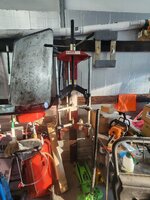
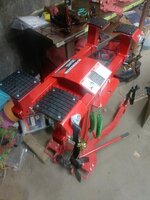
A couple projects in got done in the last week are the tire changing area. It's in the back of the "storage" side of the shop. Not ideal to walk each tire down and aisle to get to the changer but it seems like the best option to maximize my layout for storage. I pretty much only do tires for myself and then tpms sensors and a few plug/patches for others. So shouldn't be a big deal for how little I use them and should work now. Will see after shop is all set up how things work out and if I need to move things around or not. Also mounted the branick strut spring compressor I picked up off marketplace for a good deal a couple weeks ago. Had no idea what height to mount it at so that may have to get changed.

The two stainless shelves I got from a restaurant remodel I did, they were microwave shelves. The one restaurant I did had 11 microwaves when we started from the old owners. Crazy that is how some restaurants operate. We ripped them all out besides 2 so I kept some of the shelves and they work good for the shop. I will be taking them down though. I'm going to put a sheet of plywood screwed to the black shelving and have been keeping my eye out for a used wall cabinet to hold all the valve stems and other tire stuff.

I also will be taking that sliding door out and closing that off. There is a 3 seasons type room out there that we won't be using for that, we are using it for yard stuff storage. Want to take out another sliding door on the other side of that room and put a roll up garage door and will use that as a shed for the riding mower and all the other yard equipment. But that is down the road. Once I close off the shop from that room I will put wall cabinets or other storage devices to hold wheel weights and stuff for the balancer. I will also add a tire rack above to store tires. I made one for the last shop out of unistrut and it works out good to store tires and rims or just hold old tires until I get a chance to dispose of them.

Also in this corner is a tire repair stand to spread the tire and hold it while you prep and install a plug/patch. And a tire tool stand. It has spots for all kinds of tools and then air hook up for two impact guns. Think they are made for tire shops to be mounted between two bays so techs can work on a car on each side at the same time. Haven't decided where I want to put it but I will use it to hold tire tools and also my low speed die grinder to do tire plug patches. It has two air hook ups that I will put coil hoses on so I may put an impact on one. Don't really need an impact back there besides for struts. But I have a few 1/2" air impacts I rarely use since getting my M18 so might just leave one hooked up back there. Also need a blow gun back there. Can either do a hose reel with blow gun on it and tire buffer and impact on tool stand, or tire buffer and blow gun on tool stand and then have impact hooked up right at spring compressor. Lots of decisions laying this stuff out. Too many decisions. Lol.

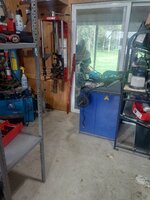
Can kind of see the grey shelves I started setting up. Going to have a bunch of rows of shelving from this back area to the front of garage. This is what I call Scott's hardware store. Being a contractor and working on vehicles I have a pretty good hardware department. Most of it is screws and nails for jobs but there is lots of nuts and bolts and then all the other stuff like fittings, orings, brake line fittings and bleeders, etc. This half of the 4 car garage will be just storage for the most part.

On the tire machine is my harbor freight small tire changer. I really like this thing for mower and ATV tires. I drilled a scrap rotor and mounted it to that. The can close the rim clamp on the rotor to hold it in place while changing those smaller tires. Works great.

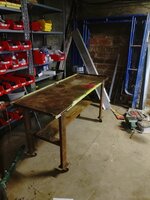
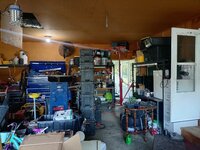
I'm also thinking about moving the safety kleen parts washer back by the balancer. Right now it's in the working half of the garage and trying to decide if I want to keep it there or move it back out of the way. If I move it I can put something else where it is now. A few weeks back I came across a transmission tear down table for 80 bucks on marketplace. I've never rebuilt a transmission but I've wanted one of these tables for a while to do messy work on and it collect the fluid in the drain. This one is really heavy duty and would be nice as a workbench in the main working area of the shop. So thinking about moving parts washer back by tire machines and tear down table work bench to where the parts washer is now. KIMG20250810_153058594.JPGKIMG20250810_153049429.JPGKIMG20250810_153257466.JPG
 
To avoid these ads, REGISTER NOW!
OP
S

signcrafter

Well-known member
Joined
May 9, 2012
Messages
12,493
Here is the tear down table I picked up that is still at the old shop. And a couple of the main area and you can see the red parts washer I'm thinking about moving to make room for the table there.

Having some issues posting pictures from my phone. Will have to try again in the morning. KIMG20250720_092832462.JPG
 
OP
S

signcrafter

Well-known member
Joined
May 9, 2012
Messages
12,493
I can measure mine when I get home Scott. I remember trying a couple variations to see what was comfortable before building my stand.
I came up to wisco last week and had to do tires for oldest daughters car. Then this weekend the local fire department had an open house we took the kids to. When getting out of the truck I noticed a nail in the driver's front tire when I walked by. When we got home I pulled the tire and dismounted it. When I went to break the bead it was tight to the strut compressor so I need to raise the branick a couple inches at least. I've tried googling and can't find any recommendations on what height to mount these branicks at. I guess I can email them and see what they say. Even the branick manual doesn't say anything about mounting height.

A simple tire repair turned into a half day job. I couldn't find my rubber prep pre buffing fluid so checked online and ran to AutoZone to get a can. Asked the guy at the counter and he says yes we have that and walked over to the aisle. I said this stuff is usually in back. He pulled a can of vulcanizing cement off the shelf and handed it to me. I said no this is to prep the rubber on the inside of the tire so you can buff it and scrape it before putting the patch plug combo in. He was confused so I said just a second and pulled out my phone and went to their website and searched and got him a part number which he was them able to look up the location.

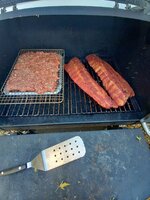
Got home and got the tire prepped and went to put the patch plug combo in and couldn't find my stitcher, pretty sure I have 2 of them. Must be in a bin packed away somewhere. So back on phone searching parts stores. I had started smoking some chicken and pork chops already and had supper so now it was getting late and needed to get this done so wife could go into work at 3am. Only place open that showed one in stock was oreillys about 15 minutes away. So once all the food was done cooking I headed out and it was about 815 and they close at 9. Asked the counter lady for one and she walks over to the aisle which I checked on my way in and didn't see one. Told her this stuff is usually in the back. Doubt they selling much rubber prep and stitches to diyers since most don't have a tire machine to dismount tires. Back to the phone to look up the part number for her. She looks up the location and heads in the back. 10 minutes later she comes back and can't find it. That's not good. One other guy working and he says he will help look after he finishes with another customer. 858 they come out with it and I pay after 28 minutes of looking. Got home and finished up the repair and mounted and balanced the tire and got it back on the truck.
 
Last edited:
OP
S

signcrafter

Well-known member
Joined
May 9, 2012
Messages
12,493
Worked on a few projects during the week. The wife called a week and a half ago saying no hot water. Had her check the flashing light and it was locked out for vapor sensor. Walked her through the process of getting it out of lock out and it fired up. Was ready to run up and fix it that night but when it fired back up I didn't need to rush. We don't have anything downstairs to set off the vapor sensor so figured it just went bad, which they do. Ordered a new one and then headed up to wisco a couple days later. Ohmed out the old sensor and it was right on border of being within spec so replaced it and all is working good.

Decided it was time to winterize the travel trailer. We didn't even take it anywhere this year but the daughter that still lives in iowa stays in it when she and her boyfriend come to visit. I just pull it out into the driveway and open it up for her. Run a hose for water and I put an outlet in the shop to plug it in for her. So needed to winterize the plumbing since they used it a couple times this summer. Got that done and then parked it out of the way for the winter. Sad we don't have time to use it and it just sits in driveway. We have talked about selling it before it's not worth anything anymore.

I drained the pool. It's just a smaller metal pole with a liner pool for the kids. Cleaned that and took it apart and put away. Kids are getting bigger and can swim good now so might get a bigger and deeper one next spring.

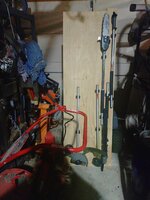
Worked on a few organizing jobs in the shop. Took a piece of scrap plywood and cut it to size to fit the end of one of the shelving units. We have a small single car garage door on the back of the garage. I keep the riding mower there and the outdoor power equipment. Still want to build a shed for all that stuff someday to make more room in the shop. Also had another idea of turning the 3 season room off the back of the garage into a "shed" and putting a roll up door in place of one of the sliders. Will look into those options more next spring. But for now needed to organize this stuff. I ordered some clips from Amazon and they worked great for all the M18 yard stuff. Have the trimmer head with interchangeable tools. Actually have 2 of them, one here and one in iowa. Then have 2 weed whacker heads(one had a brush cutter saw blade type head), pole saw and 2 extensions, hedge trimmer, and edger. Need to get either the rubber paddle wheel or broom brush head to get gravel out of the grass after the plows push it in all winter. Laid out the bored and screwed the clips on and then set the whole board up on the end of a shelf. Turned out pretty good.

Also trying some things to figure out chainsaw storage. I have an M18 that I just hung on the wall for now. Also have a bigger Husqvarna gas saw and then I have a Husqvarna double cut or cut n break saw for concrete. Use this for putting in egress windows. I came up with an idea to try and hang them instead of taking up shelf space. Just cut some 2x6s to fit between the shelf rails and then screwed some J hooks in that the saws handles fit in. Not finished yet but think it will work good once done. Also hung post hole auger on the wall. I'm going to move things around yet to get the best layout but wanted to see how these ideas would work to start off. Then can put other stuff under them on the shelf. Will hang spare chains on the wall and all the accessories can go on the shelf. The different diameter augers can hang on the wall in the back also. These are things I don't use often but are great to have when you need them.
The big walk behind concrete saw and pressure washers will go under the shelf along with the generator. Keep all the gas equipment in the far corner of the shop.

KIMG20250815_223017257.JPGKIMG20250819_090132231.JPG
 
Last edited:
OP
S

signcrafter

Well-known member
Joined
May 9, 2012
Messages
12,493
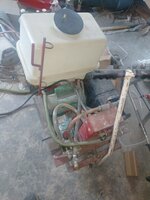
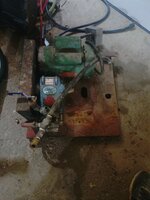
Can't remember if I mentioned this in here yet but I started a thread a couple months ago about electric pressure washers. Not the low power ones from box stores but a gas engine comparable power electric option. I have 2 gas pressure washers that are great. But, you have to pull them out and hook them up to water and get the hose and gun hooked up. Then fill with gas and start them and then put them away when done. There have been many times I would have washed the vehicles or other stuff but didn't want to drag out a pressure washer. Takes longer to get it ready then to use it. So I wanted to set up an electric pressure washer that is ready to go at all times. Wife would be able to use it also when she wants. I got a lot of good info from a bunch of guys, this forum has such a wide variety of knowledgeable members in all sorts of areas. Fatfillup gave some great advice along with some other members. I ended up finding an older used hotsy 3hp pressure washer on a cart. This isn't the typical hotsy that heats the water. Just a regular pressure washer with a cat pump. The seller was the daughter after her dad passed away and she was asking 50 bucks so I snagged that. My hobby has been finding deals on marketplace lately. For 50 dollars I didn't even test it or anything, figured it was worth the gamble. Lucky for me it works good. So I tore the cart down and just kept the motor and pump on its mounting plate.

I'm going to mount this plate above the garage door on the header. Will run a 3/4" water line to it. For now I will just have a hose hooked up to it coiled up on a hook with a gun on the hose. Being right at the garage door I can flip the switch on and wash the vehicles or hose off things like yard equipment or whatever. No dragging out and setting up a gas washer. I picked up some unistrut and threaded rod. One side of the mounting plate will be lag bolted to the garage header and the other will be hung from the trusses with all thread. Eventually I will get a high pressure hose reel for it. I got everything ready but didn't have time to mount it yet. Been looking for a material lift to help with things like this but haven't found a deal on one yet.KIMG20250502_083020925.JPGKIMG20250815_214417333.JPG
 
Last edited:
OP
S

signcrafter

Well-known member
Joined
May 9, 2012
Messages
12,493
I need to get a heater installed before temps start getting below freezing. I was going to do it last year but time ran out and I didn't have too many things that couldn't freeze here yet. But now I do. I wanted to get the vent through the roof done this week while it's still warm and shingles still pliable. Temps dropped last week with highs around 70 but got warmer again. A warning sign to get my rear in gear. Usually Menards has a sale on me heaters in the fall so was going to wait a bit before buying it. Have to redo the gas lines and run one to garage, the vent, and insulated the ceiling on one half of the shop before I can have a heater anyway. Bought the B vent and fittings and flashing and fire stop stuff to at least get the venting ready for the heater. But I've never put one of these in so was having a hard time guessing how the vent needed to be and where it need to go up through the ceiling and roof. So I bit the bullet this afternoon and went and got the heater.

I started a thread a couple years ago about heaters and sizing and all the other questions and got a lot of good advice from members here, especially poorUB. I was going back and forth between the 50,000 and 80,000 but units since my sq footage was right on the border. He suggested the 50 so it wouldn't short cycle and rust out the heat exchanger. I read lots and lots of threads from other members about their heaters. There was a bunch with about the same size shops that were happy with the 50k. Some said they upgraded to the 80k to warm the shop up faster, but these were guys that kept it off until they wanted to work in there. I'm going to keep mine at 45 or so all the time and then bump it up when I'm working. So I won't have to heat all the concrete and objects in there up when I want to go to work. Everything will already be at a decent temp and shouldn't take too long to heat up to working temps. So I went with the 50k unit. Hopefully it works out for me. Can always upgrade down the road if it ends up being too small.

Got the heater home and started getting it ready to hang. Another reason I've been looking for a material lift. But my drywall lift will have to do for today. The corner I want it in has a valley on the roof so needed to keep the vent far enough away from that to avoid issues with leaks. Made a table on my drywall lift and strapped the heater to it and raised it up to be able to visualize everything and make sure everything will work out. Measured for unistrut and cut a couple pieces and lagged them to the trusses. Bolted the heater up and got the venting planned out.

That's where I left off for the night. Tomorrow I have to get the kids off to school and then pressure wash the driveway so it can dry and I can seal coat the end of it. It's concrete besides the apron so will go fast but want to get it done before winter. Then get the vent holes cut in the ceiling and roof. Stick the vent pipe out the roof and get it flashed and sealed up. Then the heater will be ready besides electrical and gas. I might throw an outlet in the ceiling quick while I'm up there since the panel is right there.

I bought all fittings for the gas line. We have 1" coming into the house and then tees off. There is a 3/4" line that goes to our dryer which we have electric now so not using. Then tees off with 1/2" to a grill hook up outside which I'm also not using but would like to down the road. From that location it's only about 15' to the garage and then 9' up and 2' to heater. I didn't look up any calculations but I should be able to change that 3/4" line going from main 1" line to dryer and grill to 1". Then after the dryer run 3/4" to the grill and then tee off and go to shop heater with 1/2". I don't see myself having any other gas appliances in the shop so that should be fine. But may run 3/4" out to there anyway just to be safe for any future needs. Price difference isn't much. I bought or have fittings to do whichever. If I run out of time I will just run 1/2" out to shop for now to get the heater up and running and then go back and up size later. One way or another I'll get the heater running before things freeze.

Then the last step is that half of the ceiling that needs insulation. I got the foam baffles to vent from soffit already. Just need to get the insulation and get it up. Thinking for now Im going to get r19 faced and get it up. Not the best for ceilings but it will hold most of the heat in for now. I've been looking for a used blown in insulation machine for a while now. I've needed one enough times that I wouldn't mind having one. It will pay for itself over time. I posted about this in another thread and was pretty much told I'm crazy. But I do construction for a living so I won't be using it often but will use it and make some money with it. I know they give you a machine to use for free when you buy enough insulation and if this is just a one time thing for myself it would be crazy. But having the machine means I can do it whenever I want and doesn't matter how long it takes me. So plan would be r19 batt for now and then blow in the rest later to get the full r value I want. Just doing r19 because after looking at all my options online it gets me the most r value for the best price for the size insulation I need. Don't want to take the money for r38 or whatever right now. I could be wrong but don't think the heat savings would pay for the cost difference in one year and will upgrade next year.
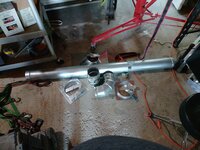
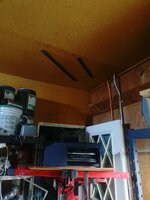
KIMG20250914_153235106.JPGKIMG20250914_155705575.JPGKIMG20250914_193523253.JPGKIMG20250914_195203325.JPGKIMG20250914_195553690.JPG
 
OP
S

signcrafter

Well-known member
Joined
May 9, 2012
Messages
12,493
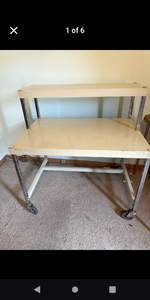
One last post for tonight. Searching marketplace I found a used metal computer desk. Pretty sure these were used when I was in grade school 35 years ago. When the school only had a few computers and would wheel them between classrooms to share. This was listed for 10 bucks and is very sturdy and rolls good. My idea is to use it for a welder cart. My welder cart is a thrown together piece that a friend that was going to school for welding 20 something years ago made for me. It works but not great.

Plan is to make a shelf on the bottom supports and put my miller XMT 304 power source down there. Then the 60 series wire feeder on the table or upper shelf. Then can see what else fits like my cold cut saw and mag drill and grinders and consumables or whatever has to do with welding. Clamps and spoolmatic gun and helmet and gloves and stuff like that. Will see how things come together for what will work and what won't. Thinking a wood shelf on bottom for now just because I have a bunch of wood and no metal. Can upgrade to metal shelf down the road. Will have to add a holder for gas bottles and something for all the cords and cables. Think it will provide a good cart that will provide a lot of storage. Also might sandblast or clean off the table part so I can use it to weld small things quick. I don't have a welding table so that would be nice for those times you need to weld something smaller quick. Will see how it comes together when I get some time to work on it.

Screenshot_20250914-093248.pngKIMG20250914_094415377.JPG
 
Last edited:
OP
S

signcrafter

Well-known member
Joined
May 9, 2012
Messages
12,493
One more little project I did last week. An m12 fuel pump for filling small engines. I have a bunch of gas cans that I've bought over the years. Recently been buying the vp racing jugs and they are nice. But when full they are heavier and a little awkward but the main issue I've found is the clear pour tube. It comes off the can, even with a crimp. Also it doesn't bend, just kinks until you basically hold can upside down. Small engines have small tanks so it can spill pretty easy.

Last week I was looking into the M18 and m12 transfer pumps, both the sticks and the utility type pump. Was going to get the transfer pump if I needed to drain the water heater and was thinking about the stick pump for draining the pool. While searching I found some info about people using the transfer pump for fuel and oil. Got to thinking that would be neat for making a gas pump to fill small engines. I've been keeping an eye out for a fuel caddy that I could fill with ethanol free fuel and has a fuel dispensing handle on it. Be nice to throw in bed of truck and go fill up and be set for a while and be good for filling tanks with its gas pump handle. But one hasn't popped up yet and the price for new is more then I want to spend for that convenience right now.

But got to thinking about making a fuel pump that runs on 12v batteries. I have a handful of pumps from silverados that I replaced the fuel sending units in because of the famous metal fittings rusting out and leaking. But thought 50-60 psi might be a little much for filling small engines. So did a little research and found a cheap pump on Amazon that is in the single digit psi range. Then bought a m12 battery adapter that has a switch and fuse built in. When they came I put them together to try out. Works great but a little slow. I just used some fuel line I had for now but know it's not rated to be submerged. I have the dorman nylon fuel line repair kits back in iowa and from what Google says the nylon is rated to be submerged. So will make up a line from that for the suction side. Will keep the rubber fuel line on the output side for now.

Going to do some digging and see if I can find a pump that is lower psi but higher flow volume or gpm. I also ordered some spare caps for the vp racing jugs and will figure out a way to mount the pump on the cap. Make up a wire so the m12 adapter can be held in one hand and the fuel line in the other while filling tanks on mowers and stuff.

So far I really like it and just need to get it flowing more gpm and it will make a great fuel transfer pump. Have maybe 20 bucks into it at the most. KIMG20250915_094634280.JPGKIMG20250915_094642631.JPG
 
Last edited:
OP
S

signcrafter

Well-known member
Joined
May 9, 2012
Messages
12,493
Stuck around Wisconsin today. Was hoping to get the driveway seal coated and heater vent done and head to Iowa. Have a f150 timing job that parts will all be there tomorrow. And a few other jobs along with getting all the outside work done on the house there before it gets cold soon.

But when I started pressure washing the driveway apron this morning after getting the kids off to school I noticed some cracks in the asphalt that were a little bigger then what the seal coat is good for filling. So ran and got some pourable crack filler and got them filled but it says wait 24 hours to seal coat. So I will do that in the morning after I fertilize the lawn while the dew is still on it.

Then got back to working on the heater vent. I cut the hole in the ceiling where the fire spacer/pipe support will go. Then used a level to mark the center point on the bottom of the roof sheathing. Drilled a hole up threw the sheathing and shingles and then went up on the roof. Marked out the hole for the flashing and cut the shingles and sheathing out. Found out there are 2 layers of shingles on there so that will be fun to tear off sometime in the future. I'm still trying to figure out how high out of the roof my pipe has to be. I had bought a 5' stick but when I got my holes cut I saw I will only have a foot of pipe in the attic. So 4 feet would be sticking out. Thinking even with the support collar at the ceiling and the roof flashing the pipe sticking out 4 ft would make it weak and more likely to lean. Want to keep the height lower if it still meets code. So left off there for the night. Tomorrow I will gently pry the shingles up and get the flashing into place. I've been meaning to order one of these shingle pry bar tools but never did yet.
It looks like it makes nailing doing these repairs much easier and less likely to damage the shingles. I ran and got a 36" long b vent tonight so will just stick that in there for now so everything is sealed up. Main thing was getting the flashing in before it got cold and shingles got brittle. I can change the pipe to the correct length later if needed.

When I ran to the store and picked up 2 4 drawer legal size file cabinets for 5 bucks each. I've been looking for 2 drawer legal size file cabinets. Want to get rid of my desk because it doesn't give much storage for the space it takes up. Will fit as many 2 drawer file cabinets in its place as I can and then make a workbench top for it to use as my desk. Won't be able to sit at it but will get a shop still or something. I want the regular file cabinets because they are 24" deep where the lateral ones are only 18 of I remember right. So would be losing 6" of depth of storage space using laterals. My upper shelves are 24" deep so matching file cabinets will work good and give the most storage. Plan is to put all my tools in blow molded cases in them. Mostly automotive specialty tools, not power tools. Those get taken out and cases thrown away right away. I loved when Milwaukee switched using blow molded cases and most of their tools come with a bag now. I don't keep the tools in the bags but use the bags for things like putting tools in to go to junkyards. I will continue to pick up file cabinets as I find them for a good price. There are lots of the cheap ones out there but I try to look for the heavy duty commercial type ones. Will also try and use the file cabinets for storing things like consumables like cut off and grinding wheels and all that stuff. I also have 2 craftsman work benches with drawers that aren't great that I will get rid of and replace with file cabinets with a work bench on top. This should give a bunch more storage in the same space.

Think that's it for tonight. Didn't take any pictures but will try to get some tomorrow.
 
OP
S

signcrafter

Well-known member
Joined
May 9, 2012
Messages
12,493
Got up this morning and got the fall fertilizer on the yard and kids off to school. I decided since I had my drywall lift out and a make shift shelf on it I would try to hang the electric pressure washer from the ceiling. Get it off the floor to make a little room and get that crossed off the list. I hooked some PEX up to it and set it up with a 3/4" npt connector to use as a way to disconnect if ever needed. Wanted to do this while on the ground since there isn't much clearance to use a crimper once up there.

Lifted it up onto the drywall lift table and moved the lift into place. This thing is heavy. The drywall lift tilts if the weight is on one side and I would have to slide the washer all the way to one end since it's going to be against the wall. I knew it could get very interesting real quick since I wasn't using the right tool for the job. But I raised the lift and slid it over the torsion bar spring for the door. Once at about the right height I used a ratchet ******** the opposite side to prevent the lift from tilting and the washer crashing down. Carefully slid the washer over to the wall and put some lag screws in the holes I had drilled and screwed that side to the wall. Measured and cut a chunk of unistrut and lag screwed that into the trusses to support the other end of the washer. Cut some all thread and got that side supported with some nuts, washers, and lock washers.

Then came the real test, making sure the door will still open and close without hitting the washer. I had thought of this and looked like I had plenty of room since the washer was probably 4" above the door tracks. But didn't think about the door rollers being spaced out from the door so when the door travels the curved part of the tracks it sticks up from the tracks more then I thought. Stopped the door just before it crashed into the washer. I was able to use the threaded rods and nuts to raise that side of the washer enough so the door would clear. I will raise the other side and lag screw it to the wall up higher so it's level. But for now it's up there and out of the way. Just need to run water and electrical to it and it should be ready to wash. That is low on the list though since it's almost winter time. Going to run hot and cold water to the garage this winter along with a drain for a slop sink along the house wall. Will also put the eye wash station I picked up from habitat for humanity a few months ago next to the sink. Will tee off of the cold line at the sink and run the supply over to the washer. But that will be a good winter project once the garage is heated. Just wanted to get the washer up and out of the way for now.

After I got that done without anything bad happening I moved on to finishing the heater venting. It was 85 today so nice and warm up on the roof. I gently pulled the shingle up and took the nails out around the hole I made yesterday. Slide the flashing under the shingles and got everything together and checked to make sure the vent was level both ways. Installed the ceiling support/spacer to hold it up and in place. Got it all flashed and nailed down. Screwed the single wall elbows and adapter together and then popped the cap on the top and checked that off the list. I used a piece of 8" single wall to make a spacer to keep insulation and anything else away from the B vent that goes through the attic.

I was pretty hot and sweaty after getting those done so ate some lunch and cooled off. After lunch I installed an outlet in the ceiling behind the heater. Will get a cord to wire up to the heater sometime. Then all that is left is the gas line which I bought most of the stuff for the other day. I measured a bunch of times since it's in the same area as my feed for garage sub panel and lots of wiring in the house basement in that area. Once I knew I wouldn't make any booms hitting a wire I drilled a pilot hole to triple check I was in the area I wanted to be and drilled a hole to pop the gas line out into the garage. That's where I left off with the heater. Won't take much to get the heater running once insulation is done. Main thing is I got the vent in before the weather gets cold and shingles get brittle.

I was going to seal coat the driveway apron since I got any cracks filled yesterday and that had to sit for 24 hours. I haven't done it since we bought the house so didn't measure the apron when I was at the store the other day and saw the seal coat which reminded me I needed to get it done this year before it gets cold. I figured one bucket would be enough since it's just the apron but when I measured this afternoon I found out it's bigger then I guessed. So had to run and get another bucket tonight and will do that first thing in the morning. Think that's the end of before winter items I needed to get done here besides putting all the outdoor stuff away and unhooking the garden hoses. Then load up tools and head to Iowa and start getting that house ready for winter. KIMG20250916_105813032.JPGKIMG20250916_110039496.JPGKIMG20250916_120118116.JPGKIMG20250424_213800984.JPGKIMG20250916_142732580.JPG
 
Last edited:
OP
S

signcrafter

Well-known member
Joined
May 9, 2012
Messages
12,493
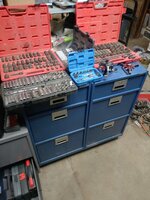
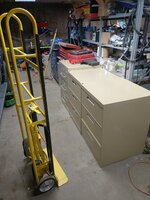
Here is a picture of the file cabinets I got yesterday with some cases in them. I have a ton of specialty tools in cases that take up a lot of shop space. But more importantly when on a shelf I have to stack them and it's a pain to get to what I need if it's on the bottom or behind other cases. I made a thread a while back asking for ideas on how to store these better and file cabinets was mentioned a lot and I chose to go with them. A bonus is there are tons of them on marketplace for cheap. My plan was to get the 2 drawer legal size cabinets to replace some older craftsman workbenches and then make a top for them of some sort. So I still will have work benches but the file cabinets will be better storage then the craftsman ones. But these 4 drawer ones came up for cheap so I bought them to try out.

I had a bunch of extra shelf uprights from connecting multiple shelves together in a line. So in the main area I used them to make an upper shelf all the way around for storage. Between the uprights is 60" and these file cabinets are 18" so I can get 4 between each upright. I can do a taller 4 drawer and then three 2 drawers with a 54" work surface on top. The work surface won't be used as a work surface so much but more as a work area that is half storage. I have a few top chests I keep more specialized things in. One is drill bits and taps and does and easy out type stuff. Another is mostly specialty engine type tools. one had machinist tools in it and one had coolant tester and filler and all the adapters in a couple drawers and then spark plug sockets and some other stuff in the rest. I had 4 of them in a line on top of the craftsman benches in the last shop. Most likely will set these up on the work surfaces and use them until I can get another bigger bottom chest to combine all these into one.

When I started getting tools as a teenager I only had money for tools and not tool boxes. Spent many years using buckets, bags, and Rubbermaid bins with tools thrown in them. Then bought some used boxes here and there as I found deals on them. Boxes where more of a luxury item for me. Still think of them as that, tools either save me money by allowing me to do the job myself or make me money when I do work for others. I have to have the tools to do the work but don't have to have boxes to do work. About 10 years ago I returned a bunch of insulation and other stuff that was leftover from a big job to home depot and got store credit. Just happened that they were closing out the husky boxes made by international. I slept on it for a few nights and decided to use the credit on a 56" top and bottom box. I almost felt guilty spending that much money on a box. But now that I have been using it I love having the tool storage and would love to have more since I've outgrown what I have now. But will have to wait till I have excessive cash laying around and nothing else more important then a toolbox to spend it on. Or if a great deal pops up. Too many other things I feel the money would be better spent on at this time.KIMG20250916_134334475.JPG
 

zmotorsports

ALLIANCE MEMBER
Joined
Oct 20, 2009
Messages
21,454
Location
Northern Utah
Thanks Mike. I know yours is on a stand but what height of the floor do you recommend the strut compressor to be mounted at?

I can measure mine when I get home Scott. I remember trying a couple variations to see what was comfortable before building my stand.


Scott, I owe you an apology, I completely spaced off this request a few weeks back. I'm sorry, I don't even have a good excuse other than I simply spaced it.

Here are a few pictures of the height at which my Branick 7600 is mounted on the cart. brannick1.jpg

Approx. 25" at the bottom.
brannick2.jpg

Which puts the top around 62.5". This works well for mine and my son's height and is comfortable working at this height.
brannick3.jpg


Hope those help and I'm sorry it took so long to get you this information.
 
OP
S

signcrafter

Well-known member
Joined
May 9, 2012
Messages
12,493
Scott, I owe you an apology, I completely spaced off this request a few weeks back. I'm sorry, I don't even have a good excuse other than I simply spaced it.

Here are a few pictures of the height at which my Branick 7600 is mounted on the cart. brannick1.jpg

Approx. 25" at the bottom.
brannick2.jpg

Which puts the top around 62.5". This works well for mine and my son's height and is comfortable working at this height.
brannick3.jpg


Hope those help and I'm sorry it took so long to get you this information.
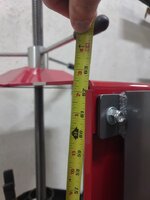
No need to apologize Mike, and thank you for the measurements. I was trying to squeeze it in next to the tire machine since there was a void there that looked like it would work well. But need to either move the tire machine a few inches or move the branick a few inches over. I just measured mine and it's 30" to the bottom and I'm only 5'8". The handle is pretty high for me but not horrible for the amount of times I'll be using it. I want to take that sliding door out and make it a solid wall to hang shelves on for wheel weights and other accessories for the balancer and tire machine. It's a 3 seasons room they made when they did the garage addition. I use it as a shed right now. Think it was more of a smoking room for the old owners. So will be able to move the branick over a little at that point and will lower it down to around 24", should be nicer to use for short guy like myself. Lol. Should be able to still fit in between tire machine and balancer and fill that dead space. Shouldn't affect using the balancer at all. No real need to stand right in front of it other then making pushing buttons easier. But these are 3 things that don't get used often so can sacrifice a tiny inconvenience for being able to fit more useful equipment in the shop. Thanks again for taking the time to measure that Mike, much appreciated. Thought it was weird I couldn't find much of anything out there on Google or even the branick manual. Would have thought they would have provided some sort of guidelines as a starting point. And having not used one but once or twice in my life I didn't know what the standard was.
 

zmotorsports

ALLIANCE MEMBER
Joined
Oct 20, 2009
Messages
21,454
Location
Northern Utah
Happy to help Scott. I couldn't find a standard either. I placed mine on my motorcycle lift table and raised/lowered it until I found a comfortable height that "felt" right, then built the cart to that spec. So far it's been perfect for me @ 6'2".
 
OP
S

signcrafter

Well-known member
Joined
May 9, 2012
Messages
12,493
Yesterday being the first day back in Iowa I had to catch up on some stuff around the house and then started going over the packages that have came. I've wanted a topside creeper for a long time and everyone recommended the traxion creeper so I've been going back and forth every time a truck engine job comes up. It was just hard to spend the 300 bucks for something I consider more of a luxury even though I knew I needed to just pull the trigger since I'm getting older and waking up more sore each day. I have a 3.5L timing and phaser job coming up so figured I would pull the trigger. I hate to admit this but I went the cheap route with the vevor model for half the price. That was easier to pull the trigger on at this time and it got decent reviews so I took a gamble since it's something I won't be using much but will be nice the couple times I do use it. I had looked for used and nothing until last night one popped up on marketplace for the same price as I paid for my cheap one. Seems to be the way it works when you need something. LOL.

I put it together last night and overall it seems pretty decent so far. The top padded area is complete garbage but the frame seems decently built. The hardware was a little iffy so I will probably go through and replace all the bolts with some nicer ones. Will try it out and see how I like using it. If I like it I may try to sell this one for half what I paid and pick up a traxion one. I usually will hold out till I can take the money for the quality stuff, buy once cry once. But have a bunch of other stuff that's adding up fast that is more important right now like the garage heater and insulation. So figured it was the cheap one or none right now. Hopefully it will hold up for a little while and if it ends up working half way decent I might just make a new padded support for it and keep using it. Time will tell.

This 6.0 has kicked my ***, doesn't help that it's a complete cobble job when it came in for a hot no start condition. Since everything was a cobble job I air tested the high pressure oil system and had leaks on both sides under valve cover, mostly passenger side. Being how it was and seeing whoever did work on it before obviously didn't care about doing things right I opted to replace the OE stand pipes, dummy plugs, ****** cup orings, and injector seals. Basically everything under the valve covers. I also pulled the IPR and the metal screen was damaged so bought a new one of them from napa, not OE. Figured that should cover myself and not just keep changing one part at a time and the seals aren't that expensive and I would be in there anyway so not much more work. That plan failed and still have a leak on passenger side. I told the owner I didn't really have time but if they wanted I would keep digging as I have time or they could take it somewhere else. These aren't overly complicated systems so I figured I could find the leak but so far haven't been able to but haven't stuck a lot of time into it either. Just here and there between doing other work. I ordered new ****** cups just in case those got worn down from a seal leaking, saw that on one of the diesel sites so figured that's all that's left under the valve cover unless one of the parts I ordered was bad.

There really isn't a way to test the IPR but I did cobble together some hose clamped to the end of the IPR so I could apply shop air to it and then got a harness connector and put some alligator clips on it so I could cycle the IPR and see if it's working. Both the new and old seem to be working but that's only at shop air pressure and not the high pressure of the oil. I also tested that the computer has control of the IPR using a test light and my scan tool bidirectional controls. Also I believe the air testing adapter I bought to go in place of the IPR seals it off when the adapter is in there and I still have a leak under valve cover so I'm fairly confident the IPR is good. The only other thing it could be from what I understand is the snap to connect fitting in by the HPOP. But from talking to others they said most of those have been fixed a long time ago, this is a 2005 truck, and they haven't seen issues in years. Also if it was that you would see air leaks on both sides valve covers from what I understand and now the drivers side doesn't seem to have a leak. Now that I have the top side creeper the plan is to install the new ****** cups and swap dummy plugs and stand pipes from side to side and see if the air leak follows. And go from there. Might have some time this weekend to do that.

Before the hot no start issue came up they had talked to me about a rattle it makes mostly at idle. They stopped by one day and it sounds like a cracked flex plate and goes away under load. So that was a future job also. During my testing after making some repairs I was revving the engine in park and heard a noise that went away pretty quick. Being a cobbled truck and with the issues I was running into I put that at the back of my mind after the noise went away real quick. A few weeks ago I needed to move it out of the shop so started it up and put in reverse, nothing. Engine is not connected to transmission anymore. At this point I walked away and haven't looked at it since. But need to get it out of the shop so need to get back on it. It still starts pretty good when cold so I don't think flex plate is cracked like originally thought. My guess is the nuts holding the flex plate to torque converter are gone or the studs on the torque converter got sheared off. These would explain the noise I heard that time. I'm going to pull the inspection plate and take a look when I'm working on it. Have a feeling I'll be pulling the trans out of it in the near future.

The parts for the 3.5 f150 are here so need to get the 6.0 out of the shop so I can knock that out and see what issues I run into on that job. Always seem to run into some unexpected thing but that's life and another learning lesson.

Have to do some remodeling jobs for a guy today who bought a house a month or so ago. Did a bunch of stuff for him 2 weeks ago and now have to rip out a built in desk and cabinet in the dinning area and then cut down and make an antique curio cabinet type china hutch fit in there. Going to be an interesting job trying to make this work. Also have to install a shop heater for him, good thing I got some practice doing mine last week. LOL.KIMG20250918_155922047.JPGKIMG20250918_160238749.JPG
 
Last edited:

zmotorsports

ALLIANCE MEMBER
Joined
Oct 20, 2009
Messages
21,454
Location
Northern Utah
Scott, good call on getting yourself a topside creeper. I have one of the original topside creepers, same as the Traxion model 3-100 sold now. I've had mine for over 20 years as my wife got it for me for Father's Day one year after complaining about all of the core supports on the newer trucks being plastic and nowhere to kneel or support yourself. It has been one of the best additions to my shop and although it doesn't get used every day like other tools, when it is needed it has been justified over and over again too many times to count. It is so much more comfortable and I feel easier to do professional work as it allows you to use both hands to work vs. having to use one hand to balance or support yourself while working with the other.

Those high pressure leaks can be a pain to locate without properly being able to pressurize the system. I broke down and purchased a very nice hose and valve assembly from Accurate Diesel about a couple of years ago that tests through the IPR port and it works great. There are so many places those 6.0's can leak from on the high pressure side that this tool makes it much easier to locate them. Unfortunately, they can be hard to get to when hot which is when most seem to fail, hot starts. I have found getting as many components out of the way and ready prior to running the engine is helpful, then once the engine is up to temperature, there is less to remove and therefore can get the tester connected while it is still hot and in a failed condition to find the leak.

As for the flex plate cracking, sounds like you may be on the right track, but I have seen the center break completely out where the crank spins and nothing turns the torque converter, although this is usually accompanied by an awful sound.

Best of luck in the diagnosis, curious what you'll find. Keep us posted.
 
OP
S

signcrafter

Well-known member
Joined
May 9, 2012
Messages
12,493
Scott, good call on getting yourself a topside creeper. I have one of the original topside creepers, same as the Traxion model 3-100 sold now. I've had mine for over 20 years as my wife got it for me for Father's Day one year after complaining about all of the core supports on the newer trucks being plastic and nowhere to kneel or support yourself. It has been one of the best additions to my shop and although it doesn't get used every day like other tools, when it is needed it has been justified over and over again too many times to count. It is so much more comfortable and I feel easier to do professional work as it allows you to use both hands to work vs. having to use one hand to balance or support yourself while working with the other.

Those high pressure leaks can be a pain to locate without properly being able to pressurize the system. I broke down and purchased a very nice hose and valve assembly from Accurate Diesel about a couple of years ago that tests through the IPR port and it works great. There are so many places those 6.0's can leak from on the high pressure side that this tool makes it much easier to locate them. Unfortunately, they can be hard to get to when hot which is when most seem to fail, hot starts. I have found getting as many components out of the way and ready prior to running the engine is helpful, then once the engine is up to temperature, there is less to remove and therefore can get the tester connected while it is still hot and in a failed condition to find the leak.

As for the flex plate cracking, sounds like you may be on the right track, but I have seen the center break completely out where the crank spins and nothing turns the torque converter, although this is usually accompanied by an awful sound.

Best of luck in the diagnosis, curious what you'll find. Keep us posted.
Thanks for the advice Mike. I'm looking forward to using the creeper even if it is the cheaper one. Will upgrade and sell this one when I can. I have the tools that screw into the IPR and ICP to apply air. I just realized I was calling the IPR an FPR in my last post. I'll go back and fix that. But I've been using them to apply air to test. Just can't see or feel where the air is coming from but by listening with stethoscope it's from something in the rear of the passenger side valve cover. Will install the new ****** cups and swap the stand pipes from side to side this weekend and see what that does.

I thought about the center breaking out, that was my first thought. But if that was the case the starter wouldn't be able to spin the flex plate. It still starts, unless it's hot. So that is why I'm leaning towards the nuts backed off or studs snapped off. But I'll find out. Haven't even cared to look into it to be honest. Normally I would have got under and taken the inspection plate off and looked right away or it would be eating at me. But after everything else with this truck I just shut it off and walked away and haven't cared to look. But need to get back on it to get it out of my way.
 
To avoid these ads, REGISTER NOW!
OP
S

signcrafter

Well-known member
Joined
May 9, 2012
Messages
12,493
Went and tore out some cabinets this morning and some other little stuff at the house. The guy is going to patch the walls and paint them since he is a painter. I'll keep working on some other projects there a little each day. One of the projects is installer a garage heater like I just did in my garage, good thing I got some practice on mine. I ran the gas line 2 weeks ago so just need to vent it and hang the heater. I ordered the shingle prybar I linked to in my above post to nail the shingles back down easier. Always trying to add tools to make jobs easier.
Then I was going to change the wheel bearing on my impala that my Grandma gave me when she went into the nursing home last year. It's a 2004 she bought new when my Grandpa passed away and had 60,000 miles on it when I got it. It hasn't been driven much at all in the last 10 years. I have taken care of it since she got it and also took care of her and her house until I moved to Iowa. So when she had to go into the nursing home and they were going to sell her car she told my aunt who is the executor of the estate that if I wanted it then she was giving it to me. I have been driving it since then when I don't need my truck to save on fuel costs going back and forth. I started to get a traction activated warning once in a while when I would back out of a parking spot turning the wheels and then put it in drive. I caught it one day when I had the scan tool with me and it was for right front wheel speed sensor. which is built into the hub so I just got a new unit hub. Will put that in tomorrow now. Also need to get some tires shipped to the Wisco house so I can mount and balance them next time I'm up there before the snow starts to fly.

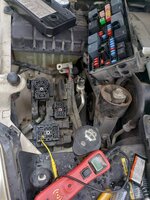
I had a guy call me last night about his 2006 cadillac heating up and no AC. He dropped that off today and I scanned it and had circuit codes for cooling fans, ac compressor, secondary air pump, mass air flow, and O2 downstream sensor. Figured I would start with the cooling fans since it was heating up which means he can't drive it. Tried to turn them on with bidirectional controls and nothing. Went to check fuses and one 15 amp was blown so I replaced it and started the car and it blew again. Looked up some wiring diagrams, side not if you don't have access to wiring diagrams go get a public library card. I use my kids library card and log in online and they have free access to chilton repair. They had chilton or mitchell or alldata with the iowa public library also so I'm guessing most public libraries have some sort of repair data for free.

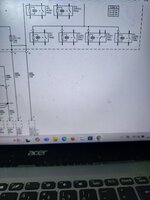
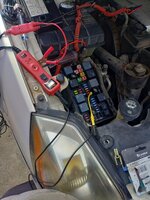
Looking at the wiring diagrams the fuse that was blowing controls the B1S2 heater circuit, mass air flow, and then sends power to 6 relays that are in the fuse box, the AC compressor relay, 3 cooling fan relays, 2 secondary air pump relays. I hooked up my power probe and used an adapter from my test lead kit to go into the fuse terminal. Applied power with the PP and the circuit breaker on the power probe tripped. Took all the relays out that are on that circuit and tried the PP again and still tripped. Only thing left was the O2 sensor so I went down and had to drill out 2 rivets that hold a heat shield channel to the bottom of the car that the O2 wiring runs through to get to the connector. Unhooked that and tried powering the circuit again and still tripping. So that means the fault is somewhere between the fuse and either the O2 sensor connector or the fuse and the MAF sensor. Looked around under the car for any signs of rubbing or corrosion but nothing popped out at me. Decided to pull the fuse box out of the car. Found the pins for the wires going to the O2 sensor and the MAF and using test lead adapters I applied power to each of them and PP didn't pop the circuit breaker. Put the fuse box back in and tried again and popped the breaker. Just to confirm I pulled the fuse box again and sent power down each wire and no popping. I like to triple check myself before making a call with electrical issues like these. So called the owner and let him know he needs a new fuse box. Told him that it would have to wait till Monday and I would have to run to the salvage yard and see what I can find. Hopefully they have one in decent shape since the hoods are usually left open and if someone pulled the fuse box cover off it will have been left exposed to rain and snow for who knows how long. I enjoy field trips to the junkyards to pull parts. Will have to think if I need anything else while I'm there.

I don't use my power probe very often but there have been a lot of threads on here about them and guys arguing over if they are worth it or if using a test light and DMM are better. When I reply I usually say it's just another tool option and they all have their place. This is one thing that it works really good at with the built in circuit breaker. Will let you know Monday if a new fuse box fixes the issue.KIMG20250920_170028896.JPGKIMG20250920_165512237.JPGKIMG20250920_181054199.JPGKIMG20250920_181818913.JPG
 
OP
S

signcrafter

Well-known member
Joined
May 9, 2012
Messages
12,493
This is just a little story about repair shops that I was sort of involved with this week. I'll start off by saying that I consider myself an average DIYer being that I don't have any training and never had anyone to teach me about repairs. I've learned by doing and researching as much as I can. I started fixing my junk when I was 16 because we couldn't afford to take it to the shop, even back then when shops weren't crazy expensive. So it makes me scratch my head with stories like this and I have more then a handful of them about shops around here. This isn't a shop bashing thread because there are good ones and bad ones just like everything else, just a story of a shop experience.

I have a person I have done a lot of repairs for over the last 5 plus years on their vehicles, their company vehicles, and their kids vehicles. A few months ago they brought one of their daughter's jeep cherokee to me for a noise in the front end, think it was a 2017. I was having a little bit of a hard time narrowing it down due to their 4WD setup but it was similar to a CV shaft noise. Ended up tracing it down to an issue with their PTU(think that's what they call the front diff/transfer case setup. Did some searching and found they had just released a recall but didn't have a solution. If I remember right it was something about the CV shaft coming loose but don't remember for sure. Fast forward to 2 weeks ago and they brought me her new 2020 ford explorer that has AWD lights on. The younger girl was ready to cry because she traded her cherokee with issues and no solution in and now thinking she has similar issues. I told them I didn't have time to diagnose it because I was leaving for wisconsin and they said that was fine but asked that I look at it and give them any advice. I don't remember the exact codes but it had some for the front axle as well as some lost communication with the AWD control module under the passenger seat. I did some research and there are a few common issues with this and told them with the codes it was setting it could be the front axle disconnect actuator or actuator sensor but the loss of communication codes could also be a module or wiring issue. Suggested they take it to the dealership and pay for an hour of diagnostics from them and let me know what they find if the quote is high and when I get back from Wisco I could fix it if needed.

They took it in this Friday to a dealership about 30 minutes away. The dealership's repair shop in this town which is a ford/chevy/dodge/chrysler dealership in one *****. Can't diagnose the simple stuff so I steer people away from them. They called me Friday saying the Ford dealership told them it was an oil seal on the front axle disconnect leaking causing her issues and that they would fix it for free out of good faith since it's where they bought the car. Nice, but I explained that when I was searching ford has a TSB about the codes her truck was throwing and if it throws these codes then you need to replace the intermediate shaft that has the axle disconnect built into it and also the passenger CV axle. They came out with a new design that gets rid of the front axle disconnect and just makes it full time AWD after reprogramming the module. So I was a little confused that they just replaced the seal when Ford is saying to just get rid of that axle disconnect actuator all together when those codes come up. But I don't have experience with these so figured they knew more then me. She called me back at the end of the day Friday saying she just got off the phone with them and they said the seal didn't fix it. Now "they are thinking it's the module and they ordered one but won't be here til Monday". She was a little upset with them at this point because she never authorized any work besides the diagnostics. The dealership said they would cover the cost of the new module and the labor since they had bought the car from them 3 months ago. Which is really good of them since they don't have to do that, there was no warranty on the used car when they bought it.

But what gets me is the first mis diagnosis which from what I have read isn't the correct repair according to Ford. And now the "We are thinking" comment about the module. To me it seems like they aren't doing any testing at all and just guessing. Which I could have done myself but I won't make the call until I know for sure and why I sent them to a dealership when I didn't have time to learn that system and do the testing needed. A module isn't hard to test usually, powers, grounds, and ohm out can bus lines. I would be embarrassed telling some I'm thinking it's your module now. They are doing the repair for free so can't really complain but just don't get how a dealership with factory trained techs and the best scan tools can't know for sure if a module is bad or not.

Another story similar to this one which I've told on here multiple times I think is with the dealership here in town and a 2019 ram 1500 that had no heat in the winter. He took it to dealership and they charged him for diagnostics and told him he needed to replace the automatic temperature control module and the HVAC control module and that they couldn't guarantee that would fix it. What? He brought it to me and I wasn't familiar with this system either but hooked scan tool up and when I pushed buttons I could see on my scan tool that the computer was getting the signals. So automatic control module is good. Took 5 minutes to find that much out. Then removed glove box and unhooked the HVAC module connector and tested for power and ground, yep. Then ohmed out the data network lines, yep. Bad HVAC module that was on national back order. Was able to find one used and get it in and all worked again. I don't do auto repair everyday and have no training and hear about this stuff all the time and it drives me nuts. You should be able to condemn a module 100 percent from my experience.

Not a rant or bashing anything but just a story from this week that makes me shake my head. Hopefully it is the module that fixes her issue. Told them if it isn't and the dealership won't keep fixing it for free then bring it to me and I'll figure out what is wrong, won't be much left to replace in that system by then! LOL
 
OP
S

signcrafter

Well-known member
Joined
May 9, 2012
Messages
12,493
Ran to the junkyard Monday and walked the muddy mile to find the cadillacs. There was only 1 that had the same fuse box and it didn't have a hood so has been exposed to the elements for who knows how long. Took a gamble and got it home and same issue. Started thinking maybe I was wrong in the call and went over the wiring diagrams again and I couldn't see how I could be wrong. With all the relays removed that eliminates anything but the fuse box itself and the 2 circuits going out of it to the downstream O2 and mass air flow. I had sent power to both those with the fuse box removed and it didn't trip the power probe circuit breaker. So that wiring should be good leaving just the fuse box. That fuse F21 powers those two sensors and then sends power to the control side of 6 relays. Being it's only the control side power removing those relays should eliminate everything to do with those things beside the internal circuit board in the fuse box. I couldn't for the life of me figure out what else it could be. But being both fuse boxes were blowing the same fuse I was second guessing myself. But there is power going to 6 relays and to two sensors so that is a lot of paths on the internal circuit board. This is a double layer circuit board so can't see inside to see if something is corroded or bad so decided to try another fuse box.

The junk yard only had 1 cadillac with this fuse box so I tried calling some other places further away and they didn't have one but could order one in for 135 dollars. I paid 25 dollars at the local pull it yard and I can order one myself for 65 to 100 dollar range. Was doing some research last night still wanting to second guess if I could be missing something or not. Came across an ebay listing for the fuse box and was able to get a part number from it and with some googling I found out that 2006 and 2007 buick lucernes have the same fuse box. So this morning I headed back to the local junk yard to see if they had some lucernes, and they had 5 of them with this fuse box in it. Found one that looked halfway decent with the hood down so grabbed that one. Also got a used tire while I was there, more on that in a moment. Got home and put fuse box in and cleared codes and car is back to normal. Was relieved with that and glad I stuck with the original diagnoses even when the second part was doing the same thing.

Back to the tire. The owner of the cadillac is a friend and I offered to give him a ride to work Sunday morning. It's about a 20 minute drive and about 10 minutes in on the interstate I had a tire go flat. Got the spare on and finished giving him a ride and made it back home. The car I have right now was my Grandmothers and she gave it to me when she went into the nursing home for taking car of it for her. It's a 2004 impala so nothing special but it only had 60,000 miles on it when I got it last year. I've put a bunch more on driving back and forth from Iowa to Wisconsin. It makes a nice little travel car and saves on fuel over the diesel truck so I take it whenever I don't need a truck. The tires still had some life in them but got to thinking after this that I have no clue how old they are. My grandma has dementia and hasn't drive the car in years. I'm in Iowa and my tire machine and balancer are in Wisconsin so don't really want to buy a set of tires and pay to have them put on here but needed something to get back to wisconsin so I could do it myself. I spent some time on marketplace looking for a rim and tire or even a whole set, could have a set of winter tires and a set of summer tires then. But dealing with people selling tires on marketplace became a headache. Asked one guy that was parting out an impala how much for rims and tires and he said tires are only 3 months old and would take 250, sold. Then he messages me saying to bring my rims and tires and now it's 250 plus my rims. I'm scratching my head wondering how my rims and tires even came into the equation. So while at the junkyard I just grabbed a used tire for 35 bucks and then called a guy I know who is the service writer for a shop here in town and asked if he could mount and balance them for me. Dropped them off and later he text saying it was done. Picked it up and asked how much and he said don't worry about it. I gave him a 20 and went home to put it on the car.

Also went and changed out a bunch of light fixtures at the house I'm doing work for a guy on. Ran an ethernet wire and fished it up the wall and will move his router tomorrow after the wife says were she wants it exactly. Started to get things ready to install his shop heater tomorrow also. Got up in the attic to see about running a wire for an outlet and see how the venting will work. Should get that up tomorrow for him. Going to dig into why the 6.0 flex plate/torque converter isn't getting any power to the trans tonight.

No pictures to add today. Hopefully will get some interesting pictures of the 6.0 damage inside the bell housing for tomorrow.
 
OP
S

signcrafter

Well-known member
Joined
May 9, 2012
Messages
12,493
Heres a height on my Branick 34 inches to base from floor. Gives me a comfortable height when working on suspension components but also high enough my jack can live under it. 20250928_181932.jpg
Thank you for taking the time to measure it. I measured mine when I was in Wisconsin and don't remember what it was now but thinking it was around 24" like Mike's is. I need to move it up or over so I can fit larger tires in the tire machine's bead breaker. My stock f250 tires were too tall for it and hit the strut compressor. I don't do many struts so that can wait. I want to take that sliding door out and frame the opening in which will allow me to move it over and also have more wall space for shelves for wheel weights and tire stuff.

I see you have the 7400 like mine, have you run into anything it won't handle? Before picking this up I was trying to find out what the difference was between the 7400 and the newer 7600 and from what I could find it seems like branick says it has more travel to handle some struts, think the cherokee trailhawk or something was mentioned. Figured it would do pretty much anything I will run into.
 

Xti04

Well-known member
Joined
Nov 11, 2016
Messages
2,355
Thank you for taking the time to measure it. I measured mine when I was in Wisconsin and don't remember what it was now but thinking it was around 24" like Mike's is. I need to move it up or over so I can fit larger tires in the tire machine's bead breaker. My stock f250 tires were too tall for it and hit the strut compressor. I don't do many struts so that can wait. I want to take that sliding door out and frame the opening in which will allow me to move it over and also have more wall space for shelves for wheel weights and tire stuff.

I see you have the 7400 like mine, have you run into anything it won't handle? Before picking this up I was trying to find out what the difference was between the 7400 and the newer 7600 and from what I could find it seems like branick says it has more travel to handle some struts, think the cherokee trailhawk or something was mentioned. Figured it would do pretty much anything I will run into.
We had one at each of the last two shops I worked in and I loved the way it worked. I bought mine from a guy after Helene trashed his property. I have only used it for a few different struts here, but theres not been much it couldnt handle. Last two big jobs were disassembling Porsche cayman struts for camber plates and a silverado getting new shocks. Handled both with ease.
 
OP
S

signcrafter

Well-known member
Joined
May 9, 2012
Messages
12,493
Been busy with other projects and working on customizing that china hutch to fit in the opening in a customer's house. Ran a wire to move his internet router and now just waiting for him to wallpaper that wall so I can throw that hutch in there. He is going to paint all the cabinets after it's in there. Was told the other day I will be putting a butcher block countertop on his island also. Also been trimming out our Iowa house and got the deck stained this weekend.

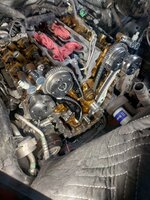
I got around to looking at the 6.0 flex plate and torque converter today. Not looking good. Was able to get an endoscope in the inspection plate and the studs on the torque converter wore elongated holes in the flex plate and seem to be missing. So will call the owner in the morning and let them know but looks like it will need a flex plate and torque converter and hopefully that is it. I did fins a bell housing bolt laying under the truck. Not sure if it rattled apart when things let loose or what. bell housing looks to be tight to engine and I don't see any cracks or anything. Also noticed starter is missing a bolt but based on the wiring and everything else on this truck I'm guessing it just never was there. Whole truck is a mess and starting to wish I wouldn't have messed with it but to late for that and it's been a learning experience.

KIMG20250928_202825509.JPGKIMG20250928_202854944.JPG
 
OP
S

signcrafter

Well-known member
Joined
May 9, 2012
Messages
12,493
Got a few things done this week. Been doing some work for a guy that just bought a house and him and his wife are making the changes they want to make it there home. I changed all the plumbing and light fixtures in the whole house. Put up this pool table light the other day. Was a fun one to do. Put it together on top of the table and then used a 3 plane laser to shoot all the holes for the anchors in the ceiling. Then used the cables to raise it up. Pretty fancy light but looks really nice. We have a pool table at our new house and while I'm not a pool player it's something fun to do with the kids so when I redo our basement and move the table I may make my own version of one of these lights. Think he said he paid around 800 for this one and no way I'd spend that much money for one.
Screenshot_20251006-091827.png

He has a 2 car garage attached to the house that had an older electric heater in it which came down and put up a 50K BTU Mr heater from menards. Got that hung and ran a gas line to it, electrical outlet, and vented. Have been fishing wires all through his house the last couple weeks adding outlets and changing locations and type of light fixtures. Got up to 90 this week and playing in the attic was not fun.
KIMG20251004_103756372.JPG
That white pex line hanging down from the ceiling will be getting moved this week. Going to drill through his brick and run a frost free line after I cut out the drywall and drill all the studs. Then will box in the gas line making that little bump out in the wall even to cover the line. Looks sloppy now but will get cleaned up. I can't stand wires or lines ran like that.


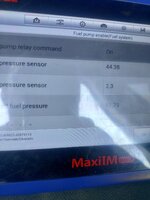
Had a 2018 silverado 5.3L dropped off with check engine light on. Scanned it and had a few codes, P018B and P2635 which are fuel pressure performance codes on the low pressure fuel system. Followed a few GM TSBs and flow charts to find the pressure sensor is working as it should and then hooked my fuel pressure tester up to it to verify pressure readings. One of the TSBs says to start the truck and then depressurize the in tank pump and let the engine stall while watching fuel pressure reading on scan tool. If pressure doesn't read close to zero after engine stalls then sensor is bad. This one dropped down so sensor is good. Then with my tester tied in just before the high pressure pump I closed the valve on the tester to dead head the low pressure pump and then commanded it on a couple of times and it never built more then 43 PSI. Since I can control the pump with my scan tool the fuel pump module seems to be working just fine so thinking it's just a pump getting weak.
KIMG20251003_095201872.JPG


The other code requesting the engine light to be one is a P0110:61 ABS pump motor circuit stuck. GM says this sets when ABS module senses abnormal voltage when it tests the ABS pump if I remember right. I tested hooked a test light into the harness after I unplugged it and power and ground are good. So will need a new ABS pump/module which looks to be back ordered. A couple online dealerships show them in stock but I've ran into this before where I will order a part that I know is backordered and then a few weeks later email them and they say they are waiting for stock. There are a bunch of used ones close by and since a new one is over 700 I think we going to try the used route and hope for the best. To replace it you have to undo at least 6 brake lines in tight quarters. Think I'm going to pick up some ratcheting flare nut wrenches to try out. Will break fittings loose with my good flare wrenches and then try the ratcheting ones to spin them all free and put new back in. The older I get the less my hands like turning a wrench like that when you can only go 1/4 to 1/2 a turn at a time and have to reposition.

Also will need to bleed the whole system after I get it replaced including an ABS bleed with scan tool. I have a mityvac MV6835 vacuum bleeder that I have used for many years and really like. It's their dedicated vacuum brake bleeder, not the hand pump brake bleeder. But that is 6 hours away. So thinking about picking up a pressure bleeder. That way I will have both a vacuum and a pressure brake bleeder for future use. Try to buy a different tool to have more capability when I already have a tool to do the job but need to buy another one. I've run into this situation a lot while we are in the process of moving and it ***** having to buy another tool when you already own the same thing. So I've been trying to make the best of it and get new tools that will do what I need but are different in some way then what I already have. Needed a fluid extractor a while back and I already have the big mityvac pneumatic one so got the hand pump one this time and now can extract fluid by pumping or by air. Have added a bunch of tools by needing something I have but it's 6 hours away. I've been watching for a deal on another tool box. Might have a whole second shop by the time this move is over. I wasn't expecting to keep doing auto repairs here but they just keep coming and I have a hard time turning down the money.

I know motive bleeder has been the standard but see a bunch of newer options out there now. Granted it's on amazon so probably chinese knock offs but going to look into my options. Seen this electronic one by autool that I want to look into more, https://www.amazon.com/AUTOOL-Autom...Automatic/dp/B0DP2PX7G7/?tag=atomicindus08-20. I have an autool smoke machine and it seems to work pretty good. I don't like buying cheap tools but for things like a smoke machine or pressure bleeder I just don't use them enough to justify the cost of the expensive ones. Then there are sets of caps for different make and models, both plastic and aluminum sets. https://www.amazon.com/Wzyblixo-Cylinder-Kit,Aluminum-Material,Brake-Connector,/dp/B0FH48ZMB7/?tag=atomicindus08-20. I'm waiting on the owner of the truck to tell me what he wants to do but if he gives the go ahead I'll look into these more and order something.

I picked up another file cabinet the other day, a 36" wide horizontal 2 drawer for 10 dollars. I like the horizontal design but it's only 18" deep. So my plan is to use file cabinets under and have a workbench using some rails on the shelving uprights I have around the shop. The workbench is 24" deep so to me I'm loosing 6" of storage when the file cabinets are only 18" deep. Was planning on getting the normal file cabinets that are 24" deep to maximize storage. But this one was only 10 dollars so picked it up to see how it works out. There are a ton of file cabinets on marketplace that are heavy duty and all shapes and sizes. My truck is in Wisco so can only get one at a time in the car and only the smaller ones. Picking up a few cheaper options to be able to see what will work the best. Can always sell or give them away if they don't work out.

Not able to load pictures for some reason.
 
Last edited:
OP
S

signcrafter

Well-known member
Joined
May 9, 2012
Messages
12,493
Not sure what the deal is with not being able to upload the picture but I tried attaching the pool table light a bunch of times last night and it would get to 100% and then just show blank on the little thumbnail when uploading and wouldn't show the option to insert. I usually type up the post on my laptop and then go to my phone to add the pictures. Even tried hooking my phone to laptop and adding the pics that way but did the same thing. It would let me do the other pictures but it was late and I gave up last night. This morning I tried again because without pictures the post is boring. But it failed again. So I took a screen shot of the picture on my phone and then it allowed me to upload the screen shot. No clue what the difference is but something. Says can't complete the action due to low memory or something close to that.

Pretty sure it's my phone. I was going through phones all the time because of dust and metal shavings getting stuck on the speaker openings. Used to have the samsung galaxy but when I needed a new phone some on GJ recommended the kyocera phones. It's been a great phone as far as durability but it's not the fastest or best hardware/software inside it. Which is fine for me most of the time, I just use it for calls, texts, and internet. Much rather have the durability then the fastest or greatest phone. I've dropped it countless times and even dropped it in a bucket of water and it just keeps going. And doesn't get the speakers blocked up with dust and metal. The samsungs would get cracked screens and would last about a year before I couldn't hear people and they couldn't understand me when talking because of the speaker issues. I would try all the tricks to clean the speaker openings but nothing worked. Been super happy with this phone but think it's processor or whatever does the magic inside is built for durability and not speed.
 
OP
S

signcrafter

Well-known member
Joined
May 9, 2012
Messages
12,493
Been a busy few weeks trying to get projects wrapped up and also keep my stuff on track. Not sure if I ever mentioned it or not but got the 2019 silverado cam job done and out and it's running good. That was a big project. Also got the guy's house I was working on all done. He kept adding little things so didn't think it would ever end, and has already told me of more projects they want done in a week or two. A butcher block kitchen island countertop and install a gas stove. I ran the gas line for it while I was there so just need to add a 120 outlet and hook it up. I like to leave the 240 outlet there since it's already there and leaves the option of ever going back if you sell the house and new owner has an electric range they want to swap out for whatever reason. I was raised only ever having electric ranges but when I met my wife she had a gas range. After using gas for the last 20 years I don't think I could ever go back to electric. I'm a simple man and could eat sandwiches and hotdogs everyday but do enjoy cooking some nice meals, mostly for the family and get togethers. But I still leave the electric in place just to have both options.

The butcher block he is just going to pick up a premade slab from somewhere. I will cut it down to size and then I will pour clear epoxy over the top to seal it all up good. I made sure they didn't want the butcher block to use as a cutting surface otherwise I wouldn't have gone with the epoxy. It's just going to be a clear epoxy but I have done a bunch of countertops over the years in houses and restaurant/bars that get pretty interesting. I'll see if I have any pictures of past ones on this phone and post them.

Got the time to get the 2013 F150 3.5L in the shop and start that timing chain and cam phasers job. I've been working on it a little here and there as I get time. Got it all tore down and parts cleaned up and the timing all back together. I ordered all the parts from rockauto and when I got it one of the gasket kits had a few pieces missing, the bag was ripped open. One of them was the seal that goes around a coolant tube coming out the front of the engine and it seals up where this tube goes through the timing cover. Then the water pump slides over this tube. Think ford calls it a radial seal. But I ran to town yesterday and picked up another one from the ford dealership. Hopefully get that back together this weekend.

Still waiting on the owner of the 2018 silverado to give the go ahead on the repairs for that, fuel pump and ABS pump/module. He is younger and says he is trying to save up the money so that is just sitting outside for now. Also had a 2006 pontiac G6 come in that the owner said they were in starbucks drive thru and lost all power steering. They limped it home and when I went to pick it up for them it was fine. Scanned it and got a C0545 steering wheel torque input sensor code. Gues in 2005 and 06 they used an electronic assist steering on these cars and had some issues with it. They went back to full hydraulic in 2007 form what I understand. So I ordered a new GM part from rockauto and waiting on that to get here. Have to pull the steering column and take apart the electric motor to replace it. Looking like that will be a Monday job. Had a couple other little jobs like end links and window regulators and a couple crash impact sensors. The impact sensors got corrosion and expanded and busted the plastic housing exposing the guts to the elements.KIMG20251008_124234880.JPGKIMG20251021_144611776.JPGKIMG20251022_110824551.JPGKIMG20251022_214606877.JPG
 
OP
S

signcrafter

Well-known member
Joined
May 9, 2012
Messages
12,493
I also picked up a couple more file cabinets for 20 dollars each. These two blue ones were crazy heavy, made by lefebure. They are really well built and will be a nice addition, and are blue so will fit in good. I'm not a color crazy guy, I take whatever works but do like blue and when I bought my bigger tool box it was what home depot had on clearance at the store. There are a few more of these type of cabinets in a tan color on marketplace right now but they are asking 100 dollars each for them. That's a little more then what I want to spend right now but they sure are a nice cabinet.

Had a neighbor about 6 houses down the street pass away last year. I had only talked to him a few times over the years. He always had snow blower and lawn mowers for sale outside his house, think he would pick them up for cheap or free and get them running and sell them for a hobby. He had a few smaller tractors also and would do the snow clearing on the sidewalks for a bunch of the neighbors. Saw yesterday there was a bunch of vehicles by his house and some people bringing items out to their vehicles. So I walked down there and they were having an estate sale. I ended up getting a bunch of sockets and wrenches for cheap. They had 5 snack containers of sockets so I asked what they wanted for one and she said 5 dollars. I picked one up and saw a couple snap on sockets in there so I grabbed all 5. Then had a tub of wrenches and saw one snap on flare wrench in it so asked how much for the tub and they said 15 dollars. Grabbed a few other bowls of tools and then there were 4 floor jacks that said 20 each. I passed them up at first but when I did a second walk through I saw an american forge and foundry 3 ton double pumper jack. The brand sounded familiar but I didn't know about them or what kind of quality products they made but figured for 20 dollars I would grab that also. There was another box with a mix of tools in it and saw an OTC and a few older valve spring compressors. She saw me looking at the box and said 15 for the whole box. Figured I would grab that also. Lastly I walked to another part of the shop that had mower parts in it and saw a like new mower seat and when I asked about it she said free and asked if I wanted the other two also but I politely said no thanks. The mower seat on my old craftsman rider that was my Grandpas broke last time I was in Wisconsin using it and I had been looking into getting a new one to replace and they were 60-100 dollars. Think all together I spent 75 dollars and had to go get my car to load everything up.

Did a little googling and see that the AFF jack sells for over 450 dollars plus shipping so seems like a nice little jack.

Went through some stuff last night and there was a mix of everything in the sockets and wrenches. Lots of American made of all sorts of brands. But a decent amount of snap on and mac and matco and SK. There are two sets of snap on SAE flare nut wrenches, one set of double flare ends and one set with flare on one side and open end on other. Wish they were metric because I already own a set of snap on SAE flare nut wrenches but I will either keep them or try to sell a set of them. Also a few snap on bit sockets, a full set of metric allen sockets and then some torx and other bits. I sorted the good stuff from the cheap stuff and will have to go threw and see if I can make any sets of them or not. Came out pretty good but it's kind of sad thinking how a guy spends his whole life collecting the tools to work in his garage and then it's all just given away. But at least I will put some of them to use.KIMG20251024_190510594.JPGKIMG20251024_113452042.JPGKIMG20251024_111048315.JPGKIMG20251021_205239279.JPGKIMG20251021_173159105.JPG
 
Last edited:
OP
S

signcrafter

Well-known member
Joined
May 9, 2012
Messages
12,493
Got the 3.5L F150 all back together and out of the shop. Only have 2 more vehicles waiting outside. Still waiting on the 2018 silverado owner to give the go ahead on the repairs. Talked to him the other day and he said his wife's car was making a noise on the front driver's side tire area so was waiting on his truck. Guess he has a company vehicle so doesn't need his truck and he is younger and trying to prioritize his money. Said he wants to get his wife's car fixed first. He also tries to do some of his own work so said he was going to take a look at her car and try changing the brakes. I told him to let me know and if he can't figure it out to bring it over and we can pull the tire and see what we find. Talked to his dad last night when he dropped off some money for some work I did and his dad said when I get back from Wisconsin to let him know and he will pay to fix his son's truck and his son can pay him back.

I was doing some googling about the American Forge and Foundry floor jack I picked up for 20 dollars from the estate sale the other day and saw they make a fuel tank adapter for transmission jacks. I had started a thread a while back asking about them to make dropping fuel tanks easier. Was looking at the cheap ones on amazon and had planned on picking one up but when I went to amazon saw they had a AFF one that sells for 375 dollars on a amazon warehouse deals for 175 so I pulled the trigger on that. It says like new condition so hopefully it is and works out as a good deal. Looks like the same one snap on rebrands and sells.


I'm kind of glad the silverado has waited on repairs because I'm heading up to Wisco today and can grab a few tools I already moved so I don't have to buy duplicates that I already have. I like new tools but also have so many I want that I don't have that would rather spend money on them then to get tools I already have. This has been a challenge with the move and still doing work. When this happens I try to get tools that will still do the job but different then I already have. Have a vacuum brake bleeder that I really like but was going to need something to do that abs pump job so was planning on picking up a pressure bleeder so I would have ability to pressure or vacuum bleed brakes. But I will grab my vacuum bleeder while I'm in Wisco this week so can save a couple hundred bucks.

Also had a pontiac G6 come in that had lost power steering. When it got dropped off everything was working good again but had a code of C0545 stored in the computer. Did some testing and some homework and decided it needed a new steering angle sensor. So ordered an ACDelco sensor and got that in yesterday as soon as it got delivered. Had to pull the steering column and then do a steering calibration and it was good to go.

Also came across some more file cabinets, or sewing pattern cabinets from a material store that closed down about 30 minutes away. I went and grabbed the 3 cabinets for 25 dollars each. These things were crazy heavy and well built and come with drawer divers already so they will work perfect for the shop. I don't know much about sewing but from what I remember as a kid and mom and grandma sewing is patterns were light paper so no clue why these cabinets are so heavy duty but I'm not complaining. Between these and the 2 blue heavy duty ones I picked up I think I have a very good start and can hold off searching for more until I get these up to wisconsin and see how things fall into place. Will be getting rid of my metal office desk and the 2 craftsman workbenches and use file cabinets in their place. Should give a lot more storage for the space. Will be a few weeks before I bring the truck and trailer back to Iowa to bring another load of stuff to Wisco. Figure I only have 2 more trailer loads of stuff and house will be empty so down to the last things unless I keep picking up more stuff on marketplace.

I also need to change the particulate matter sensor on our f250. It's been bad for a little while now and I ordered a new one a while ago but haven't made the time to change it out yet. Partly because everything I've read says they are pretty much welded into the bung on the tail pipe and lots of issues with threads pulling out when you try to unscrew it. I ordered this "shockit" set from LTI this week to try and help with that issue. Will bring the induction heater up to Wisco and hopefully between that and this kit you use with air hammer I can get it out in one piece without damaging the threads. Have read really good stuff about this kit so will put it to the test. Wife doesn't think it's funny when I tell her that the truck's PMS is acting up since she has been driving the truck. :ROFLMAO:


Loading up the car this morning with stuff I need to take up to wisco and then heading out. Have the new seat for the riding mower I picked up from the estate sale to replace the one that broke off last time I was up there. Need to use it to clean up the leaves in the yard. Also taking the ridgid 700 pipe threader I picked up on marketplace so I can get the gas line ran to the shop heater and finish that up before temps drop much lower. Have to insulate the one half of the garage yet so it will be a busy rest of the week. Also need to order some tires for my car and get them changed while I'm up there.

KIMG20251029_074042749.JPGKIMG20251029_074037363.JPGKIMG20251028_111208188.JPGKIMG20251028_110909947.JPG
 
OP
S

signcrafter

Well-known member
Joined
May 9, 2012
Messages
12,493
Has been a busy couple weeks. Made it up to Wisco and went and bought some insulation right away. The shop came insulated besides half the ceiling, about 550 sq ft. For now I went with faced R19 rolls of fiberglass just to get something up there without spending a ton of money. Still was over 500 dollars. That was a fun project with all the shelving and everything else in the way but got it done. R-19 isn't the best for ceilings but it's something to keep most of the heat in and will add blown in insulation in the future. I'm only going to be heating the garage to 40-45 most of the time anyway. Just to keep it above freezing and then will crank it up when I'm working in there. So it should be fine for now and the half that was already insulated is probably only around R13 so it needs more anyway.

I was looking on marketplace last night and saw a Krendl 425 insulation blower for sale for a good price so thinking about picking that up. Stores "rent" you the machine(most are this same machine) for free when you buy so much insulation from them. But I like to have my own stuff so I can use it when needed and not worry about timelines. I will use it for the house in Iowa and also for the whole house in Wisco so it will get occasional use. And I'm sure I will need it for a job sometime down the road so one paying job and the machine will be paid for. People have told me I'm crazy for wanting one, and I sort of would agree with them. But I think it will be nice to have and be able to use whenever I want so will pick a used one up for a decent price.

Got the gas line ran to the shop heater and got that fired up. It's the Mr heater 50K unit. I debated between the 50K and 80K units since my sq ft was right at the overlap for sizing. A GJ member strongly recommended the 50K so it wouldn't short cycle and burn out the exchanger. I would like it to heat up the shop a little faster than it does but it's not horrible. Other then taking a little longer to bring up to temp from 40 degrees I think it will be fine. Got this done just in time for the temps to drop.

I got the PMS sensor change on the F250. The Shockit diesel sensor tool kit arrived a day or two after I got to Wisco. I didn't try removing the sensor without the tool because I didn't want to risk having the threads pull out like I've read about so went straight to the air hammer and tool. So can't tell you if the tool was needed or not but it worked great and I'll consider it a win since the threads were still good. Got the new sensor in and then cleared the codes and did a regen in the driveway. Truck ran at 2000 RPM for about 35 minutes so the filter should be nice and clean. There are still permanent codes stored that can't be cleared but there is no pending codes after driving it all week. The permanent codes will go away on their own after it completes a drive cycle if it doesn't see any issues remaining. Which from what I read can take a long time to do for the after treatment codes. Think it has to do 1 or 2 regens under normal driving before it will ready the monitor and clear the codes. But since the current codes didn't come back I'm confident it's fixed.

KIMG20251107_091719314.JPG

The kit works by inserting the long pointed shank in your air hammer and then lining the point up in one of the notches on the flare wrench heads. It shocks the sensor to help get it out since these sensors are in the exhaust that gets really hot when doing a regen cycle and is also exposed to the salt all winter long. It also has thread chasers. It is supposed to work on most sensors on a variety of diesel vehicles. I don't get a ton of diesels in the shop but it will be nice to have if nothing else for my own truck since it has a bunch of sensors for the after treatment. I've already replaced the def heater/pump, def injector, and now the PMS sensor.

KIMG20251107_091743327.JPG
The AFF fuel tank adapter was delivered and looks really well made. There is some paint scraped off but for 200 dollars off I think I can live with that. In reality I use my tools and while I don't try to abuse them they are there to get a job done. I need to figure out the best way to secure it to my HF transmission jack since it's made to work with the AFF trans jack. Will need to drill a couple holes to line things up but shouldn't be a big deal and will do that when I get a few minutes this week now that I'm back in Iowa.
 
Last edited:
OP
S

signcrafter

Well-known member
Joined
May 9, 2012
Messages
12,493
I got the new seat on the riding mower. Had to pick up some flat steel stock to make an adapter since the bolt holes didn't line up. This is an older craftsman mower that was my Grandpa's and he passed away in 2004 so will keep using it for as long as I can. It does the job and the kids love driving it. Had to do leaf duty while I was up there and let the kids drive around with the lawn sweeper to pick up the leaves.
KIMG20251030_143528461.JPG
KIMG20251030_152805034.JPG
Got to take the kids trick or treating which is pretty much just a big block party in that neighborhood. Right across the street is a brand new subdivision that does a nice trick or treating for the kids, and the adults. Kids get a ton of candy and most houses have coolers and shots for adults and roads aren't technically closed but the streets are full of people walking around. I didn't have any adult beverages this year but in previous years since we bought the house it's been a good time, just another Wisconsin tradition I guess. Also have a few horse stables around us so there was a few groups of riders that ride around on horses passing out candy. A good time for all and thankfully this year it wasn't freezing out like the last few years.
KIMG20251031_164818859.JPG
Made a bunch of food for the family while I was up there. Made beer battered cod, coleslaw, fries, beer battered onion rings and tarter sauce one night. Smoked ribs and threw some meat and veggies on the smoker to make chili. The chili turned out really good. I used ground beef, pork, and some thin cut chuck I made into a big "patty" and smoked it over the top of onions and peppers. Then added them to a pot with all the other chili stuff. A double smoked ham and then birria tacos one night. I'm pretty simple when it comes to food when it's just me but I do like to cook some decent food for the family.

KIMG20251101_171443114.JPGKIMG20251103_135614483.JPGKIMG20251108_180425312.JPG
 
Last edited:
OP
S

signcrafter

Well-known member
Joined
May 9, 2012
Messages
12,493
Started to throw my welding cart together while I was moving things around to insulate to see how it will work out. My thought for now is to mainly fit as much as I can on the cart that has to do with welding and maximize my storage. Will see how it works out and make changes as needed. So far I have my welder and it's wire feeder on it, cold cut saw, mag drill, small drill press, and a small belt sander. Still want to try and get all my grinders on it so need to look into options for that. I think it will work out pretty good to store everything and then wheel out when needed.

KIMG20251106_130036520.JPGKIMG20251106_130029740.JPG

While I was moving stuff around to insulate I moved the 2 file cabinets I got last time I was up there into their temporary spots. I had to cut down the wood tops on the craftsman benches to make them fit and still plan on getting rid of both those craftsman benches once I get all the other file cabinets up there. I put one by the press and plan to keep all the press tooling in there. Might try to put all my pullers and stuff like that in there also but will see how things lay out. The other one I started putting all my specialty tools in plastic cases in and cleared up a shelf and a half. Still have a long way to go and lots of thinking of how to set up all the file cabinets and what tools to put where. I'm sure there will be lots of re arranging a few times.

KIMG20251106_143457841.JPGKIMG20251106_143355813.JPG
 
Last edited:
OP
S

signcrafter

Well-known member
Joined
May 9, 2012
Messages
12,493
It's getting there bit by bit Scott. That looks like a great neighborhood as well.
Thanks Mike. Little by little just trying to get it usable and be able to store everything I have and try different things to see what works the best for me, and doing it on a pretty tight budget. Trying to figure out the best layout and storage options right now. Then the real fun will begin with going through the 100 or so bins and sorting and putting away all that stuff. So much stuff I can't find right now because of the move.

It is a pretty nice neighborhood. Our house was built in the late 70s and is on dead end a cul-de-sac with 6 others. When we bought it 3 years ago there was farm fields a block away and the development across the street was about half built up. The road between us and them is a 45MPH county HWY. Our dead end is pretty quite so kids can ride bikes in the road and don't worry much. The corn fields have steadily gotten built up and now there are a few developments between us and them. There is a nice park right across the HWY from us that they can go play at also. Overall we are pretty happy with the purchase.
 
OP
S

signcrafter

Well-known member
Joined
May 9, 2012
Messages
12,493
Not much to share but did get the fuel tank adapter mounted to the trans jack. The AFF adapter has four threaded holes and also some other holes without threads but it's meant to be used with a AFF jack and not the HF jack I have. My HF jack has some holes in the plate also so I could have chose either set and then drilled out the other component to put some bolts and nuts to hold it together. I decided to just use some M10x1.5 bolts in the threaded holes of the adapter. The holes are about 3/8" away from the plate on my trans jack. So I got some bolts and fender washers and just tightened them up. I think this will work decent since the weight of the fuel tank will be pushing down on the trans jack, the bolts are more to just keep the adapter attached to the trans jack. This will allow me to just loosen the bolts and the adapter should then just slide off the jack plate. Won't have to fully undo 4 bolts/nuts to take the plate off and on and will keep the hardware attached so it won't get lost. If this doesn't work I will drill some aligning holes on the two and either tap the holes or use bolts/nuts to secure it. I might look into some sort of cam locks in the future but honestly this won't get much use so taking it on and off shouldn't be a huge deal the few times a year I might use it.

As I get older "luxury" items like these become much easier to pull the trigger on buying these kinds of things. I have usually just struggled thru things to get the job done. But as I get older and have most of the basic tools now it becomes easier to justify things like this that won't get used often but will hopefully make jobs easier. Back a few years I did a couple silverado fuel pumps a year and have tried both removing the bed and dropping the tank. Neither option are fun when you live in the rust belt. Used to install the tank by either laying on my back and pushing it up if it wasn't too full or try to balance it on a floor jack, which got interesting a few times. Ended up buying a HF motorcycle/atv jack that worked a little better but not great. Then finally got a transmission jack last year so that opened up some more options. Now having a trans jack with this adapter hopefully will make things easier. I don't mind spending money on tools, actually enjoy it, but try to only spend so much of each job's labor money on new tools so it takes a while to acquire everything.

KIMG20251112_152934559.JPGKIMG20251112_152956542.JPG
 

zmotorsports

ALLIANCE MEMBER
Joined
Oct 20, 2009
Messages
21,454
Location
Northern Utah
As I get older "luxury" items like these become much easier to pull the trigger on buying these kinds of things. I have usually just struggled thru things to get the job done. But as I get older and have most of the basic tools now it becomes easier to justify things like this that won't get used often but will hopefully make jobs easier.


I completely understand this rationale Scott. Especially when I work alone most days now compared to 10+ years ago when I had the help of my son nearly every day.
 
OP
S

signcrafter

Well-known member
Joined
May 9, 2012
Messages
12,493
I completely understand this rationale Scott. Especially when I work alone most days now compared to 10+ years ago when I had the help of my son nearly every day.
I work alone all the time until the little ones get old enough to help out. Both of them like being in the shop. The daughter even built herself her own office in the shop many years ago when I bought my wheel balancer she claimed the wooden shipping crate it came in and painted the walls and hung up pictures she drew on the inside.

Now just need to pull the trigger on a lift to really make things easier. After I raise the ceiling and put a new concrete floor in. Just too many things on the need/want list right now. The roof will need to be redone in the next few years so plan is to reframe the trusses at that time to gain the height needed at that time. Will throw up some gable walls at the front and back and be able to gain my height that way by not raising the roof line too much.
 
To avoid these ads, REGISTER NOW!
Top Bottom