To avoid these ads, REGISTER NOW!

Between 705 & 1200 SQ/FT Seven year itch is finally getting scratched

Workspaces between 705 and 1200 squarefeet.

TXNinAZ

Well-known member
Joined
Oct 9, 2011
Messages
507
Location
Phoenix, AZ
After buying my home in 2016, I made plans to add on to the garage. It was a compromise with my wife since she preferred the floor plan of the house we bought, while I preferred the house with the 5 car garage and pool that we didn’t buy.

Fast forward through a job loss and 9 months out of work sucking away savings, a pandemic, and all the other interruptions that life throws in the way, I finally got started on it. The permitting process through the pandemic was a nightmare and an explosion of housing construction meant homeowner projects were an afterthought for the city’s planning and dev department. That also increased costs enormously in my area of the world. Homebuilders in the zip code were adding a surcharge of $40,000 just for lumber!

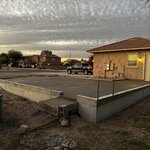
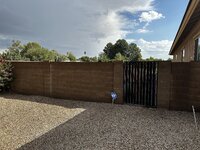
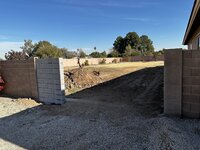
Eventually the permit trouble cleared up and after waiting out a concrete shortage, I started my build. Here’s the spot where the new ~900 square ft machine shop would be built.

Garage Site Before.png


First task was removing the tree which was done by pros- I don't have much patience for digging out roots.

Next was the concrete guys starting by tearing down the block wall and prepping for footings. Seeing those first bricks come down was super satisfying after such a long wait.
IMG_5075.jpeg

It doesn't rain much in Arizona, but when it does, it comes down. Usually our rain falls in the summer during our monsoon but we had some severe storms in October coinciding with the start of my project, including the day the wall came down (10/15/22). The crew ended up quitting for the day once it was clear the downpour would continue- the county rain gauge nearest my house measured 2.32" for the day! From 10/2021 to 9/2022 we only totaled 4.72" so getting half of the previous 12 months' rain in one day was just the kind of luck I get starting a project.


IMG_5089.jpeg
Other than my irrigation supply pipe, there was no drama with the footings. In the background you can see the stump of our biggest tree that fell during a storm on 10/3 with another fallen soldier in the background waiting to be rendered.
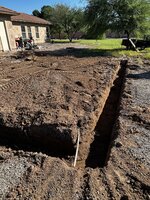
IMG_5094.jpeg

It's hard to tell in these photos, but the ground slopes away from the house quite a bit- this is farmland converted into a subdivision and to avoid flood plain designation, the builder built up the house sites with fill material, but only the house itself, so the rest of the property is lower. This caused complication and expense for my project, but I knew that going in.
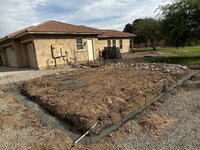
IMG_5131.jpeg

Next up were stem walls- almost unheard of in my area- our part of the Phoenix valley is almost exclusively slab on grade construction with no basements or crawl spaces. Post-tension slabs have been required forever here, so finding a residential concrete contractor that knew how to pour footings and stem walls was not as easy as you'd think in an area with over 4 million people.
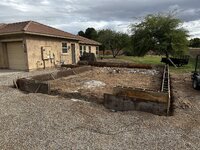
IMG_5140.jpeg

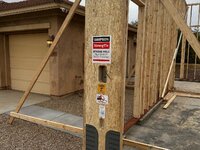
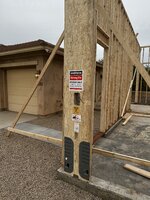
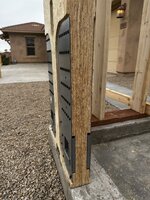
My designer talked me in to going up to 14' ceiling height (I initially wanted 12') and I didn't know until way too late what that really meant- Simpson Strong Wall shear panels. With the large opening for the garage door, the front of the building needed extra strength to not blow over in the wind, so these special panels (more on them later) had to be super-anchored- 1" bolts with nuts buried in concrete and rebar joined to the footing and webbed around for max strength. Simpson specs these out at over 20,000 lb wind load each so I think I'll be ok when we get storms. These surprisingly hard-to-find brackets make sure the bolts are in the right spot in the stem wall- there's no stretching things around to make the bolts line up if they're poured wrong.
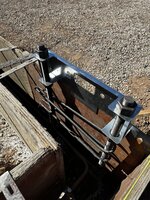
IMG_5164.jpeg

With the stem walls in they prepped for the slab pour. This area is a concern for me with water- there will be a lot of roof area dumping rain into a small space surrounded by concrete, so I knew a drain would be needed to move water out. The concrete guy thought I was being silly about it, but I would be proved right when the framing was done and we got a storm- there was about 3" of standing water here (the grade needs to be brought up for our future pavers to move the water to the trench drain). Rather than a $50 Home Depot drain I went to WhiteCap and got a commercial drain that is meant for driving over in parking lots, so I think this will outlast my house.

IMG_5226.jpeg

I am generally happy with the work my concrete guys did with a couple of exceptions. With a 6"+ slab, they were convinced rebar wasn't needed despite my insistence. They threw this down to appease me, but its' an embarrassing effort IMO. They did better when I made the same request for rebar in the driveway- I don't know why contractors try to talk themselves out of making more money. It's not like I was asking them to do anything for free.
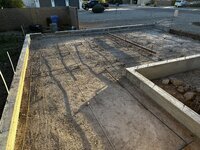
IMG_5231.jpeg

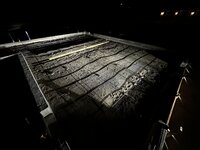
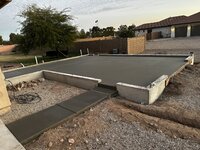
Concrete was coming the next morning, so I went about fixing it in the dark. Apologies to the neighborhood for the grinder cutting rebar well after bed time to be done in time for pouring the slab. I would have liked a lot more steel in there, but I ran out of time, and I'm sure this will be plenty strong- I just don't like taking chances when a fix would be astronomically expensive.
IMG_5239.jpeg
 
To avoid these ads, REGISTER NOW!
OP
T

TXNinAZ

Well-known member
Joined
Oct 9, 2011
Messages
507
Location
Phoenix, AZ
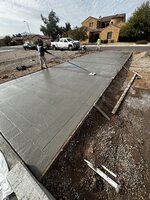
And now we have concrete!

IMG_5243.jpeg
IMG_5248.jpeg
IMG_5252.jpegIMG_5280.jpeg

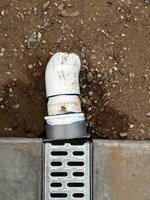
My landscaper had a fight with this 4" PVC joining up to the drain and lost. The end cap should have been poured with the sidewalk but it still should have been better than this. I've got the parts to replace this mess, but I'll get to that when more important things are finished.

IMG_5358.jpeg

And the driveway is in.
IMG_5359.jpeg

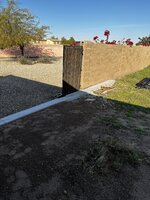
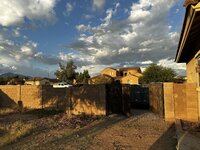
Another part of this project I haven't mentioned yet is the RV/access gate for my back yard. I was going to keep it on this side of the house but with the utilities and the limits that would put on landscaping, I decided to put the new one on the other side of the property. My buddy owns a fabrication business and gave me the friend's discount for a new rolling gate and pedestrian gate. The concrete guys removed the block wall and poured a thick footing for the gate to roll on.
IMG_5079.jpeg
IMG_5221.jpeg
IMG_5403.jpeg

Now on to do something about the grade. With the concrete in place, there is a steep drop everywhere from the stem walls and the framer wanted more dirt to stand on so his guys could be safer and make work easier.

IMG_5398.jpeg
 
OP
T

TXNinAZ

Well-known member
Joined
Oct 9, 2011
Messages
507
Location
Phoenix, AZ
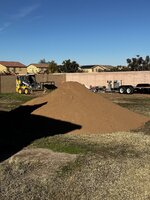
Although not ideal, I wanted to rent machines as few times as possible, so for my weekend skid steer rental, I wanted to add dirt and cover with granite all together. That's not great because the following trades will muck up the granite, but it's a lot cheaper than doing this process twice.

It doesn't look like much in a photo, but that pile is over 6' tall and accounts for 30 tons of clean dirt.

IMG_5416.jpeg


As a cost-saving measure my buddy offered to loan me his equipment trailer to bring the skid steer home. As the above photo spoils it, it worked out, but not without drama. The machine was a bit too heavy for his ramps.
IMG_5409.jpeg

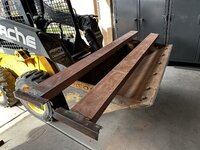
I didn't like my chances of getting back up the trailer to return it with these ramps, so I slapped some angle iron on some C channel I have around. They're ugly and heavy as all hell, but they weren't going to bend under a 5,500 pound skid steer. It all worked out in the end and no more damage to the trailer.

IMG_5415.jpeg

This little machine made short work of the mess of river rock and tree stump on the side of the house behind the new shop- my poor truck would have had a hell of a time digging out this mesquite without a ton of shovel-digging.

IMG_0051.jpeg

For someone with almost no experience running a machine I am happy with the result of this clean-up. Reasonably flat and will allow us a place for garden beds.

IMG_5426.jpeg

The pile of remains from this area went over behind the new gate so I can load it into a dump truck and have someone take it away without driving through my whole yard.

IMG_5443.jpeg

Load after load after load of dirt, building up around the building and driveway.

IMG_5424.jpeg

Then load after load after load of granite- 20 tons of it, in fact. For one guy with no experience and one weekend, I think I did a decent job.

Garage Site Concrete Finished.png
IMG_5430.jpeg
 
OP
T

TXNinAZ

Well-known member
Joined
Oct 9, 2011
Messages
507
Location
Phoenix, AZ
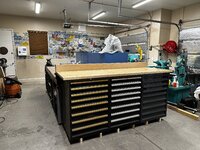
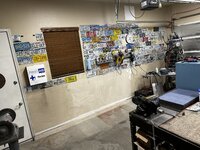
Now it was time to deal with connecting the new with the old. My wife wanted a connected building (which she later forgot and asked why I didn't build the building separate) /facepalm. It will be a nice place to live with, though- the entire space is level and continuously air conditioned. There is room for 8 cars, though several would be blocked in.

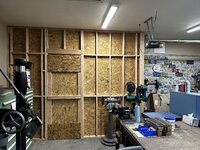
The trick was to allow me to keep my shop usable when the framers took down my outside wall. The simplest thing I could think was to build a temporary wall that would be strong enough to withstand high winds and jerks wanting to steal from me. Before I could do that, though, I had some moving to do.

Before:
IMG_5444.jpeg

IMG_5446.jpeg


After a lot of work:
IMG_5451.jpeg

These old Lista cabinets have a few thousand pounds of tools and raw stock in them so the heavy cabinets weren't the problem- it was their contents. To avoid having to unload them again to move them into the shop when the time comes, I put 2x4 frames under them so pallet jack can pick them up and move them. I'll have to work out removing the pallet jack but I think my toe jack and some bravery will handle that.

IMG_5452.jpeg

Now to frame and sheath a new wall with crude door:
IMG_5467.jpeg

IMG_5472.jpeg


I though for sure I'd have to rent some storage space or kick my wife's car out of the garage, but it all packed in there and I can still use the mill and the lathe, and she can still park in her spot.

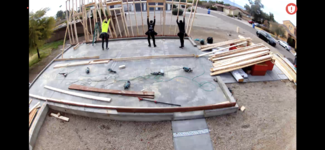
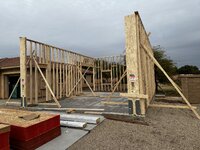
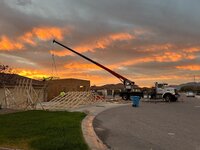
Time to start framing. All in with the lumber and trusses, it was about $13,000 in wood. Quite a bit more than I was planning on in the beginning, but a few months earlier would have cost me twice that, so I was trying to stay positive.
IMG_5474.PNG

I didn't appreciate how messy the crew was (cigarette butts and food wrapper all over the place), but their quality of work leaves very little to be desired which is the important part.
IMG_5493.jpeg
 

Attachments

  • CD4F954B-F1BC-43A1-9D32-AB29D79900C6.jpg
    CD4F954B-F1BC-43A1-9D32-AB29D79900C6.jpg
    524.2 KB · Views: 64
OP
T

TXNinAZ

Well-known member
Joined
Oct 9, 2011
Messages
507
Location
Phoenix, AZ
Here's a closer look at the Simpson panels- a serious amount of steel and glue holding this together. Bolted to my 1" studs buried in concrete.
IMG_5489.jpeg

IMG_5490.jpeg


IMG_5579.jpeg

It was finally time to tear out the wall. They appeared to put the apprentice on this job and he picked every sphere of styrofoam out of the wall so it could blow around my yard. It took forever to clean up when they were done.

IMG_5590.jpeg
IMG_0160.jpeg

IMG_5604.jpeg

It was at this point I made a terrible realization. The whole point of this design was to look like it could have been original to the house- same elevation, pop outs, etc. I started thinking about installing the windows and realized the front windows and garage door would look nothing like the house- they would sit flush with the front of the building while I have recessed doors and windows on the house.
IMG_5610.jpeg

Fortunately it wasn't too late, just more time and money to make it right. The framer suggested adding a wall on the front of the building to give depth for the recesses, but then the eaves wouldn't be right. I came up with a plan to build an inside false wall that would only hold the garage door and drywall up, and the inspected framing would do all the real structural work. I had the concrete guys come back in and pour curbs in place for the wall to go on, and then the framer built onto that. I lose a few square feet, but not a big deal to make it look right.

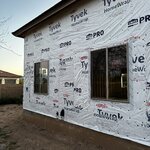
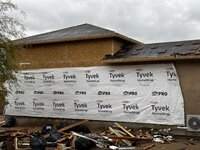
While that was getting worked out, I got started on the building envelope. In Arizona you don't need a weather resistant barrier in the way the rest of the country works- tarpaper under the foam and stucco is all the code requires (yikes!). I decided to go with Tyvek and sealing all joints with SikaFlex to keep air and scorpions out. Very time consuming and a few hundred dollars to do it right. My pneumatic caulk gun with air regulator on it made life so easy for dispensing the sealant. A cordless power tool would have been great, but this was $45 total and I'm very happy with that choice.
IMG_5652.jpeg
Here's my setup for a one-man Tyvek install. Worked like a charm.

IMG_5653.jpeg
 

GlennSullivan

Well-known member
Joined
Mar 15, 2006
Messages
341
Location
Yorktown, NY
Very nice, I especially love the fact that you guys don't have any lawns. One question, where is the pool? You said you gave up a garage and a pool......
 
Last edited:
OP
T

TXNinAZ

Well-known member
Joined
Oct 9, 2011
Messages
507
Location
Phoenix, AZ
One continuous piece all the way around- probably around 80' long. Then I moved my dispensing rig over where the building joins that house so I wouldn't have the text upside down. Yes, I know there's something wrong with me.

IMG_5661.jpeg
IMG_5656.jpeg

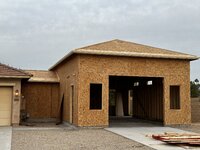
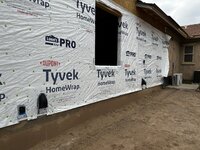
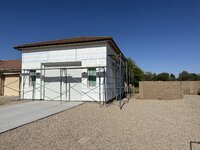
In this update you can see that the roof has been installed, and the false wall inside is up (Tyvek wrapped around it). It also shows a major mistake I made in the quest for saving money. You'll notice there are no staple caps, just staples. We rarely get severe weather in the winter so I figured I was safe just going with staples. Then I went into my busy work travel time and was brutally punished by the windiest late winter in the 14 years I've lived here. Almost all of this wrap was ripped off and torn to shreds. Nothing like doing it twice.

IMG_5748.jpeg

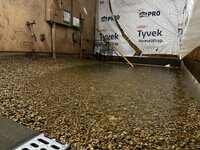
Remember my comment about the need for that drain? Here's what it looked like in this storm (it got worse though I didn't take a picture). Note the ruined Tyvek and some emergency staples with caps in them now that I bought the stupid cap hammer. I put them in to keep the wrap from flapping in the wind until I could tear it off and replace it.

IMG_5799.jpeg

I've taken several trips around neighborhoods being constructed to see how things are done, check on products the home builders use, etc. This little gem of a fixture on the front of someone's $700,000 house is a taste of what laziness looks like. 'Just gob some caulk on there, I'm sure it'll be fine- the stucco guys will fix it'! I pray the inspector didn't let that go.

IMG_5776.jpeg

One thing I discovered is how many options QuickFlash has for building 'protrusions.' I picked up these neat all plastic and rubber AC line entries. Most builders here just use the galvanized sheetmetal type and hammer them around the lines and it looks like **** IMO. These are great and easy to install.
IMG_5937.jpeg

IMG_5941.jpeg


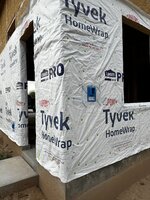
I could have done a lot less work and spent less, but I wanted a quality build, so I used Tyvek flashing tape and FlexWrap for the windows and doors. A few hundred extra bucks over the Home Depot options, but this stuff is so much nicer to work with and Dupont has made good (and evil) stuff for a century.

In the back corner I put in a single gang box for outside air- I'll have an air line plumbed through the wall to a quick coupler in this box with a weatherproof cover. When I need air outside, instead of dragging a hose through the door and letting the heat in, I can just pop in a hose here and take it back in when I'm done.
IMG_5942.jpeg
 
Last edited:
OP
T

TXNinAZ

Well-known member
Joined
Oct 9, 2011
Messages
507
Location
Phoenix, AZ
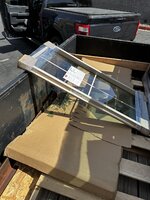
Now onto the saga of my windows and doors. I waited until the framing was done to order them, because I wanted to avoid buying windows that don't fit openings. That concern was well reasoned- with the front face of the garage changing to accommodate the recessed finish, I had to change window size. Well, I ordered them with a 4 week lead time. I think it was week 10 before I finally picked them up. This happened as I was loading up my precious cargo.

IMG_5973.jpeg

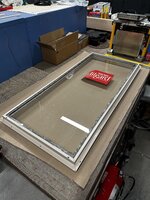
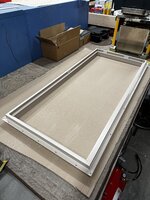
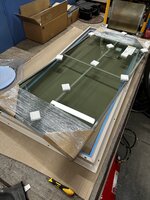
I tried to pay for delivery for a reason- windows are fragile, and if something goes wrong, it goes wrong. The window company didn't have guys available to deliver since I was installing them myself so I paid a price. The rep I was working with was super sympathetic and spoke with Millgard about a 'goodwill replacement' of the glass unit at no charge. They approved it and a week and a half later I got a new IGU. Finding someone to install it when they weren't providing the windows, nor installing them, proved to be a challenge. So I did it myself.
IMG_6109.jpeg


IMG_6111.jpeg
IMG_6114.jpeg

All done:
IMG_6115.jpeg

Now the real challenge with the windows- installing them. I provided my request very specifically- I highlighted that I was providing the rough opening dimensions, not the size of windows I wanted. Since I'm not in this business, I wanted the experts to determine how much clearance the manufacturer requires to install their way. I should not have relied on them because the windows arrived the exact size of my rough openings. I wasn't willing to wait another 2 months, so I got to ripping out sills and cripples. Then planed up new lumber to provide that much needed clearance around the frames:
IMG_6029.jpeg

IMG_6028.jpeg

This also meant tearing out the flashing I had done, and the FlexWrap is about $2 a foot, so that was a bummer to throw out. I can confirm that once that stuff is down on the wood, the wood has to be discarded- there is no separating that flashing from the wood without destroying it.

All's well that ends well, right? I got it done to all 7 windows and the 2 doors and everything is now installed.
IMG_6033.jpeg
 
OP
T

TXNinAZ

Well-known member
Joined
Oct 9, 2011
Messages
507
Location
Phoenix, AZ
While getting windows installed, I called my garage door guy who had my custom door delivered, but was waiting for me to be ready for install. His installer came and installed it and another sad problem- the panels on the top panel are half-covered. This was again because of the false wall being put in- the framer didn't tell the garage door guy he'd be putting in a new header and I certainly didn't think to tell him.

IMG_6104.jpeg


When he came to check out the install we talked and he offered to order replacement panels and not charge me for labor to swap them out. For a couple hundred bucks I'll end up with a proper looking garage door, so I can't complain about that.

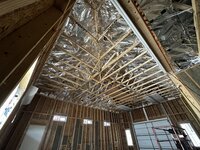
While the last few things get buttoned up for stucco, I've been working on radiant barrier installation. This is a heavy aluminum coated fabric that cuts easily enough but doesn't tear. I wasn't originally planning on renting the scissor lift, but doing this on a ladder would be a big 'no' from me. Still more to do, but it's getting there and I have the lift a few more weekends to finish.

IMG_6085.jpeg


One of my biggest concerns has been lighting. Everyone has opinions on fixtures, how many to put up, what color temperature...it kills me with the lack of answers which forces me to make decisions. After a million hours of thinking and worrying, I decided on a brand name light that isn't too expensive and should still be available for years if I need to replace a fixture. I'll have 16 of these 8 foot led strips in the main shop area, and two (maybe three) in the little connecting space. The 14' ceilings really make lighting more challenging. I temporarily wired up one of the fixtures and hung it in the 'hallway' to see if I would like it and I think it will work.
IMG_6144.jpeg

Nothing to do but do it, so I'll keep on working and add updates as they come. In the mean time I've gotten Stiggy's stamp of approval, so if he's good with it, so am I.

IMG_6134.jpeg
 
OP
T

TXNinAZ

Well-known member
Joined
Oct 9, 2011
Messages
507
Location
Phoenix, AZ
Very nice, I especially love the fact that you guys don't have any lawns. One question, where is the pool? You said you gave up a garage and a pool......

We actually have quite a bit of grass, but it's reclaimed water not fit for drinking, so it's less of a bad idea than a lawn watered by city water.

The pool was at the house I wanted (ironically enough, it's the house next door, so I get to look at what I wanted every day lol). My wife has been a superstar with my interests so it really wasn't hard to go with the house she wanted, even though it didn't have the garage I wanted and was pool-free. We're fixing the first issue and once the savings bounces back, we'll fix the second problem.
 

DeeDubz

Well-known member
Joined
Nov 20, 2019
Messages
1,448
Location
Socal
Nice build OP looking forward to seeing it finished. I cant believe those ramps bent from that john deer. What was the trailer rated at? were u towing it with a 1/2ton?
 
OP
T

TXNinAZ

Well-known member
Joined
Oct 9, 2011
Messages
507
Location
Phoenix, AZ
Nice build OP looking forward to seeing it finished. I cant believe those ramps bent from that john deer. What was the trailer rated at? were u towing it with a 1/2ton?
Yeah I was surprised, too. It’s a 12,000 lb trailer with dual 7k axles and my F150 Powerboost had no problems towing it. But man those ramps folded like tacos in the parking lot of the equipment company.
 

DeeDubz

Well-known member
Joined
Nov 20, 2019
Messages
1,448
Location
Socal
Yeah I was surprised, too. It’s a 12,000 lb trailer with dual 7k axles and my F150 Powerboost had no problems towing it. But man those ramps folded like tacos in the parking lot of the equipment company.
holy ****! i thought those ramps would be more beefy. I towed my 9200 lb skidsteer on a 7k 200miles.... ramps didnt fold. I guess im lucky.
 
OP
T

TXNinAZ

Well-known member
Joined
Oct 9, 2011
Messages
507
Location
Phoenix, AZ
holy ****! i thought those ramps would be more beefy. I towed my 9200 lb skidsteer on a 7k 200miles.... ramps didnt fold. I guess im lucky.
Yeah he just needed thicker angle iron and I'm sure they would have held up fine. He built them with cars in mind, though and they handled everything from a C2500 truck to an old Ford Galaxie just fine. The concentrated weight of the machine was too much.
 
OP
T

TXNinAZ

Well-known member
Joined
Oct 9, 2011
Messages
507
Location
Phoenix, AZ
For the led shop lights. If you want them to match in the future I’d recommend buying and extra 3 or 4 for when some of them fail.
That’s a good idea. I went the same route with the ones currently in the garage and one failed a couple of months ago. The replacement came with a different lens. Fortunately nothing wrong with the old lens, but I might not get so lucky down the road. Shouldn’t be a shelf-life issue with them, so grabbing 4 extra and socking them away is good insurance.
 

dmittz

Well-known member
Joined
Dec 2, 2016
Messages
1,298
What a great build, I really like the look of the garage and the house they fit well together.

Its always very interesting to see thr different building techniques and methodologies in different areas.

Some of the things you incorporated in your construction even though its not common where you live, such as 'stem walls', having walls both bolted to the foundation, and having 'eathquake' ties (Simpson ties you used), and using rebar in the slab have been standard practice (and code) for many decades where I live. I think your building will be much better because you incorporated them, even if its not required in your area.

I live in a 'temporate rainforest' up in British Columbia, so I had to chuckle about the construction guys leaving because it was raining. But here it rains so much that only working in good weather isn't an option, the trades guys work in rain, snow wind etc...
 
To avoid these ads, REGISTER NOW!
OP
T

TXNinAZ

Well-known member
Joined
Oct 9, 2011
Messages
507
Location
Phoenix, AZ
What a great build, I really like the look of the garage and the house they fit well together.

Its always very interesting to see thr different building techniques and methodologies in different areas.

Some of the things you incorporated in your construction even though its not common where you live, such as 'stem walls', having walls both bolted to the foundation, and having 'eathquake' ties (Simpson ties you used), and using rebar in the slab have been standard practice (and code) for many decades where I live. I think your building will be much better because you incorporated them, even if its not required in your area.
I live in a 'temporate rainforest' up in British Columbia, so I had to chuckle about the construction guys leaving because it was raining. But here it rains so much that only working in good weather isn't an option, the trades guys work in rain, snow wind etc...
I’ve got a video of the storm- it doesn’t show well in the photo but this was not rain you could work through. Here in the desert we do quit when it rains, though- there’s so many perfect days in the winter that waiting a day will make life easier and more comfortable.
 

Firescooby

Member
Joined
Mar 29, 2005
Messages
22
Location
GA
Yeah I was surprised, too. It’s a 12,000 lb trailer with dual 7k axles and my F150 Powerboost had no problems towing it. But man those ramps folded like tacos in the parking lot of the equipment company.
That's a very light duty trailer, SLIGHTLY more than a car hauler. It's also NOT 7k axles (7k axles will be 8 lug). They are 5200lb axles which means the trailer has a capacity of around 7500-8000.

Also, don't use straps to "secure" a skid, especially a rubber tired one.
 
OP
T

TXNinAZ

Well-known member
Joined
Oct 9, 2011
Messages
507
Location
Phoenix, AZ
That's a very light duty trailer, SLIGHTLY more than a car hauler. It's also NOT 7k axles (7k axles will be 8 lug). They are 5200lb axles which means the trailer has a capacity of around 7500-8000.

Also, don't use straps to "secure" a skid, especially a rubber tired one.
Yes the straps were not appropriate- I used them because I don’t have chains. Cognizant of the added risk, I took the quietest street route home and stayed below 30 mph for the ~4 mile drive. I should have paid for delivery and pick up, and that’s what I’ll do next time.

I’ll have to ask him about the axles- he put them on after buying the trailer and said they were 7k. Still plenty of safety factor with the skid steer being 5,500 lbs.

Not sure I agree with your assessment that it’s barely a car hauler, though. Curb weight on the heaviest 1 ton dually Chevy makes is 8,300 lbs, and Ford and Ram are lighter than that for their chubbiest HD one tons. The average car is about 4K lbs so that’s not pushing the trailer at all. I’m not suggesting it’s the ideal car hauler or that trailers should be pushed to the limit, but this is a perfectly fine trailer for hauling almost any vehicle on the road.
 

rharman

Well-known member
Joined
Apr 22, 2012
Messages
8,891
Location
SoCal
Good to see that Milgard stepped up to help you. We have 511 of their windows on our house - remodeled in 1993.

We've had a few fail over the years and they replace the glass unit no questions asked - even 30 years later. In fact, I have a couple that I need to call them out for.
 
Last edited:

Bruce 993 SEA

Well-known member
Joined
Oct 22, 2016
Messages
1,033
Location
La Conner, WA
Are you going to use "Driv-It" for stucco or real stucco?

We have seen a lot of failures of driv-it in areas where there is rain. Northwest and in Folsom area of California.

Just curios...

Nice build and looking forward to seeing your outfitting the interior
 

Chilliwack Murray

Well-known member
Joined
Dec 10, 2012
Messages
1,506
Location
Chilliwack BC
Looks great so far.

Interesting to see how things are done in a completely different climate - yours is the opposite extreme from southwest BC. Thanks for sharing.
 
OP
T

TXNinAZ

Well-known member
Joined
Oct 9, 2011
Messages
507
Location
Phoenix, AZ
Are you going to use "Driv-It" for stucco or real stucco?

We have seen a lot of failures of driv-it in areas where there is rain. Northwest and in Folsom area of California.

Just curios...

Nice build and looking forward to seeing your outfitting the interior
Other than on very old houses, we use EIFS here and this will be foam and stucco as well.
 

Sam Lin

Member
Joined
May 6, 2005
Messages
5
Location
Gilbert, AZ
Would you be willing to share or recommend some of the contractors or builders you used? I'm in the research phase for a large guest house/workshop add-on in Chandler. I do not have the trade skills you do, I'd need someone to turnkey the whole project.
 
OP
T

TXNinAZ

Well-known member
Joined
Oct 9, 2011
Messages
507
Location
Phoenix, AZ
Would you be willing to share or recommend some of the contractors or builders you used? I'm in the research phase for a large guest house/workshop add-on in Chandler. I do not have the trade skills you do, I'd need someone to turnkey the whole project.
Sure I can share who I’ve used that I recommend and the suppliers I’ve used. I am the general contractor on this so I can use labor without an ROC number (me), but if you hire a general contractor to coordinate everything, all of your sub contractors must be registered with the state. I can DM you contact info for the guys I’ve used so far, or if you want to wait a few more weeks when it’s done (hopefully) I can send you everyone that did work for me.
 
OP
T

TXNinAZ

Well-known member
Joined
Oct 9, 2011
Messages
507
Location
Phoenix, AZ
Progress has continued, albeit slower than I'd like. I've been out of town for work a lot this spring/early summer so things are bound to drag on a bit when I'm 1,500 miles away.

AC guy came and got the mini splits installed. I don't like how he protected the linesets but he promised it was good enough and indeed, the very picky inspector didn't have a problem with it.

IMG_6205.jpeg


IMG_6221.jpeg

I wish I could tell you why he haphazardly hung the sheetrock up where it doesn't end up on the studs, but I don't have a clue other than laziness. I like this contractor (he installed my old mini split in the original garage), but he seems to be in such a rush that he makes very avoidable errors. One of the units is still not working because of the signal wiring he used- not rated for burial apparently because it failed within days. Another trip out here is costing him much more money than it would have been to do it slowly, carefully, and correctly the first time.

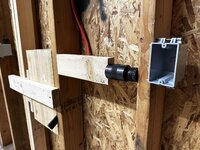
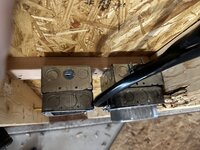
Installing the outlet boxes I found a few studs twisting so I fixed them how a machinist does things- machinist jack backed up by filling the adjacent stall with timbers and then putting in a brace to keep the studs square to one another. I didn't want to abuse my Starrett jacks so I bought a couple of imports on Amazon- turned out to be surprisingly good quality so I'll keep them around when I need to use pliers to crank them.

IMG_6213.jpeg

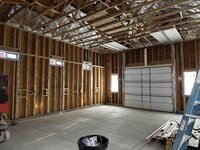
While I was traveling the stucco guys got started and put up the lath and the electrician got started. I was going to run all the electrical myself, but with travel and this project dragging on so much, I decided to hire someone to run the feeder cable and install the sub panel. The sparky wanted more work and gave me a reasonable price to run all the circuits into the boxes and finish the panel, so I took him up on that.

IMG_2822.jpeg


IMG_6251.jpeg

IMG_6229.jpeg


I taped the boxes to make it easy to know what went into each box, and then made notes for the switches so he could work without mistakes. I taped up one of the lighting circuits with yellow tape around the box so they'd be easy to identify which ones go together and which ones are on the other circuit. Unfortunately there were some things the electrician did that really annoyed me, and maybe some of it was miscommunication on my part, maybe some of it was laziness, I don't know. I do know that I'm very picky, so I just went ahead and fixed it myself rather than have him come back out.

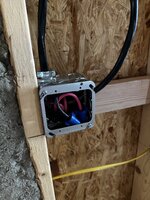
"Rough electrical" to me means 'ready for inspection.' He ran all the circuits and stuffed the wire in the boxes, stapled the cables, and that was it. For inspection all of the grounds have to be joined up in boxes (or screwed to metal boxes), and although not 100% required, the inspectors here want to see wires stripped, wire nutted, and folded back into the box. It makes sense to me, as the next time they see the wiring it will be finished and behind devices and wall plates. Seeing everything 100% prepped at rough inspection gives them a better chance at finding problems. Oh well, I spent last weekend stripping insulation, crimping grounds, installing wire nuts, and all the fiddly little things to get ready for insulation and drywall. Then on to the 230v circuit with three devices on it...

IMG_6247.jpeg


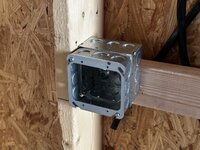
The electrician didn't do anything for these- just ran them approximately to the boxes and that was it. I knew he ran out of time the last day he came so I told him I would take care of it. I learned something new pretty quick- those fat cables create a bunch of challenges. I put in metal boxes backed up by a brace and used an extension as I knew it was a lot of wire to cram in there.

IMG_6352.jpeg

What I didn't know beforehand was that I would either have to use split bolts or Polaris connectors in two of the boxes to feed the wire on to the next device. Split bolts would not have been cheaper in the end because copper is expensive right now so the bolts were about $10 each, and I needed the cambric tape, rubber tape, mastic tape... so with all the supplies I don't already have, I'd end up spending more than just buying the Polaris connectors in the first place so that's what I did.
 

Attachments

  • IMG_6249.jpeg
    IMG_6249.jpeg
    634 KB · Views: 14
OP
T

TXNinAZ

Well-known member
Joined
Oct 9, 2011
Messages
507
Location
Phoenix, AZ
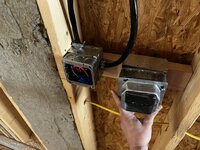
The inspector didn't fail me on the 230v boxes, but did want more breathing room in them. Not a ton of options and stacking 2 or 3 extensions is iffy. The electrical supply house suggested going with a 4-11/16" square box with extension ring and 1" mud ring. I think this will provide enough volume, and using the extension's knockouts, I'll still get my 6" cable length sticking out of the boxes. A pull box mounted on the wall would solve all of these problems, but I want it behind the drywall unless I have no choice. In two of these boxes I'll have the following: three 3 port Polaris connectors, 3 #10 ground wires, and three 6/3 cables coming in. The neutral is there for potential future use, so I don't have to run the 'device wire' out of the neutral Polaris connector, so it's not quite as full. Still going to be a pain getting everything torqued correctly and inside the box while leaving sufficient room for the device.

IMG_6355.jpeg

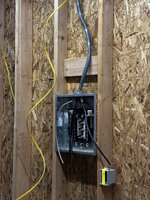
Another failure on the electrician's part was the back of the main panel- pretty mangled up for running the feeder into. Why he drilled the extra hole to the bottom right I have no idea, but he left it like that as though it would pass inspection. Just more stuff to fix before the inspector got here.

IMG_6320.jpeg

After all of my fixes I passed my electrical rough inspection which is a big step. I also scheduled the city for a pre-drywall inspection and that didn't go so well. The framer did not fully bridge the gap between the double walls up front, so I have to put blocking in (just 2x4s) so that the wall cavity is sealed off from the attic above it.

IMG_6353.jpeg

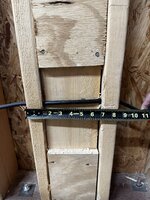
He also wants to see the front wall broken into 3 separate cavities for fire safety. I didn't know this until we talked about it- the rule is a maximum 100 sq ft of wall area can be 'open.' Anything greater than that must have fire breaks put in to reduce the size of the space. This includes sealing holes drilled through studs for wiring, and in my case, fire breaks between the double walls. It will be a bit tricky to frame it all in cleanly since the gap between them isn't a dimensional lumber size, but it won't be too bad. Because my walls are 14' high, the holes in the fire breaks have to be foamed in as well. I had the top plates sealed up, but I had to go around and fill in below them, too.

IMG_6361.jpeg

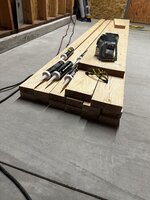
He also didn't accept the roughed in attic access framing so I have to redo that. I have to stack a 2x6" on each joist at the sides of the opening and back them up with OSB, and use 2x10s or bigger on each end of the opening (between the joists). Must be 22x30" or larger, and the lid/door must be 3/4" plywood with sheetrock on the indoor face, or 2 layers of OSB glued and screwed plus drywall. Here's most of my new pile of lumber to make corrections with- someday I'll stop making daily $200+ trips to the hardware store, but not yet.

IMG_6362.jpeg

As I mentioned in the previous post, he didn't like the drywall behind the AC units, so I had to trim that so insulation is easier for me, and 2x6s under the edges of the drywall to support it. Because I'm more thoughtful of the drywall guys than the AC man, I trimmed the drywall to 96-1/4" above the curb so they can fit a full piece below it (or two pieces running horizontally).

IMG_6358.jpeg

I have plenty to get to over the next week to remedy the inspection failings and hanging insulation. Fortunately the inspector was fine with me getting that done everywhere but the front wall where he'll need to see the framing fixes. Hopefully after he approves those changes, all that will be left is that wall of insulation and then drywall can be hung everywhere.
 
Last edited:

dmittz

Well-known member
Joined
Dec 2, 2016
Messages
1,298
Looks like things are coming along. Question for you what was the reason for the 'Double wall'?
 
OP
T

TXNinAZ

Well-known member
Joined
Oct 9, 2011
Messages
507
Location
Phoenix, AZ
Looks like things are coming along. Question for you what was the reason for the 'Double wall'?
It's a fairly common design feature around here depending on the house's elevation plan. The interior non-bearing wall allows the house to have a deeply recessed window ledge and inset garage doors without actually having 18" thick walls. I did this on my garage just so it matched the house as closely as possible. My aim was for this addition to look as though it could have been original.
 
OP
T

TXNinAZ

Well-known member
Joined
Oct 9, 2011
Messages
507
Location
Phoenix, AZ
Built the new attic access opening as required by my inspector. I'm sure I sound whiny, but man I just don't see the need for this. 2x12s spanning between the joists, 2x6s on top of the joists connecting the 2x12s, with OSB screwed to the outside for lateral support. I realized that wouldn't do it because he wants drywall to drywall contact between the lid and the inside 'walls' of the opening, so I had to rip a 2x4 down to 2-1/8" and screwed it to the top of the 2x6s so it would line up with the top of the 2x12s. Then the lid had to be two layers of OSB, glued and screwed with 5/8" drywall screwed to it. The thinking here is that if there is a very hot fire in the garage, the pressure won't lift the access lid and allow the fire to spread. Be sure to eat your Wheaties to get into the attic- the 39"x25" lid is not light.

IMG_6379.jpeg

IMG_6380.jpeg

Successfully swapped out the 230v boxes with 5x5 (4-11/16") boxes, extension ring, and 1" mud ring. I think that will work well for installing the devices and having enough wire length to make future changes if needed.

IMG_6371.jpeg

3 Polaris taps and a lot of 6 gauge wire jammed in there.

IMG_6372.jpeg

I think I mentioned the AC guy is in a rush to get things done as quickly as possible? Well, the communication wire to the larger indoor unit had a fault so he replaced it with some better cable. Unfortunately he installed it in a pretty sloppy manner and it was asking to be punctured by the drywall guys. On the bright side the perpendicular studs stacked behind this weren't drilled into.

IMG_6375.jpeg


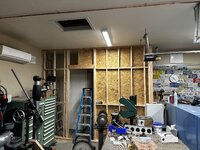
Since I was able to get the insulation started, I went ahead and filled in the 'hallway' walls that connect the original garage to the shop using Rockwool. Unsurprisingly it makes a dramatic difference to the sound level in that area.

IMG_6389.jpeg
 
OP
T

TXNinAZ

Well-known member
Joined
Oct 9, 2011
Messages
507
Location
Phoenix, AZ
After the insulation I got to work on finishing the radiant barrier in the attics. I got it all stapled in above the hallway and started to cut the vent holes. Here's where the story gets a bit stupid and sad. I'm a very careful person and for the number of parts made and projects completed I have been injured very few times. Well I did something stupid in the name of satisfying my usually well-controlled OCD (actual disorder, not just that I'm picky). I didn't like how imprecise the vent holes were that I had cut by hand. I figured that I could use a hole saw to make nice round holes a bit larger than the soffit vents and solve a couple of problems at once- not remove any more barrier than necessary, have nice, consistent holes everywhere, and it'd be very quick. I'm sure you can see where this is going- where the barrier was taut it was no problem- the saw bit in, made a reasonably nice hole, and that was that.

IMG_6417.jpeg

Where there is any slack in the foil, you have a problem. Because of the two long cuts for the cable and wire to pass through, this piece was pretty loose. I foolishly held onto the edge of the foil to keep it tight and the saw grabbed and climbed up the foil and into my hand. 41 years of avoiding the ER down the drain. 8 stitches so not the worst injury in the world, but certainly an embarrassing and time-consuming one. Learn from my stupidity and don't do things like this.

IMG_6416.jpeg

IMG_6418.jpeg


IMG_6398.jpeg


Some antibiotics and a few days of rest and I'll be back at it.

Completing the rest of the radiant barrier was the next task, and one I haven't been looking forward to. I'm not a fan of heights. The lift is essential and very safe, but my head is still 18' in the air with skull cracking concrete waiting below if I should fail. For the center (highest) section of the attic the lift couldn't get me there- it would reach up that high, but it was too wide to rise between the joists so I had to use my OSB platform to install the last of the foil. For the first time in my life I truly felt the 'weak in the knees' feeling when nervous. I've been on stage doing theater in a 3,000 seat auditorium, given speeches to huge groups of people, made a hundred YouTube videos and I've never been as nervous as standing up there hoping to not fall. I'm sure the hand injury a few days beforehand played a large part in fearing another injury, but that sucked.

Alls well that ends well, as they say. The barrier is done and after I cut the remaining vent holes tonight it'll be ready for the inspector to come back. Unfortunately, I think I'm making a Faraday cage out of my shop so cell signal will probably be compromised, but getting fewer phone calls won't bother me one bit and the cooler, cheaper environment will make up for it anyway.

IMG_6439.jpeg
 
To avoid these ads, REGISTER NOW!
Top Bottom