MP&C
Well-known member
Thanks, the drill press is a Rockwell, 1969 date of manufacture.


This was my first effort with my HF bead roller... so some of the learning curve is evident... I think it came out cool though.
...I can't help but laugh though... all this work, and its still just a baja bug that I plan on beating to death...
This was my first effort with my HF bead roller... so some of the learning curve is evident... I think it came out cool though.
...I can't help but laugh though... all this work, and its still just a baja bug that I plan on beating to death...

Pretty nice job considering the POS HF English Wheel................corner for a trailer???
This was my first effort with my HF bead roller... so some of the learning curve is evident... I think it came out cool though.
...I can't help but laugh though... all this work, and its still just a baja bug that I plan on beating to death...


Where does everyone get sheet metal/steel that is NOT galvanized? Everything I see for sale is galvanized.


Your work is incredible on that 55. What gauge sheet metal do you use on that build?Well, between a couple trips overseas for the day job and just life in general, I really have put this off long enough. (continuation of post 261)
My Nephew Chris came over today and gave me a hand fitting up the tailgate. The re-pin job on the hinges was finished just before Christmas, so we got those installed and fitted up the bare inner tailgate to see how it fit the hole...
..and then set the new skin in the hole to see how it looked...
Prior to putting these two pieces together, the areas inside that will face each other were scuffed. After assembly some fresh epoxy primer will be flowed around the perimeter so this will hopefully last another 55 years.
Major tools we'll be using today, a door skin hammer and a small shot bag for a dolly.
With both pieces in place, bolted to the car, the lower corners were folded to help hold things in place, then worked the sides.
As the sides were folded we checked the gaps as we went...
Before folding the top edge, we installed the upper gate to have as a reference...
Working the top edge....
The lower edge is folded partially, but was awkward to finish that close to the body, so it will come off and be completed on a door stand. The upper gate gaps aren't quite as nice as the lower, so this will be another area that we fine tune the gaps....
Well, between a couple trips overseas for the day job and just life in general, I really have put this off long enough. (continuation of post 261)

Looking good ZT.Made these for the wife today.
A pair of Stainless Steel bracelets.
That works fine in your weather, but up here If I got my girl Looking good ZT.
to wear one of those up here she would freeze to death...

Made these for the wife today.
A pair of Stainless Steel bracelets.
[/IMG]
what did you do? your wife found out about the new tool you bought without her knowing? heh heh, beats buying flowers
Looks great, btw.


Here's my newest project, so far (far from done, mind you...)
/
...and the front tacked in place.
I know that it is not as fancy as what some of you guys have here, but it is all shrunk, stretched, and planished by hand. no power hammer or english wheel, just hammers, mallets, dollies, a beater bag, and some tucking forks. now that all 4 of these parts are together, I'm going thru the whole shell with a ******* and dollies to get it all perfectly smooth.
I guess you left an opening to slip the dollies in? On the underside maybe?That's cool man.
Any how, lot's of work there.


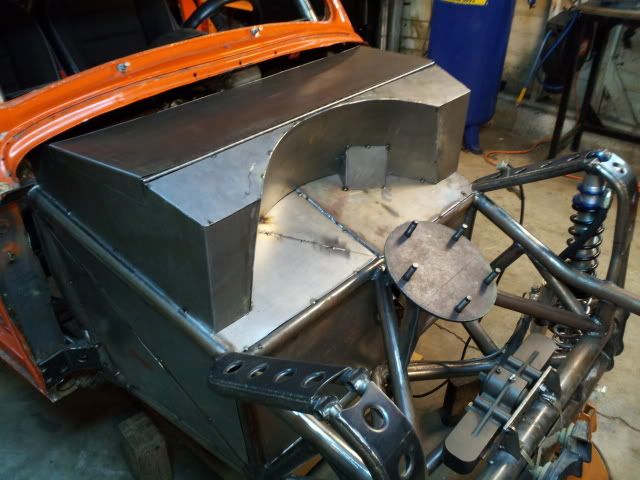


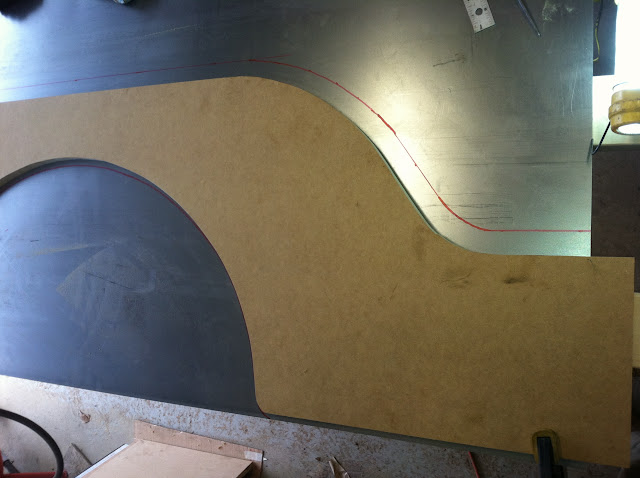
More amature hour... but i'm awful proud. I wanted the "cab" of my buggy to be as waterproofed as possible... and decided to make use of the dead space with a storage box. Still in progress obviously. It'll all be sprayed with bedliner to hide my fabrication sins, and to add some sound deadening.
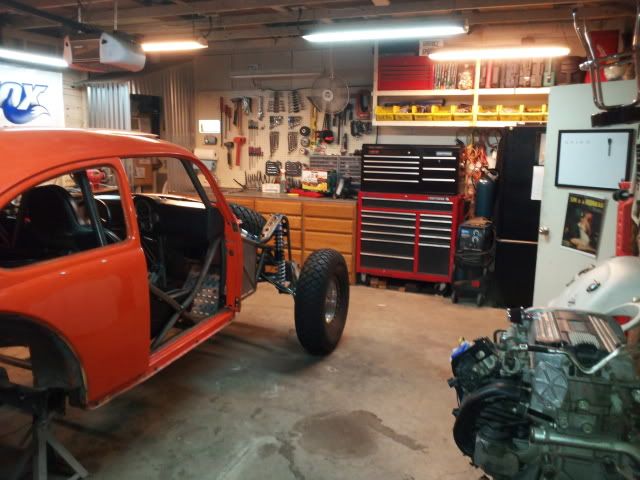
and a shameless favorite garage pic:
I see an Ecotec!! Is that going into the buggy?
Its an 04' 2.2 that's stock as could be....and yup, its destined for the baja bug. I've got the adapter already, and everything else I need to make it run except for the fuel pump. I've never had a buggy with anything other than VW power, so i'm excited to give this a shot.
...and good eye.