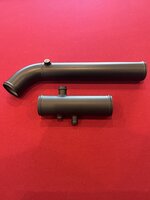
Had a chance to do a little fab this weekend. My grandpa built this gooseneck hay trailer many years ago and it’s been a great tool. I’m guessing he must have had a short 2wd pickup when he built it because the vertical part of the coupler was way too long for either of my pickups. The trailer was always riding way high in the front, putting the majority of the weight in the rear axle. So I chopped 6” off the coupler and it sits much better now. Sorry I didn’t get a lot of pictures, time was escaping me.
So the original plan was to just cut a 6” segment out of the vertical piece, weld it back together, and the sleeve over it with a larger diameter pipe. But that’s not really an ideal joint for something this critical, plus I didn’t have any pipe on hand that would sleeve over it correctly. I also thought about cutting the coupler itself off, cutting 6” off the vertical piece, then welding the couple back. But I was a worried about ruining the coupler and I wanted to clean up the vertical welds at the end of the neck and along the gussets anyway. My grandpa could build anything, but a welder he was not.
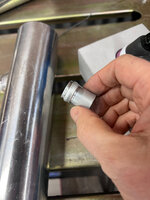
So I started with some 4.5” cutoff wheels:

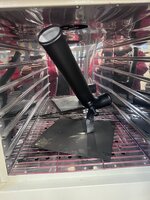
Unfortunately I ran out of cutoff wheels so I had to resort to using the torch. It was ugly. Took lots of grinding to get it all clean and straight again, but I got it tacked back up after shortening it by 6”. Here it is after a 6010 root pass on each side.

Next I ran a 6010 hot pass on each side as well as around the top of the tube. I went ahead and put the cap on top and finished it off with 7018 cap.

And finally I did a 2 bead 7018 cap on each side. I also did a 6010 hot pass and single bead 7018 cap on the inside of the gussets but didn’t get a picture. As you can see in these last pictures, not my best work. It was getting dark and I was having hell with my electrode holder. After every rod I’d have to lay it down and let it cool because it was so hot I couldn’t hold onto it. I think I’ve got a bad section in my lead near the end. I cut off about 18” or 2’ and reattached the electrode holder but it didn’t help at all. I’ll chase the problem down before I weld again. As always, thanks for looking!


 . I figured I'd leave the cardboard mockups there for a while to see if I still liked the look of the kilt while I ground out spots to put D-rings