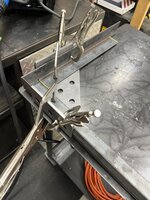
I posted this in another GJ thread but this one seems an appropriate place to drop it too. This is my first welding project. Always wanted to learn to weld but never did. Retired and decided it’s now or never. Got a great deal on a used Miller MultiMatic from a buddy and started watching YouTube. Then got a cylinder of C25 and loaded a spool of 030 and tried to lay some beads. While I plan to take an evening class at the local votech this fall, I decided heck with it, I’m going to build a welder cart. I needed something that could accommodate a couple of 120cf cylinders so I can eventually utilize both the mig and tig functions of my welder. Looked at a lot of options and settled on my own version of a ZTfab tool box cart. I purchased a tank bracket and a couple of cable hangers from ZT as well as casters and steel hub rear wheels. I then got the cheapest Craftsman tool chest they had at Lowe’s. Went to the steel yard and got 2” x 1/8” angle for the frame and some 5/8” rod for the rear axle. I had fun making it and have a very functional cart for my needs. Like I said, this is my first welding project. So no, the welds aren’t pretty. But with a bit of grinding and a rattle can they are good enough for me. Welding the axle was the most difficult part of this project. Because of its thickness and being round, it took multiple passes to get what I thought was acceptable penetration. Looking forward to learning a whole lot more about proper technique. I don’t think your ever too old to pick up a new skill and I’m excited about the prospect!

You are using an out of date browser. It may not display this or other websites correctly.
You should upgrade or use an alternative browser.
You should upgrade or use an alternative browser.
Show us your welding projects
- Thread starter neonnblack
- Start date


f150skidoo
Well-known member
I have a a JD2 hydraulic tube bender with a 180 degree die for 1.5" square tubeHow'd you bend the tubing?
Retroman
Well-known member
Looks great for your first project. It doesn't take long to get fairly good with a mig welder. I am in the same boat as you but not yet retired (but close) bought a MM211 I am surprised how much I have used it just for little things around the house. Would like to get a Tig machine but space is an issue.I posted this in another GJ thread but this one seems an appropriate place to drop it too. This is my first welding project. Always wanted to learn to weld but never did. Retired and decided it’s now or never. Got a great deal on a used Miller MultiMatic from a buddy and started watching YouTube. Then got a cylinder of C25 and loaded a spool of 030 and tried to lay some beads. While I plan to take an evening class at the local votech this fall, I decided heck with it, I’m going to build a welder cart. I needed something that could accommodate a couple of 120cf cylinders so I can eventually utilize both the mig and tig functions of my welder. Looked at a lot of options and settled on my own version of a ZTfab tool box cart. I purchased a tank bracket and a couple of cable hangers from ZT as well as casters and steel hub rear wheels. I then got the cheapest Craftsman tool chest they had at Lowe’s. Went to the steel yard and got 2” x 1/8” angle for the frame and some 5/8” rod for the rear axle. I had fun making it and have a very functional cart for my needs. Like I said, this is my first welding project. So no, the welds aren’t pretty. But with a bit of grinding and a rattle can they are good enough for me. Welding the axle was the most difficult part of this project. Because of its thickness and being round, it took multiple passes to get what I thought was acceptable penetration. Looking forward to learning a whole lot more about proper technique. I don’t think your ever too old to pick up a new skill and I’m excited about the prospect!
f150skidoo
Well-known member


PugetDude
ALLIANCE MEMBER
Nice work!
mielked
Member
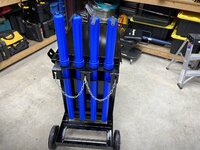
Trickle charge boom arm for our water rescue equipment. We needed the cords off the ground to prevent tripping over them. It swivels from bay to bay to accommodate the trailer location.
Attachments


mielked
Member


OX1
Well-known member
My new to me Road Force balancer had the tire lift "system", but the external parts were removed and who knows what happened to them. My Hunter Rep came last Mon, fully calibrated/checked out my machine and gave it a clean BOH. i was hoping maybe I could get the bolt on pieces from someone discarding a bad machine (eventually), but he said most of the machines from my era didn't have the wheel lift.
Anyway, time to build my own. This is what it is supposed to look like.

Basically, I have everything in the pink "circle", need to fab up everything else.

Started with main plate, that bolts to arm brackets.


Decided on this square 3/16 wall tube for main support.


Also picked up these small casters for the wheels. Rated 88 lbs each, going to use two front, two rear. Drilled out to 5/16 ths for higher grade hardware.

That's about it for now. Working on pathways for wheels next. Figure closest pathway (to tire) will be pushing wheels down, but rear pathway will be pivoting on front wheels and pushing other set of wheels up (with weight of trolley/tire acting as a cantilever in the front)..
Anyway, time to build my own. This is what it is supposed to look like.
Basically, I have everything in the pink "circle", need to fab up everything else.
Started with main plate, that bolts to arm brackets.
Decided on this square 3/16 wall tube for main support.
Also picked up these small casters for the wheels. Rated 88 lbs each, going to use two front, two rear. Drilled out to 5/16 ths for higher grade hardware.
That's about it for now. Working on pathways for wheels next. Figure closest pathway (to tire) will be pushing wheels down, but rear pathway will be pivoting on front wheels and pushing other set of wheels up (with weight of trolley/tire acting as a cantilever in the front)..
solo machinist
Well-known member
Looking pretty good! Nice you can DIY! I like the lights on your mill, where did you get those?My new to me Road Force balancer had the tire lift "system", but the external parts were removed and who knows what happened to them. My Hunter Rep came last Mon, fully calibrated/checked out my machine and gave it a clean BOH. i was hoping maybe I could get the bolt on pieces from someone discarding a bad machine (eventually), but he said most of the machines from my era didn't have the wheel lift.
Anyway, time to build my own. This is what it is supposed to look like.
Basically, I have everything in the pink "circle", need to fab up everything else.
Started with main plate, that bolts to arm brackets.
Decided on this square 3/16 wall tube for main support.
Also picked up these small casters for the wheels. Rated 88 lbs each, going to use two front, two rear. Drilled out to 5/16 ths for higher grade hardware.
That's about it for now. Working on pathways for wheels next. Figure closest pathway (to tire) will be pushing wheels down, but rear pathway will be pivoting on front wheels and pushing other set of wheels up (with weight of trolley/tire acting as a cantilever in the front)..
Old Man Roger
Well-known member
Those lights remind me of the aliens from war of the worlds..lol
OX1
Well-known member
Looking pretty good! Nice you can DIY! I like the lights on your mill, where did you get those?
Thanks!!. Lights were harbor freight close outs a year or so ago (maybe two).

OX1
Well-known member
Got the "trolley" system mostly worked out.


Made "inner" rail removable, as otherwise, the only way to remove trolley would be to slide it off the end of main tube.
I won't have that kind of space, as my garage to house stairway is right next to RF balancer


Tire "lifter upper"")


Welded in plate, with internally welded nut on each end of outer bar

To make it adjustable for different diameter tires.


So this is basically the entire thing. May put a stop screw/bolt on end of main tube. Looks like Hunter had "something" to keep trolley from coming off tube (but again, mine won't be able to move that far due to stairway, so do I really even need it?).

Made "inner" rail removable, as otherwise, the only way to remove trolley would be to slide it off the end of main tube.
I won't have that kind of space, as my garage to house stairway is right next to RF balancer
Tire "lifter upper"
Welded in plate, with internally welded nut on each end of outer bar
To make it adjustable for different diameter tires.
So this is basically the entire thing. May put a stop screw/bolt on end of main tube. Looks like Hunter had "something" to keep trolley from coming off tube (but again, mine won't be able to move that far due to stairway, so do I really even need it?).
OX1
Well-known member
Not exactly a welding "project" I guess but I welded up my SWAG finger brake last weekend.
Been meaning to eventually grab one of those setups. Post up when you start using it, would love to see "projects" with it.
PugetDude
ALLIANCE MEMBER
Here's my latest welding project...
Bought an LED headlight at the local farm supply store out of the impulse purchase display. $5.00; comes with a USB charger and a headband. Nice and bright.
I cut the headband loops off and installed it with a couple of pop rivets on my backup welding helmet to try it out. It works great, has an easy to operate on/off switch on the end and swivels to shine the light where you need it. It's really lightweight, don't even notice it is there- and is a great grab handle for picking up the helmet.
kaymccampbell
Well-known member
My big welding project, that I had planned all out, and gathered all the parts from the scrap bin, turned into two pieces of PVC wood.
PugetDude
ALLIANCE MEMBER
Inquiring minds want to know...My big welding project, that I had planned all out, and gathered all the parts from the scrap bin, turned into two pieces of PVC wood.
kaymccampbell
Well-known member
I was going to make a double clamp for a well tube, with an angled spar, and a curved saddle, to hold my well chlorinator.Inquiring minds want to know...
Well. After bringing in the well cap to bore it for the drop tube, while holding the chlorinator over the newly bored cap, I had an epiphany. I realized that all I needed was a short little saddle, right on the well cap, to hold it. And since the well cap is pot metal, I'd have to bolt it on. And, oh, look, wouldn't two little chunks of PVC wood screwed to the cap suffice? It's not like it's a high powered, vibrating machine. It's just a very slow synchronous motor that cycles with the well pump.
And, that's my story.
Here's the chlorinator. Those three little vertical things are the two pieces of the saddle, with the drop tube in the middle.

OX1
Well-known member
Added some UHMW in areas that metal edges (or wheel bolts) might end up rubbing.

Tapped a bunch of holes to hold down longer polyethylene strip.

Ended up having to use a drill bit on a vise grip to do countersinks. Tried a bunch of times with a drill, just kept drilling all the way through.


Came out OK, after some trial and error...........


Welded main tube to mount plate. Angled it downward a bit, to roll tire up easier.


Tapped a bunch of holes to hold down longer polyethylene strip.
Ended up having to use a drill bit on a vise grip to do countersinks. Tried a bunch of times with a drill, just kept drilling all the way through.
Came out OK, after some trial and error...........
Welded main tube to mount plate. Angled it downward a bit, to roll tire up easier.
WoodsTruck
Well-known member
- Joined
- Jan 12, 2013
- Messages
- 1,031
I chuck the bit in the drill and find a suitable piece of tubing to go over the bit, cut so that the desired hole depth is exposed (you can do minor adjustments by rechucking the bit) and then if the tubing is pliable metal, compress one end slightly so it is a snug fit and it will stay on the bit. I have used thick wall rubber tubing as well. Usually after a hole or two, the drill debris will work up into the encased flutes and hold the tube in place too.Ended up having to use a drill bit on a vise grip to do countersinks. Tried a bunch of times with a drill, just kept drilling all the way through.
Works well for drilling through a single layer of metal without going too deep. I helped my wife's Uncle install tie downs across the front of the pickup bed. Used this technique to keep from ventilating the back of the cab.
Crazyjake8493
Well-known member
The pallet forks for my tractor were not homemade but I use them even more than the bucket. Great for moving logs and long posts besides just palletized materials. Lately I've been taking off one fork and put the other one directly in the center and using it for trenching for some irrigation and electrical lines.Had some big hook on front end loader forks so wanted to use them on my new tractor. Mage the Quick Release frame out of stuff sitting on the shelf. The forks will definitely extend the usefulness of the tractor.

shortykorte
Well-known member
I’ll have to experiment with the trenching idea. I already have plenty of practice spearing the dirt.The pallet forks for my tractor were not homemade but I use them even more than the bucket. Great for moving logs and long posts besides just palletized materials. Lately I've been taking off one fork and put the other one directly in the center and using it for trenching for some irrigation and electrical lines.

I would NOT recommend, I started to bend the flange on the bottom of the fork mount trying to trench. Luckily I saw it before any substantial bent.I’ll have to experiment with the trenching idea. I already have plenty of practice spearing the dirt.
Last edited:
OX1
Well-known member
Pretty much done, time for a test run.


Flex's a little bit, might add some reinforcements to main plate and main tube.
But goes up plenty high enough..... (the silver lever near air hose is the up/down, air switch).

I also added two small tubes with removable "handles", that will allow me to move trolley sideways easier.
Figure after everything is POR-15'd, will put friction tape or something similar on handles.

Next up is paint (and as mentioned maybe some reinforcements)
Flex's a little bit, might add some reinforcements to main plate and main tube.
But goes up plenty high enough..... (the silver lever near air hose is the up/down, air switch).
I also added two small tubes with removable "handles", that will allow me to move trolley sideways easier.
Figure after everything is POR-15'd, will put friction tape or something similar on handles.
Next up is paint (and as mentioned maybe some reinforcements)
Old Man Roger
Well-known member
Nice, wish we had this when I was a tire changer back in the day.
Crazyjake8493
Well-known member
Multiple, shallow passes. Works here on hard, clay soil with a subcompact tractor and lightweight fork/frame setup. You can't dig a 24" deep trench in one pass.I would NOT recommend, I started to bend the flange on the bottom of the fork mount trying to trench. Luckily I saw it before any substantial bent.
Or you already had an issue with your forks.
Terra Nova
Well-known member
overhead storage shelf to utilize some unused space in the garage. The frame is mostly 1 x 1 1/2” 16 ga steel tubing with some 1” square and angle thrown in. Shelf bottom is 1/2” plywood.

WoodsTruck
Well-known member
- Joined
- Jan 12, 2013
- Messages
- 1,031
Might I suggest installing some "shatter sleeves" over the light bulbs?overhead storage shelf to utilize some unused space in the garage. The frame is mostly 1 x 1 1/2” 16 ga steel tubing with some 1” square and angle thrown in. Shelf bottom is 1/2” plywood.
Terra Nova
Well-known member
They are LED bulbs. Dropped one from the ceiling once and it survived a trip to the floor without issue.Might I suggest installing some "shatter sleeves" over the light bulbs?
Old Man Roger
Well-known member
Yup, I’ve abused mine every time I’ve moved in the last few years. Can’t believe how tough they are. Mine were the $19.99 special they had at lowes or Costco one year.They are LED bulbs. Dropped one from the ceiling once and it survived a trip to the floor without issue.
harley jim
Well-known member

Started a new frame yesterday, it looks like it's going to work out so I'll post a couple of pics.

It was a mini Chopper and a Chinese four wheeler.

OX1
Well-known member
Finished this up with some POR-15. Also added some supports on main plate
to keep main tube from bending downward. Machine is rated up to 175lbs

All finished up. Added the friction tape on handles also.


Next up, a center post adapter kit for my older tire machine.
to keep main tube from bending downward. Machine is rated up to 175lbs
All finished up. Added the friction tape on handles also.
Next up, a center post adapter kit for my older tire machine.
Squez
Well-known member


iagsxr
Well-known member
So I haven't documented this very well, but push bumper for my quad to push my race car around.
Wasn't going to butcher anything on the quad. Bought a winch mounting plate. My nephew then broke out a bracket that bolts to the plate that will have a reciever welded to it.

Wasn't going to butcher anything on the quad. Bought a winch mounting plate. My nephew then broke out a bracket that bolts to the plate that will have a reciever welded to it.
iagsxr
Well-known member
Actual push bumper. 
The bumper needs to be as tight to the quad as possible for trailer space and I also didn't want it to rattle. Drilled and tapped the reciever tube for a cinch bolt. Welded a 1/2" pin in the bumper tube so I can tighten the bolt tight and not crush the tube.

The square part of the bumper will have a couple layers of 3/4" plywood covered with the tread of a tire for cushion to actually push on.
The bumper needs to be as tight to the quad as possible for trailer space and I also didn't want it to rattle. Drilled and tapped the reciever tube for a cinch bolt. Welded a 1/2" pin in the bumper tube so I can tighten the bolt tight and not crush the tube.
The square part of the bumper will have a couple layers of 3/4" plywood covered with the tread of a tire for cushion to actually push on.
WoodsTruck
Well-known member
- Joined
- Jan 12, 2013
- Messages
- 1,031
Could your push plate be mounted with 2 holes in the stinger, first, close up for transport and one further out for use?Actual push bumper.
The bumper needs to be as tight to the quad as possible for trailer space and I also didn't want it to rattle. Drilled and tapped the reciever tube for a cinch bolt. Welded a 1/2" pin in the bumper tube so I can tighten the bolt tight and not crush the tube.
The square part of the bumper will have a couple layers of 3/4" plywood covered with the tread of a tire for cushion to actually push on.
iagsxr
Well-known member
Could your push plate be mounted with 2 holes in the stinger, first, close up for transport and one further out for use?
Yeah could, I didn't think of that.
I like push bumpers tight to the quad. Some guys struggle to see what they're doing though. Getting the bumper out farther helps with that. I'll see how it works as is, can always add another hole.
pancholasvegas
Well-known member
- Joined
- Nov 6, 2017
- Messages
- 261
Today I built a bumper/stinger for my new to me mower I had delivered. Learned some lessons with the old one, hence the bumper for this one. Did both mig and tig welding, depending on the joint. All of the tubing was spare cut offs!


PugetDude
ALLIANCE MEMBER
How did you do the bends?Today I built a bumper/stinger for my new to me mower I had delivered. Learned some lessons with the old one, hence the bumper for this one. Did both mig and tig welding, depending on the joint. All of the tubing was spare cut offs!
pancholasvegas
Well-known member
- Joined
- Nov 6, 2017
- Messages
- 261
I didn’t have to, fortunately. All of the tubing was various scrap cutoffs that I had and they were already bent. I just had to make some creative cuts and weld the pipe back together.How did you do the bends?