Jamesbbh
Well-known member
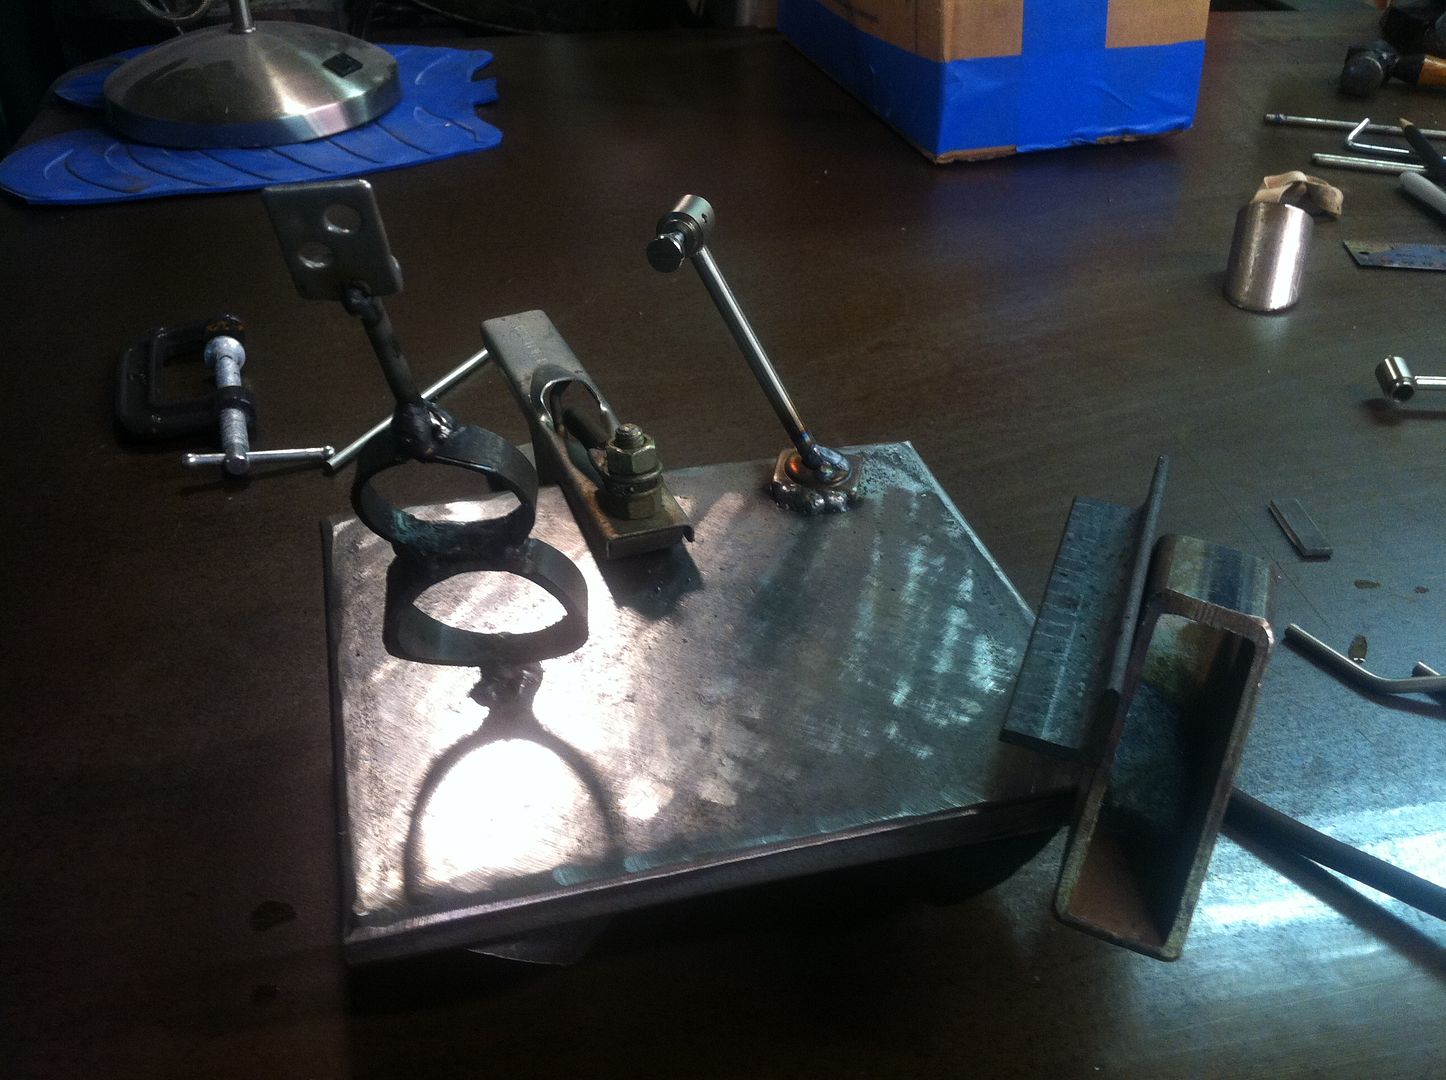
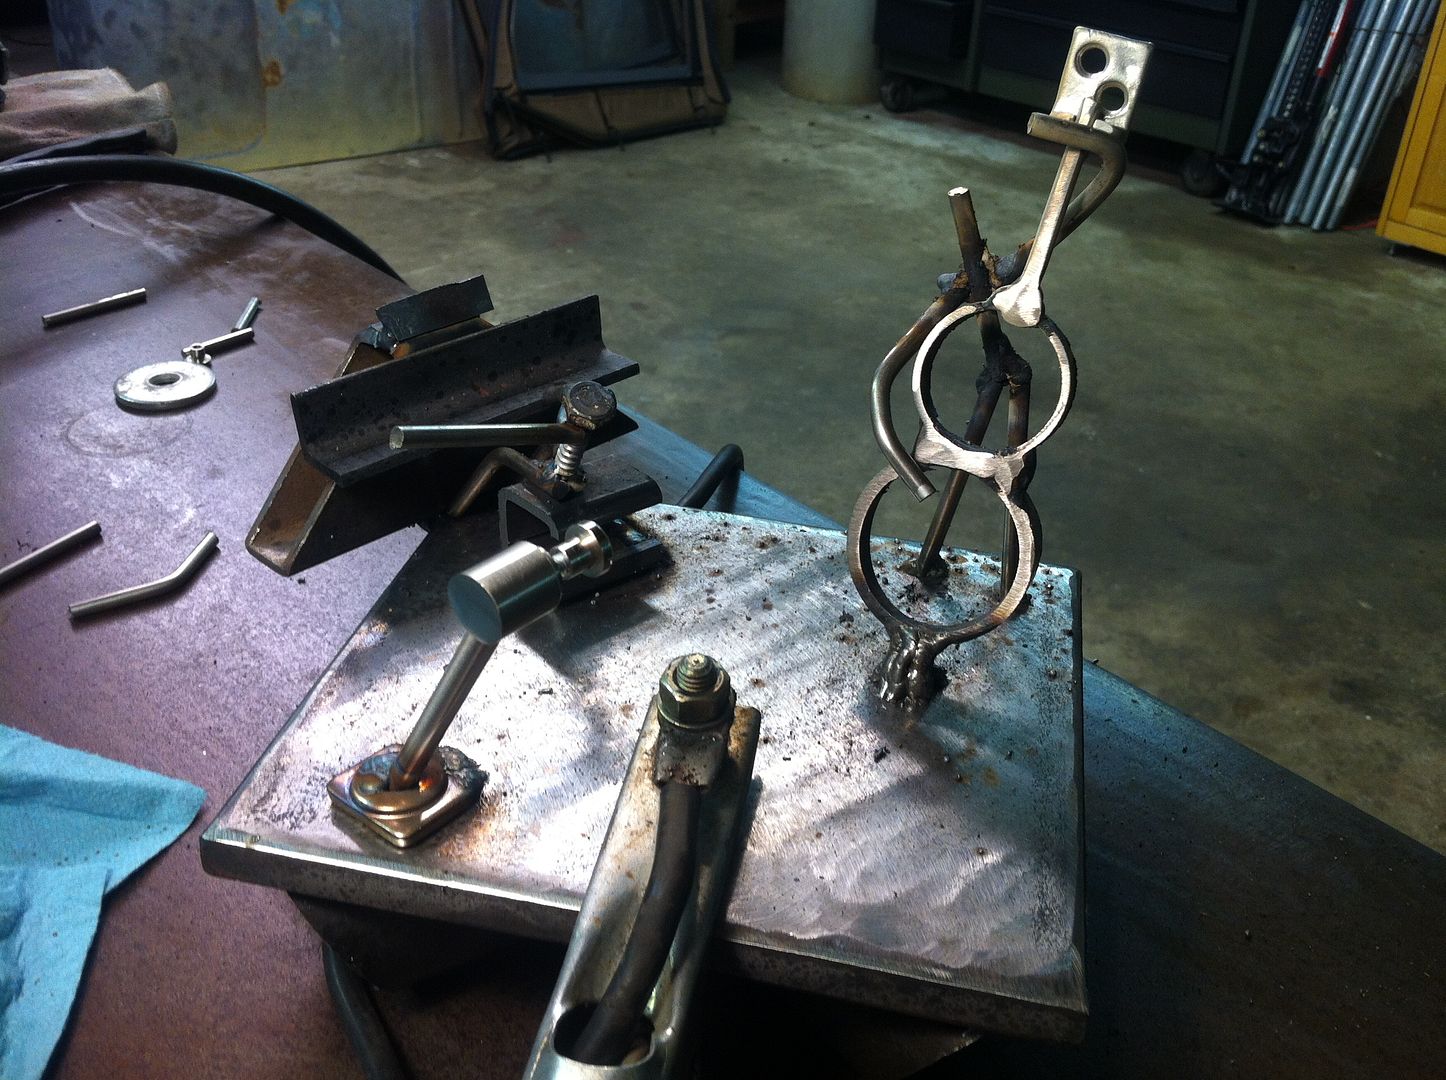
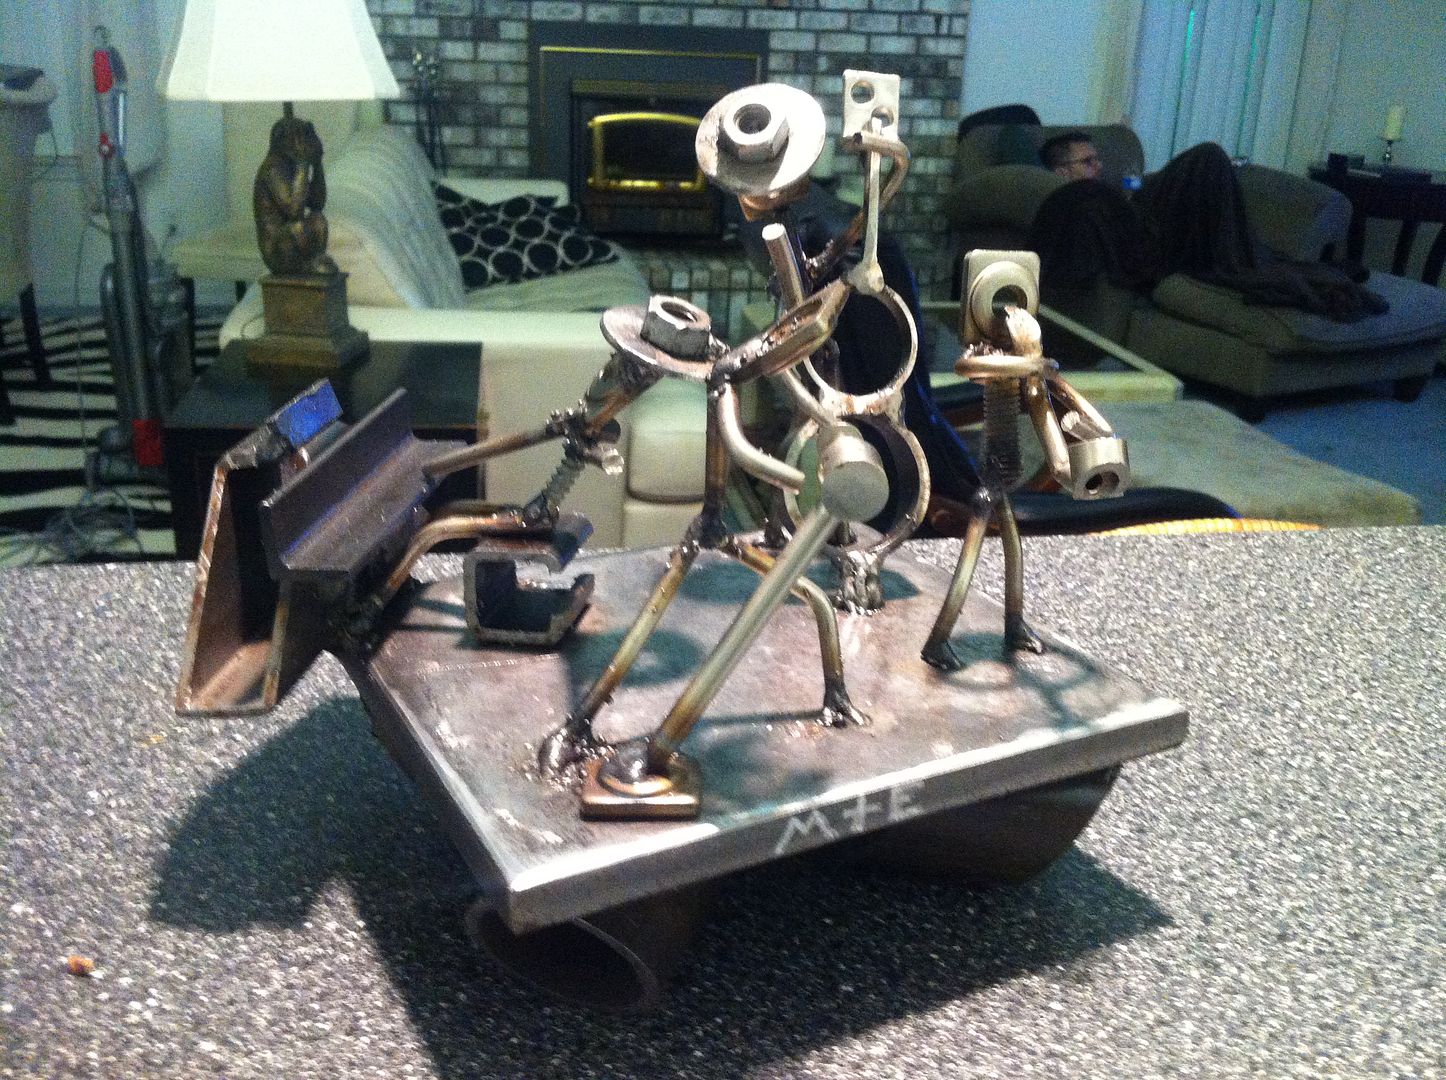
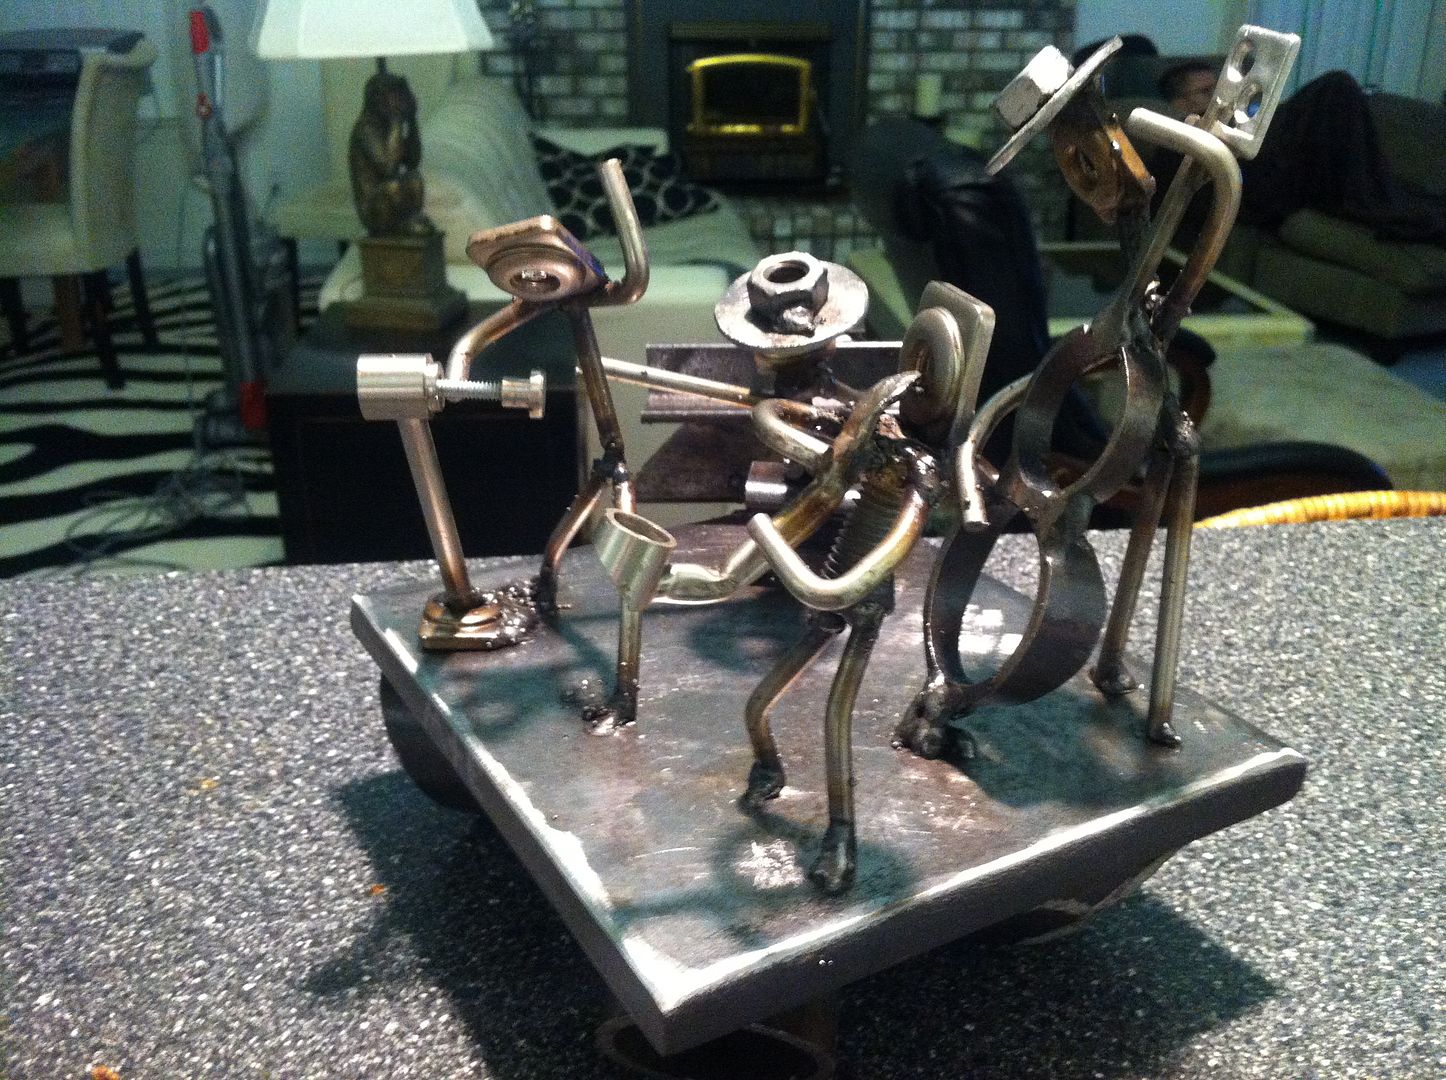
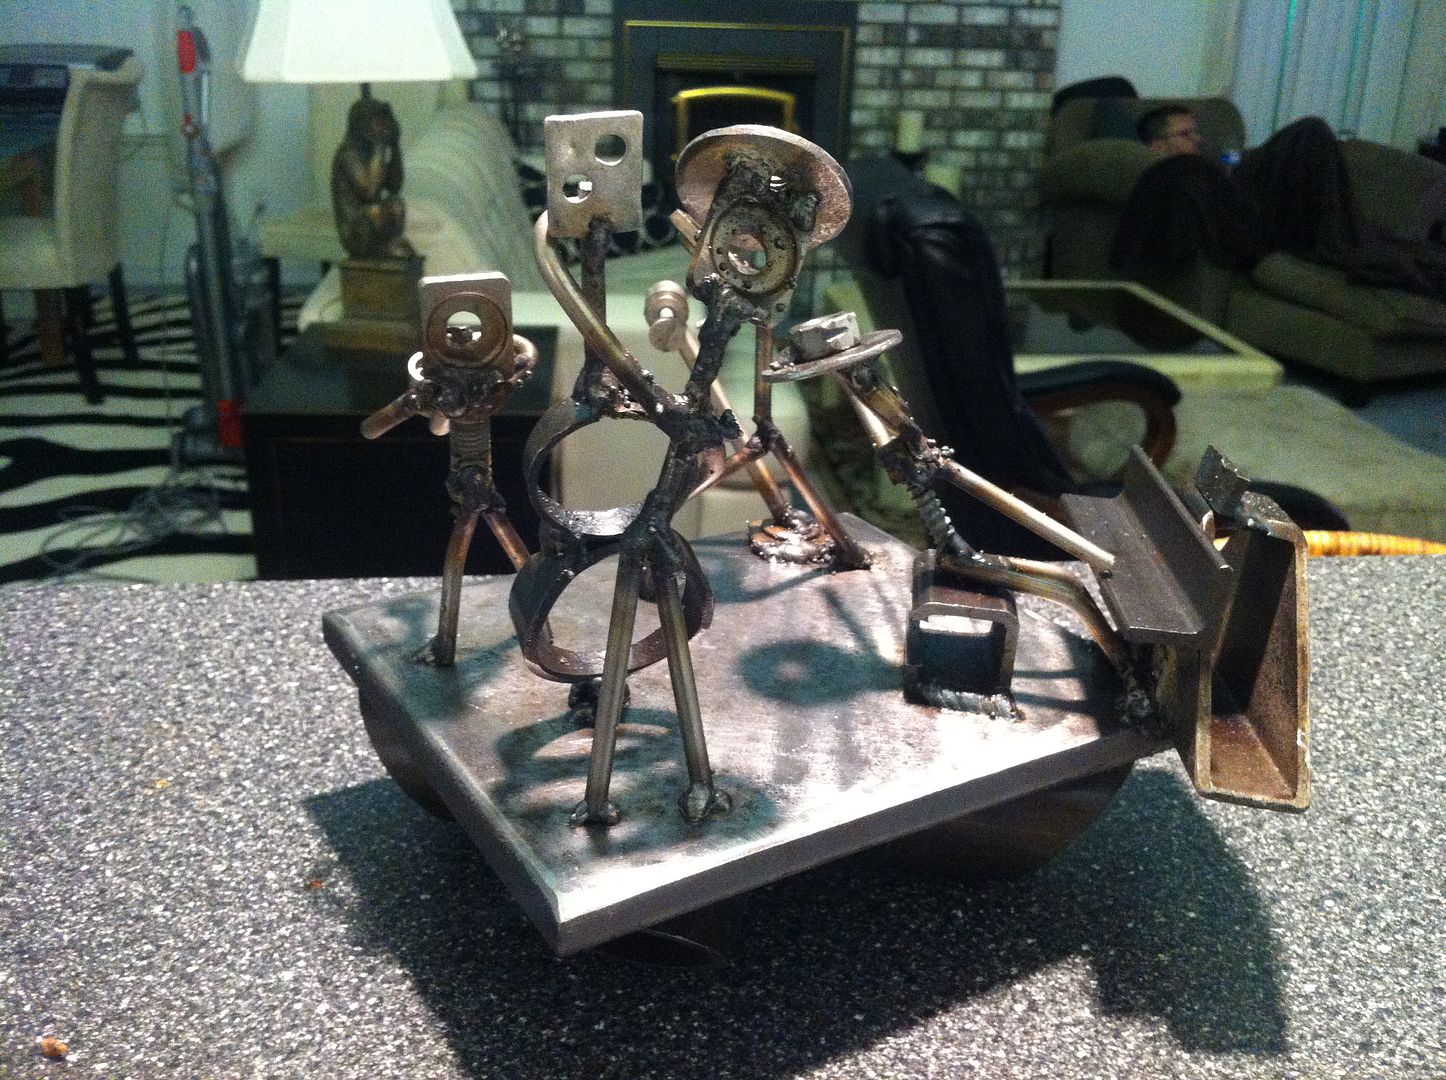
Little random something for my friend's wedding (his wife wanted a jazz band a while ago and I remembered)


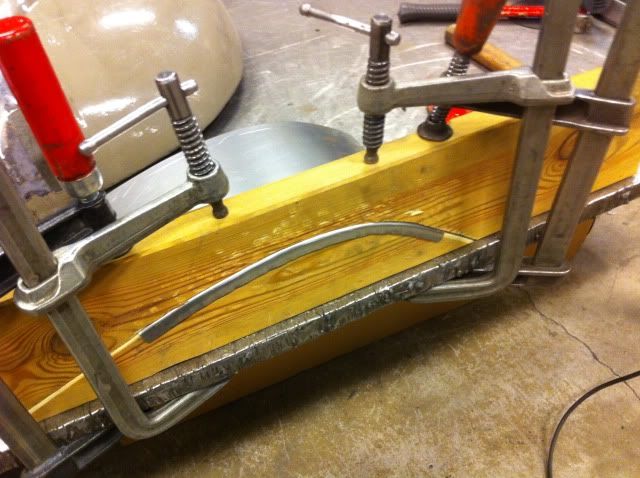


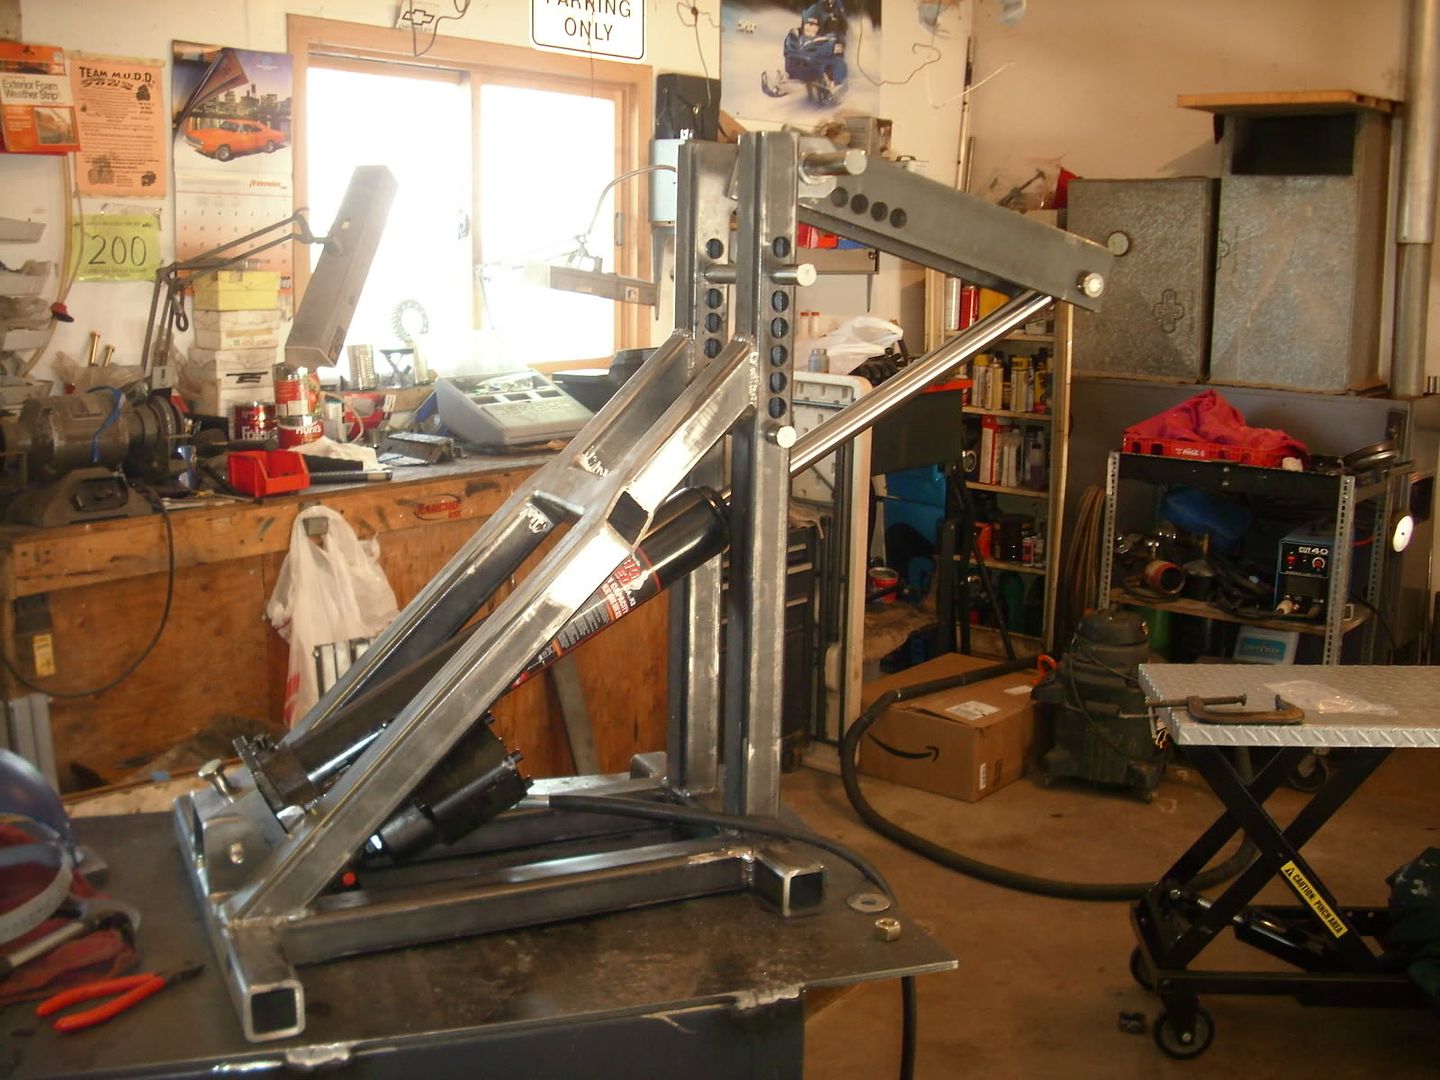
Just finished my GOTTRIKES tubing bender. Ordered the plans last year and just did not the time to start. It is built out of a 20 ft stick of 2X2X1/4 and 4 feet of 3X1/2. The dies are from PRO_TOOLS in Tampa. The welds will never be used in the welding **** section, but I need more practice.
Mike
Just finished my GOTTRIKES tubing bender.


.....I will let you know how it does next week.
Mike

being able to beat the living hell outta somethin on it with a BFH

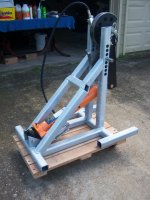
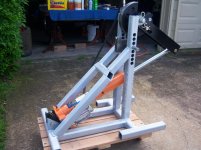
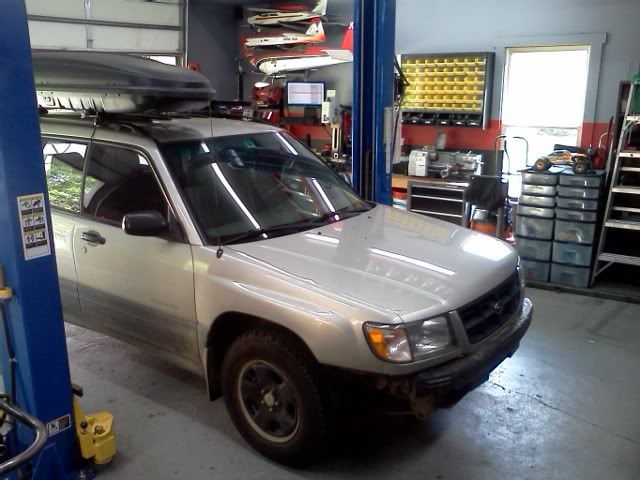
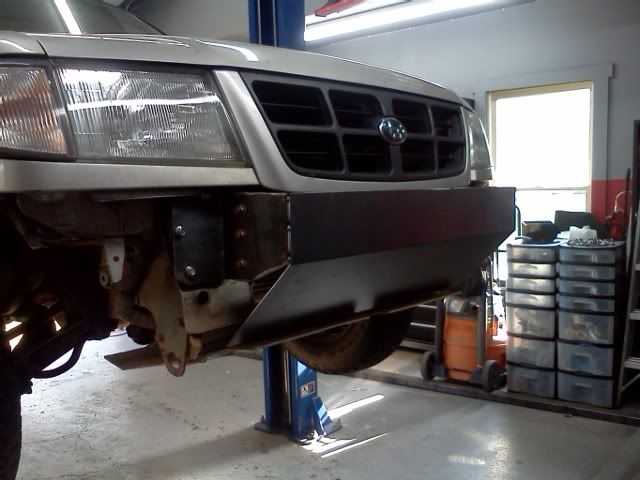
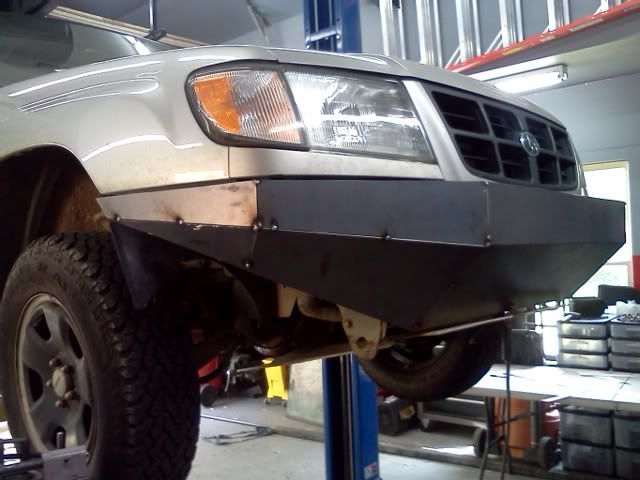
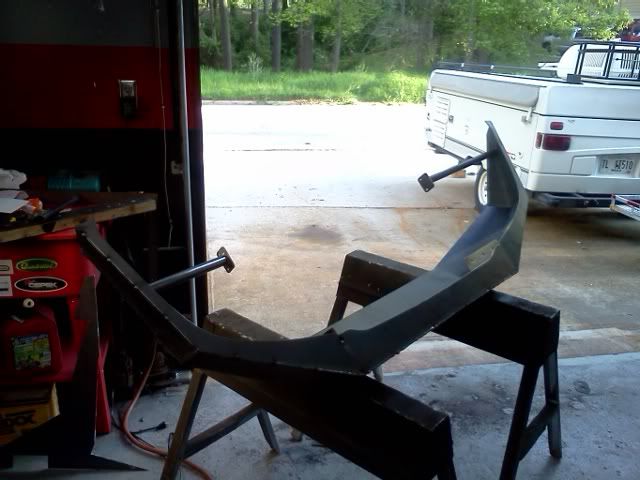
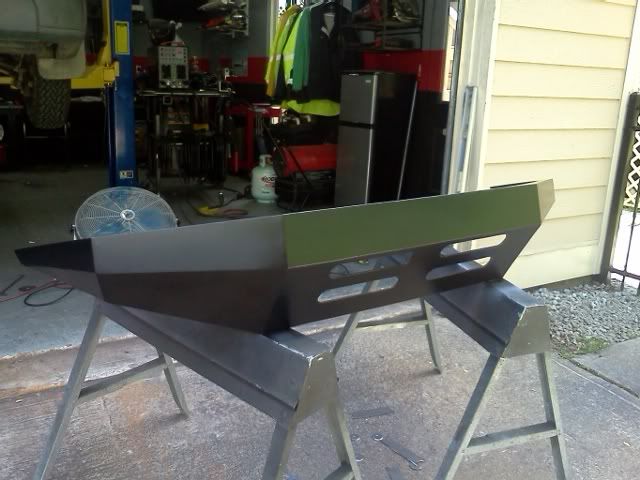
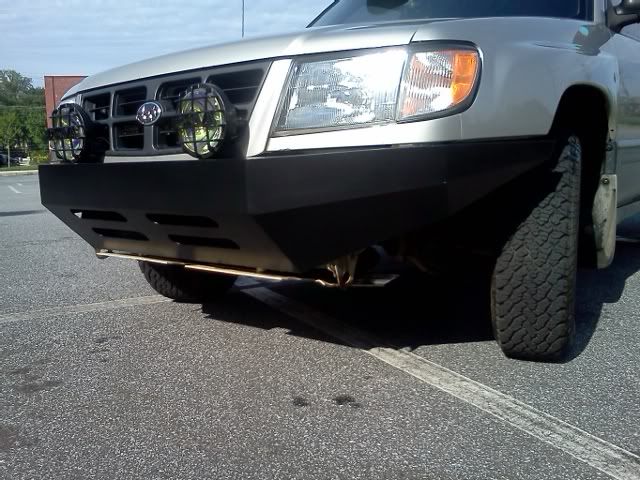
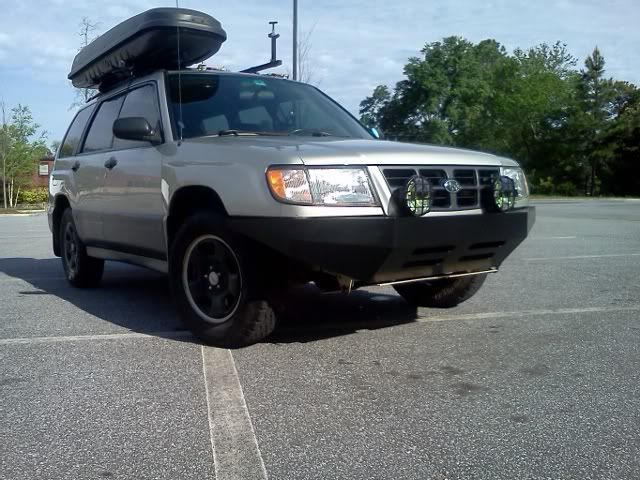
Built a pretty cool bumper for my buddies little Subaru Forester that he takes offroad occasionally.
~Stump
Wow, another Stumpificated Project-NICE!

The S must be short for Sweet........
 "Stumpified" and that is a good thing.....
Built a pretty cool bumper for my buddies little Subaru Forester that he takes offroad occasionally.
~Stump


Very nice Mr Stump. Simple, functional and attractive.
I like it a lot.
I may even copy it for my Santa fe.
Bruce.

tkdblackbelt, the forks are awesome and the bike looks pretty nice too.
Just can't warm up to the sissy bar. Looks just like a mailbox.


..... It's been a fun but very time consuming project. Lots of triple measurements and weird angles to deal with. Straight tube and sheet on a curved windshield frame.
Thanks! Actually "borrowed" the general design from another JF member who does great fab work. Just making a few small changes. The LEDs are also new to this design.
Nicely done.
Those cutouts are pretty cool, what technique did you use to cut them out?
")
I like the lightbar FF315, I was wondering how you cut the shapes out, question answered.
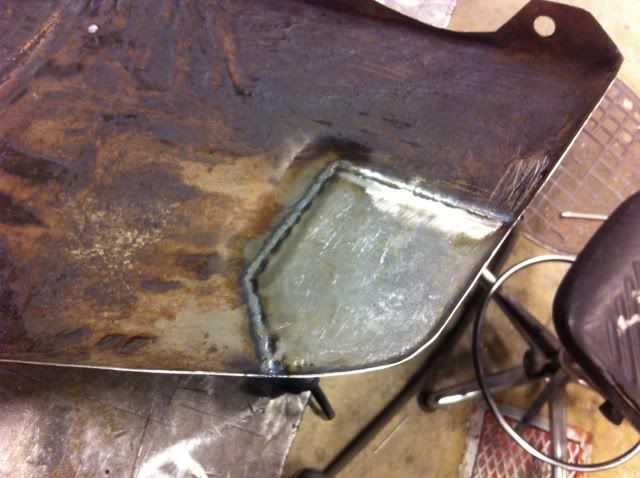
They will be fine I guess. It will all be painted black, so that will hide some of the imperfections......Press is on deck and tubing bender is in the hole.
new here. figured i would make a post in here. been welding for about 3 years, started tig and aluminum about 1 1/2 years ago. most of these pics are random and old. have produced better stuff. i also have alot of car fab stuff i can post up that i built. anyways
some flux core

1/8th stainless housing welded to handle


oh and my garage. just a 13x30 storage unit that i work on the car in.

Have you decided which one yet?