To avoid these ads, REGISTER NOW!

Show us your welding projects

OP
N

neonnblack

Well-known member
Joined
Jun 7, 2010
Messages
4,913
Location
Reno, NV
Started a new steel/wood desk.
First, you buy WAY more steel than you need, because its only bought in 20' lengths.

Set up your bandsaw with the US made bosch 64 1/2 inch blade (which ****** rocks btw)

Cut your steel, half of it cut to long and have to cut it again (better than to short)

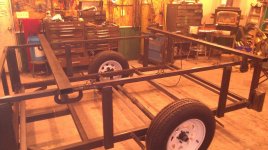
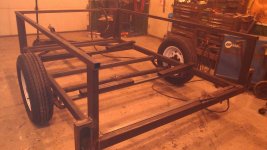
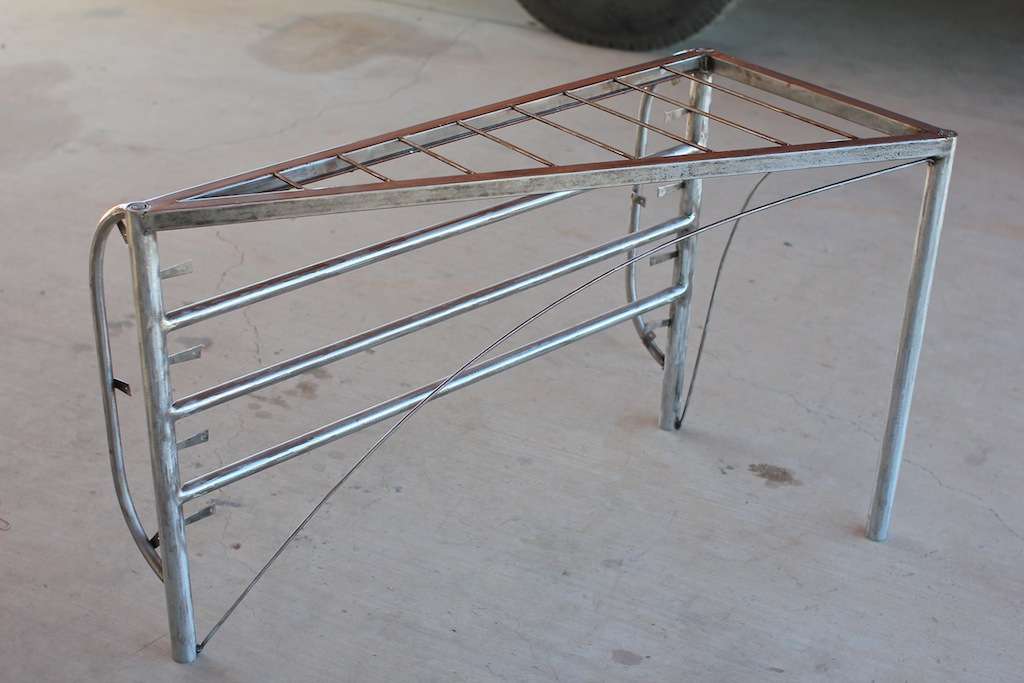
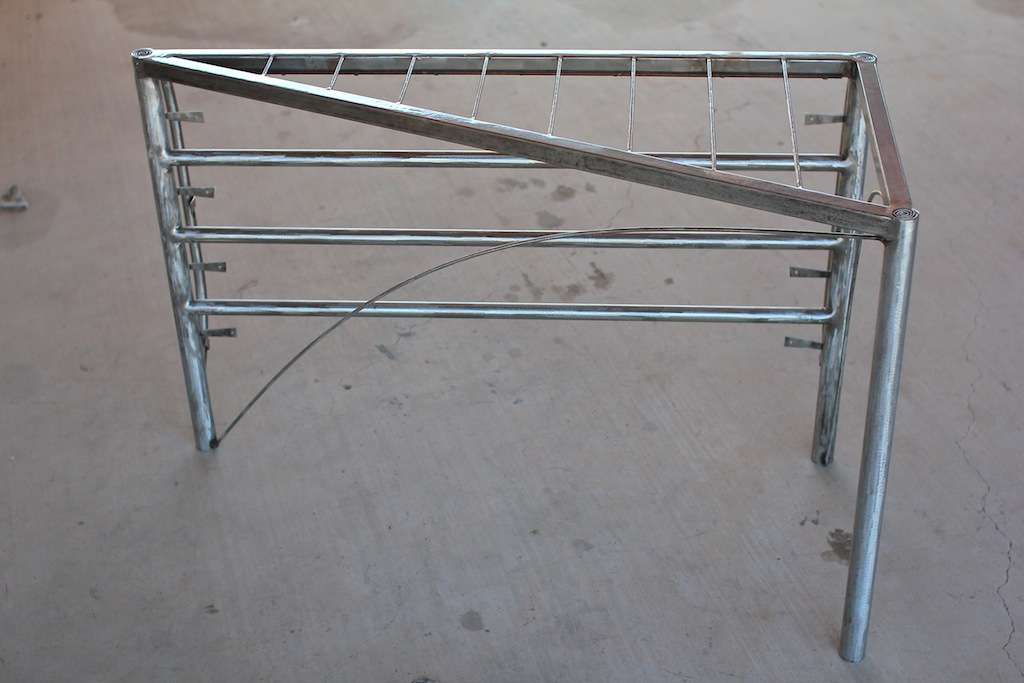
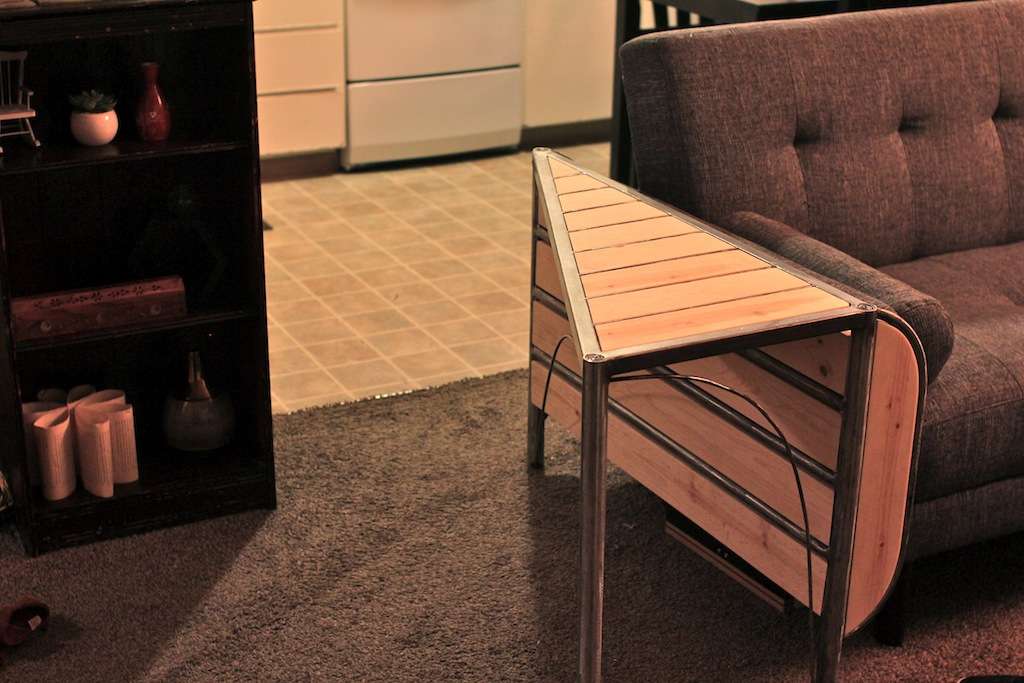
Square up the top frame, and tack and weld together.

Start welding on the legs that arent cut exactly straight.
(same pic i know, i didnt take one of just the top frame)
Get all four legs tacked on.


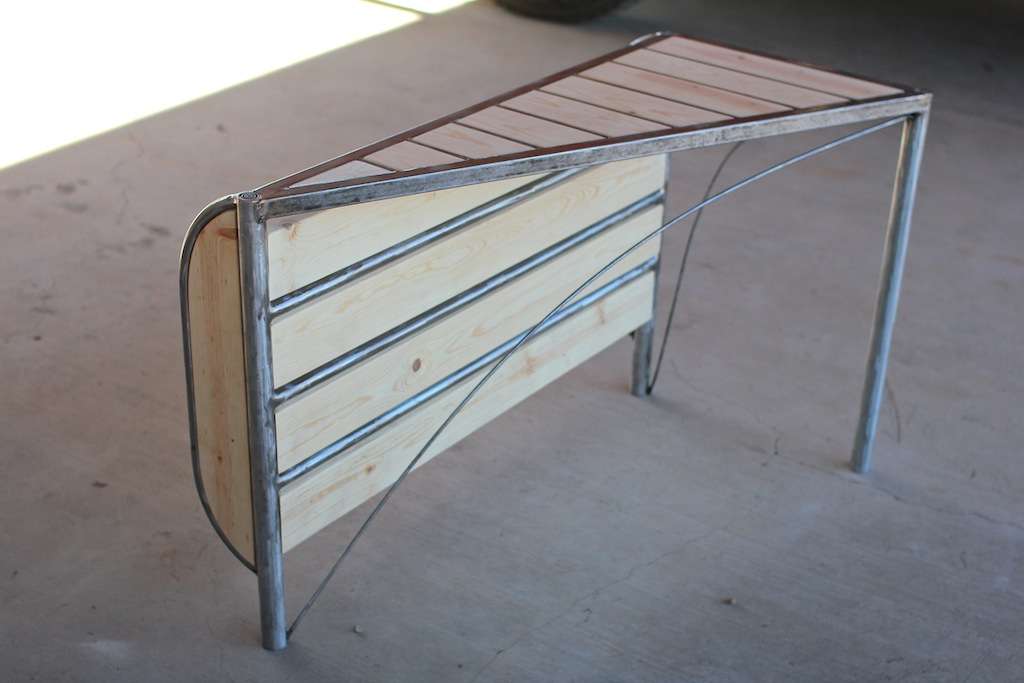
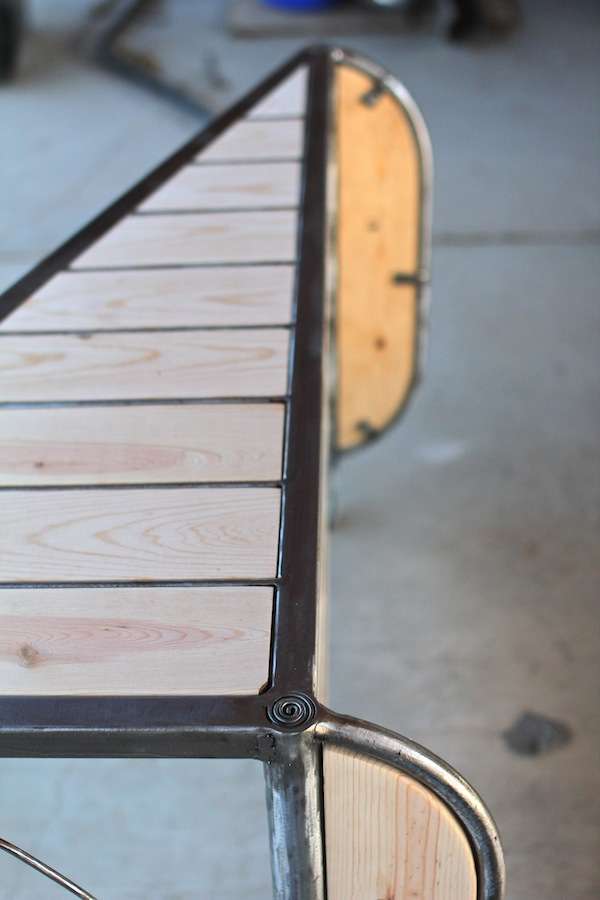
Thats where im at for now.
 
To avoid these ads, REGISTER NOW!

sunsation288

Well-known member
Joined
Mar 20, 2012
Messages
730
Location
Eastern Townships PQ
I love stainless. I used 3/4" but I also used Swagelok fittings for any expansions needed.

i work with swagelock too , the main is 1 inches , but regulator and filter are3/4
P1130589_zps83406917.jpg


Stainless air lines?? I love over kill.:thumbup:

Y va pas de main morte le gars.

Oui je vais en construire juste un garage , il y a eu ben des t' an qu' a y être !!! lollll :lol:
 

F-117HWK

Well-known member
Joined
Apr 17, 2012
Messages
283
Location
Virginia
Finished the bottom. Not i just have to grind it all down and fill in any holes.

Looking good. What gauge is that expanded metal? Are you going to use that on the table? If so, any guesstimate as to how much weight it can support? I have been wanting to use it on my welding cart but don't know what size to order to be able to support the ~90lbs of Miller 211+stuff, across an ~18"x24" span. Any thoughts?
 

WakonTonka

Well-known member
Joined
Feb 20, 2012
Messages
118
Location
The BORG ship
Looking good. What gauge is that expanded metal? Are you going to use that on the table? If so, any guesstimate as to how much weight it can support? I have been wanting to use it on my welding cart but don't know what size to order to be able to support the ~90lbs of Miller 211+stuff, across an ~18"x24" span. Any thoughts?

I used expanded metal like this for a few projects. I welded every single place where it touched the edge and it absolutely will handle quite a bit of weight, certainly 90#. I was happy that I had an auto darkening helmet with all of that quick bead, move, quick bead thing.
 

F-117HWK

Well-known member
Joined
Apr 17, 2012
Messages
283
Location
Virginia
I used expanded metal like this for a few projects. I welded every single place where it touched the edge and it absolutely will handle quite a bit of weight, certainly 90#. I was happy that I had an auto darkening helmet with all of that quick bead, move, quick bead thing.

Ah awesome, thanks for the reply.
 
OP
N

neonnblack

Well-known member
Joined
Jun 7, 2010
Messages
4,913
Location
Reno, NV
Actually, the expanded isnt for my desk. I bought it for two reasons - 1) fire baskets for a few smokers im building and 2) as you can see in the pic i have my ground clamp on it, so i can set my work wherever on the expanded and still weld without having to worry about the ground clamp getting in the way, or moving a piece.
 

CubbyChowder

Well-known member
Joined
May 16, 2013
Messages
175
Hey guys, new to the site and liking it so far! I've recently begun dabbling in metal work and welding and have really started to grow an interest in it. Everything I've done is pretty basic but here are a few of my "projects".

I made a roof rack for my daily driver. I wanted one bike tray, and have the rest of the rack be a wooden platform to haul stuff around on considering the e30 isn't really the most spacious car, especially since the seats don't fold down.

So I went to my local metal supply shop, got 20ft. of 1"x1" metal tubing, had them cut it into four 5' pieces and headed up to my dads.

From there, I made some measurements, cut some stuff, welded stuff together, ground some welds down on the surface and ended up with this frame. It's kind of hard to tell in the pictures, but the legs are a bit longer on one side to make room for the bike tray:

img7618k.jpg

img7621v.jpg


So this is how it sits with the bike tray installed:

img7626i.jpg

img7633kt.jpg

img7652m.jpg


Spent the next few hours making precise measurements so everything is proportional, drilling into the wood, and drilling into the metal on my kitchen floor with ****** drill bits. Drilling through the metal sucked and I'm so happy it's over...

img7673ie.jpg


img7681rf.jpg


I welded on a few hooks throughout the rack to secure tie downs and painted the whole frame and carriage bolt heads black. I also stained the wood, and it's a bit darker now.

img7772vb.jpg

img7763g.jpg


Then it was time for final assembly!

img7799l.jpg

img7803t.jpg


And here's where the e30 sits currently:

img7815v.jpg

e30ps1.jpg


I'm also restoring a 1973 BMW 2002 which has been a huge learning process for me. I'm welding in fender flares to give the body a wider, more aggressive look. I'll just post some random pictures throughout my build:

What I started out with:

img4382q.jpg

img4401xf.jpg


And throughout the build...

img7014g.jpg

img7068c.jpg

img7208m.jpg

img7331b.jpg

img7358r.jpg

img7404d.jpg

img7406f.jpg

img7407ov.jpg

img7488j.jpg

img7553dl.jpg

img5987p.jpg

img6004qk.jpg

img7299e.jpg

img8876s.jpg

img9642x.jpg

img9648q.jpg

img9695h.jpg

img9706z.jpg

img9715w.jpg

img9752a.jpg

img9764x.jpg


Sorry for all the pictures, just thought I'd show some of my work. If you are interested in seeing more on my build, you can view it here: http://roundierevival.webs.com/
 
Last edited:
OP
N

neonnblack

Well-known member
Joined
Jun 7, 2010
Messages
4,913
Location
Reno, NV
Continuation on the desk. made the tower holder, i was gonna do something adjustable, but meh.
45's like a pro!

all welded in

Welds ground, cleaned with spirits and primed.

Darker hammertone gray


Working on the wood top now.
 
Joined
Feb 21, 2013
Messages
21
finally got the rear bumper moved, bolted, welded, shortened, boxed to the frame, and tied to the rear crossmember


:beer:

Looks to be an S-10 series truck? First generation?

I have a solid axle swapped 89 I have a few more changes to make, like making a front bumper, modifying the existing bumper in the back to accommodate a winch, replacing the 1" bolt pivot on the swingarm with a trailer spindle, and so on..
 

CubbyChowder

Well-known member
Joined
May 16, 2013
Messages
175
Thanks for the nice comments everyone, they are appreciated! The fender flares are from a MK1 Volkswagen Rabbit/GTI (late 70's early 80's). You can buy them as rust repair panels online.
 
To avoid these ads, REGISTER NOW!

CubbyChowder

Well-known member
Joined
May 16, 2013
Messages
175
My girlfriend just bought a nice new couch and it's basically a perfect scratching post for our idiot cat so I had to find a solution. I thought it'd be fun to take some scrap metal from around the property my dad lives on and build a table to cover up the area of the couch that he (the idiot) was terrorizing. This was a really fun project, as I basically went into it with no set plan, I just built it however I felt like at the moment. I knew the general dimensions it needed to be to cover the cushion, but the rest was up to my imagination at the time.

The couch is also next to the walkway into the kitchen, which is why it is triangular shaped. It leaves plenty of room for people to walk in and out of the kitchen.

Here is the frame of it. It is all scrap metal that I found, ground down to bare metal and welded together. I made little swirlys in the tops of the round pipe on the corners haha:

img9791w.jpg

img9793x.jpg


I then spent $30 at home depot on wood and clear coat. Cut some wood, sprayed some clear and ended up with this:

img9799ro.jpg

img9800n.jpg

img9801j.jpg

img9802dg.jpg


Here is the couch before the table. You can see at the back of the cushion where our cat started tearing **** up:

img9814k.jpg


And after:

img9813i.jpg
 

racingtadpole

Well-known member
Joined
Dec 3, 2011
Messages
2,029
Location
The far side of crazy.. but sometimes Australia
My girlfriend just bought a nice new couch and it's basically a perfect scratching post for our idiot cat so I had to find a solution. I thought it'd be fun to take some scrap metal from around the property my dad lives on and build a table to cover up the area of the couch that he (the idiot) was terrorizing. This was a really fun project, as I basically went into it with no set plan, I just built it however I felt like at the moment. I knew the general dimensions it needed to be to cover the cushion, but the rest was up to my imagination at the time.

The couch is also next to the walkway into the kitchen, which is why it is triangular shaped. It leaves plenty of room for people to walk in and out of the kitchen.

Here is the frame of it. It is all scrap metal that I found, ground down to bare metal and welded together. I made little swirlys in the tops of the round pipe on the corners haha:

Thats way cool, very creative solution.
The $30 you spent at home depot would have bought you a few rounds for your weapon of choice too :evil:
 

CubbyChowder

Well-known member
Joined
May 16, 2013
Messages
175
Very cool stuff. I have wanted to build a bar in a similar fashion for a long time. What did you use to connect the wood to the frame?

Thanks. The top wood pieces just pop in, they sit on some 1/4" round bar so they sit flush with the top. They are super snug in there so I didn't feel it was necessary to bolt them in.

The side pieces are bolted on from the little tabs throughout the frame of the table.
 

BigChevy17

Well-known member
Joined
May 1, 2013
Messages
64
I worked on a few projects this weekend, I started on the cart for my dynasty. I wanted something small and simple, easy to move around and still have room for my custom torch cooler I'm going to build soon.

[/URL

[URL=http://s923.photobucket.com/user/BigChevy17/media/IMG_0625_zpscee22795.jpg.html] [/URL

[URL=http://s923.photobucket.com/user/BigChevy17/media/IMG_0626_zps2e1cbca5.jpg.html]


I still have a lot to do but I need to get casters tomorrow before I go any farther.

I got tired of my grinder laying on the welding table so I made a little hook for it, it's nothing fancy but its a welding project


Bending down to use my my chop saw gets old so I worked on a stand for it today.


Cut up some 1 1/2" square tubing on the chop saw, the 3" is what's left over from my table.

[/URL


Welded up the legs and ground the bottom smooth

[URL=http://s923.photobucket.com/user/BigChevy17/media/IMG_0642_zpsff95ce5e.jpg.html] [/URL

[URL=http://s923.photobucket.com/user/BigChevy17/media/IMG_0644_zpsba73018b.jpg.html]


I figured I would need this anyway and the 3" wasn't perfectly square so I made a little jig out of some flat bar.


Clamped up my tubing and no daylight, dead nuts!


Stand welded up


I made a frame on the bottom of the saw out of 3/4" angle and welded it to the base, I didn't take any pics though. Here's the finished product.


That's all for now!
 

MarkG

Well-known member
Joined
May 23, 2012
Messages
1,219
Location
Elgin, IL
Nice job! You could always add a 'swing-up' outfeed support to that pedestal too sometime if you wanted.
 

BigChevy17

Well-known member
Joined
May 1, 2013
Messages
64
After raising up my chop saw I can only cut short pieces without having to prop the other end up with random **** to get it level so I built a solution tonight.
Started cutting some 1 1/2" square tubing and some scrap 2 1/4 ID pipe.


Tacked up the base


Then the top


The two together


Then I tig welded a 3/16" rod to a bolt and welded a nut to the side of the pipe on the base to make it adjustable.


Just needs a coat of paint and its ready to go.:rocker:
 

Sea_Chicken1

Well-known member
Joined
May 29, 2013
Messages
87
Location
Oak Harbor WA
This is a license plate mount and new gas tank mounts that i welded up for the bike the other day.
 

Attachments

  • ATT_1369882591066_2012-06-09_12-53-51_713 (1).jpg
    ATT_1369882591066_2012-06-09_12-53-51_713 (1).jpg
    91.4 KB · Views: 193
  • 2013-05-26_13-20-14_198 (2).jpg
    2013-05-26_13-20-14_198 (2).jpg
    97.5 KB · Views: 189
  • IMG_20130527_095417 (3).jpg
    IMG_20130527_095417 (3).jpg
    132.9 KB · Views: 201
  • 2013-05-26_16-12-04_725 (1).jpg
    2013-05-26_16-12-04_725 (1).jpg
    119.2 KB · Views: 181

Stooge

Well-known member
Joined
Mar 24, 2013
Messages
3,533
Location
South Shore, MA
Ive been trying to chip away at my c10, so i started cobbling away at the floor with some scrap sheetmetal i had sitting in the corner (truck's bagged so the stock floor needed some trimming) so far the floor's only cost me some cutting wheels and grinding discs
Start of my trans cover
IMG_20130414_183156_995_zpse977c559.jpg

And the driveshaft tunnel
IMG_20130417_200248_381_zpsee0e9072.jpg

IMG_20130417_200549_661_zps398ea091.jpg

Then decided i'd like a cup holder and got a little carried away
IMG_20130419_195552_499_zps7532f15b.jpg

IMG_20130419_204300_364_zps4255b22a.jpg

IMG_20130420_103031_021_zpsf3a72a8f.jpg

IMG_20130420_103551_952_zpsca6315ea.jpg

IMG_20130420_105227_145_zps313aacfa.jpg

Also needed a place for a new shift indicator and an extra gauge an possibly an aux switch or 2. Wasnt sure how to start this so i figured exhaust tubing had the right the shape to bend around
IMG_20130602_094703_328_zps203efedb.jpg

IMG_20130602_105331_236_zpsc9709fa6.jpg

Still need to make the openings for whatevers going in there but its a start
IMG_20130602_105221_184_zps3705261f.jpg
 
Last edited:

kkroger

Well-known member
Joined
Apr 21, 2013
Messages
1,143
What the heck, here is my welding/fab cart.

Started out with an idea to mary my "welding" toolbox to my welder and plasma cutter.
The Toolbox was a roll away and typically the welder and Plasma machines sat on top... Until the night that the plasma got pulled off the top. UGH
Anyway I have a Miller 211 autoset MVP and a Hypertherm Powermax 30.

so I had a vision something like this, and a coupon to the harbor for $3.99 tires and wheels. I needed this to be able to roll over gravel and uneven terrain.
Mockup_zps13d7fed8.jpg

After a trip or two to the steel yard for some materials.
DSC_5214_zps19f7fe0d.jpg

One piece of square tube short
DSC_5245_zps196e0883.jpg

I got a circle template from Troy Rutherford at SWAG Offroad
IMG_20130531_152241_298_zpsa3a502d0.jpg

A little further, I have the last piece of Square tube on, and the Lead Hangers
IMG_20130601_172936_604_zpsece6f761.jpg
 

koditten

Well-known member
Joined
Apr 10, 2008
Messages
5,528
Location
Midland, Michigan
Here is a tailer I started last night. I was having a hard time sleeping so I said the hell with it and went out to the shop around 11pm. What you see is the results of 5 hours of work. This trailer is being built with my usuall utility trailer design. The only thing different is the customer needed some cross bars installed. These bars are to hold kayak transport brackets. This is the first time doing something of this sorts.

I was able to design the racks so that they could be removed, thus using the trailer for whatever is needed. Trailers are expensive and I like to think up ways to make a trailer more usefull.

You can see in a couple of the pics the normal fashion for hauling the boats and you can see how the racks will be stored out of the way when the trailer needs to be used for something else.

The "c" clamps are just in place to keep the racks from sliding too far into their tubes. There will be holes and pins installed later.

You will notice the tongue is extra long, this is to ensure that the boats don't hit the back of the tow vehicle.

The pics are in no particular order. Be happy I got this far:)

KO
 

Attachments

  • stubbs.jpg
    stubbs.jpg
    147.8 KB · Views: 217
  • stubbs4.jpg
    stubbs4.jpg
    147.3 KB · Views: 194
  • stubbs5.jpg
    stubbs5.jpg
    148.2 KB · Views: 185
  • stubbs6.jpg
    stubbs6.jpg
    145.3 KB · Views: 195
  • stubbs7.jpg
    stubbs7.jpg
    150.5 KB · Views: 177
  • stuubs3.jpg
    stuubs3.jpg
    147.7 KB · Views: 188
To avoid these ads, REGISTER NOW!
Top Bottom