To avoid these ads, REGISTER NOW!

Show us your welding projects

Hot Chop shop

Well-known member
Joined
Apr 12, 2013
Messages
628
Location
Las Vegas
Thanks for the feedback!

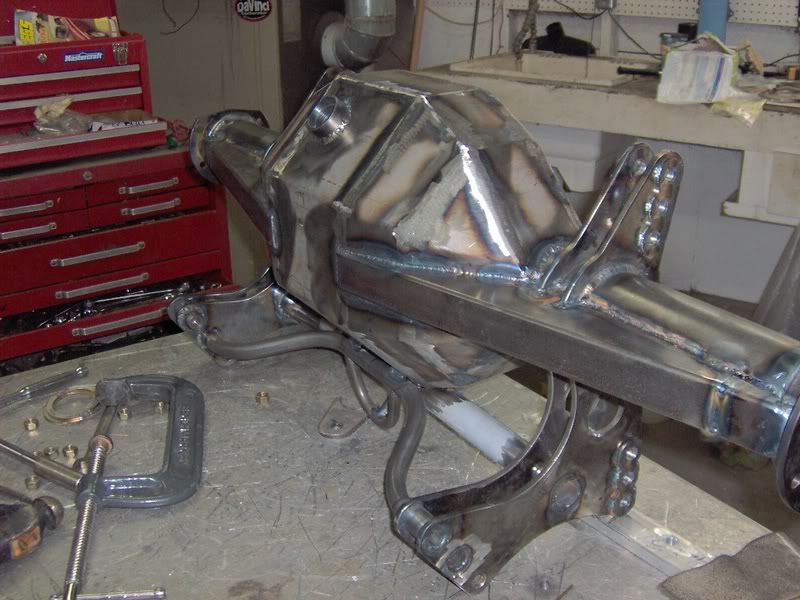
Also too many projects latley to quote but keep the great pics coming they give me great ideas of what's possible and a skill level to strive for.:beer:
 
To avoid these ads, REGISTER NOW!

StumpXJ

Well-known member
Joined
Apr 12, 2009
Messages
485
Location
Decatur, Georgia
Picked up a Ford 9" from a guy a couple days ago for my XJ/Buggy build. Its got a full spool, full width, 4.56 gears, and its a big bearing 31 spline unit. Got it stripped down, and trussed. Still have to get a disc brake set up on it, and shave the bottom. I also need to fab up another fill plug. Shes getting beefy by the minute though...

How I got it:


Stripped it down in about 40 minutes, LOVE 3rd member axles.


Stripped the housing down to bare steel.


Started cutting out the truss. They are made from .120 wall 2x6" tubing.


Got the rear truss welded on. I prebent the housing to around .250" before welding it, and kept it to around 0.040" warpage according to my fathers 9" lineup bar. Pretty darn good considering the amount of welding that was done on the housing. Specs call for less than 0.100", so I should be good to go.


Drilled a **** load of 1-1/8" holes. 62 of them to be exact. Just for the cool factor, and maybe a 5lb weight savings. Its gonna be fun washing the mud out, but I dont care...


Here she is, all finished up. Got the top truss done and drilled today.


~ Stump
 

Mario428

Well-known member
Joined
Dec 4, 2009
Messages
156
Location
PEI, Canada
Picked up a Ford 9" from a guy a couple days ago for my XJ/Buggy build. Its got a full spool, full width, 4.56 gears, and its a big bearing 31 spline unit. Got it stripped down, and trussed. Still have to get a disc brake set up on it, and shave the bottom. I also need to fab up another fill plug. Shes getting beefy by the minute though...

How I got it:


~ Stump

You are going to cut the housing ends off and put them back on lined up aren't you?
That housing is at least 3/16 of an inch out of line right now
 

mghwah

Active member
Joined
Jul 10, 2013
Messages
25
Here is my "welding project"

Here is my new Hon cabinet. It's my first "tool" cabinet and it was only $80. My garage is small. So being able to re-arrange quickly is nice. So with all this in mind I decided to make a little project out of this new cabinet.

Why do this? - Metal base will have leveling casters which will make Hon roll easily around the shop and once it is in place I will be able to adjust to the uneven concrete of the garage.

Purpose - To practice welding and cutting.

Key components are the leveling casters.
http://www.ebay.com/itm/Set-of-4-Level-Casters-with-2-Polyolefin-Wheel-Retractable-Leveling-Leg-600-/400314703528
Mainly, I think these are neat and hope they work well.

From now on referred to as "the Hon"
IMG_0362 (765x1024).jpg

IMG_0363 (765x1024).jpg

My garage area....
IMG_0364 (765x1024).jpg

Really enjoying the SWAG setup and portaband...
IMG_0366 (765x1024).jpg

Sketch
IMG_0367 (765x1024).jpg

Cut list from stuff I had...
IMG_0368 (765x1024).jpg

The frame all cut.
IMG_0369 (765x1024).jpg

More details to follow....I haven't shown any welding yet I know...just wanted to get something going. If this isn't the right place for the post I will gladly put it in the main forum instead.
 

LG63

Well-known member
Joined
Sep 7, 2012
Messages
1,003
Sketch
IMG_0367 (765x1024).jpg

Cut list from stuff I had...
IMG_0368 (765x1024).jpg

Looking good and bonus points for showing your work. I put casters/wheels on everything too, although I've haven't splurged for any as nice as those. Let us know how they work out.
 

mghwah

Active member
Joined
Jul 10, 2013
Messages
25
Thanks.
Here are a few more pics...

I decided on 45 degree miter joints because I wanted to test out my miter gage on the portaband.

I didnt want to raise the whole cabinet up to much. Once it is all said and done with casters the height will be around 6 inches taller.

I plan to cut a piece of wood to fit on top of the "dolly" so the entire cabinet rests on it rather than just the metal 1"x1" tubing.

IMG_0370 (765x1024).jpg

IMG_0371 (765x1024).jpg

IMG_0372 (765x1024).jpg

IMG_0374 (956x1280).jpg

No welds yet. Just a mock up.
IMG_0375 (956x1280).jpg

Leveling Casters Online Image.jpg
 

Hot Chop shop

Well-known member
Joined
Apr 12, 2013
Messages
628
Location
Las Vegas
Thanks.
Here are a few more pics...

I decided on 45 degree miter joints because I wanted to test out my miter gage on the portaband.

I didnt want to raise the whole cabinet up to much. Once it is all said and done with casters the height will be around 6 inches taller.

I plan to cut a piece of wood to fit on top of the "dolly" so the entire cabinet rests on it rather than just the metal 1"x1" tubing.

Looks great so far! I was just looking at that same portaband saw with Swag table (the version that locks into the vise) cause my cuts on the chop saw are all over the place... I am always looking ideas for small projects to practice my welds since I am a noob :shocking:
 

mghwah

Active member
Joined
Jul 10, 2013
Messages
25
Looks great so far! I was just looking at that same portaband saw with Swag table (the version that locks into the vise) cause my cuts on the chop saw are all over the place... I am always looking ideas for small projects to practice my welds since I am a noob :shocking:

Well, to be honest, I didn't end up using the miter gage for the 45 cuts. The fence on the miter wasn't long enough nor was the table big enough to really make the job easy. I needed about 2 more hands and maybe I could have used the miter gage. But with the long tubes I was having a tough time holding them flat against the table and flat against the miter while also being able to push everything forward at the same time.

So the miter cuts I did without the gage. However, the gage is VERY helpful for smaller shorter stuff, no doubt.

Thanks for the reply.
 

superspec

Well-known member
Joined
Nov 28, 2011
Messages
2,172
Location
WM louisiana
I'm glad I popped for the Incra miter instead of the cheaper Ryobi. Once you set it up with a square it is dead on. I use mine pretty much daily now. next on my list is to mod the SWAG table to be longer.
 

StumpXJ

Well-known member
Joined
Apr 12, 2009
Messages
485
Location
Decatur, Georgia
Got the rear truss welded on. I prebent the housing to around .250" before welding it, and kept it to around 0.040" warpage according to my fathers 9" lineup bar. Pretty darn good considering the amount of welding that was done on the housing. Specs call for less than 0.100", so I should be good to go.

You are going to cut the housing ends off and put them back on lined up aren't you?
That housing is at least 3/16 of an inch out of line right now

Maybe you missed the above portion. This aint my first rodeo.


Thats what I was thinking.

Holes hold too much mud also.

I aint scared of a little mud...

does StumpXJ get points off for lack of dimples too? lol

I didnt want to dimple before I welded the truss on, since it would cause some severe metal warping (this is 11 gauge) on the truss, so i just went with plain old holes.

I'll try harder next time guys... I promise.


Which brings me to my next post.

Got a little more done on the 9". Shaved the bottom as much as I could, gained about 1.5-2". Welded some 3/8 plate on, and ground it smooth.


Then I spent some time on the lathe a made a Fill plug and weld on bung for the top side of the housing. (it was on the bottom, and hung down over an inch...)


Mario428

Well-known member
Joined
Dec 4, 2009
Messages
156
Location
PEI, Canada
Maybe you missed the above portion. This aint my first rodeo.

18Finishedhousing-int.jpg


Not mine either, .005 clearance on the bar and housing ends, they slide in, less than 020. All about making the car roll as easy as possible.
And you have a bar to do it right!!!!
 

koditten

Well-known member
Joined
Apr 10, 2008
Messages
5,528
Location
Midland, Michigan
Here's a few more pics of the project. The letters posed more of a challenge than anticipated, but I think they turned out ok. I still have to finish the 4x4 letters since I cut them a tad too small. The light bulbs are bout a 1/2" too big if I were to box the letters in now. Not a bid deal, but I was pissed for about three seconds today:evil:. More to come :beer:.


What is this, besides pretty cool looking. 'nother Toyota man here as well.

KO
 

koditten

Well-known member
Joined
Apr 10, 2008
Messages
5,528
Location
Midland, Michigan
Here is my contribution.

I had an old pop up camper frame given to me. All it had was a good tongue, wheels and axle. I was planning on making a full sized trailer to sell but decided to go the mini trailer route.

I was looking at all my scrap steel I had on hand and decided to just start welding pieces together to get lengths I needed. I didn't have to buy any iron, which was kind of cool. The only thing I had to buy was the lumber. 35 bucks plus the 7 hrs to build, paint and deck.

This little trailer is built with the same fabrication process that I use on the trailers you see in my avitar. If you are more interested in the build process do a search for "threads posted by me"

Anyways, this is the results of piecing together leftover chings of tube steel. I don't think any piece was longer than 24".
 

Attachments

  • IMAG0240.jpg
    IMAG0240.jpg
    160.2 KB · Views: 133
  • IMAG0241.jpg
    IMAG0241.jpg
    155.8 KB · Views: 123
  • IMAG0242.jpg
    IMAG0242.jpg
    154.5 KB · Views: 121

Hot Chop shop

Well-known member
Joined
Apr 12, 2013
Messages
628
Location
Las Vegas
Well, to be honest, I didn't end up using the miter gage for the 45 cuts. The fence on the miter wasn't long enough nor was the table big enough to really make the job easy. I needed about 2 more hands and maybe I could have used the miter gage. But with the long tubes I was having a tough time holding them flat against the table and flat against the miter while also being able to push everything forward at the same time.

So the miter cuts I did without the gage. However, the gage is VERY helpful for smaller shorter stuff, no doubt.

Thanks for the reply.

I'm glad I popped for the Incra miter instead of the cheaper Ryobi. Once you set it up with a square it is dead on. I use mine pretty much daily now. next on my list is to mod the SWAG table to be longer.

Make sure to post what you guys come up with on making the swagoffroad table longer... Being new to this stuff I would think to just make a similar size (or exact same size) box as the swag table so you can easily move it further out for long piece or to the side for wider pieces as long as its flush with the height of the swag table top it should work? Hope that makes sense.
 

Zebedeewesty

Well-known member
Joined
May 31, 2013
Messages
4,072
Location
Wales, UK
I got given a couple of suspension units and some wheels and tyres a few years ago and i've finally got around to using them by making a small 3x 5ft trailer for pulling behind my vw camper.

Just need to finish giving the ply sides a couple more of coats of yacht varnish and assemble it now.
 
To avoid these ads, REGISTER NOW!

mghwah

Active member
Joined
Jul 10, 2013
Messages
25
I got given a couple of suspension units and some wheels and tyres a few years ago and i've finally got around to using them by making a small 3x 5ft trailer for pulling behind my vw camper.

Just need to finish giving the ply sides a couple more of coats of yacht varnish and assemble it now.

Sweet
 

toomanytoyzz

Well-known member
Joined
May 11, 2012
Messages
1,571
Location
Malvern, PA
What is this, besides pretty cool looking. 'nother Toyota man here as well.

KO

It's going to be garage wall art. Trying to get it to look like an old marquee sign you'd see in the 50's. I've always liked the look of them.

Been a Toyota man for over twenty years now. First ride was a 1978 Toyota Landcruiser FJ40. The addiction has never left since.
 

grego

Well-known member
Joined
Apr 25, 2009
Messages
251
Location
Sac, CA
It's going to be garage wall art. Trying to get it to look like an old marquee sign you'd see in the 50's. I've always liked the look of them.

Been a Toyota man for over twenty years now. First ride was a 1978 Toyota Landcruiser FJ40. The addiction has never left since.

I love the sign, been a Toyota fan just about as long as you have been. I am a Datsun convert. While I worked on Datsuns and Nissan's, I thought that everyone else had it backwards, then I got a job working on Toyota's and finally saw the light!! 18 years of working on Toyota and Lexus :beer:

Getting back to the post. It might be too late but I would have went with LED rope lights, run way cooler, less power usage and if you use a 12 volt power supply, you could use this,

Water proof led lighting

I use this stuff for my back up light on several cars and you have no problem seeing it in the middle of the day.

Just a thought but either way you go, that's going to end up being a awesome sign.
 

toomanytoyzz

Well-known member
Joined
May 11, 2012
Messages
1,571
Location
Malvern, PA
I love the sign, been a Toyota fan just about as long as you have been. I am a Datsun convert. While I worked on Datsuns and Nissan's, I thought that everyone else had it backwards, then I got a job working on Toyota's and finally saw the light!! 18 years of working on Toyota and Lexus :beer:

Getting back to the post. It might be too late but I would have went with LED rope lights, run way cooler, less power usage and if you use a 12 volt power supply, you could use this,

Water proof led lighting

I use this stuff for my back up light on several cars and you have no problem seeing it in the middle of the day.

Just a thought but either way you go, that's going to end up being a awesome sign.

grego
Thanks for the idea on the rope lights. I didn't even think about using them. That will be used for the next one :thumbup:.

My good friend has been wrenching on Lexus' since they came out. He swears by Toyota as well. He's not a Lexus type guy by any means, but he's always had a Toyota pickup in one generation or another throughout the years. I've owned over thirty Toyota 4x4's in the last 20 plus years. They were mostly 1st generation 4Runners and second generation Toyota mini 4x4's. Throw in about ten Landcruiser's (FJ60's, 62's &40's), but my retirement gift to myself will be a SWB FJ45. To me, it's mixing the best of both worlds. A pickup with a removable top and doors. Toss in a diesel motor and life will be good:beer:.
 

toomanytoyzz

Well-known member
Joined
May 11, 2012
Messages
1,571
Location
Malvern, PA
What is your SN over on the PBB?

First one was toomanytoys, but I switched internet providers, lost my email addy and forgot my password. My current one is toomanytoyzz, and has been active since 2004. I wish I could get the first username password sent, but the mods will not budge. I had a REALLY low member number in 2001.
 

mghwah

Active member
Joined
Jul 10, 2013
Messages
25
Its all done!
Other than a little twist in the frame the base came out great. Check the pictures!

Getting ready for paint.
IMG_0396 (956x1280).jpg

Added some braces
IMG_0397 (956x1280).jpg

Wood top
IMG_0398 (956x1280).jpg

Upside down with the leveling casters.
IMG_0400 (956x1280).jpg

Close up.
IMG_0404 (956x1280).jpg

Filling it up with stuff! Leveled and mobile now though.

You may also notice the vertical threaded rod. I added that to keep the shelves from flexing. There are just some nuts beneath the shelves that support the middle section. Works okay.
IMG_0405 (956x1280).jpg
 

Stooge

Well-known member
Joined
Mar 24, 2013
Messages
3,533
Location
South Shore, MA
wasted a little more time on a sheetmetal console i made for my c10 squarebody, added some cupholders, a tray thing for the Accuair remote, not pictured is a bolt in a panel i started for the side of the console where i plan to house some electical stuff im adding since space in the cab is fairly limited. still might add a little pop up hinged cubby behind the remote tray, just to keep stuff, just not alot of space to work with, not sure if it will be worth the effort
(cupholders made from modified 3" exhaust adaptors)
IMG_20130824_191333_772_zpsc8264f1c.jpg

IMG_20130825_174246_217_zpsa95c6823.jpg

IMG_20130825_192459_600_zpsf8da4d64.jpg

IMG_20130825_192438_966_zpsbb0bd64f.jpg

IMG_20130825_192817_611_zps823f1e6b.jpg

IMG_20130824_195035_866_zps2d3bff1e.jpg
 

ClintNZ

Well-known member
Joined
Sep 6, 2012
Messages
107
Location
Rotorua, New Zealand
Just got the latest project largely finished, a 20T press:

rP1020427_zpsaea2d5d8.jpg


This was made mostly from some 4x2 channel I had in stock from an old trailer chassis & some other scrap I had lying around. I would have designed it a little different if I didn't have that material already (or just bought one!) but I'm quite happy with the way it has turned out for the minimal $ invested.

The last few projects on the TIG have been small thin fiddly tube work so it's been fun laying in the full 200A downhand in a straight line. It's hard to get the old steel clean enough for a really pretty TIG weld but it sure sticks it good.

844ec33c-75a1-45cf-89fa-9604afd0e853_zps35494ac1.jpg


I can stall the jack out with minimal flex & I think it would take a 30T ram no problem. I've made it so the jack can slide across if required or be easily removed. If I find a suitable ram & pump for cheap sometime in the future it will be a simple matter to make & attach a mount for that instead. The business end is a 20mm HT bolt, so attachments can be easily made up by welding a nut to whatever.

Cheers
Clint
 

DesertSparky57

Well-known member
Joined
Apr 12, 2013
Messages
92
Location
Las Vegas
Put a few final touches on the bender/notcher cart. I am happy with how it turned out. Still have a few more small things like the air line, a small chip tray under the hole saw area, a holster for the drill when it's not in use and maybe even a small magnetic mount tray for a tape measure and sharpie or soapstone for when I'm in the driveway bending and notching.
null_zps85b39504.jpg


The return springs work excellent. Picked up from McMaster.
null_zps68159890.jpg


The upright for the notcher is bolted on, if a wacky piece of tube hits it I can make it go away for a bend if needed.
null_zpse76b1e70.jpg

:rocker: Rock On GJ. One step closer...
 

mghwah

Active member
Joined
Jul 10, 2013
Messages
25
Just got the latest project largely finished, a 20T press:

rP1020427_zpsaea2d5d8.jpg


This was made mostly from some 4x2 channel I had in stock from an old trailer chassis & some other scrap I had lying around. I would have designed it a little different if I didn't have that material already (or just bought one!) but I'm quite happy with the way it has turned out for the minimal $ invested.

The last few projects on the TIG have been small thin fiddly tube work so it's been fun laying in the full 200A downhand in a straight line. It's hard to get the old steel clean enough for a really pretty TIG weld but it sure sticks it good.

844ec33c-75a1-45cf-89fa-9604afd0e853_zps35494ac1.jpg


I can stall the jack out with minimal flex & I think it would take a 30T ram no problem. I've made it so the jack can slide across if required or be easily removed. If I find a suitable ram & pump for cheap sometime in the future it will be a simple matter to make & attach a mount for that instead. The business end is a 20mm HT bolt, so attachments can be easily made up by welding a nut to whatever.

Cheers
Clint

Wow! Stout looking press. Nice stuff.
 

Stooge

Well-known member
Joined
Mar 24, 2013
Messages
3,533
Location
South Shore, MA
Very nice. :thumbup: Did you use 18 gauge?

sure did, some buddies in another dept scrapped it for me after i mentioned i needed a big piece of sheetmetal. was originally a side panel off of a cantilevered shelf they had, i think i have maybe $7 into the console and that is just the cost of the exhaust pieces :pimpflash
 
To avoid these ads, REGISTER NOW!
Top Bottom