vartz04
Well-known member
Thanks guys. Tested it out today hailing firewood. Bouncing over curbs and such. No bending or breaking.
Sent from my SPH-L710 using Tapatalk
Sent from my SPH-L710 using Tapatalk


Could you do an airplane?
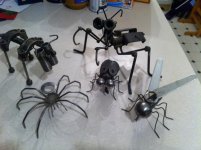
Here's some more of my mechanimals that I have laying around. The praying mantis was the first one I made. I make way better looking mantises now.
Works4Me - nice grinder! Details please on the motor, controls, and disc source please.


So the coffee table is all done and it's the first welding project that made it "inside" the house!
Here was the almost finished project :
Hot Chop nice table. You posted the end table up before and my wife liked it so I made one also. Thanks.
What did you use for the slab of wood. I know nothing about wood and I like that much better.
Thanks..
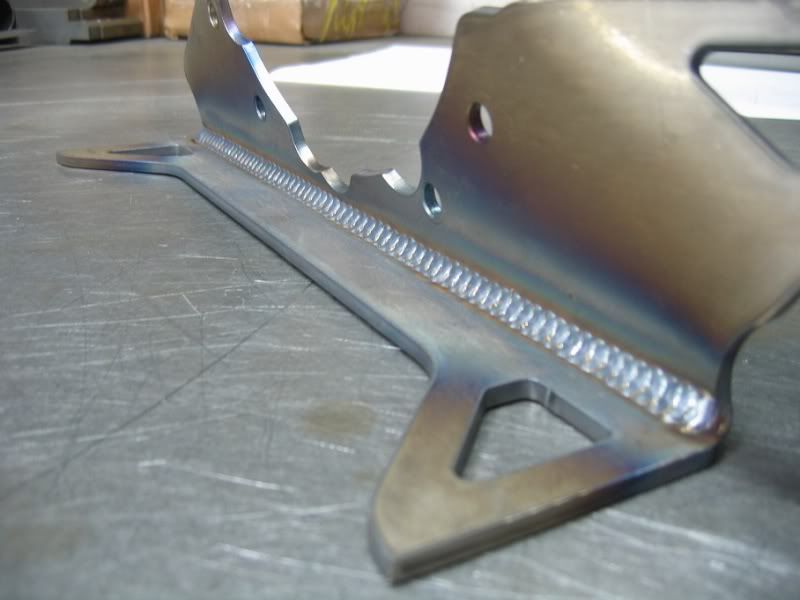
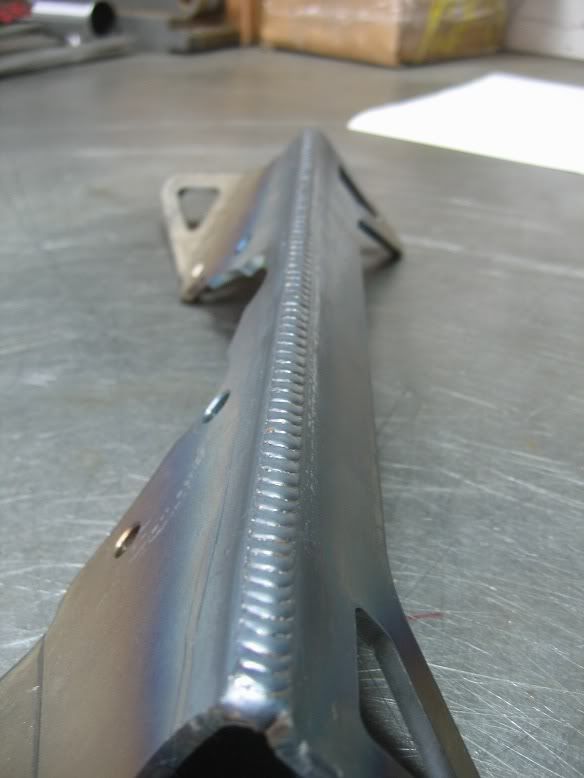
Got the front trans mount welded, bent, and mocked up in the car.


I usually cut for miters by cutting straight pieces to length, minus 2x the wall thickness (if doing both ends, say for a square). Then I just cut the miter for a 45 right to the inside edge of the tube.
Any tips on getting the top nice and clean? I have tried a wire cup on my angle grinder and 80 grit on disk sander, and I am not making much progress lol.
Those feet look familar since I just bought 8 of them LOL. Did you get them from JC WInco?
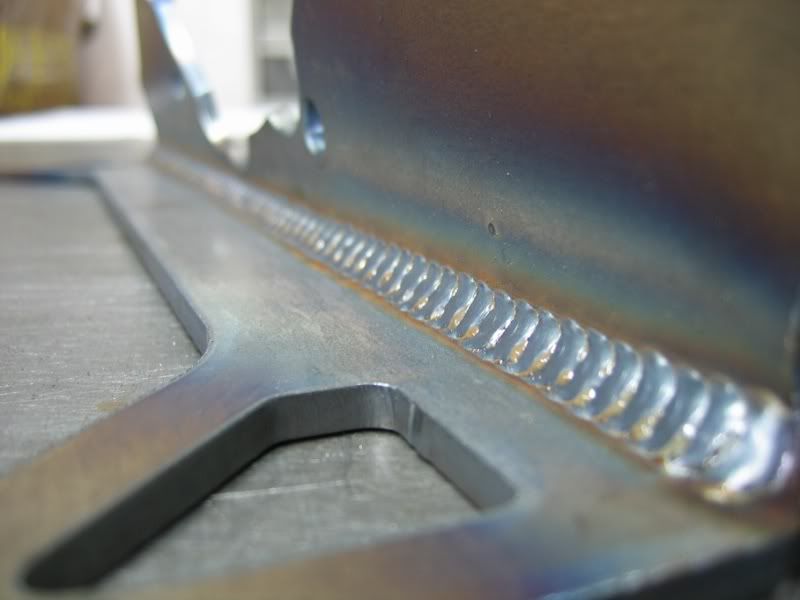
you mig welded this right. If you did then what wire size do you use and what gas? Ive laid a clean weld but never do they look like this. There always just solid all the way
Holy **** - I've never made a weld look anything like these. It must take a VERY STEADY hand and an INCREDIBLE amount of patience to continue the bead all the way through.
I gotta go practice....as soon as I get a TIG!
I agree. But then ZT always does it right.you mig welded this right.
Clamp your work to death, then wait until it cools before removing clamps. Removing them too soon will still result in a curve, im guilty of removing clamps as soon as the weld is done....bam instant curve as it cools.
Mark
That looks to be a TIG job to me, for a number of reasons.
That looks to be a TIG job to me, for a number of reasons.

its mig forsure. you can see the golden brown stuff on the edge of most of the "dimes".
 !! That "golden brown stuff" is all the impurities in the metal being pulled to the surface.
 .
.Clamp your work to death, then wait until it cools before removing clamps. Removing them too soon will still result in a curve, im guilty of removing clamps as soon as the weld is done....bam instant curve as it cools.
Mark
That looks to be a TIG job to me, for a number of reasons.
I find clamping straight,letting it cool,then removing clamps is not enough alot of the times.
If I want to have it come out straighter,depending on the shape and material,I like to tack it good then use clamps and shims to clamp it past straight in the opposite direction of the force then weld,cool,release. This becomes a learning game. Sometimes the weld does not even pull it to straight let alone curl up the piece.
I often back weld objects even though one weld is enough just to have the two welds counteract their forces.Or use flame straightning and quenching on the opposite side of the weld to pull it straight.
Weld forces can sometimes work in your favor if used right. -Cheers
Are you doing all this to achieve those pretty looking beads? I just slow it down to reduce on the warpage.
http://www.garagejournal.com/forum/attachment.php?attachmentid=307572&stc=1&d=1389304709
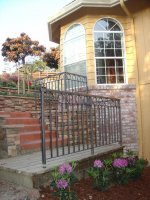
I made a series of steel railings for our last house. This set just need the feet and finish. I like this thread, let us keep it alive!
I have more photos, but am having difficulty uploading them due to size considerations. Anyone have a painless way to downrez photos before uploading?