This is as much a welder project as a welding project.
I picked up this Lincoln tombstone, some welding gloves and 5 lbs of rod at an estate sale for cheap ($85). Its practically new, just a little surface rust on the bottom foot, mostly from sitting on a basement floor. I've been watching for one for a while, and am glad to have it in my shop.
View media item 50183
Note that I am a rank amateur welder at stick welding, still learning how to control heat, move the puddle, etc. I need a lot more practice, and maybe some lessons at the local CC.
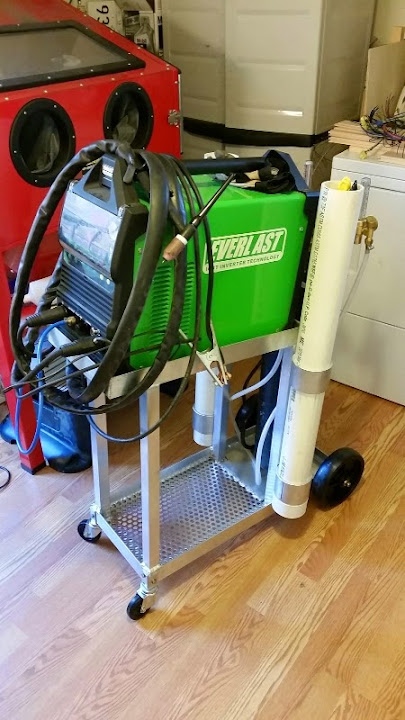
Anyway, the ol' tombstone is heavy, so I fabbed a wheel kit from some 5/8" rod and two wheels w/ bearings from Lowes. Yeah, I know you can buy a kit for these, and probably for less than I paid in materials, but so what. I made it myself, and I like it.
After putting on the wheels, I still had to bend down pretty far to move the thing around, dragging leads and power cord all the while. I decided to build a handle to wheel it around.
View media item 50182
After all the snow we had around here this winter, we wore out a few snow shovels, and I had saved a handle from one, just in case I needed it for a project. This one was perfect. I swapped the hand grip from the handle end to the shovel end, and dimensionally, it was perfect.
I found an el bracket in my scrap box and drilled it for 1/4" fasteners. I attached it to the handle, then drilled a single hole in the "handle" at the top of the welder to connect the shovel handle. I found a 2" screw in my miscellaneous parts bin to replace the short factory one on the back cover and drilled another hole in the handle shaft for that one.
Here's what is looks like installed:
View media item 50181View media item 50180View media item 50179
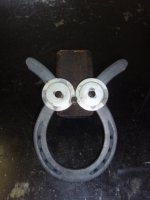
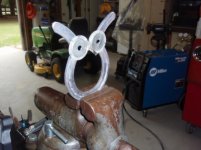
To get the cables off the ground (and not wrapped around the body of the welder) I fabbed this hanger from an old horse shoe and a leftover bracket from another project.
View media item 50177
Here's the finished product in tow behind me:
View media item 50178
I like it! The bent handle puts the load down low for pulling and puts the hung cables toward the front of the panel. My only complaint is that the handle flexes a bit when pulling left or right (perpendicular to the wheel axis). Now I just need to fashion a holster for the welding rod container.
")

 The oil keeps moisture out and also helps the sand compact. The sand gives the stand mass and kills vibration. With the anvil mounted tight to the stand it helps deaden the noise.