spent21
Well-known member
the two together


I'm sorry, but this looks terrible.
I feel compelled to knock that thing off of the axle... with a sledge hammer.
Last edited:

the two together
That isn't safe at all.
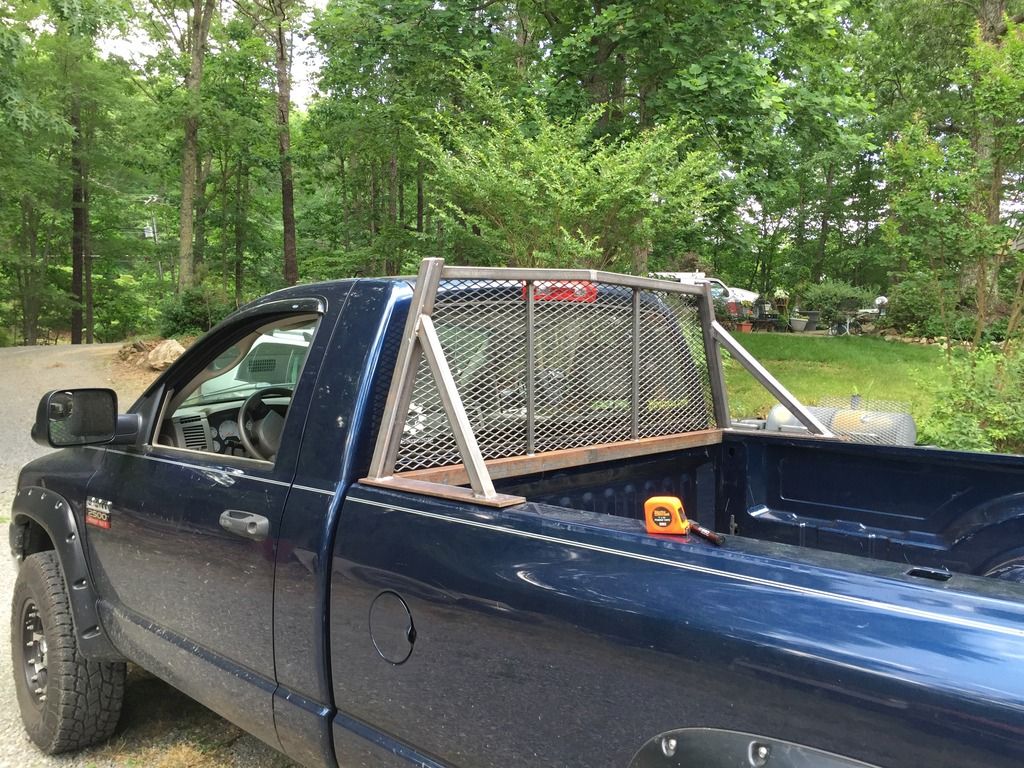
Meanwhile in my garage, I'm making a license plate frame out of some 1/2"x1/2" angle iron for my sons Jeep. Pictures to come this weekend ...
")
Question: When welding 2 pieces of angle iron at 90 deg, do you cut both at a 45 or do you notch one?

Question: When welding 2 pieces of angle iron at 90 deg, do you cut both at a 45 or do you notch one?
My welding skills are steadily improving.
This is more often that not, not true...
There's a difference between 'strong' and 'will hold for the intended application'. That rear end work is questionable for safety.
built a GM 10bolt/Ford 8.8 hybrid axle using the 10 bolt out of my z28 and an 8.8 out of a ranger.
torque arm end of custom mount
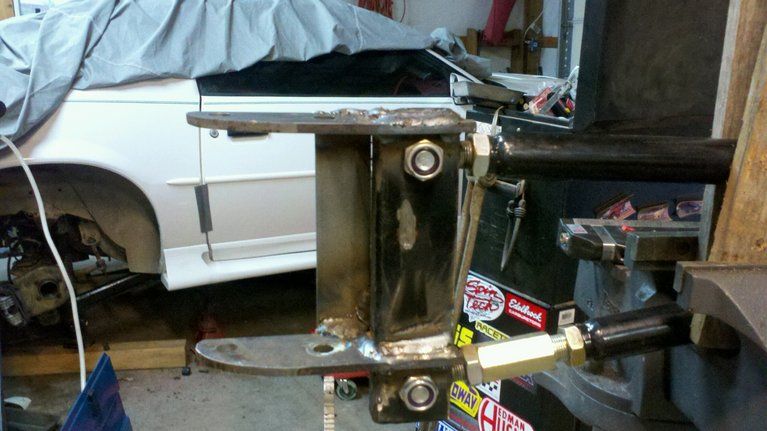
it has been taking repeated abuse from 425rwhp and keeps ticking!
Certainly not pretty...But it is a difficult thing to ascertain how strong a weld is, by judging a picture. The real life test seems to be holding up for the man.
I'm a little more concerned with how the torque arm is mounted in the picture above. It should be in double sheer. Hard to tell. The other thing is how much bolt is protruding from the nuts. Rule of thumb, always have 5 threads beyond the nut.
Enjoy your toys!
Any prior knowledge of welding before this project? Welding galvanized members produces a toxic gas, which can be at best, harmful to your heath, at worst, they can kill you.
Be safe!
spent21, magnumforce, etc... thanks for critique.


the two together


I am sorry but those look like ZTs weld's
The finished product. Excuse the blurry pic


 .... If I had something that fancy at the last place,
Welding up a squat rack for a buddy. Done-ish for now, need to drill all of the holes before I can weld more.

My guess would be tack a corner move it to where it needs to be tack the corner across from it repeat on other corners.How did you manage to keep that bottom plate flat after welding?
How did you manage to keep that bottom plate flat after welding?

Where are you in VA? Always good to see another Pirate here


This thread is inspiring, especially for a novice welder.
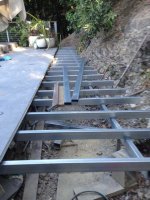
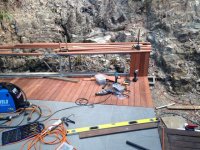
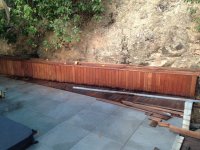
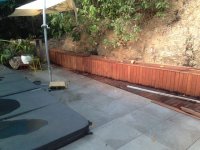
SWMBO (She Who Must Be Obeyed) has never been satisfied with my construction of our deck around the spa. It was squared off to match the tiles that I had. Not wanting to purchase, and lay more tiles, I am making it out of steel frame, and timber decking. I was given permission to get a welder if I just finished the deck, so I purchased a Cigweld 175 the following day!! She wanted it to extend to the excavated hill side, but we have a problem with Cane Toads in this part of Australia. If I build up to the hill side, the Cane Toads can easily hop on the deck, and into the sunken spa. My solution is to build a bench seat along the wall, hopefully creating a Cane Toad barrier. It wraps around along with the contour of the hillside. My welding skills are steadily improving.
Cheers,
Ken
been making a stand for my tube bender. almost done with it. the tabs on the bottom are where the pump bolts to. going to cap the ends of the legs and i'm waiting on a couple gussets to show up and then i can get it painted and call it good

been making a stand for my tube bender
Nice work!
Glad you don't have to bend anything to make the bender!
Looking forward to your (instructional) build thread and all of the helpful photos that accompany it.