To avoid these ads, REGISTER NOW!

Show us your welding projects

velillen01

Well-known member
Joined
May 20, 2015
Messages
481
Location
Wyoming
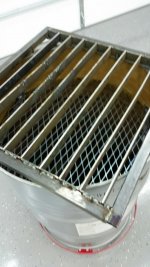
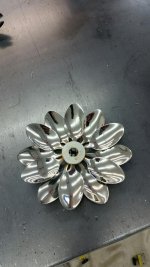
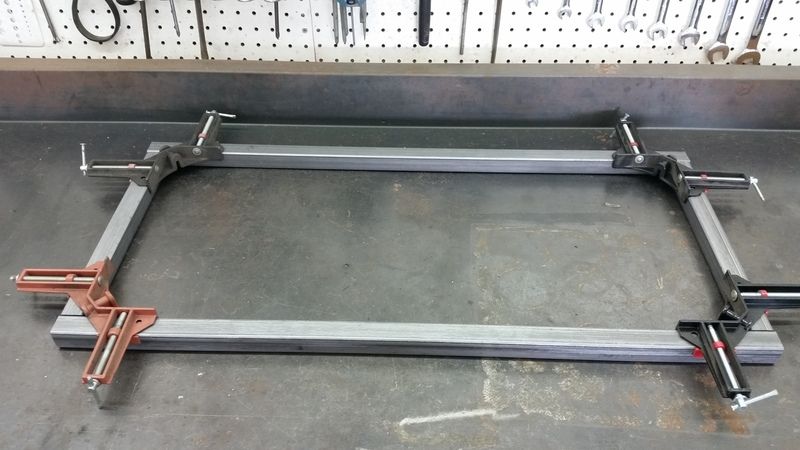
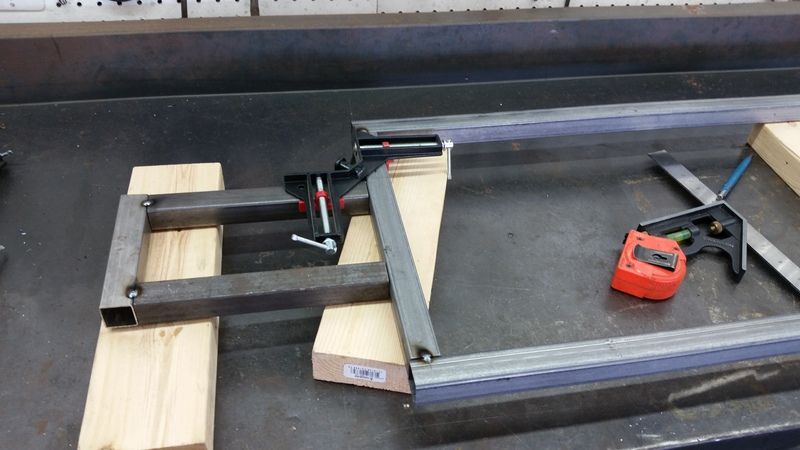
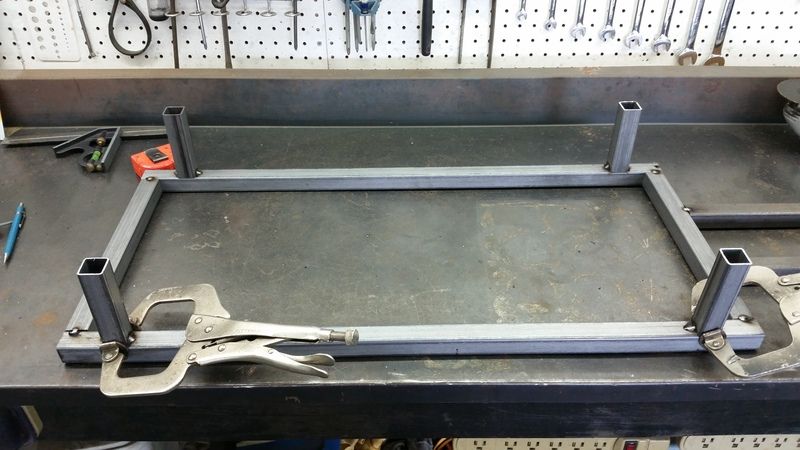
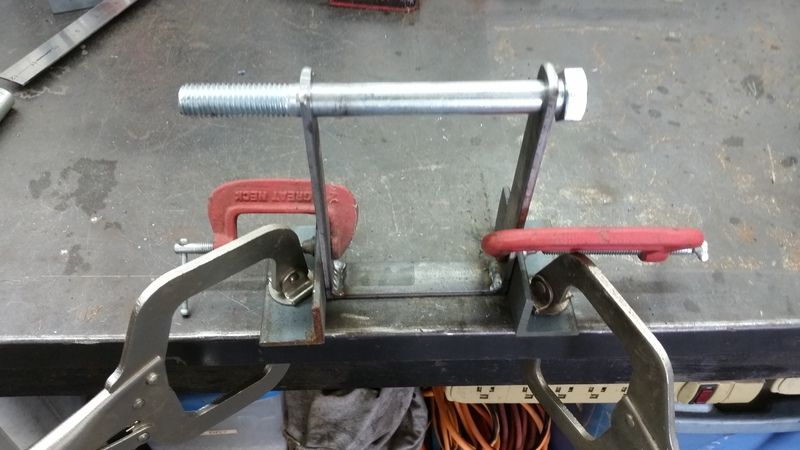
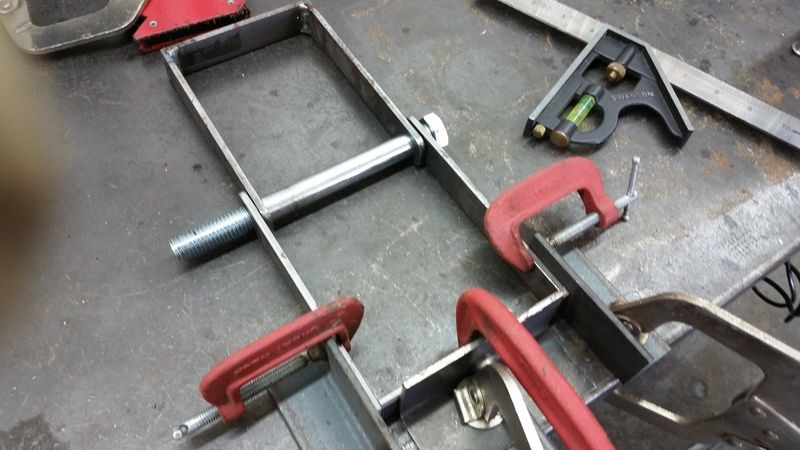
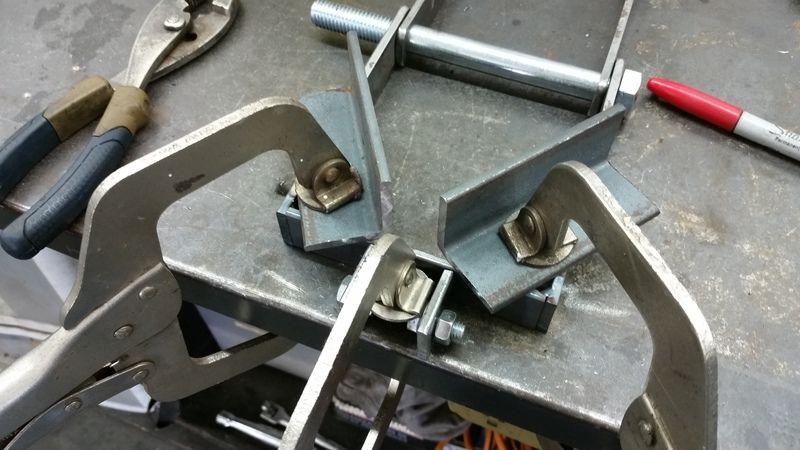
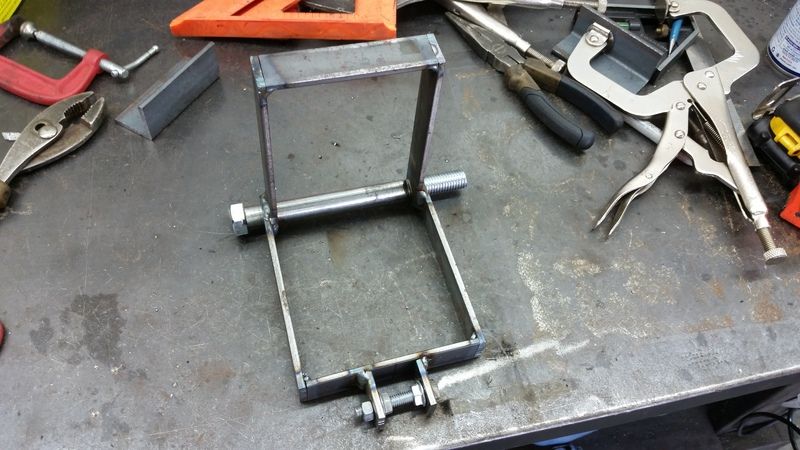
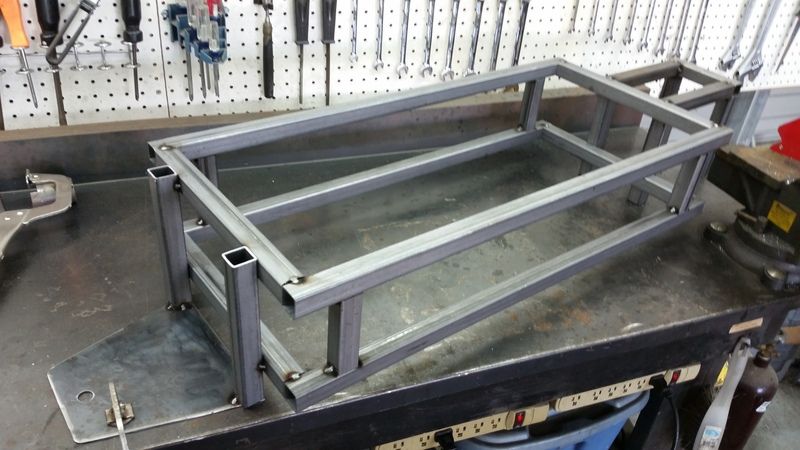
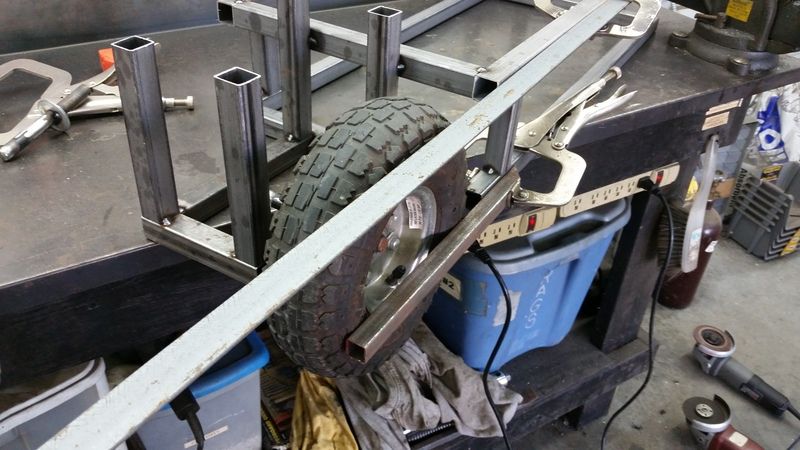
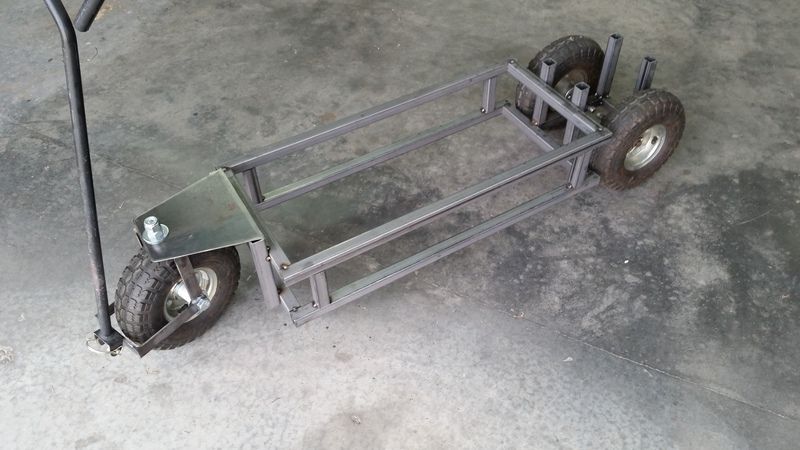
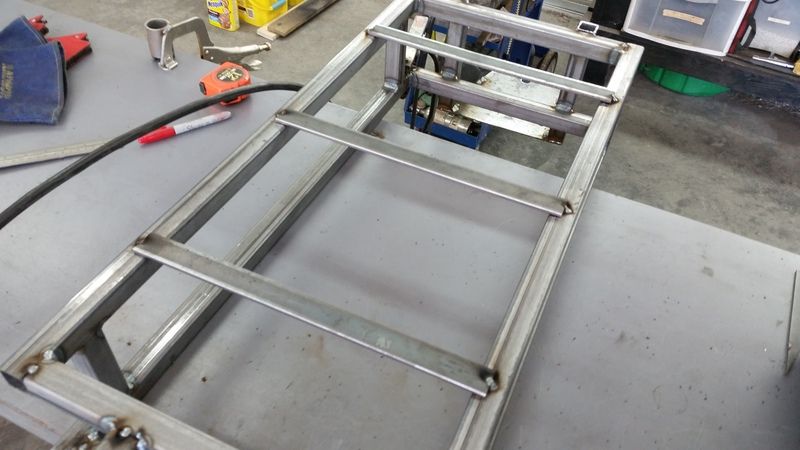
Well i can finally post here! I picked up Hobart 210MVP a few weeks back. Played around with it for about 30 minutes before deciding I had the jist of it and started my cart project. Im happy with the cart but for someone who had never done metal work and really didnt have the right tools (least till halfway through) there are alot of mistakes. And I wont even both showing the welds....which ranged from "hey i sorta have the hang of this" to "What in the hell am I doing" all the way to "let me grind that off and try again". But i started with just the welder and a single grinder. Used the grinder to cut all the angle which worked ok. The sheet i was trying ot cut with the grinder as well. Obviously that was rough. Ended up buying a chop saw, two more angle grinders (cheaper to buy a two pack), and a 14 guage metal shear. If I'd had the chop saw and shear to start with it would have looked better but o well its still quite functional and hasnt fallen apart yet! And the top plate is bent...i had a brilliant idea of wanting to test my welds by standing on it and then jumping on which left it bent.
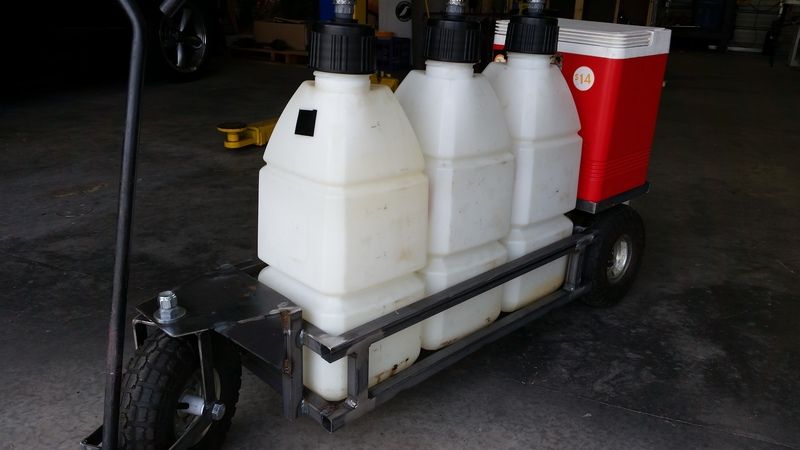
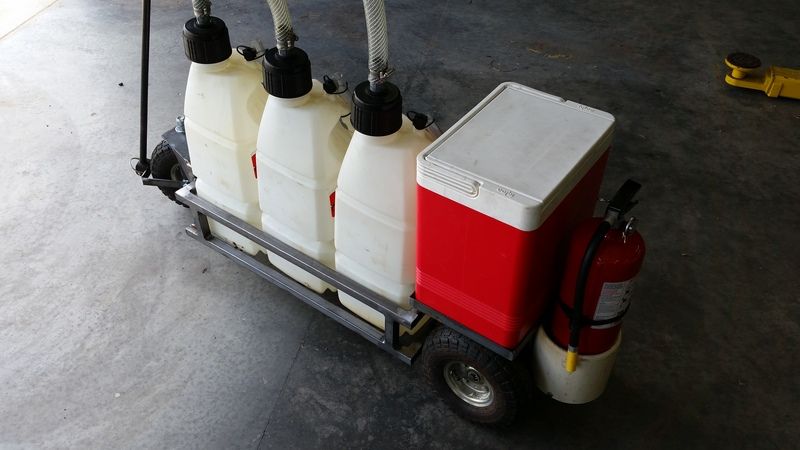
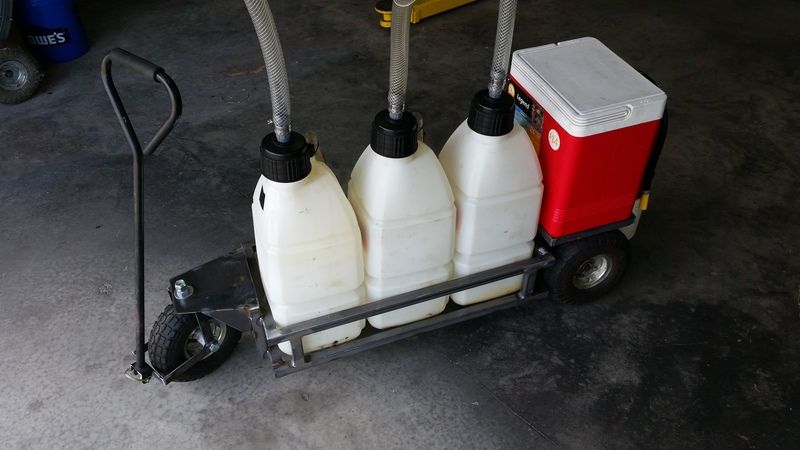

Anyways here it is.
nB2AAX8.jpg

FAkNzMt.jpg


I have plenty of other projects in mind to do, I just need to find a metal supplier who isnt to far from me and has decent prices
 
To avoid these ads, REGISTER NOW!

catalytic

Well-known member
Joined
Jul 16, 2011
Messages
636
Location
Boston, Los Angeles, Cleveland
Critique my mobile base for my DoAll please.
I'm wondering if I should weld these gussetts
on for strength and or to prevent possible twist.
The unpainted pieces are 3/8ths and the
Primered pieces are 5/16ths. I chamfered
All edges on one side to a 45 degree angle and
welded. I'll probably still put some weld
on the other side.

Put weld on the other side and DEFINITELY add gussets and additional support. I have a mobile base under a 900lb Davis and Wells 20" vertical band saw and mine's made of similar materials. I was surprised that when I lowered the machine onto the base, I could see it flex. It's on my list to redo it out of structural tubing and just overbuild the hell out of it. Full wrap welds are overkill if you're a pro, but if you screw up the penetration, you want them there to stop a crack that could let 1000lb of saw fall over and smash someone.

Also, if you're using swivel casters, remember that when you pull the machine towards them they will swivel a few inches UNDER the machine, making it tipsy. For this reason, I always recommend locating them at least a few inches OUTSIDE of the footprint. No one remembers to do this on their first mobile base, but it's critical on a top heavy machine like that.
 

4 FN 27

ALLIANCE MEMBER
Joined
Oct 19, 2015
Messages
4,635
Location
Minnesnowta
Nice job. I am sure envious of that kind of wall space and real estate.

Mike.

Thanks. I built this building in the backyard with plenty of space so I don't have trip over everything. 10574 sq ft and it is filling up fast. A childhood dream come true. Now building a 16 foot work bench.
 

BD1

Well-known member
Joined
Mar 18, 2007
Messages
4,602
Location
north side
Nice steel rack and a beautiful ELLIS sitting there. NOW make a set of feed tables for it. :beer:
 

4 FN 27

ALLIANCE MEMBER
Joined
Oct 19, 2015
Messages
4,635
Location
Minnesnowta
Nice steel rack and a beautiful ELLIS sitting there. NOW make a set of feed tables for it. :beer:

Thank you.

Already done. Moved it out of the way so I could load the rack up.

Side Gauge too. Just need to make a Micrometer Stop for it.

IMG_4285.jpg
 

TheEquineFencer

Well-known member
Joined
Jan 15, 2009
Messages
9,275
Location
Farmville, NC 27828
We had a tree come down through a fence and didn't want to take a tractor in the pasture because it was so wet and trash the place hauling the tree out. So I cut the tree into smaller sections and built this "Logging rig" for the carriage horse I drive. 1x2 .120 wall tubing with a 1/4 inch thick plate welded and drilled to take the harness quick fittings.


I used some of the quick attach/release fittings from her driving harness to attach the rig to her carriage harness. If something goes wrong, it takes literally a couple of seconds to release her from the rig.

I used the two 4000# sling straps to attach to her harness with the chain links that screw together and another to attach my log grapple to the single tree. I also found the limit of what she will pull without "getting in a bind" and lunging to pull a heavy load. A 2ft x 6ft section with a branch digging into the ground was a real load, she pulled it, but was not happy doing it. We got it out of the fence and quit. The shorter sections, she just leaned into it and walk off with it.
 

Attachments

  • 20160506_164207.jpg
    20160506_164207.jpg
    148.3 KB · Views: 245
  • 20160506_172833.jpg
    20160506_172833.jpg
    145.6 KB · Views: 271

Cue

Well-known member
Joined
Jul 25, 2013
Messages
291
Location
Zebulon, NC
Little Mothers day gift :thumbup:
 

Attachments

  • 20160504_223746_resized_2.jpg
    20160504_223746_resized_2.jpg
    95.2 KB · Views: 259
  • 20160504_224339_resized_1.jpg
    20160504_224339_resized_1.jpg
    122 KB · Views: 284
  • 20160507_213452_resized.jpg
    20160507_213452_resized.jpg
    132.3 KB · Views: 298

royce

Well-known member
Joined
Jun 22, 2014
Messages
3,103
Location
fairbanks ak
Here's one i gave my bride.
I told her that our 3 daughters are moms and mothers but she was the only true mutha
 

Attachments

  • IMG_0165.jpg
    IMG_0165.jpg
    151.1 KB · Views: 141

DpSyChO

Well-known member
Joined
Sep 16, 2006
Messages
402
Location
Blue Ridge Mountains of Southern Virginia
Critique my mobile base for my DoAll please.
I'm wondering if I should weld these gussetts
on for strength and or to prevent possible twist.
The unpainted pieces are 3/8ths and the
Primered pieces are 5/16ths. I chamfered
All edges on one side to a 45 degree angle and
welded. I'll probably still put some weld
on the other side.

What kid of DoAll are you making the base for?
 

Cue

Well-known member
Joined
Jul 25, 2013
Messages
291
Location
Zebulon, NC
Did you do the powder job yourself? I got a gun for Christmas and haven't had any time to play with it yet.
Was that done in several different bakes?

Sent from my phone using Tapatalk

Yea I do it myself, it was 4 different bakes for each one, that was more time consuming than welding them up.
 

aka Larry

Well-known member
Joined
May 2, 2012
Messages
8,020
Location
Eastern, NC
Since we started Lemons racing, our team has used a garden cart that I bought from Tractor Supply to transport the fuel and other items to and from the paddock area to the hot pit. It has worked OK, but it's kind of top heavy, and things tend to bounce off of it or fall over unless the pavement is flat. It's also hard to store inside the car because it's too tall. l've been wanting to modify the existing cart, but once I started figuring the dimensions I decided it would be easier and better to just build one from scratch.

First off I needed a list of just what needed to be transported for each pit stop. Basically we need 3 cans of fuel, fire extinguisher, drip pan for spills, and a cooler to hold the ice for the cool suit. I wanted to keep the C-of-G low and keep it from being to tall to transport inside the car to and from events. I worked on a drawing last week, and since the boss was out of town all weekend, now was the time to build it. I picked up the steel on Friday and got to work first thing Saturday morning. I pretty much worked on it non-stop until later afternoon on Sunday.

I started with some 1" square tubing to form the basic frame:

20160507_094644_zpsexyahwq4.jpg


This section is added to accommodate the rear axle:

20160507_103239_zpsmuqxpxcf.jpg


I built a second frame like the first, and added spacers as seen here:

20160507_105743_zpsukk0drwd.jpg


Here I'm building the yoke for the front wheel using some 1" flat bar:

20160507_143320_zpssuenrxtj.jpg


20160507_144410_zps7au3tluj.jpg


Since I don't have a welding table I used lot's of clamps to keep everything square:

20160507_152420_zpsa0ik1tkf.jpg


The completed yoke and axle for the front wheel:

20160507_153550_zpshihu2c9v.jpg


Somehow I got to here without step-by-step pics, but you can see the frame taking shape. BTW, all of this is just tacked together for now:

20160507_163246_zpswbzgn24s.jpg


Here I'm aligning the rear wheels so I can weld the axle in place:

20160507_172352_zpso1yvmf1s.jpg


Mocked up with the wheels in place:

20160507_185902_zps1m1sabvk.jpg


Here I'm adding pieces of 1" flat bar for the bottom support:

20160508_120958_zpso1yiescw.jpg


Again, I was on a roll and skipped a few steps, but basically what I did was build a frame from 1" angle to hold the cooler, and I used some 6" PVC to hold the fire extinguisher. Here are a few pics of where it stands now:

20160508_150625_zpsmowxnywq.jpg


20160508_150555_zpsbczj3ry8.jpg


20160508_150548_zpsabx0rgml.jpg


The main item that remains is a way to attach the drip pan. Its just so damn big and awkward. I wish we could find one smaller that would work. Once that part is completed, I'll paint it and it will be ready to be put into service.
 
To avoid these ads, REGISTER NOW!

JHunter

Well-known member
Joined
Jan 27, 2006
Messages
76
Location
DeRidder, LA
How about fab up a sheet metal drip pan that acts as a liner in the cart - put it in the cart first, then the fuel cans? Wouldn't take up any room, but not sure how many pans you need.
 

Griff93

Well-known member
Joined
Jul 25, 2009
Messages
1,121
Location
Huntsville, AL
Started working on the frame for my AR51 buggy build this weekend. I'm excited to be putting this thing together. It will have a CBR900 engine in it so it should be lots of fun.

 
Last edited:

larry4406

Well-known member
Joined
Jan 27, 2006
Messages
19,073
Location
Northern Virginia
Timing belt tensioning tool for a Mitsuibishi Montero Sport made from a 1" section of angle iron. Hand filed the inside corners to a sharp corner to make the female 1/4" drive. Used finish nails for the pins. Welds not the best looking but it worked fine.
 

Attachments

  • Tightening Cam Belt Adjuster Pully.jpg
    Tightening Cam Belt Adjuster Pully.jpg
    85 KB · Views: 236
  • Tightening Cam Belt Adjuster Pully Alternate View.jpg
    Tightening Cam Belt Adjuster Pully Alternate View.jpg
    94.6 KB · Views: 225
  • Timing Belt Tensioner Tool In-use.jpg
    Timing Belt Tensioner Tool In-use.jpg
    121.1 KB · Views: 216
  • Timing Belt Tensioner Tool Welded.jpg
    Timing Belt Tensioner Tool Welded.jpg
    111.8 KB · Views: 221
  • Timing Belt Tensioner Tool Assembled.jpg
    Timing Belt Tensioner Tool Assembled.jpg
    81 KB · Views: 170
  • Timbing Belt Tensioner Tool Parts.jpg
    Timbing Belt Tensioner Tool Parts.jpg
    101.1 KB · Views: 171
  • Special Tool MD998767 drawing.jpg
    Special Tool MD998767 drawing.jpg
    3.6 KB · Views: 147

code4pay

Well-known member
Joined
Jun 5, 2014
Messages
237
Location
Jervis Bay Australia
We had a tree come down through a fence and didn't want to take a tractor in the pasture because it was so wet and trash the place hauling the tree out. So I cut the tree into smaller sections and built this "Logging rig" for the carriage horse I drive. 1x2 .120 wall tubing with a 1/4 inch thick plate welded and drilled to take the harness quick fittings.


I used some of the quick attach/release fittings from her driving harness to attach the rig to her carriage harness. If something goes wrong, it takes literally a couple of seconds to release her from the rig.

I used the two 4000# sling straps to attach to her harness with the chain links that screw together and another to attach my log grapple to the single tree. I also found the limit of what she will pull without "getting in a bind" and lunging to pull a heavy load. A 2ft x 6ft section with a branch digging into the ground was a real load, she pulled it, but was not happy doing it. We got it out of the fence and quit. The shorter sections, she just leaned into it and walk off with it.
That's really cool, using the horse
 

racer-john

Well-known member
Joined
Apr 1, 2008
Messages
1,461
Location
Newmarket, ON Canada
this one goes with the previous post... needed an engine stand for the 460 and this is the final product... a caveat... I didn't do the welding on this...just the design, layout and tack up work. I'm not quite confident in my welding in high stress/weight situations... had a good friend/ironworker do the welding for me...

http://jniolon.classicpickup.com/enginestand/BDES.html

john

And this one says "FORBIDDEN" also
 

Cue

Well-known member
Joined
Jul 25, 2013
Messages
291
Location
Zebulon, NC
built a small plasma cutting table. I have it sitting on a 55 gallon drum and it contains all of the slag and sparks, works great. When the 1/8 slats get messed up, flip them over and when that side is messed up just replace them as they just slip in. I ran out of 1/8 steel though which is why I am missing a slat in the picture.
 

Attachments

  • 20160510_144914_resized.jpg
    20160510_144914_resized.jpg
    60.7 KB · Views: 220
  • 20160510_174642_resized.jpg
    20160510_174642_resized.jpg
    67.6 KB · Views: 232

Griff93

Well-known member
Joined
Jul 25, 2009
Messages
1,121
Location
Huntsville, AL
I really should start a build thread on my buggy.

We had a plasma cutting table like that. One thing that kinda ***** is when you drop a part through the slats. If I was to do on now, I'd put some expanded metal 6-12 inches below the slats to catch parts that fall through. Trying to fish them out of the bottom in a pile of slag isn't fun.
 

Cue

Well-known member
Joined
Jul 25, 2013
Messages
291
Location
Zebulon, NC
I really should start a build thread on my buggy.

We had a plasma cutting table like that. One thing that kinda ***** is when you drop a part through the slats. If I was to do on now, I'd put some expanded metal 6-12 inches below the slats to catch parts that fall through. Trying to fish them out of the bottom in a pile of slag isn't fun.


Good Idea, I had a scrap piece laying around and added it :thumbup:
 

Attachments

  • plasma table 2.jpg
    plasma table 2.jpg
    114.6 KB · Views: 155

BMW Rider

Well-known member
Joined
Apr 8, 2010
Messages
346
Location
Calgary, Alberta, Canada
Added a small TIG/Stick welder to my arsenal so I needed to redo my welding cart to fit it. The original cart was a freebie from a buddy. I don't know what its original purpose was, but I cobbled it up as a welding cart, then re-cobbled it up for a new MIG to replace the little cheapo one I started with. This time I needed to get a bit more serious with the reworking. I cut half of the top deck off and fabricated the two tier rack to hold my existing MIG and the new TIG. I added some cord hangers to keep the cables and hoses tidy, then gave it a coat of paint to make it look a bit better, it was just bare rusty steel before. I even added a spot to hang my small grinders.

2016-05-13%2011.04.55.jpg


2016-05-13%2011.05.08.jpg
 
Last edited:

TauntDevil

Well-known member
Joined
Mar 19, 2014
Messages
194
Location
Mesa, AZ
Making another bash bar for a client. The agreement was to have it migged but since my Tig was already plugged in and setup, I decided I would do practice run with it trying out a friend suggestion... which worked great for me....

It is not the best but to me, I am happy with it. (on a none structural section...ish)
KanUcU1.jpg


Now I just need to work on my welds around tubes as well
 
Last edited:
To avoid these ads, REGISTER NOW!
Top Bottom