To avoid these ads, REGISTER NOW!

Show us your welding projects

dozerbuilder01

Well-known member
Joined
Jun 20, 2011
Messages
180
Location
Far Northwest Burbs of Chicago
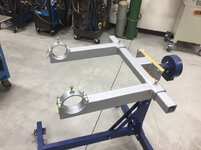
I built a rotary weld positioner a little while ago. I had a lot of questions on how much weight it could handle and how high frequency noise would affect the arduino controller. I finally made a video that should answer those questions.

 
Last edited:
To avoid these ads, REGISTER NOW!

Gamble

Well-known member
Joined
Oct 12, 2011
Messages
410
Location
CHITOWN
love me some aluminum tig :rocker:
 

Attachments

  • IMG_0035.jpg
    IMG_0035.jpg
    142.6 KB · Views: 351
  • IMG_0119.jpg
    IMG_0119.jpg
    113.3 KB · Views: 261

zmotorsports

ALLIANCE MEMBER
Joined
Oct 20, 2009
Messages
21,347
Location
Northern Utah
Finished my axle stand today.
e2b944bf88d5ddddb38ab44a257c5a69.jpg

31f21e67da5b48174267756d30e7b351.jpg

36c90e6c3155984f4627d40459245aaf.jpg

072a55259052eb150dc0f7a9d07f234c.jpg

More detailed pics can be seen in my Shop Projects 2.0 thread linked in my signature.


Sent from my iPhone using Tapatalk
 

Attachments

  • 31f21e67da5b48174267756d30e7b351.jpg
    31f21e67da5b48174267756d30e7b351.jpg
    676.9 KB · Views: 1
  • e2b944bf88d5ddddb38ab44a257c5a69.jpg
    e2b944bf88d5ddddb38ab44a257c5a69.jpg
    689.9 KB · Views: 1
  • 072a55259052eb150dc0f7a9d07f234c.jpg
    072a55259052eb150dc0f7a9d07f234c.jpg
    756.1 KB · Views: 1
  • 36c90e6c3155984f4627d40459245aaf.jpg
    36c90e6c3155984f4627d40459245aaf.jpg
    766.2 KB · Views: 1

mr_magicfingers

Well-known member
Joined
Apr 22, 2013
Messages
70
Location
Devon, UK
I guess this counts as a project, my first ever try at welding.

Looking for comments and critiques so I can learn. Currently playing with different settings and watching youtube videos while the steel cools down :)

I need a proper welding bench, which will be a project once I can weld well enough to stick things together. Currently using an old wooden bench which isn't the right height.

first welds, at the left, progessing to the ones on the right
DNowfe8.jpg


straight push welding, torch travelling right to left.
rzJMAgJ.jpg


Looking a bit more even.
WCXIjOL.jpg


using a U motion to make wider welds.
tqF1pc4.jpg
 
Last edited:

mr_magicfingers

Well-known member
Joined
Apr 22, 2013
Messages
70
Location
Devon, UK
Latest practice welds.

Settings:

Portamig 235. power coarse 6, wire speed around 5.5, I was experimenting between 5 and 6.5 during those runs. Metal angle 3.5mm thick. 0,8mm wire.

VLZi7XQ.jpg


5AR4Cf5.jpg


HS9rk4u.jpg


Xrd9tND.jpg


erZGwhS.jpg


iiGLA30.jpg


V7ogEid.jpg


LHU86rm.jpg
 

machine_punk

Well-known member
Joined
May 14, 2011
Messages
2,540
Location
Napa Valley, California
A hairpin-leg coffee table.

Used OA to bend the rebar.

MIG/Flux Core for the rest.

My shop didn't have 240 volts at the beginning of this project. After resetting the break 5 times in one minute, spent a month upgrading the electrical with three 240-volt outlets and four 120-volt circuits. Plenty of power now.
 

Attachments

  • Hairpin Leg Coffee Table 2.jpg
    Hairpin Leg Coffee Table 2.jpg
    110.8 KB · Views: 151
  • Hairpin Leg Coffee Table 1.jpg
    Hairpin Leg Coffee Table 1.jpg
    96 KB · Views: 187

ndr1968

Well-known member
Joined
Apr 18, 2012
Messages
207
Location
Oklahoma
Latest practice welds.

Settings:

Portamig 235. power coarse 6, wire speed around 5.5, I was experimenting between 5 and 6.5 during those runs. Metal angle 3.5mm thick. 0,8mm wire.

VLZi7XQ.jpg


5AR4Cf5.jpg


HS9rk4u.jpg


Xrd9tND.jpg


erZGwhS.jpg


iiGLA30.jpg


V7ogEid.jpg


LHU86rm.jpg

For some reason, I can't see a single one of those images. Am I the only one?

I see that the first one I opened experimentally by opening the "link" to imgur.com. Still, that's a really "jump through hoops" way to have to view the photos. Looks like the cloud has turned into an impenetrable fog bank.
 
Last edited:

smalltown

Well-known member
Joined
Jul 9, 2015
Messages
985
Location
Western Maine
Me either. Mr. magicfingers I personally think it's much better to up load your photos to Garage Journal. It's easy and they will be there for future searches.
 
Last edited:

Bigwheels

Well-known member
Joined
Nov 4, 2017
Messages
114
Location
Idaho
That axle stand has welds that i only dream of. Very nice. Here are some ipad frames for a yoga studio. The welds are adequate but extremely amature.
 

Attachments

  • 34184D5B-1F09-4E55-87E5-9D77728A07FC.jpg
    34184D5B-1F09-4E55-87E5-9D77728A07FC.jpg
    11.4 KB · Views: 221
  • C255F1DA-B246-4D17-B021-1B116A23F970.jpg
    C255F1DA-B246-4D17-B021-1B116A23F970.jpg
    15.8 KB · Views: 288
  • EEFA9E0F-78F9-4586-A792-72E5C2724008.jpg
    EEFA9E0F-78F9-4586-A792-72E5C2724008.jpg
    13.8 KB · Views: 255

code4pay

Well-known member
Joined
Jun 5, 2014
Messages
237
Location
Jervis Bay Australia
I guess this counts as a project, my first ever try at welding.

Looking for comments and critiques so I can learn. Currently playing with different settings and watching youtube videos while the steel cools down :)

I need a proper welding bench, which will be a project once I can weld well enough to stick things together. Currently using an old wooden bench which isn't the right height.

first welds, at the left, progessing to the ones on the right
DNowfe8.jpg


straight push welding, torch travelling right to left.
rzJMAgJ.jpg


Looking a bit more even.
WCXIjOL.jpg


using a U motion to make wider welds.
tqF1pc4.jpg
Amperage was a bit too high when welding that piece of timber in the background.
 

dta1984

Well-known member
Joined
Jan 15, 2015
Messages
53
Location
Northeast Ohio
I guess this counts as a project, my first ever try at welding.

Looking for comments and critiques so I can learn. Currently playing with different settings and watching youtube videos while the steel cools down :)

I need a proper welding bench, which will be a project once I can weld well enough to stick things together. Currently using an old wooden bench which isn't the right height.

first welds, at the left, progessing to the ones on the right
DNowfe8.jpg


straight push welding, torch travelling right to left.
rzJMAgJ.jpg


Looking a bit more even.
WCXIjOL.jpg


using a U motion to make wider welds.
tqF1pc4.jpg


As others have mentioned, your photos aren't showing up.

For a table, depending on your needs, I am happy with the Harbor Freight fold up table. It's cheap (use coupon), portable, has edges and places to clamp.
 

bggrnchvy

Well-known member
Joined
Nov 14, 2011
Messages
579
Location
Pleasant Hill, CA
Gate and hinges I welded up a month ago.


Mini Rocket Stove. I wasn't too happy with the corner transitions; will use a smaller cup next time.

The biggest change for me on transitions was going to a gas lense, I use a 6 most of the time. Being able to have the extra stick out to see when I'm changing plane makes the roll so much easier.
 

mr_magicfingers

Well-known member
Joined
Apr 22, 2013
Messages
70
Location
Devon, UK
I'll see if posting photos to the journal makes it easier. Won't repeat all of them, but a few of the ones from my second go at mig welding.

Settings:

Portamig 235. power coarse 6, wire speed around 5.5, I was experimenting between 5 and 6.5 during those runs. Metal angle 3.5mm thick. 0,8mm wire.
 

Attachments

  • IMG_8727.jpg
    IMG_8727.jpg
    134.2 KB · Views: 144
  • IMG_8726.jpg
    IMG_8726.jpg
    140.7 KB · Views: 146
  • IMG_8729.jpg
    IMG_8729.jpg
    131.9 KB · Views: 142
  • IMG_8730.jpg
    IMG_8730.jpg
    132.9 KB · Views: 142
  • IMG_8728.jpg
    IMG_8728.jpg
    132.2 KB · Views: 139
To avoid these ads, REGISTER NOW!

sanddan

Well-known member
Joined
Jul 7, 2005
Messages
708
Location
Oregon
I'll see if posting photos to the journal makes it easier. Won't repeat all of them, but a few of the ones from my second go at mig welding.

Settings:

Portamig 235. power coarse 6, wire speed around 5.5, I was experimenting between 5 and 6.5 during those runs. Metal angle 3.5mm thick. 0,8mm wire.

Most look a little "cold". The weld sitting up in a tall narrow bead = cold, flatter and wider bead is what you should be going for. Are you "pushing" the puddle or "dragging"? Pushing will tend to give you a hotter weld than dragging, that's my preferred method for MIG.
 

Gamble

Well-known member
Joined
Oct 12, 2011
Messages
410
Location
CHITOWN
After weeks I had time to throw down until my tank ran out. Oh well at least I got 10 minutes in haha
 

Attachments

  • BECCBCFB-D5D3-4F2C-82DA-10A22172E2E0.jpg
    BECCBCFB-D5D3-4F2C-82DA-10A22172E2E0.jpg
    15.4 KB · Views: 312

Ole Slewfoot

Well-known member
Joined
Feb 22, 2016
Messages
5,098
Location
Freedom, CA
Small and silly, but it was a fun puzzle.
Gal bought a house, and the front door didn't unlatch right from the outside.
she had some dude who thought he was the ---- look at it, then took it to the locksmith who claimed he'd brazed something, but wasn't sure if it would work.
Well it didn't, and I could not tell what he had brazed if anything.
Anyway, the outside thumb latch didn't work at all, and a little study of the geometry showed it couldn't. But a faint track in the grease and grime showed there had been a piece that we didn't have anymore....
It had to ;
be a pushrod from the top of the thumb handle to the release actuator
be roughly L shaped
have a notch to allow the mode buttons to switch it from aoutolocking the outside handle to not.
Stay in place and slide smoothly without jamming anything.

This is what I came up with. don't recognize the logo.
 

Attachments

  • 20171215_145444.jpg
    20171215_145444.jpg
    153.8 KB · Views: 339
  • 20171215_145531.jpg
    20171215_145531.jpg
    155.9 KB · Views: 286
  • 20171113_213305.jpg
    20171113_213305.jpg
    146.6 KB · Views: 266
Last edited:

Griff93

Well-known member
Joined
Jul 25, 2009
Messages
1,121
Location
Huntsville, AL
I wanted to build some table legs for an oak slab. I started out drawing these up and cutting them on our cnc plasma.
1121171415 by Griffin93, on Flickr

Started adding the sides.
1121171725 by Griffin93, on Flickr

Had to get a bit creative pulling the material in at the ends. I need a plate roller.
1124171546b by Griffin93, on Flickr

This takes a while.
1124171553b by Griffin93, on Flickr

Both ends are done and working on the center.
1218171337 by Griffin93, on Flickr

The obligatory close up.
1218171756 by Griffin93, on Flickr

All finished.
1219171315 by Griffin93, on Flickr

1219171316a by Griffin93, on Flickr
 
Last edited:

zmotorsports

ALLIANCE MEMBER
Joined
Oct 20, 2009
Messages
21,347
Location
Northern Utah
I wanted to build some table legs for an oak slab. I started out drawing these up and cutting them on our cnc plasma.
1121171415 by Griffin93, on Flickr

Started adding the sides.
1121171725 by Griffin93, on Flickr

Had to get a bit creative pulling the material in at the ends. I need a plate roller.
1124171546b by Griffin93, on Flickr

This takes a while.
1124171553b by Griffin93, on Flickr

Both ends are done and working on the center.
1218171337 by Griffin93, on Flickr

The obligatory close up.
1218171756 by Griffin93, on Flickr

All finished.
1219171315 by Griffin93, on Flickr

1219171316a by Griffin93, on Flickr

Table is looking awesome!!:thumbup: 
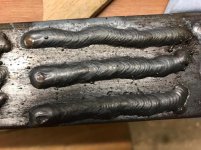
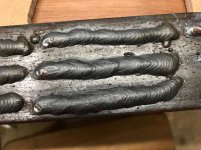
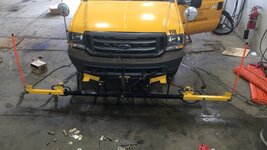
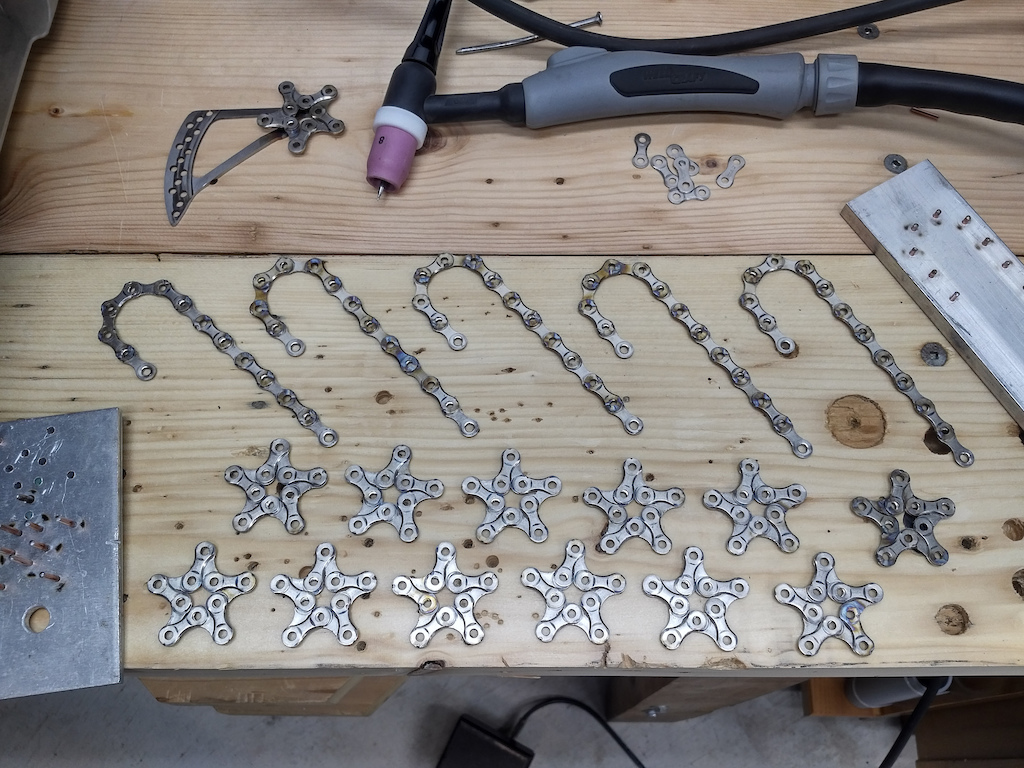
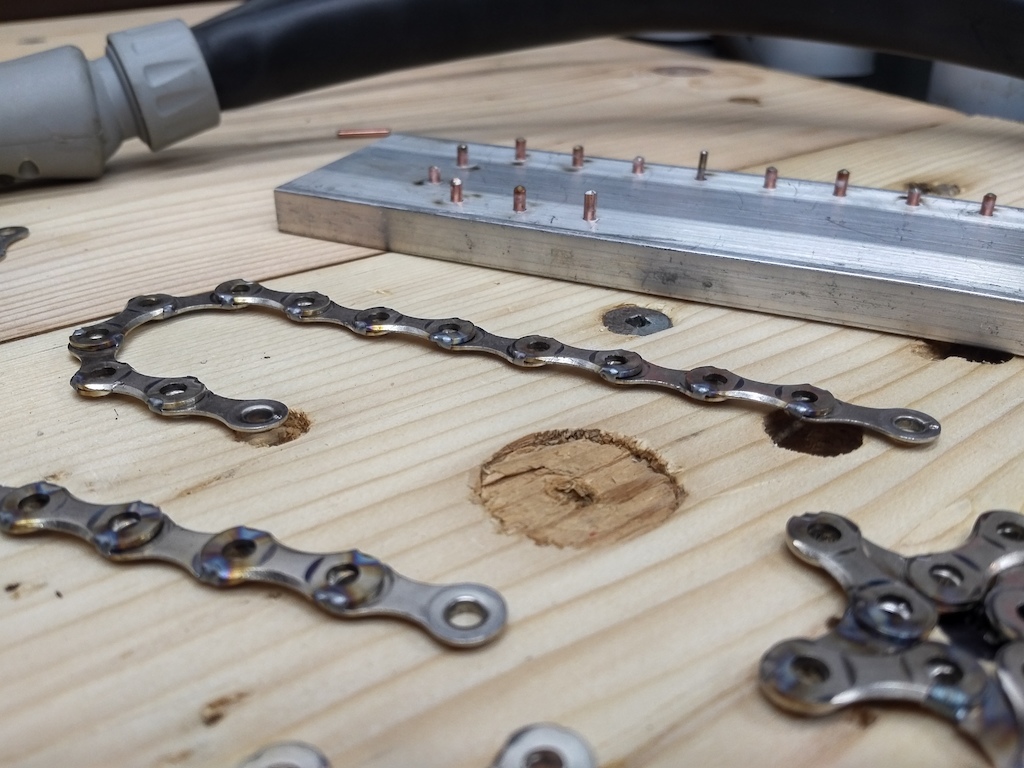
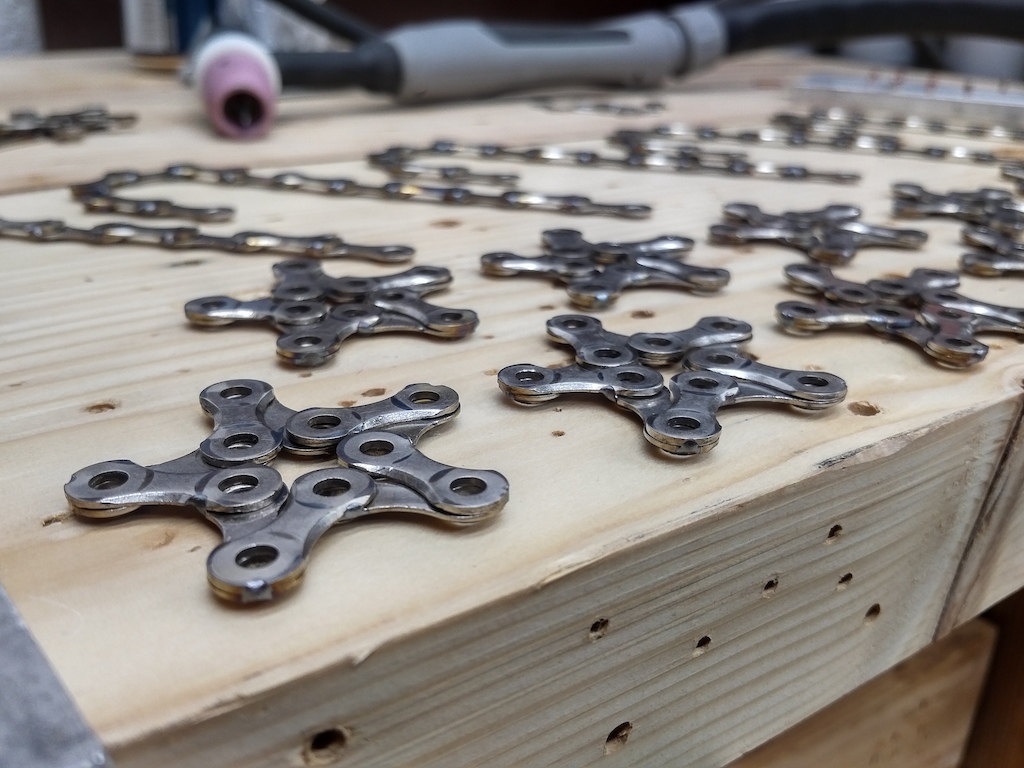
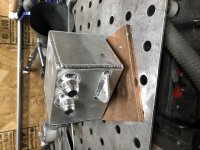
That thing is gonna be a beast.
 

PurpleZj

Well-known member
Joined
Feb 1, 2014
Messages
150
Location
Louisburg, Ks
I’ve done quite a few. Making brackets for work trucks, a tire carrier for my old grand Cherokee, and I do horseshoe art. 6a8e0e6f23270ae33a23191c9081c1c4.jpg5a12d7490dae60909c8ad051d1814b99.jpgb19a5dea4a22a5e5ce779586eb3ffaa3.jpg16c2dcc9f697a3ae3ff1be7590d66a6f.jpgdf5a3e4f666ff47078096ad6f238deb9.jpg85242ad5a8bd1e82351ed73aa2750425.jpgdf393cbc61e1fb55b737ebeff2a5e74a.jpg2ab5fba0006c832ba1e9acd60f057b46.jpg


Sent from my iPad using Tapatalk
 

Attachments

  • b19a5dea4a22a5e5ce779586eb3ffaa3.jpg
    b19a5dea4a22a5e5ce779586eb3ffaa3.jpg
    228.6 KB · Views: 1
  • 6a8e0e6f23270ae33a23191c9081c1c4.jpg
    6a8e0e6f23270ae33a23191c9081c1c4.jpg
    104.6 KB · Views: 0
  • 85242ad5a8bd1e82351ed73aa2750425.jpg
    85242ad5a8bd1e82351ed73aa2750425.jpg
    291.5 KB · Views: 0
  • 16c2dcc9f697a3ae3ff1be7590d66a6f.jpg
    16c2dcc9f697a3ae3ff1be7590d66a6f.jpg
    193.5 KB · Views: 0
  • df5a3e4f666ff47078096ad6f238deb9.jpg
    df5a3e4f666ff47078096ad6f238deb9.jpg
    305.7 KB · Views: 0
  • 5a12d7490dae60909c8ad051d1814b99.jpg
    5a12d7490dae60909c8ad051d1814b99.jpg
    650.6 KB · Views: 0
  • df393cbc61e1fb55b737ebeff2a5e74a.jpg
    df393cbc61e1fb55b737ebeff2a5e74a.jpg
    316.2 KB · Views: 0
  • 2ab5fba0006c832ba1e9acd60f057b46.jpg
    2ab5fba0006c832ba1e9acd60f057b46.jpg
    499.8 KB · Views: 0

VR6ix

Well-known member
Joined
Mar 24, 2013
Messages
355
Location
Onterrible, Canuckistan
It's getting late in the season but I'm trying my hand at making some Christmas tree ornaments from old mountain bike parts. Well, specifically bike chain links, for now. I've got plenty of old junk parts and just this fall I sold my little Lincoln 110v MIG and picked-up a Miller Diversion 165 TIG machine.

I broke the chain down by removing all the pins and then cleaned the links, rollers and pins in paint thinner and then in acetone. The rollers and pins will be saved for some other shinanigans in the future. Tried to make a "shooting star" with a pie slice of an old brake rotor but it didn't look as good as I thought it would. So, stars and candy canes for this year.

Going to make the hanger wire from some 0.035 309 MIG wire and I want to bend some 1/16" SS rod into a "2017" and stick that to the hanger. Tick tock, running out of time!

:bounce:

These are all just fusion tacks, the stars went together beautifully but the candy canes showed a lot more discolouration - by the time I got the hang of them I ran out of parts! Figuring out the spacing of the guide pins and making the jigs easily took as much time as breaking-down the chain, cleaning, then welding. Now the learning curve is over.

p5pb15466028.jpg


p5pb15466042.jpg


p5pb15466029.jpg


p5pb15466043.jpg


p5pb15466034.jpg


p5pb15466032.jpg
 

Attachments

  • IMG_20171215_2201461 copy.jpg
    IMG_20171215_2201461 copy.jpg
    117.1 KB · Views: 66
  • IMG_20171221_2226440 copy.jpg
    IMG_20171221_2226440 copy.jpg
    118.2 KB · Views: 70
  • IMG_20171215_2202222 copy.jpg
    IMG_20171215_2202222 copy.jpg
    100.7 KB · Views: 64
  • IMG_20171221_2226571 copy.jpg
    IMG_20171221_2226571 copy.jpg
    113.6 KB · Views: 68
  • IMG_20171221_2201591 copy.jpg
    IMG_20171221_2201591 copy.jpg
    100.1 KB · Views: 65
  • IMG_20171221_2226320 copy.jpg
    IMG_20171221_2226320 copy.jpg
    97.1 KB · Views: 68

PurpleZj

Well-known member
Joined
Feb 1, 2014
Messages
150
Location
Louisburg, Ks
Finished this one up last night
89e050470e9685920f18d1d67cbef39f.jpg0dde13cbf7c806ac527dd289d7a0f8db.jpg


Sent from my iPhone using Tapatalk
 

Attachments

  • 0dde13cbf7c806ac527dd289d7a0f8db.jpg
    0dde13cbf7c806ac527dd289d7a0f8db.jpg
    709 KB · Views: 0
  • 89e050470e9685920f18d1d67cbef39f.jpg
    89e050470e9685920f18d1d67cbef39f.jpg
    315 KB · Views: 0

mr_magicfingers

Well-known member
Joined
Apr 22, 2013
Messages
70
Location
Devon, UK
Most look a little "cold". The weld sitting up in a tall narrow bead = cold, flatter and wider bead is what you should be going for. Are you "pushing" the puddle or "dragging"? Pushing will tend to give you a hotter weld than dragging, that's my preferred method for MIG.

I’m pushing the puddle, I’ll try turning up the power a bit, thanks.
 

matt_i

Well-known member
Joined
Mar 14, 2008
Messages
10,725
Location
SE Michigan
This is a mildly interesting project (maybe!!) in making an overhead lifting device for an ironworker. Higher stakes than your typical welding project, to address this I purposefully undercut the parts with the milling machine. The idea is to get max penetration in the cross section for max strength, no way a surface weld is going to develop full strength in a 1/2" thick part without some mods. So I used tig to get things aligned and dimensions stabilized. Then it was outside the shop to get everything nice and hot with 7018 stick, I used a sacrificial piece of 2x6 to help protect the old chair. I stick weld outside otherwise the shop just fills with smoke and becomes sort of undesirable to work in for awhile. Still need to finish the pin and get some hairpin-cotterpins from TSC when the holiday is over.


Last edited:

lis2323

Well-known member
Joined
Dec 25, 2016
Messages
3,234
This is a mildly interesting project (maybe!!) in making an overhead lifting device for an ironworker. Higher stakes than your typical welding project, to address this I purposefully undercut the parts with the milling machine. The idea is to get max penetration in the cross section for max strength, no way a surface weld is going to develop full strength in a 1/2" thick part without some mods. So I used tig to get things aligned and dimensions stabilized. Then it was outside the shop to get everything nice and hot with 7018 stick, I used a sacrificial piece of 2x6 to help protect the old chair. I stick weld outside otherwise the shop just fills with smoke and becomes sort of undesirable to work in for awhile. Still need to finish the pin and get some hairpin-cotterpins from TSC when the holiday is over.


Nice job![emoji106]

Any chance of pictures of the ironworker and how you plan to attach and lift ? And determine balance point?
 

ndr1968

Well-known member
Joined
Apr 18, 2012
Messages
207
Location
Oklahoma
ndr1968 your avatar reminds me of Peter Fonda in Easy Rider !

Ho Man! Thanks! I am flattered!

At the risk of despoiling your mental image though, here's the photo from which the avatar was made.

It's an '08 Shadow and it's one sweet little "town bike".
 

Attachments

  • IMG_0268 print.jpg
    IMG_0268 print.jpg
    149.6 KB · Views: 132

jimgood

Well-known member
Joined
Aug 4, 2014
Messages
2,394
Location
Marshall, VA
Probably the easiest welding project ever! The handle to my wood stove door went missing. Got tired of looking for it. Grabbed a couple different sizes of bolts to see what fit the brass knob. 3/8ths was perfect.

Put the bolt through a 3/8ths washer and welded it in place. Turned that upside down and welded the washer to the end of a scrap piece of 1" sq tube. Cut the bolt off about a 1/2" long and chamfered the edges. Wire brushed the welds and Bob's yer uncle!

I swear it took me less than 10 minutes concept to completion. Maybe tomorrow I'll make it purdy.

attachment.php


attachment.php


attachment.php
 

Attachments

  • IMG_2889.JPG
    IMG_2889.JPG
    127.6 KB · Views: 1,328
  • IMG_2891.JPG
    IMG_2891.JPG
    99.5 KB · Views: 1,332
  • IMG_2890.JPG
    IMG_2890.JPG
    134.8 KB · Views: 1,331

Jlarson

Well-known member
Joined
Mar 27, 2015
Messages
738
Location
AZ
View media item 78636
We needed a walkway/pipe bridge made, catch was I had to design-build it out of what scrap I could pull from the pile in the lay down yard. :rolleyes:

And I tossed in some galvy pipe top rails for max fume production.
 

erty67

Well-known member
Joined
Sep 30, 2012
Messages
1,151
Finished this one up last night
89e050470e9685920f18d1d67cbef39f.jpg0dde13cbf7c806ac527dd289d7a0f8db.jpg


Sent from my iPhone using Tapatalk
Nice. Just made one myself. 64fd367ae998dbc5883477ee3aaaba86.jpg

Sent from my SM-G930P using Tapatalk
 

Attachments

  • 0dde13cbf7c806ac527dd289d7a0f8db.jpg
    0dde13cbf7c806ac527dd289d7a0f8db.jpg
    369.2 KB · Views: 0
  • 89e050470e9685920f18d1d67cbef39f.jpg
    89e050470e9685920f18d1d67cbef39f.jpg
    158.6 KB · Views: 0
  • 64fd367ae998dbc5883477ee3aaaba86.jpg
    64fd367ae998dbc5883477ee3aaaba86.jpg
    62.2 KB · Views: 0
To avoid these ads, REGISTER NOW!
Top Bottom