Figured I'd copy/paste the post from another site from the guy I mentioned above:
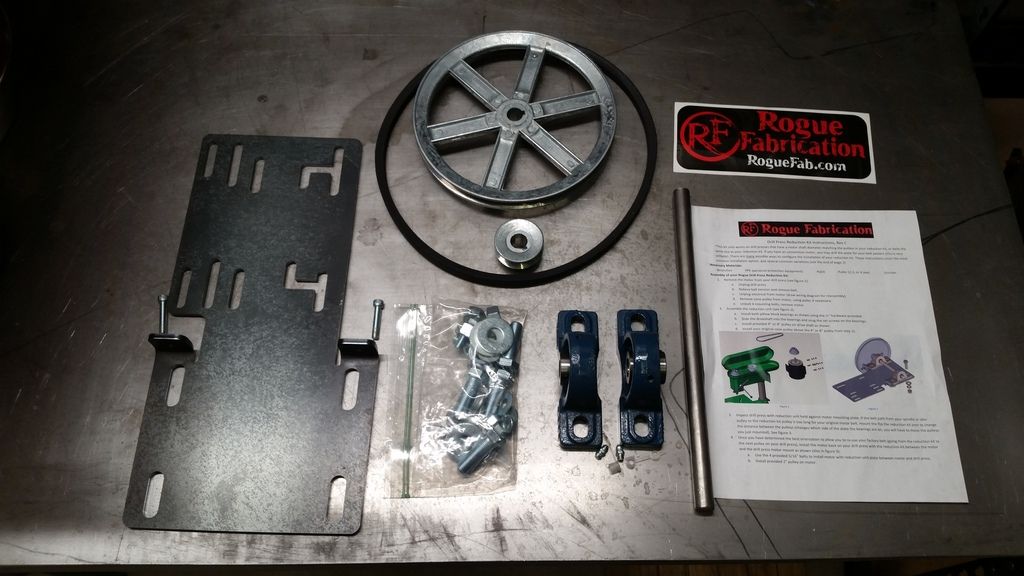
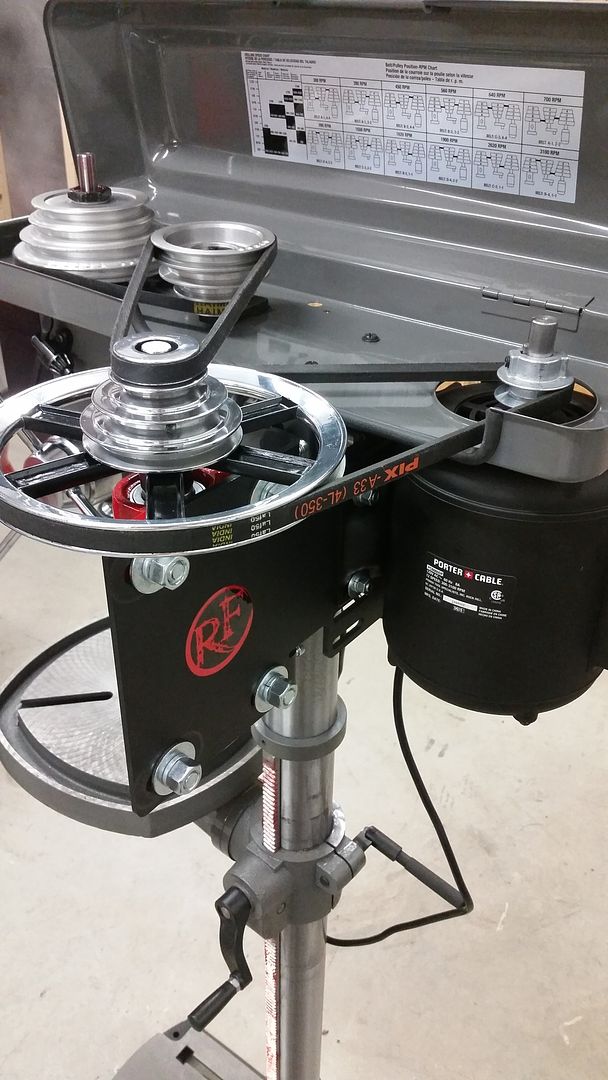
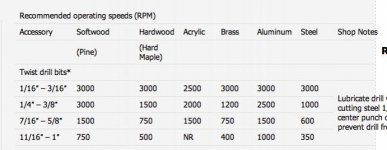
More tool stuff for now. One reason I'm posting this up is for 95riosnake to see since he told me about this kit and was interested in it for himself. By the way I'm glad you told me about these guys, not only for this but because they have a pretty kick *** tubing bender and notcher that I plan to buy. I counted 256 holes to drill for the cart and it's all 3/16" and 1/4" steel so I figured it would be a good time to pick one of these up. This is the Rogue Fabrication 4:1 drill press reduction kit and is $149 shipped. The factory RPM for this Porter Cable drill press is 300-3100, and with this kit the new range will be from 75-775. I tried to piece together a kit myself through McMaster and Grainger (the pillow block bearings were about half the cost at Grainger) and save some money, and I even already have some plate to make the mounting bracket, but the total was only about $10 cheaper, and that was without shipping.
This is the kit as it arrives.
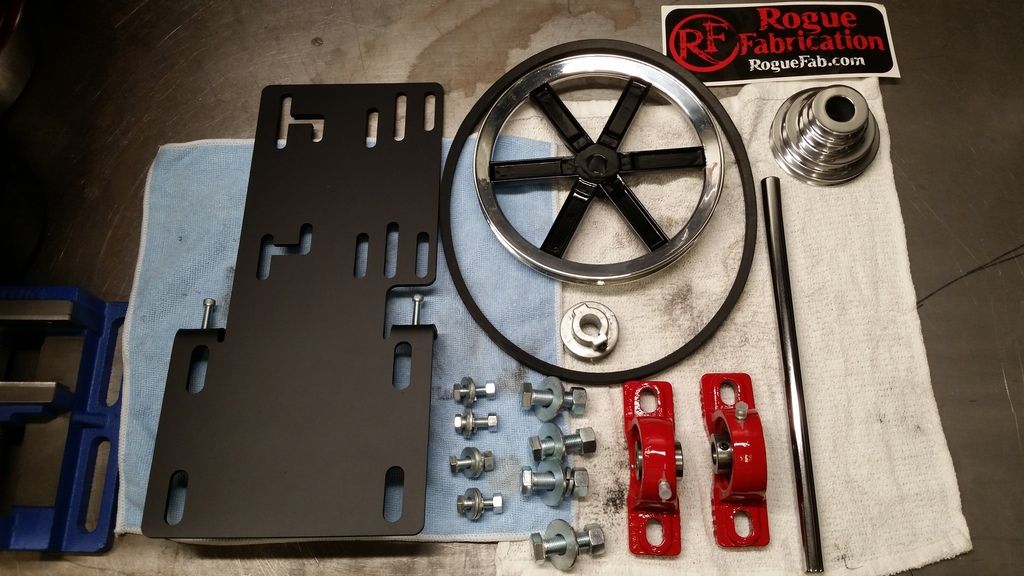
I dressed it up a bit before installing it. Painted the pillow block bearings red, painted the mounting plate flat black to match the drill press, cleaned up the casting flash on the big wheel, polished the rim, and painted the spokes semi-gloss black, polished the shaft, and polished the original cone pulley from the drill press motor.
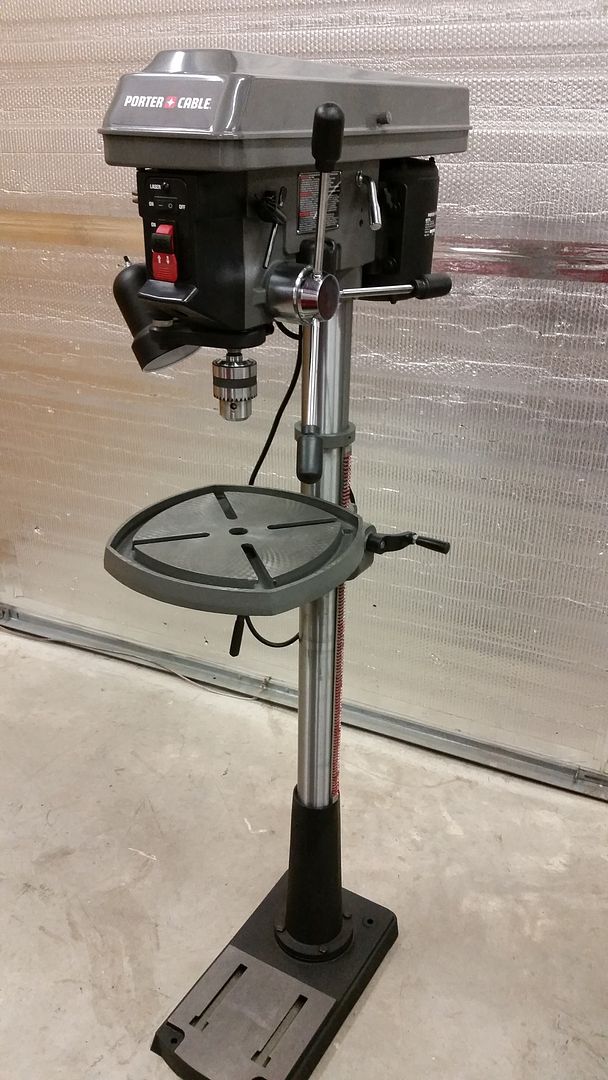
Here's the drill press before.
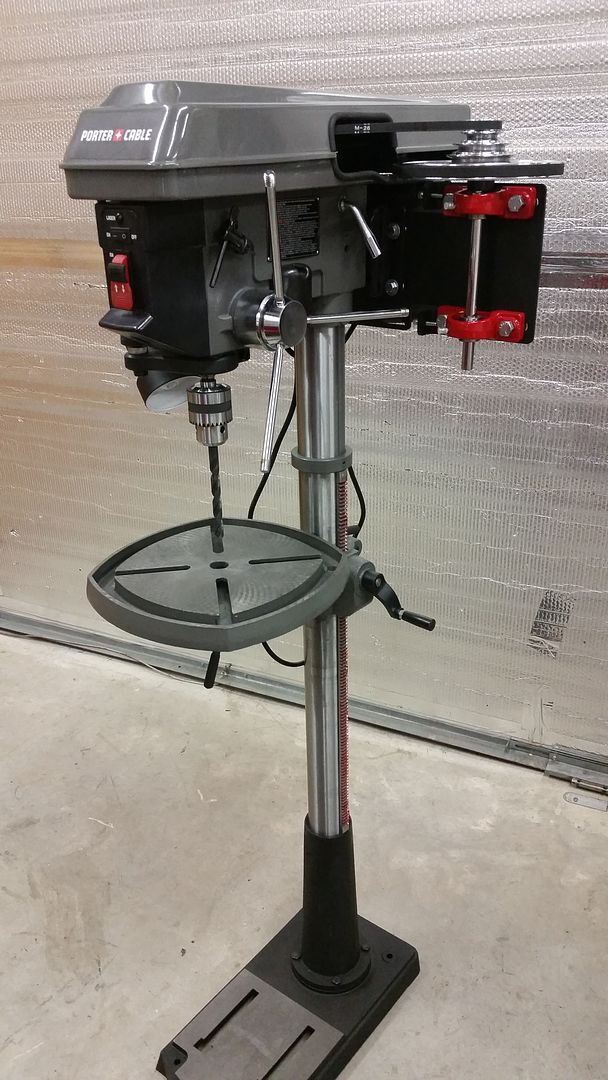
And after. The kit went together well. I had to install the pulley assembly on the front side of the plate vs the back because things just lined up and fit better that way; this is normal depending on your application. It took quite a bit of time to get everything adjusted just right, but I expected that. If the mounting plate weren't so universal with all the different slots, things would go faster, but it's ridiculous to expect him to make a specific plate for every drill press out there.
Little closer view. I used some Greenlee punches to make the holes for the rounded corners in the pulley cover then just 'connected the dots' with a cut off wheel, deburred the edges, and cut some small hose to put over the edge. I also had to remove the factory knobs for the press for clearance, but no biggie as I was going to replace them anyways.
View of the backside with the cover open.


![IMG_0221[1].jpg](https://www.garagejournal.com/forum/data/attachments/412/412050-a76aaeca9170fa6bec845b603f1a87e4.jpg "IMG_0221[1].jpg")