To avoid these ads, REGISTER NOW!

Small Two Car Operation

OP
H

HSpencer

ALLIANCE MEMBER
Joined
Nov 28, 2010
Messages
2,854
Location
South Central US
Saw stand is great. Good idea. Looking for an old bedframe myself to make a rolling setup like yours and also support an old parts cabinet on the wall. Cheap is good! Thanks for sharing.

Thanks for stopping by. I like to rebuild things and this saw was a top choice from items I currently have in the shop. This saw has no plastic or other cheap materials in it, and it was "Made in the USA". It deserved a new life as it has served me since 1975.

Best Regards
Herb Spencer
 
To avoid these ads, REGISTER NOW!
OP
H

HSpencer

ALLIANCE MEMBER
Joined
Nov 28, 2010
Messages
2,854
Location
South Central US
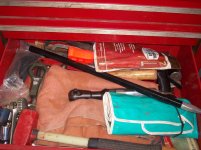
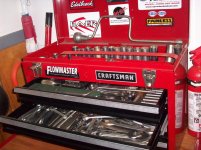
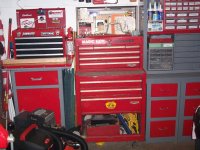
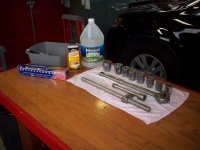
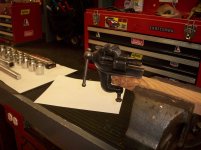
Since I am on a roll as far as restorations go, I have decided my next project will be my 1960s Craftsman Tool Chest. It has been very neglected over the years, and it is high time for it to shine! The tools are in pretty sad shape as well. I noticed when I was looking it the top area, I found a stick on Calender I had put there and the date on it was April, 1985. Well, it's time for action!! I am going to strip it all the way down, sand it, and repaint the cabinets inside and out, and do the trim on it. I worked for Sears from around 1962 to 1975. I picked up this cabinet and tools which was a repossession.
I found it in the warehouse, went to the store manager and asked what they would take for it. He said "How about $150.00?" This was somewhere around 1968 or so.
So this is my "next" time filler project. I will keep you posted on progress.
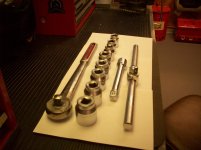
The smaller cabinet to the left holds my 1/4 inch and 3/8 inch drive, so I plan to make the cabinet match that one.

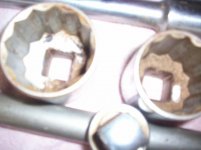
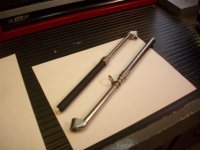
ps: I would prefer not to have to hand polish and buff "each" of these wrenches, so I will take any advice given on a quicker tool clean method---LOL
 

Attachments

  • Craftsman Tool Chest Resto 001.jpg
    Craftsman Tool Chest Resto 001.jpg
    145.9 KB · Views: 245
  • Craftsman Tool Chest Resto 002.jpg
    Craftsman Tool Chest Resto 002.jpg
    139.8 KB · Views: 232
  • Craftsman Tool Chest Resto 003.jpg
    Craftsman Tool Chest Resto 003.jpg
    147 KB · Views: 228
  • Craftsman Tool Chest Resto 004.jpg
    Craftsman Tool Chest Resto 004.jpg
    148.7 KB · Views: 255
  • Craftsman Tool Chest Resto 007.jpg
    Craftsman Tool Chest Resto 007.jpg
    148.2 KB · Views: 258
  • Craftsman Tool Chest Resto 008.jpg
    Craftsman Tool Chest Resto 008.jpg
    147.1 KB · Views: 245
  • Craftsman Tool Chest Resto 005.jpg
    Craftsman Tool Chest Resto 005.jpg
    143.1 KB · Views: 187
Last edited:

patent pending

Well-known member
Joined
Feb 7, 2012
Messages
271
Location
Charleston, SC
That saw stand turned out great Herb! I love the idea of being able to manuever everything around like that.

Looking forward to the tool box resto now!
 
OP
H

HSpencer

ALLIANCE MEMBER
Joined
Nov 28, 2010
Messages
2,854
Location
South Central US
Good luck and enjoy the memories of where you got each tool. I am sure there is a story in one of the drawers- maybe you fixed something you were unsure or .....!!!

Thanks Cpt14. There are tools in that chest I have not seen in years, and don't even remember having!! I am thinking this may be a rather larger job than I envisioned.

Best Regards
Herb Spencer
 
OP
H

HSpencer

ALLIANCE MEMBER
Joined
Nov 28, 2010
Messages
2,854
Location
South Central US
That saw stand turned out great Herb! I love the idea of being able to manuever everything around like that.

Looking forward to the tool box resto now!

Thanks for your visit. I have been watching your thread and enjoying it. The mobile saw base will be a huge help in my shop.


Best Regards
Herb Spencer
 
OP
H

HSpencer

ALLIANCE MEMBER
Joined
Nov 28, 2010
Messages
2,854
Location
South Central US
So after thinking this project over, I am a little befuddled as to the path I want to take.
The "Craftsman Purist" in me wants to re-do the chest in original colors, which would be Craftsman gray with red drawers. (I painted the chest red somewhere around the mid 1980s).
However the rebel in me wants to do something pretty radical and not go with a pure color restro on it. If I go pure color restro, I should also remove all but Craftsman brand tools that would have been available in the 1960s.
What to do---what to do??? Or just make it match it's little brother newer box?

HS
 

Attachments

  • Craftsman Tool Chest Resto 007.jpg
    Craftsman Tool Chest Resto 007.jpg
    148.2 KB · Views: 120
  • Craftsman Tool Chest Resto 008.jpg
    Craftsman Tool Chest Resto 008.jpg
    147.1 KB · Views: 110

taumac

Well-known member
Joined
Aug 30, 2011
Messages
8,104
Location
Brooksville, Fl
Well well Mr Herb looking good. As a person who suffers from OCD from time to time my suggestion would be to paint the little brothers drawers red to have a overall theme of red and gray. The black/ charcoal drawers will stand out to much. I'm thinking you could get away with just doing the drawer fronts and not entire drawer.


Have a good one, Gerard

Florida GJers ( FGJ)
http://www.garagejournal.com/forum/group.php?groupid=117

The 5 Stitches Garage
http://www.garagejournal.com/forum/showthread.php?t=211899
 
OP
H

HSpencer

ALLIANCE MEMBER
Joined
Nov 28, 2010
Messages
2,854
Location
South Central US
Hey Gerard, thanks for your input. I agree against the charcoal/black drawer fronts. The original chest was gray with red drawers. I am thinking of keeping the chest red, and maybe doing gray drawers on both chests. I am walking around thinking about it anyway.
If you have any suggestions, let me know. Always nice to hear from you!!

Best Regards
Herb Spencer
 
OP
H

HSpencer

ALLIANCE MEMBER
Joined
Nov 28, 2010
Messages
2,854
Location
South Central US
You have done so much with all the stuff in your place. It's really an inspiration to make what I have more convenient and useable. Thanks for sharing all this.

Ric

Hi Ric, thanks again for stopping by. And thanks for your kind words as well!

Best Regards
Herb Spencer
 
OP
H

HSpencer

ALLIANCE MEMBER
Joined
Nov 28, 2010
Messages
2,854
Location
South Central US
To see just how hard this tool clean up will be, I started with the 3/4 inch drive set. It was not too bad, but sure needed some clean up. I used car wash liquid to soak ithe tools, and then the old tin foil/vinegar method. The vinegar gets right to the rust and grime. Afterwards just a little polishing up. Only 5000 more to go!

Best Regards
Herb Spencer
 

Attachments

  • Tool Clean 001.jpg
    Tool Clean 001.jpg
    141.8 KB · Views: 160
  • Tool Clean 002.jpg
    Tool Clean 002.jpg
    134.2 KB · Views: 150
  • Tool Clean 003.jpg
    Tool Clean 003.jpg
    138.6 KB · Views: 164
  • Tool Clean 004.jpg
    Tool Clean 004.jpg
    141.2 KB · Views: 216
  • Tool Clean 005.jpg
    Tool Clean 005.jpg
    136.3 KB · Views: 167
  • Tool Clean 006.jpg
    Tool Clean 006.jpg
    136.7 KB · Views: 191

taumac

Well-known member
Joined
Aug 30, 2011
Messages
8,104
Location
Brooksville, Fl
Hey Gerard, thanks for your input. I agree against the charcoal/black drawer fronts. The original chest was gray with red drawers. I am thinking of keeping the chest red, and maybe doing gray drawers on both chests. I am walking around thinking about it anyway.
If you have any suggestions, let me know. Always nice to hear from you!!

Best Regards
Herb Spencer

Well least work would be red.
I'm having same issue. My issue is coming up with paint to make this all look together.
View attachment 321449 I'm going to be sending you all my tools for resto work cause yours came out so great. Expect I large box coming your way. LOL. Looking great Herb.


Have a good one, Gerard

Florida GJers ( FGJ)
http://www.garagejournal.com/forum/group.php?groupid=117

The 5 Stitches Garage
http://www.garagejournal.com/forum/showthread.php?t=211899
 
OP
H

HSpencer

ALLIANCE MEMBER
Joined
Nov 28, 2010
Messages
2,854
Location
South Central US
Well least work would be red.
I'm having same issue. My issue is coming up with paint to make this all look together.
View attachment 321449 I'm going to be sending you all my tools for resto work cause yours came out so great. Expect I large box coming your way. LOL. Looking great Herb.


Have a good one, Gerard

Florida GJers ( FGJ)
http://www.garagejournal.com/forum/group.php?groupid=117

The 5 Stitches Garage
http://www.garagejournal.com/forum/showthread.php?t=211899

Great Idea Gerard!! When I get your box, I will ship the Craftsman Cabinets to YOU for painting. A real fair trade out, don't you think?? Your the guy with spray can talents!!!

Best Regards
Herb Spencer
 
OP
H

HSpencer

ALLIANCE MEMBER
Joined
Nov 28, 2010
Messages
2,854
Location
South Central US
Digging in the tool chest, I found a few treasures I had forgotten I had. The little vise is pretty old but cleaned up well and works great. The old transmission funnel will be painted to be a "shop" decoration. I have needed the air gauges, so glad I found them. The machinist level will be a nice addition to my other machine tools. Just like Christmas!!! Going to dig further!!

Best Regards
Herb Spencer
 

Attachments

  • treasures 005.jpg
    treasures 005.jpg
    135.3 KB · Views: 141
  • treasures 004.jpg
    treasures 004.jpg
    136.7 KB · Views: 139
  • treasures 003.jpg
    treasures 003.jpg
    150 KB · Views: 156
  • treasures 002.jpg
    treasures 002.jpg
    139.8 KB · Views: 151
  • treasures 001.jpg
    treasures 001.jpg
    148.2 KB · Views: 158

Sunbimmer

Well-known member
Joined
Dec 6, 2011
Messages
2,022
Location
The province of Limburg, The Netherlands
Herb,

can you explain the tin foil/vinegar method (or maybe I missed it somewhere in your thread) to me and maybe some others.
I have a couple of tools I can maybe revive with this method, I mean if I look at your results :thumbup:

Thanks
 
To avoid these ads, REGISTER NOW!
OP
H

HSpencer

ALLIANCE MEMBER
Joined
Nov 28, 2010
Messages
2,854
Location
South Central US
Herb,

can you explain the tin foil/vinegar method (or maybe I missed it somewhere in your thread) to me and maybe some others.
I have a couple of tools I can maybe revive with this method, I mean if I look at your results :thumbup:

Thanks

Hey Hugo, good to hear from you!!
Here is my method for cleaning metals, in particular "polished" tools:

First soak in warm water with either dishwashing liquid, or a good car wash liquid.
Depending on the built on grime, I would soak about 30 minutes to an hour.
Inspect the results and if stubborn grime remains, use a SLOW SPEED and brass wire brush on your grinder to remove. (Very light use of the wire brush).
Make a wad of tin foil and put distilled vinegar into a cup. Wet the tin foil wad in the vinegar, and scrub the item until you see black coming off the tool/metal. Continue to scrub until you rinse and see really cleaned up metal.
Once really clean, take the tool to a buffer and polish it up.

This has worked for me every time. Of course it will depend on the condition of the tools your trying to clean. I only recommend the wire wheel for "non-chrome" parts. For chrome, I use brasso. (Rubber gloves recommended for the entire procedure)

Best Regards
Herb Spencer
 
Last edited:

Sunbimmer

Well-known member
Joined
Dec 6, 2011
Messages
2,022
Location
The province of Limburg, The Netherlands
Herb,

Thanks very much :bowdown:for teaching me how to clean chrome tools, much appreciated.
I already put it on my to do list and a print has been made of your post #261.
Thanks again and keep the pics coming, I'm very curious of what you are going to do with your tool chest :thumbup:
 
OP
H

HSpencer

ALLIANCE MEMBER
Joined
Nov 28, 2010
Messages
2,854
Location
South Central US
OP
H

HSpencer

ALLIANCE MEMBER
Joined
Nov 28, 2010
Messages
2,854
Location
South Central US
Herb,

Thanks very much :bowdown:for teaching me how to clean chrome tools, much appreciated.
I already put it on my to do list and a print has been made of your post #261.
Thanks again and keep the pics coming, I'm very curious of what you are going to do with your tool chest :thumbup:

Thanks Hugo, always glad to help out anyway I can. Hope it works well for you!!

Best Regards
Herb Spencer
 

taumac

Well-known member
Joined
Aug 30, 2011
Messages
8,104
Location
Brooksville, Fl
Yeah I do like it a lot. It is really old, not sure just how old, but is in great shape. Do you think it needs a paint job?

Best Regards
Herb Spencer

Hmmmmm...... Honestly the casting is done very well from the pictures and think it looks great just cleaned up. It might be a shame to cover that up.


Have a good one, Gerard

Florida GJers ( FGJ)
http://www.garagejournal.com/forum/group.php?groupid=117

The 5 Stitches Garage
http://www.garagejournal.com/forum/showthread.php?t=211899
 
OP
H

HSpencer

ALLIANCE MEMBER
Joined
Nov 28, 2010
Messages
2,854
Location
South Central US
In doing some on line research, I found a site that allows you to download most all years of Craftsman Tool Catalogs up through about 1975. In the 1969 catalog, I found the tool set that I have, except my top cabinet is the 6 drawer one instead of the one shown. Other than that, it is the set I bought.
The chests then were gray with red drawers, and I know now why I painted my chests red. Those were ugly. Era correct for Craftsman, but still ugly. Now I can inventory my set of tools and see what I might be missing.


Best Regards
Herb Spencer
 

Attachments

  • 1969_001.jpg
    1969_001.jpg
    84.6 KB · Views: 167
Last edited:
OP
H

HSpencer

ALLIANCE MEMBER
Joined
Nov 28, 2010
Messages
2,854
Location
South Central US

taumac

Well-known member
Joined
Aug 30, 2011
Messages
8,104
Location
Brooksville, Fl
In doing some on line research, I found a site that allows you to download most all years of Craftsman Tool Catalogs up through about 1975. In the 1969 catalog, I found the tool set that I have, except my top cabinet is the 6 drawer one instead of the one shown. Other than that, it is the set I bought.
The chests then were gray with red drawers, and I know now why I painted my chests red. Those were ugly. Era correct for Craftsman, but still ugly. Now I can inventory my set of tools and see what I might be missing.


Best Regards
Herb Spencer

Personally I like the gray its like a hammertone paint with contrasting drawers. I can help you. Here's mine. View attachment 322050
View attachment 322051
uploadfromtaptalk1393811433992.jpg
In my place I'm trying to add rye gray in so from right to left I'm doing gray/red, gray/red, all gray and table is already gray (primer) DP I havnt decided and tall cabinet Im keeping red maybe repaint doors. I'm trying to keep a within 3 colors. White, Gray, and Red.


Have a good one, Gerard

Florida GJers ( FGJ)
http://www.garagejournal.com/forum/group.php?groupid=117

The 5 Stitches Garage
http://www.garagejournal.com/forum/showthread.php?t=211899
 
OP
H

HSpencer

ALLIANCE MEMBER
Joined
Nov 28, 2010
Messages
2,854
Location
South Central US
Hey Gerard
I like the way your shop looks. It is really half dozen of one, and 6 of another what I will decide to do.
I may even paint the sucker yellow!!! No, maybe not.

Best Regards
Herb Spencer
 

taumac

Well-known member
Joined
Aug 30, 2011
Messages
8,104
Location
Brooksville, Fl
I know its really tough decision. My issue is 1970 craftsman and red/black chest where given to me by neighbors son after his mom passed away. They where his fathers and we still see him from time to time when he visits from IL. So Im trying to keep them original as possible and come up with paint scheme to match overall theme. Honestly I would love to find another matching 1970 craftsman bottom.


Have a good one, Gerard

Florida GJers ( FGJ)
http://www.garagejournal.com/forum/group.php?groupid=117

The 5 Stitches Garage
http://www.garagejournal.com/forum/showthread.php?t=211899
 
Last edited:
OP
H

HSpencer

ALLIANCE MEMBER
Joined
Nov 28, 2010
Messages
2,854
Location
South Central US
I got some more of the Craftsman tools cleaned up today. I got a little red metal tool box for the 3/4 drive set. I have set up a bench grinder to have a brass wire wheel and a buffer on it, and that is saving a lot of time. I have a lot more to go, but it is going to be worth it. Not a bad clean up for nearly 50 year old tools!! Some of the Craftsman tools were pretty worn. I am going to replace those to keep the set complete, although I have plenty of the same item only in other branded tools including Snap On and Proto among a few.
I do want the set to be pure Craftsman, to go in the reconditioned tool cabinet.
This whole affair has become a much bigger job than I first thought---------

Best Regards
Herb Spencer
 

Attachments

  • tool clean up 006.jpg
    tool clean up 006.jpg
    142.8 KB · Views: 168
  • tool clean up 005.jpg
    tool clean up 005.jpg
    143.5 KB · Views: 208
  • tool clean up 004.jpg
    tool clean up 004.jpg
    138.5 KB · Views: 158
  • tool clean up 003.jpg
    tool clean up 003.jpg
    147.8 KB · Views: 214
  • tool clean up 002.jpg
    tool clean up 002.jpg
    143.9 KB · Views: 173
  • tool clean up 001.jpg
    tool clean up 001.jpg
    139.9 KB · Views: 223
  • tool clean up 008.jpg
    tool clean up 008.jpg
    137 KB · Views: 219
OP
H

HSpencer

ALLIANCE MEMBER
Joined
Nov 28, 2010
Messages
2,854
Location
South Central US
Hmmmmm you are a rebel. I see the craftsman badging is on the right side vs the left.LOL


Have a good one, Gerard

Florida GJers ( FGJ)
http://www.garagejournal.com/forum/group.php?groupid=117

The 5 Stitches Garage
http://www.garagejournal.com/forum/showthread.php?t=211899

Yeah that seems odd. My chests came with the badging on the right side, both top and bottom, I haven't moved them. I see yours are on the left. I guess back then it was changed within specific model years. I am glad you pointed that out--thanks!! My chests "might" be pre-1970's.

Best Regards
Herb
 

impala4speed

Well-known member
Joined
Oct 11, 2009
Messages
194
Location
Youngstown, Ohio
I got some more of the Craftsman tools cleaned up today.

snipped

This whole affair has become a much bigger job than I first thought---------

Best Regards
Herb Spencer

All I can say Herb is, Wow. I have so many projects to work on but now I want to go clean my tools. Everything looks great!
 

taumac

Well-known member
Joined
Aug 30, 2011
Messages
8,104
Location
Brooksville, Fl
Hey Hugo, good to hear from you!!
Here is my method for cleaning metals, in particular "polished" tools:

First soak in warm water with either dishwashing liquid, or a good car wash liquid.
Depending on the built on grime, I would soak about 30 minutes to an hour.
Inspect the results and if stubborn grime remains, use a SLOW SPEED and brass wire brush on your grinder to remove. (Very light use of the wire brush).
Make a wad of tin foil and put distilled vinegar into a cup. Wet the tin foil wad in the vinegar, and scrub the item until you see black coming off the tool/metal. Continue to scrub until you rinse and see really cleaned up metal.
Once really clean, take the tool to a buffer and polish it up.

This has worked for me every time. Of course it will depend on the condition of the tools your trying to clean. I only recommend the wire wheel for "non-chrome" parts. For chrome, I use brasso. (Rubber gloves recommended for the entire procedure)

Best Regards
Herb Spencer

Question, why tin foil? Does the Tim foil do anything special? Would scotch bright or steal wool work? The buffing? What compound you using?


Have a good one, Gerard

Florida GJers ( FGJ)
http://www.garagejournal.com/forum/group.php?groupid=117

The 5 Stitches Garage
http://www.garagejournal.com/forum/showthread.php?t=211899
 
OP
H

HSpencer

ALLIANCE MEMBER
Joined
Nov 28, 2010
Messages
2,854
Location
South Central US
To avoid these ads, REGISTER NOW!
Top Bottom