Herb,
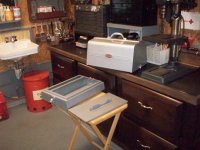
A polishing set up is another thing on my to do project lists. I have a fairly crude setup to say the least but it works.
Some of the larger items I polish like the stainless Model A radiator surround require a bit of elbow room to get around, how is yours on the castors and do you find it stable enough?
Yours is a nice setup, well done.
Regards
1/2
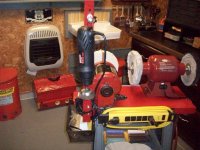
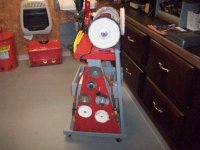
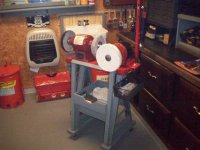
What I came up with is quite easy to use. As you well know, one really needs to "cut" on the front of the buffing wheel, and "color" or polish on the back. With the buffer setting on the bench this is not possible. Also one needs the whole thing movable, so you can get to all sides of it. Additionally, having the slow speed wheel with a clean sisal pad, you don't have to be constantly changing around the wheels which is a pain.
I also have my high speed motor with flexible shaft and wire wheels hanging on the set up, easy to get to and change from a wire wheel to a pad or what ever comes up I am needing.
My set up is not the prettiest thing, but I am sure it will be better than I was using.
I also buff out some larger items and this is the ticket for that. When you redo your set up, I suggest you make it mobile, and where you can get to all sides of it. If your like me, you will want all your wheels and pads handy and a good supply of abrasives within reach.
AND DON'T FORGET A FULL FACE SHIELD PLEASE!!!!! Yep I am preaching to the choir, but I am guilty of not doing that. For me, that old dog is now fixed!!! My eyes are the only two I have.
Sorry for the long answer!!
Best Regards
Herb


 ...
...