To avoid these ads, REGISTER NOW!

Smoothing out MIG welds

myredracer

Well-known member
Joined
Nov 1, 2015
Messages
557
Location
Langley, BC
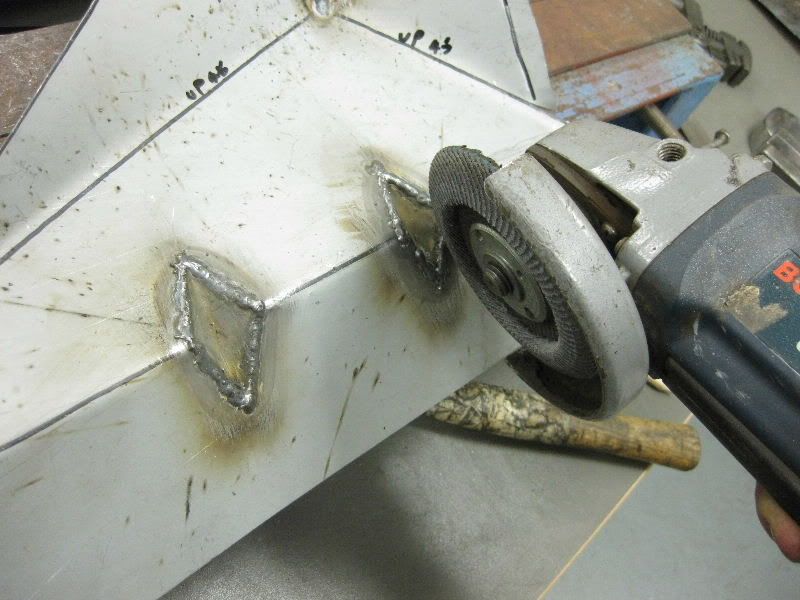
Anyone know of any youtube vids or websites with a good description on how to smooth out MIG welds on sheet metal and how to use the various tools and discs? Can't seem to find any vids that are worth watching.

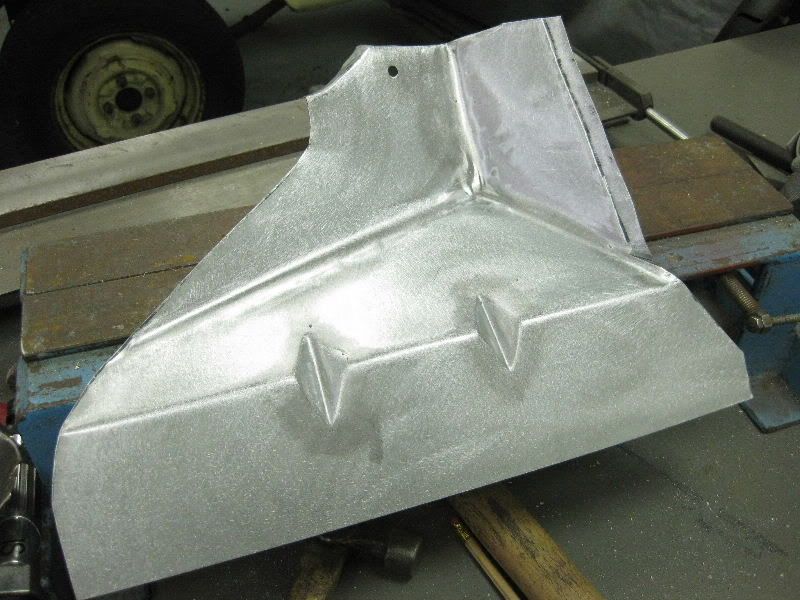
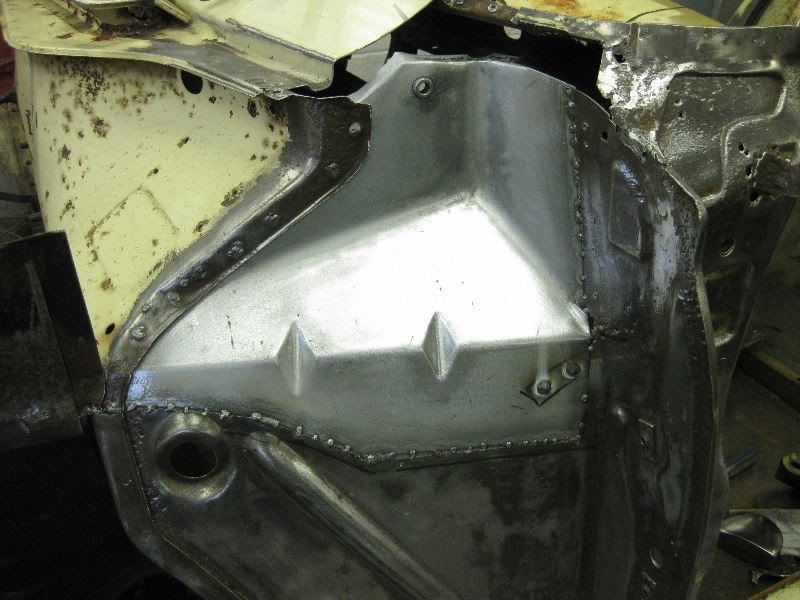
Am doing my first restoration on a vintage car body that is needing a lot of sheet metal replaces due to rust. Having a bit of difficulty in getting the welds smoothed down without making the metal thin. Have gone right through a few times and welding that back up is a PITA and can end up making it worse due to distortion. Am getting the hang of doing the welding and have learned how important it is to keep distortion to a minimum. Have been planishing welds and checking with a straightedge as I move along

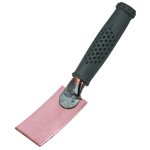
For tools I have a Dremel, couple of die grinders and 4 1/2" angle grinder and an assortment of cutoff, thin grinding discs and flap discs for all 3 tools, 2" and 3" roloc grinding discs in different grits for the die grinders as well as some roloc surface conditioning discs for them. Also have a Dynabrade belt sander which is great for hard to reach spots.

I'm okay with knocking down the welds pretty close to the sheet metal but it's the final sanding/smoothing that I'm finding are hard. Sometimes the sheet metal has a curve to it and sometimes can be convex/concave which makes it harder. Do I maybe need to swap to a finer grit sanding pad as I get closer to the sheet metal surface or use a conditioning disc and coarse, med. or fine? Also, what tool and disc do I need for inside 90 degree corners? Have tried flap wheel but they seem to wear out way too fast.
 
To avoid these ads, REGISTER NOW!

EdT

Well-known member
Joined
Sep 21, 2010
Messages
1,104
Location
North Georgia
If you haven't checked out MP&C's thread on this site, you should. IMHO it's about as good as it gets AFA how to weld in panels with MIG. It is a difficult, tedious task and requires a lot of practice. start learning in an area that's seldom seen and save the high visibility stuff for last after you have some experience. When you're starting out, there are no short cuts that are likely to turn out well. After you've got a feel for it, there may be some, but they are riskier than just taking your time. Resist the temptation to run a long bead even though you think it'll work. It probably won't especially on low crown panels. Robert has several good segments on setting up for the right wire feed speed an current and he always runs test pieces to make sure it's going to work right. One of the best tricks is to only put on as much weld as you need rather than a ton that you have to grind off and that takes practice and more practice as well as proper set up and learning how the set-up variables affect the result. Good luck with it.
 

BD1

Well-known member
Joined
Mar 18, 2007
Messages
4,602
Location
north side
Are you using gas ? Like 75/25 ? That would be a big help.
As for wire, .023 or .024 EASYGRIND WIRE will make your life so much easier.
 
OP
M

myredracer

Well-known member
Joined
Nov 1, 2015
Messages
557
Location
Langley, BC
If you haven't checked out MP&C's thread on this site, you should. IMHO it's about as good as it gets AFA how to weld in panels with MIG. It is a difficult, tedious task and requires a lot of practice. start learning in an area that's seldom seen and save the high visibility stuff for last after you have some experience. When you're starting out, there are no short cuts that are likely to turn out well. After you've got a feel for it, there may be some, but they are riskier than just taking your time. Resist the temptation to run a long bead even though you think it'll work. It probably won't especially on low crown panels. Robert has several good segments on setting up for the right wire feed speed an current and he always runs test pieces to make sure it's going to work right. One of the best tricks is to only put on as much weld as you need rather than a ton that you have to grind off and that takes practice and more practice as well as proper set up and learning how the set-up variables affect the result. Good luck with it.

After reading everything and watching every video I could find on the web that was relevant, you've said exactly what I've ended up doing! Patience, patience and more patience is what really helps. Started the first work on a hidden area and am progressing to the hardest areas near the end of the project. Am **** welding instead of taking shortcuts like lap welds.

I have read MP&C's posts which are excellent and will be going back for another read. There's a guy on the retrorides.com forum in England that has a great thread on making repair pieces, welding and grinding here: http://retrorides.proboards.com/thread/70135/panels#.U44ixSimWIY Just doesn't seem to be a whole lot on how they ground down and smoothed out the welds and the tools and techniques they used.
 

sanddan

Well-known member
Joined
Jul 7, 2005
Messages
708
Location
Oregon
Quote: Sometimes the sheet metal has a curve to it and sometimes can be convex/concave which makes it harder.

Once you get the weld down use a dolly and body hammer to massage the metal until smooth then continue sanding with a DA sander. The convex/concave you are seeing is from weld heat shrinking the metal. MP&C discuses this in detail in his thread.
 

dffay

Well-known member
Joined
Jul 9, 2015
Messages
434
If you have access to the opposite side of something, say a firewall, as long as you have 100% penetration, you can weld from that side and leave the bead as is. That make the side that shows an easier grind and smoothing.
 
OP
M

myredracer

Well-known member
Joined
Nov 1, 2015
Messages
557
Location
Langley, BC
Quote: Sometimes the sheet metal has a curve to it and sometimes can be convex/concave which makes it harder.

Once you get the weld down use a dolly and body hammer to massage the metal until smooth then continue sanding with a DA sander. The convex/concave you are seeing is from weld heat shrinking the metal. MP&C discuses this in detail in his thread.

I meant the panel pieces have a shape to them like in this photo, but yes I see how the weld shrinks the metal and you have to try and bring it back. I have a floor pan all tacked in place and used a hammer and dolly one by one from one weld to the next and checked flatness with a 6" metal ruler as I moved along the joint.

I have a DA sander but haven't thought about trying it on welds yet. I suppose it's the larger surface of the pad that helps?
 

Attachments

  • DSCF0001 (1).jpg
    DSCF0001 (1).jpg
    145 KB · Views: 242
OP
M

myredracer

Well-known member
Joined
Nov 1, 2015
Messages
557
Location
Langley, BC
If you have access to the opposite side of something, say a firewall, as long as you have 100% penetration, you can weld from that side and leave the bead as is. That make the side that shows an easier grind and smoothing.

I've been basically doing that in some spots and the "good" side barely needs any sanding. And where one side will get covered by undercoating, floor mats, etc. the welds don't need to be perfectly smoothed out.

The hard part is getting the hang of not holding the trigger too long and getting holes or too much buildup or holding it too short and not getting enough penetration. Getting better day by day... Was doing some welding today with some weld-through primer - the sputtering is awful and made for some messy welds. May try another brand like U-Pol.
 

RandyWanger

Member
Joined
Aug 20, 2014
Messages
9
Location
Essex, England
Just reading that link you posted to RetroRides, it says:

"Cleaned off with the 40 grit flap disc on the grinder"

IMG_1061.jpg


"and a 40 grit flap wheel in the die grinder"

IMG_1062.jpg


"You get this"

IMG_1063.jpg


"Then over the whole lot with a 40 grit DA disc to remove the flap disc marks and the weld splatter, should really have used anti spatter spray but I did not have any"

IMG_1064.jpg


IMG_1065.jpg
 

dffay

Well-known member
Joined
Jul 9, 2015
Messages
434
Nice work. The only other thing I recommend is cruising estate sales and flea markets for sanding/grinding consumables. I've found great deals on discs and abrasives that would otherwise kill the best intentions of a professional job due to pricing. Flap discs really get eaten up quickly.


Did you know that 6 out of 7 dwarfs are not Happy?
 

Zeke

Well-known member
Joined
Aug 13, 2009
Messages
17,176
Location
Long Beach CA, the sewer by the sea.
Weld thru primer is a joke. Once you weld thru it it's gone from the weld area anyway, both sides. It was originally intended for the backside and adjacent areas. Get an oxy/acet set of bottles and braze over where you think you have pin holes. Some say the brass is hard to prime and get paint to stick. Those folks haven't worked with lead. But once you braze an area, you're done welding.
 
To avoid these ads, REGISTER NOW!

ToddW

Well-known member
Joined
Sep 18, 2009
Messages
229
Location
In the snow
Nice work. The only other thing I recommend is cruising estate sales and flea markets for sanding/grinding consumables. I've found great deals on discs and abrasives that would otherwise kill the best intentions of a professional job due to pricing. Flap discs really get eaten up quickly.


Did you know that 6 out of 7 dwarfs are not Happy?

Maybe you're buying flap discs at the wrong stores? (IE: Home Depot and welding shops)

http://www.lehighvalleyabrasives.com/

Less than $2 and they last and work as well as any you'll find at home depot and welding stores. They have various brands, spend 100$ or so and you'll be set for years in a home/garage setting :bounce:

If you want to last longer get ceramic but they're around 2x the cost.
 

MP&C

Well-known member
Joined
Oct 21, 2009
Messages
4,403
Location
Leonardtown, MD
Here's a video I did on grinding plug welds. This should be similar to grinding weld dots as part of a weld seam.


For grinding the welds, I use 1/16 thick 3" cutoff wheels and grind using the outer edge of the disc, as shown in the video above. Do not grind using the sides of the disc as this puts lateral pressure on the attachment point at the arbor, which may result in cracking the disc and flying parts.

I find that the disc gives the best unobstructed view to help eliminate errant thinning of the metal to either side of the weld bead (as opposed to a larger flap or grinding disc that hides what you're grinding). Also, the minimal contact area of the 1/16 wide disc introduces much less heat buildup than other methods. Last, spend the extra money to buy discs that are rated for STAINLESS STEEL as they will last much longer, but more importantly, put less brown resin in the air than those cheap HF or swap meet specials. Cheap is rarely cheap when it comes to these abrasives, there is always a trade-off.


Final cleanup afterward is done with a 3" roloc sander and approx. 60 or 80 grit. If your epoxy primer won't fill in the scratches, ie: 24 or 36 grit, then you are only damaging the metal.
 
Last edited:

mike13u

Well-known member
Joined
Mar 1, 2008
Messages
616
Location
S.Florida
I knock the weld down with flap discs or regular AO discs on a rubber backing pad. Then when the weld is only very slightly proud, I will switch to an RO and move from coarse to fine adhesive pads usually stoping in the 300 grit range for steel.
If you really want to get down to fine polish, you then move to unitized discs (look something like red scotchbrite pads on a disc) and then to polishing compounds and buffing discs. These last steps are mostly for stainless
 
OP
M

myredracer

Well-known member
Joined
Nov 1, 2015
Messages
557
Location
Langley, BC
Thanks for the comments!

Here's a video I did on grinding plug welds. This should be similar to grinding weld dots as part of a weld seam.

^^ This is exactly what I've been doing and have been using the 1/16" cutoff discs. I've been finding that the cutoff discs work better for me. Tried 2" and 3" flap discs but are more awkward and can thin the metal too quickly if not careful. Have been using a re-enforced cutoff wheel in a Dremel sometimes which gives better control in tight spaces or curvy surfaces. Am still working on learning how NOT to grind/smooth welds down too much and thin out or go through 18 & 20 ga. metal. Have read and reread some of MP&C's posts and they are great. One of the most important things I learned pretty quickly is to go slow and not heat sheet metal any more than you have to so as to avoid distortion. It is NOT fun fixing distorted metal mistakes... :(

Gil - thanks for the retrorides link! There went 45 minutes on page 1 alone!
It's amazing what that guy can do with some basic and low cost tools! If you spend the time to read through his posts he makes it seem like anyone can do it, no problem. He's the person who made me realize I can form repair pieces myself.
Not related to your grinding but using a copper backer if accessible will help in the welding.http://www.harborfreight.com/welding-spoon-66785.html
Have that HF tool! Works great. Also made one from a piece of scrap copper pipe - can bend it as needed to conform to curvy pieces or fit it between a couple of layers of sheet metal.

Tried my DA sander and it does work great on relatively flat surfaces but is no good in more confined and curvy spots which is what I'm working on mostly at the moment. Have started to use my belt sander more and is a kinda nice tool for getting to hard to reach spots plus it's smooth to handle and is really quiet. Haven't had much luck with a few different flap discs I tried. They wear out too quickly and lose the edge that you really want (and they are expensive!).

Just bought a stash of various 2 & 3" sanding discs and some conditioning discs as well. Bought some zirconia ones but not sure how they compare to AO. Not sure if conditioning discs are needed that often? Checked some of the local commercial sources for grinding discs and they are kinda expensive. Need to do some more research to find a good source. Will look at lehigh valley.

I ditched my zinc-based weld-through primer and went to a body shop supplier and they talked me into some copper-based U-Pol. The U-Pol stuff seems pretty good in comparison, except that an arc won't strike very well so scratched a little off in the center of a plug weld. I figure the U-Pol is better than nothing.

Have been busy lately on the car. A few photos below. First is where I started. Lot's of rust repair needed. I fabricated an upper shock bracket and bump stop bracket. Also modified and installed a suspension re-enforcement plate that I got from Italy. Second to last photo shows where I'm at on the front left inner fender area - still have more to do there.
 

Attachments

  • DSCF0011.jpg
    DSCF0011.jpg
    143.9 KB · Views: 74
  • DSCF0015.jpg
    DSCF0015.jpg
    143.9 KB · Views: 67
  • DSCF0002.jpg
    DSCF0002.jpg
    145.7 KB · Views: 72
  • DSCF0022 (1).jpg
    DSCF0022 (1).jpg
    145.6 KB · Views: 67
  • DSCF0023 (1).jpg
    DSCF0023 (1).jpg
    141.9 KB · Views: 82
  • DSCF0023.jpg
    DSCF0023.jpg
    144.3 KB · Views: 79

iajonesy

Well-known member
Joined
Feb 8, 2009
Messages
2,467
Location
Iowa
I will second using MP&C techniques when it comes to anything in automotive panel work. Robert's work is top notch. Although Robert didn't mention it in the video,he uses very little downward pressure when doing his grinding to avoid cutting groves into your panel material. Let the tool do the work,don't force it.

Mike
 

kkroger

Well-known member
Joined
Apr 21, 2013
Messages
1,143
Tacks, Grind the tacks with the edge of a cutoff disk, More Tacks, Rinse Lather and Repeat... once you are fully welded use an 80 Grit Flapper... move around a lot to limit warpage...
 

gahrajmahal

Well-known member
Joined
Dec 12, 2008
Messages
2,537
Location
Cincinnati, Ohio
The length of time I weld in one spot is as long as I can say "one-one thousand, two-one thousand, then I release the trigger. I use the MP&C procedure for grinding after the weld. For something like an inner fender panel like you have I just hit it quickly with a grinder and put a layer of seam sealer around the patch, smooth it with a wet rag and move on. A bit of bondo to smooth the inside seam under the hood area and it is good to go for me. By the time I get etching primer and paint on it no one but me would ever know it has been patched. I save all of my fiddly exacting work for the panels you would see on the outside of the car.

Practicing perfection on the inner panels is good to do and your work so far looks excellent.
 
To avoid these ads, REGISTER NOW!
Top Bottom