To avoid these ads, REGISTER NOW!

Started My Cabinets

ddawg16

Well-known member
Joined
Jul 11, 2008
Messages
21,005
Location
S. California
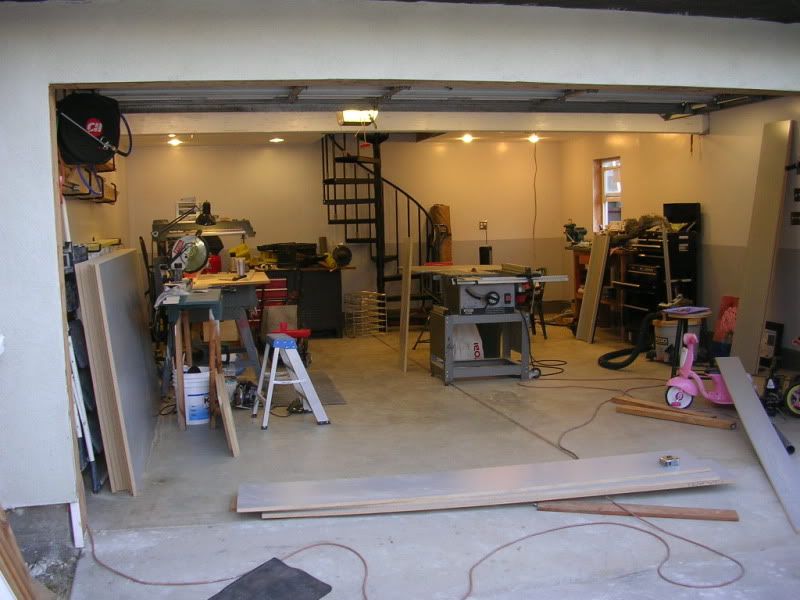
It's been a common question here....how to make cabinets.....well, here is my version of cabinets based on useing melimine....gray melimine to be exact with black trim.

Here is the stack of 10 4x8 sheets along with some of the pieces already cut.....only 80lbs/sheet....cost was about $31 each.

DSCN7373.jpg


And here is the first cabinet.....it's going to mainly be used for storing paints and other cans that size. I still have the doors and shelves to do. To give the shelves support I'm going to make strips of SS the width and thickness of the shelves and screw them to the front and rear edges....this should give them plenty of support and provide a good durable edge.

DSCN7375.jpg


And in case you are wondering how I support the cabinets.....because I wanted them all off the floor....I screwed the base and top into the bottom and top plates....

DSCN7376.jpg


I'll post update photos as I make progress.
 
To avoid these ads, REGISTER NOW!

boiler7904

Well-known member
Joined
Apr 4, 2006
Messages
3,414
Location
NW IN
Looks good. You might want to consider a support of some sort for that cabinet. Looks to be about 4 ft wide. If so, 4ft of paint cans is going to sag and break.

Cabinets are on my list of garage projects. First one will be a rolling cabinet and stand with folding extension wings for my miter saw.
 
OP
D

ddawg16

Well-known member
Joined
Jul 11, 2008
Messages
21,005
Location
S. California
Covered.....

And here is the first cabinet.....it's going to mainly be used for storing paints and other cans that size. I still have the doors and shelves to do. To give the shelves support I'm going to make strips of SS the width and thickness of the shelves and screw them to the front and rear edges....this should give them plenty of support and provide a good durable edge.
 

metal1313

Well-known member
Joined
Apr 28, 2009
Messages
3,416
Location
clinton NJ
how are you doing the joints? im gonna be doing some major wood working this winter. a few sets of 12' tall book shelves for the house, cabinets for the garage, the laundry room, and the storage area in the basement. but i do have a ton of wood working tools, experience and well i am willing to make my mom something that will last but god im gonna spend alot on cabinet/furniture grade plywood.
 
OP
D

ddawg16

Well-known member
Joined
Jul 11, 2008
Messages
21,005
Location
S. California
how are you doing the joints?

I screw everything together.....you can't really glue the stuff....ok, you can glue two bare ends....but that is about it.

The key is to use the right size drill....too small and you will split the particle board...too big and it won't grab. And....use a course screw....the drywall screws work well. And try to use as long of a screw you can....that spreads the force out over a larger area. AND....don't get too close to the end....with this batch of melamine I have found 1.5" from the end to be the min.....

Another option is to use pocket hole screws......

And in cases where I am attaching the edge of melamine to plywood, I'll glue them using biscuts.

As someone noted/asked above....the stuff will sag with too much weight....it has great compressive strenght...good to fair tensile strenght...and fair to poor sag strength....to keep the shelves from saging, I'm putting strips of stainless steel on the front and rear edges of the back and front....that will make it plenty stiff enough.

Looks good. Where did you get your melamine that cheap?

There is a wood supply not far from me....the specialize in supplying wood to cabinet makers....tons of furniture grade plywood.

For reference......I realy prefer melamine over other wood for shelves in the garage....tough and easy to clean...not much sticks to it.
 

Git

Well-known member
Joined
May 18, 2008
Messages
6,894
Location
S Cal
There is a wood supply not far from me....the specialize in supplying wood to cabinet makers....tons of furniture grade plywood.


Looks good

Can you share the name/location of the lumberyard?
 
OP
D

ddawg16

Well-known member
Joined
Jul 11, 2008
Messages
21,005
Location
S. California
Summerville

Inglewood BL/147th....Hawthorn.....about 1 block north of Marine.
Not open on Saturdays.....
 

Ray-CA

Well-known member
Joined
Jan 6, 2007
Messages
3,451
Location
San Diego CA
And in case you are wondering how I support the cabinets.....because I wanted them all off the floor....I screwed the base and top into the bottom and top plates....

DSCN7376.jpg


I'll post update photos as I make progress.

This looks GREAT but I do have a question. Are you going to seal the exposed, cuts at the bottom edge of the cabinets? I would be concerned about moisture wicking into the wood.

Ray
 

tcianci

Well-known member
Joined
Feb 7, 2009
Messages
4,242
Location
Walpole, Ma
There is this stuff called Roo-Glue, it is made for gluing melamine to itself or to the cut particle board edge, looks like Elmers glue but holds like crazy!
 
OP
D

ddawg16

Well-known member
Joined
Jul 11, 2008
Messages
21,005
Location
S. California
A friendly warning...drywall screws aren't a very good choice for hanging cabinets. They're brittle and can break pretty easily when used in shear. I'd think about replacing them with a screw designed for the purpose.

Another choice is to hang them with a french cleat - this method was discussed recently: http://www.garagejournal.com/forum/showthread.php?p=566611

I'm not using drywall screws for the attachement to the wall....#10 flat heads that are about 3" long.....I've used the same thing for all the cabinets in my garage.....they are not going to shear.....

About the only advantage of the french cleat is that it makes an easy way to hold the cabinet in place....but you still need to screw the actual cabinet to the wall....Mine is attached at the bottom, middle and top....At each point the actual board that the screws go into is about 4" tall....and that board is attached to the sides and the shelf that is next to it....The screws at top are basically preventing the top from moving away from the wall....the bottom and middle screws are providing a majority of the shear support...

I've been out of town on business...and on vacation before that...hence, not a whole lot of progress....today was a lot of 'honey dues'....tomorrow and Monday it's just me and the boys so I should be able to post some updates.

EDIT: Just had another look at the first pic above....it is a good example of the difference in light color....right side is soft white, left side is Daylight.....you can actually tell the difference in color....
 
Last edited:

willot1

Member
Joined
Oct 27, 2006
Messages
12
What about cutting that Melimine? ie, what saw and blade are you using and how is the chipping? Melimine is a bear on the table saw, especially when single handed handling. I was looking at some last week, but they were special ordered 5' x 9' and over 100# each!
 
To avoid these ads, REGISTER NOW!
OP
D

ddawg16

Well-known member
Joined
Jul 11, 2008
Messages
21,005
Location
S. California
I'm using 60 tooth carbide blades....good blades....my table saw has a new Ryobi blade on it....overall I've had good luck with Ryobi and Festo blades.....

About the only time I get chipping is on the radial arm saw if I push the blade back to the fence after a cut....it chips it on the return...

As anyone who does woodworking will tell you....$50 for a blade is cheap....

As for handling....my wife helps me for cutting large sheets.....or I'll rip off a piece using one of my circular saws....then do the final cut on the table saw or radial arm saw...

BTW....those fine blades make a really smooth cut....translation....sharp edges....I'm talking 'drawing blood' sharp edges....
 

Test Pilot

Well-known member
Joined
Mar 19, 2009
Messages
46
Those are going to look sweet but I have a thing for steel and aluminum !!! >>>>.
 

Attachments

  • cool **** 001.jpg
    cool **** 001.jpg
    119 KB · Views: 259
  • cool **** 002.jpg
    cool **** 002.jpg
    123.5 KB · Views: 207
  • cool **** 003.jpg
    cool **** 003.jpg
    115.3 KB · Views: 170

shmo

Well-known member
Joined
Aug 28, 2009
Messages
195
Huh,

maybe those look better in person:rolleyes:. Nice way to Hijack someone elses thread Test Pilot
 
OP
D

ddawg16

Well-known member
Joined
Jul 11, 2008
Messages
21,005
Location
S. California
Update......with pics....

Here is a shot of the edges....first pic is the top side cut....no nicks...second pic is the bottom side....some very small chips....it will be down so it won't be an issue.....

DSCN7378.jpg


DSCN7379.jpg


This is a view of one of the shelves with the metal strip attached to the front to add rigidity.....I'll add another taller strip on the rear as soon as I have time to go to work and use the shear to make them....you can also see the brackets that I use....drill a 3/16" hole...shove it in...shelf is secure....and it's easy to raise or lower...just drill a new hole......

DSCN7380.jpg


And here are a couple of views of the semi finished cabinet....I'll do the doors tomorrow....

DSCN7381.jpg


DSCN7382.jpg


I need to stop my wife from buying the 'ooopppsss' paints from HD.
 

Dan in Pasadena

Well-known member
Joined
Feb 18, 2009
Messages
13,105
Location
Pasadena, CA
Update on these cabinets?

It's been 3 months, has sagging been an issue yet? I love the idea of making your own cabinet with melamine. Have you thought about using a piece of stainless 3/4" x 3/4" angle so that leading edge would be VERY strong? I read you planned on using a taller strip on the rear side but the angle would give you the same strength (or more) on the leading edge. Very impressive work.
 
OP
D

ddawg16

Well-known member
Joined
Jul 11, 2008
Messages
21,005
Location
S. California
Here is a more recent pic with the support strip on the back....if you look closely you can see them.....14g ss about 3" tall...

PA200010.jpg


I just might have time to build the doors today.....I just need my wife help me lift the sheet up onto the table saw.....They tend to be heavy....
 

tstang90

Well-known member
Joined
Sep 27, 2009
Messages
108
very nice how much would you say that unit costs ya for materials with the doors on it? I also has access to all kinds of equipment at work was debating on making my own a co worker who used to build custom cabinets for a living said it would be cheaper to buy e pre made when i asked him.
 
OP
D

ddawg16

Well-known member
Joined
Jul 11, 2008
Messages
21,005
Location
S. California
Once the doors are done I will have used about 2 1/2 sheets....I think I paid about $28/sheet....it was about $8 for a 50' of the iron on black tape...the Blum hinges are about $6/pr....and I'll be using 3 pair....
 

tcianci

Well-known member
Joined
Feb 7, 2009
Messages
4,242
Location
Walpole, Ma
A good blade to cut the stuff with is a 60 or more tooth ATB (alternate tooth bevel) It leaves a nice edge and if you plan your cuts you can almost always bury the small chip out on the lee side of the cut when you assemble your project.
 

Smokey

Well-known member
Joined
Dec 26, 2006
Messages
62
Location
The Garden Spot of SC.......Rock Hill!
Is that blocking under the bottom shelf?

When I saw you're design and read your write up my fear was a vertical sag of the entire unit with only the back giving support (gravity is a *****). Did you anchor the front top of the unit to the roof rafters, by chance?

Like the look of it!
 

BlindViper

Well-known member
Joined
Dec 1, 2009
Messages
1,304
Location
York, PA
How about something like this for your shelf fronts and backs?
http://www.mcmaster.com/#aluminum/=4xpfgl
I know you have the stainless strips, but just a thought.
2 doors or 4 ?
if 2 doors you might want to plan on at least 4 hinges per door. Your standard wood kitchen with 42" doors has 3 hinges and it will weigh 4-5 lbs. I installed a kitchen a few months back the wall cabinets were 53 1/2". The doors were particle board with a cherry veneer. There was 4 hinges and these doors were 15-20lbs a pop.
DSCN0093.jpg
 
Last edited:

Steve from Socal

Well-known member
Joined
Jan 27, 2009
Messages
3,490
Location
Hutchinson Ks.
I am wondering why you used the strips instead of say 3/4" angle? Regarding blades to get a clean cut; High ATB are what most cabinet shops use, unless they have a scoring saw.

I hope these work out for you. I was involved with MDF fabrication for a number of years and the high durability items we made used high pressure laminate on both sides.

Steve
 
OP
D

ddawg16

Well-known member
Joined
Jul 11, 2008
Messages
21,005
Location
S. California
Is that blocking under the bottom shelf?

When I saw you're design and read your write up my fear was a vertical sag of the entire unit with only the back giving support (gravity is a *****). Did you anchor the front top of the unit to the roof rafters, by chance?

Like the look of it!

In the back on the bottom there is a 5" high strip....screws in the backside go into the bottom shelf....and screws on the side support the sides...there is a 1 1/2" strip in the front.....there for support and looks....

The third shelf up is also a fixed shelf....it too has a 5" high strip in the back.

At the top I have another 5" strip attaching to the wall.

I thought about attaching something to the roof...but I'm not going to bother....if you look at the stresses involved....I'm dealing with shear force....Melamine handles shear (compression and stretching) well, but not pulling....

All of the screws are #10....and there is enough in there that it's not coming down.....but I did run a few extra in the side next to my big PSL beam....

As for blades....almost all of my blades are 60 tooth.....I learned some time ago that a good blade is the best investment....it doesn't bother me to spend $50 or more for a blade....

My problem now is deciding if it's worth the money to have them sharpened....
 
To avoid these ads, REGISTER NOW!
Top Bottom