That drawer with the contents weighs about 50 pounds, the balance have slightly lighter loads. It is not really a toolbox as such, it was designed for supplies such as screws, nails, pins/keys, fittings, etc. to keep all in a central location. Those slides are 3/4" wide, I lied. They were just screwed to the case side, no glue if I remember correctly. I figure they could handle , maybe 50% more weight before they begin to groan. The disadvantage of that style is that you do not have 100% exposure of the drawer contents, but very close if you are careful. There are no fancy drawer joints, the sides are held on with glue and screws and the bottoms are 1/8" plywood panelling pieces that are glued and nailed directly to the bottom of the sides. No inlet grooves here, I wanted the full depth--no wasted space! That was all done about twenty years ago and everything is as good as when it was put together originally. Have been thinking about making another similar one for more supplies and a toolbox with thinner drawers. The secret is keeping the drawer width down, so you cannot overload it. If you look at most new metal toolboxes, they have full width drawers which is crazy from a users view point but makes perfect sense to the maker (faster and cheaper)
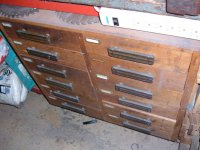
I have a toolbox like the upper one pictured and those bottom three drawers are toooo wide. The bottoms sag and scrape on the one below. I'd be much happier if I could find one with all the drawers like the upper three on L. and R.


 As heavy as this is I would think you will be using a set of casters in the center anyway. Can you get away with using multiple smaller ones? Say 4 sets? Just thinking out loud...