To avoid these ads, REGISTER NOW!

Between 485 & 705 SQ/FT Steven's Craftsman Space

Workspaces between 485 and 705 squarefeet.

radrush

Well-known member
Joined
Oct 30, 2010
Messages
828
Location
Atlanta, GA
:cool:
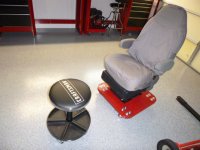
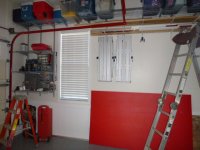
Got inspired by the GJ guys and cleaned up and reorganized my Craftsman 2-car space.

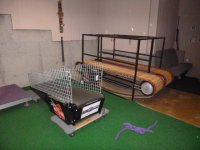
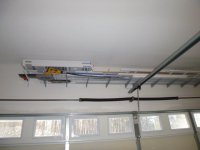
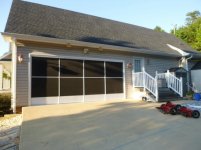
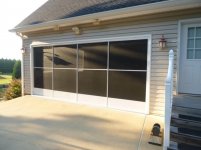
1. Decided that no matter how well organized, long handled lawn & garden implements are incompatible with the new & improved Craftsman space so got a Craftsman shed to hide all that stuff in. These little sheds fit nicely along the side of the house. One is good and two is even better.

2. Repainted the walls with Sherwin-Williams® ‎Duration Home® Interior Acrylic Latex Paint.
Duration Home® Interior Acrylic Latex paint, has excellent durability and washability for an active garage. It is ideal for high traffic areas like garages and most stains wipe clean with water. This paint goes on smoothly and quickly and offers excellent hide.

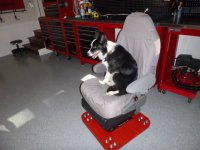
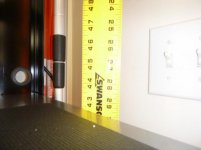
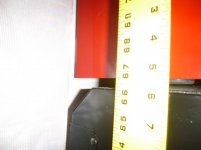
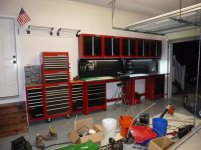
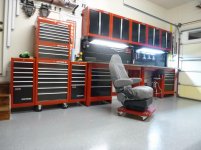
3. Refinished the floor with the Rust-Oleum EpoxyShield 2-gal. Gray High-Gloss 2-Part Epoxy Garage Floor Coating Kit. EpoxyShield offers one-coat coverage and outstanding durability. EpoxyShield, a high-performance coating, excels on the most demanding surfaces—garage floors.

However, I found the colors of the decretive flakes supplied with the Rust-Oleum kit to be offensive, particularly the aqua-blue flakes. So I picked up 4 bags of the BEHR Premium Metallic Blend Decorative Color Flakes.

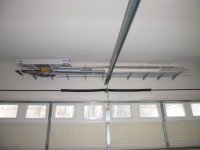
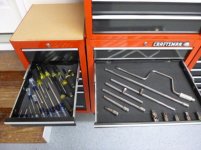
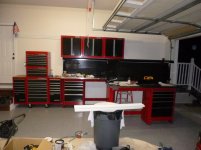
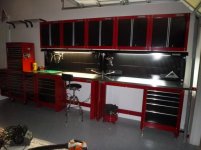
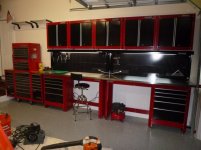
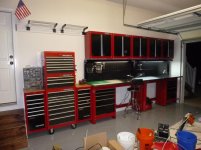
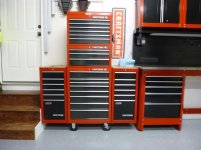
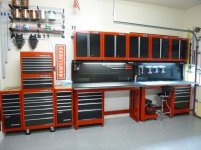
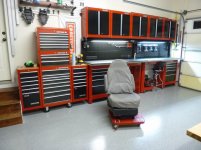
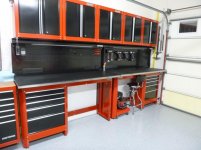
4. Reorganized the wall shelves so that the Craftsman tool storage unit and the Craftsman work benches could all fit along one wall.

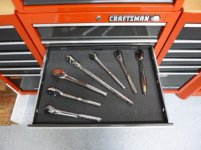
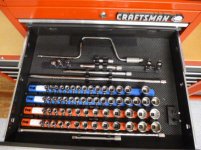
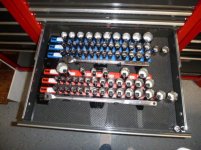
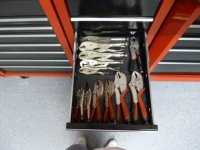
5. Purchased two Craftsman 6-foot workbenches, and mated them with stainless steel tops, black pegboard back-walls with lights, and drawer modules.

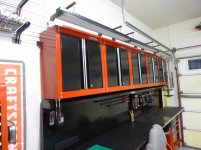
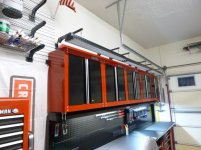
6. Purchased five Craftsman wall cabinets and mounted them over the workbench back-wall. I'm 6' tall so they are within easy reach.

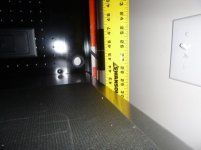
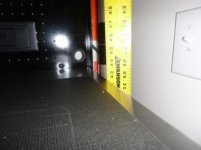
Was originally going to put the tool box between the workbenches but later decided to put the workbenches side-by-side. The toolbox and workbenches fit between the stairs and the garage door with only a 1/4" to spare.

More to come....
 
Last edited:
To avoid these ads, REGISTER NOW!
OP
R

radrush

Well-known member
Joined
Oct 30, 2010
Messages
828
Location
Atlanta, GA
Various random pics of garage transformation in-progress.
 

Attachments

  • P1010996 (1024x768).jpg
    P1010996 (1024x768).jpg
    80.9 KB · Views: 1,185
  • P1030006 (1024x768).jpg
    P1030006 (1024x768).jpg
    92.7 KB · Views: 1,197
  • P1030009 (1024x768).jpg
    P1030009 (1024x768).jpg
    84.6 KB · Views: 1,051
  • P1030010 (1024x768).jpg
    P1030010 (1024x768).jpg
    91 KB · Views: 977
  • P1030008 (1024x768).jpg
    P1030008 (1024x768).jpg
    89 KB · Views: 1,079
  • P1030011 (1024x768).jpg
    P1030011 (1024x768).jpg
    89.6 KB · Views: 988
  • P1030012 (1024x768).jpg
    P1030012 (1024x768).jpg
    94.3 KB · Views: 918
Last edited:
OP
R

radrush

Well-known member
Joined
Oct 30, 2010
Messages
828
Location
Atlanta, GA
Got a screen door for the garage. I love this thing. Had it shipped up here from FL. Installed it myself with no problems.

The screen is in 4 sections which simply side back-and-forth in tracks that are mounted to the slab on the bottom and the underside of door header above.

I got the screen from the guys listed below. (Update: website s apparently defunct.) Sent them my dimensions and the screens and tracks arrived in perfect condition in about two-weeks. I just had to screw the tracks and side panels in place, pop the screen sections into the tracks, screw on some accessories (handles/stops), and it was done.

Update: (5-17-15) I can not longer recommend this type of screen. The threshold & track that the screen slides back & forth in was crushed under the weight of the vehicles. It was a huge PITA fixing it and it's a huge PITA keeping it from being damaged. again. If had to do it over again, I'd figure out how to make a trackless screen work.

Cool-Breeze Home and Patio Products
http://coolbreezeproducts.com/produc...oor-screens-2/
Email: [email protected]
Phone: (941) 586-6147

Garage Slider Measuring video:

Garage Slider Installation video:
 

Attachments

  • P1030294 (1024x768).jpg
    P1030294 (1024x768).jpg
    75.6 KB · Views: 854
  • P1030293 (1024x768).jpg
    P1030293 (1024x768).jpg
    78.4 KB · Views: 903
  • P1030291 (1024x768).jpg
    P1030291 (1024x768).jpg
    84.8 KB · Views: 1,427
  • P1030290 (1024x768).jpg
    P1030290 (1024x768).jpg
    85.5 KB · Views: 1,029
  • P1030289 (1024x768).jpg
    P1030289 (1024x768).jpg
    95.4 KB · Views: 1,190
Last edited:
OP
R

radrush

Well-known member
Joined
Oct 30, 2010
Messages
828
Location
Atlanta, GA
Wife insist on keeping two of the captain's chairs from her Ford E350 SuperDuty van in "my" garage so I'm making mobile platforms for them so at least they will be useful.

I wonder how much trouble I'd get in if I spray painted the metal bases of those captains chairs red....
 

Attachments

  • P1040011 (1024x768).jpg
    P1040011 (1024x768).jpg
    85.9 KB · Views: 535
  • P1040010 (1024x768).jpg
    P1040010 (1024x768).jpg
    99.1 KB · Views: 676
  • P1040009 (1024x768).jpg
    P1040009 (1024x768).jpg
    89.4 KB · Views: 730
  • P1040008 (1024x768).jpg
    P1040008 (1024x768).jpg
    96.8 KB · Views: 3,772
  • P1040007 (1024x768).jpg
    P1040007 (1024x768).jpg
    100.3 KB · Views: 735
  • P1040006 (1024x768).jpg
    P1040006 (1024x768).jpg
    99.2 KB · Views: 907
Last edited:
OP
R

radrush

Well-known member
Joined
Oct 30, 2010
Messages
828
Location
Atlanta, GA
Was dissatisfied with the amount and quality of light at the workbench so I picked up some 4-foot 3-light fixtures at HD. I ran an additional row of Craftsman VersaTrack Trackwall along the top of the cabinets and fabricated some extensions for the shelf supports and hung the light fixtures from these.

HD had some aluminum square tubing that fit just perfectly in the shelf bracket. I simply cut the pieces to length, drilled two horizontal holes and one vertical hole and then spray painted the aluminum black.

Each of the light fixtures holds three 32-watt bulbs producing a lot of useful light. I don't use the light fixtures' pull-chains for on/off, but instead plugged them into one remote controlled three-way socket adapter.
 

Attachments

  • P1040052 (640x480).jpg
    P1040052 (640x480).jpg
    139.9 KB · Views: 462
  • P1040051 (640x480).jpg
    P1040051 (640x480).jpg
    134.3 KB · Views: 474
  • P1040050 (1024x768).jpg
    P1040050 (1024x768).jpg
    83.4 KB · Views: 504
  • P1040049 (1024x768).jpg
    P1040049 (1024x768).jpg
    52.6 KB · Views: 665
  • P1040048 (1024x768).jpg
    P1040048 (1024x768).jpg
    96.7 KB · Views: 507
  • P1040027 (1024x768).jpg
    P1040027 (1024x768).jpg
    90.7 KB · Views: 499
  • P1040026 (1024x768).jpg
    P1040026 (1024x768).jpg
    87.7 KB · Views: 488
Last edited:
OP
R

radrush

Well-known member
Joined
Oct 30, 2010
Messages
828
Location
Atlanta, GA
Wasn't happy with the visibility inside the toolbox so I picked up a 24" under-cabinet dimmable LED light fixture at HD. Didn't really need the dimming feature but this unt had a really high lumen output and that's what I wanted. Using some aluminum angle stock and some threaded rod that was laying around I fabricated and painted a little doohickey to hold the light fixture in place. On full bright this unit puts out 800+ lumens so visibility inside the drawers is no longer a problem.

Using some 2x2x1/8 aluminum angle and some threaded rod, I made this for my tool box.

I used this light fixture specifically because it's super-bright pumping out 812 lumens, and it's got full range dimming.

GE 24 in. Linkable LED Under Cabinet Light Fixture with Full Range Dimming
At HD - Model # 10449 Internet # 204663926 Store SKU # 1000024625

•8 non-replaceable LEDs
•24 in. fixture length
•812 Lumens
•Plug in and linkable

http://www.homedepot.com/p/GE-24-in...xture-with-Full-Range-Dimming-10449/204663926
 

Attachments

  • P1040157.JPG
    P1040157.JPG
    144 KB · Views: 533
  • P1040156.jpg
    P1040156.jpg
    35 KB · Views: 497
  • P1040155.jpg
    P1040155.jpg
    49.2 KB · Views: 389
  • P1040154.jpg
    P1040154.jpg
    51.5 KB · Views: 408
  • GE under cabinet LED light fixture3.jpg
    GE under cabinet LED light fixture3.jpg
    136.4 KB · Views: 356
  • GE under cabinet LED light fixture4.jpg
    GE under cabinet LED light fixture4.jpg
    75 KB · Views: 257
Last edited:
OP
R

radrush

Well-known member
Joined
Oct 30, 2010
Messages
828
Location
Atlanta, GA
Painted the garage door rails, brackets, and motor cover to match the Craftsman cabinets. Found a piece of black split tube to put the operator cables in.

Not sure why, but the wife doesn't seem to grasp either the importance or the urgency of this project.
 

Attachments

  • P1040163.JPG
    P1040163.JPG
    144.5 KB · Views: 536
  • P1040164.JPG
    P1040164.JPG
    143 KB · Views: 582
  • P1040165.JPG
    P1040165.JPG
    130.5 KB · Views: 515
Last edited:
OP
R

radrush

Well-known member
Joined
Oct 30, 2010
Messages
828
Location
Atlanta, GA
Pretty awesome. What is the main benefit of the screen door? Bugs?

Since the panels slide back and forth 25% of the opening is always covered. If one needed, for some reason, to use the entire opening at once the screen panels could be easily removed.

without screen = bugs

with screen = no bugs - life is good

This screen is fantastic at keeping the garage bug free. As a side benefit, it also keeps the field mice out.

Update: (5-17-15) I can not longer recommend this type of screen. The threshold & track that the screen slides back & forth in was crushed under the weight of the vehicles. It was huge PITA fixing it and it's a huge PITA keeping it from being damaged. again. If had to do it over again, I'd figure out how to make a trackless screen work.
 
Last edited:
OP
R

radrush

Well-known member
Joined
Oct 30, 2010
Messages
828
Location
Atlanta, GA
Fantastic looking set up.

I've been looking at those Craftsman work benches for my garage.

What do you think of them?


Never use any Goof Off product on any of the Craftsman painted steel products as this will not only remove both the label/sticker and the paint This will surely make you very :sad:. I only use WD-40 for sticker/label removal.

What do I think of the benches? They are very sturdy and look great. The stainless steal tops are HEAVY and super tough. I keep each of my stainless steel tops covered and protected with a 1/2" piece of that military grade tool foam.

The back-board has a hood with two 32-watt 4' bulbs and a pegboard. I was pretty sure that peg-board was from a device sent from hell by Satan himself to mess with us until I found Talon pegboard hooks at http://www.talonhooks.com/ Even with the Talon hooks, I'm still not a pegboard guy; I like nearly everything to be put away in the drawers and/or the cabinets.

The addition of the back-board to the workbench frame pushes the stainless steel top (or whatever top) out front several additional inches because the top can no longer be centered front-to-back on the bench frame. If the home of your favorite thingamabob or whatever is in the top drawer this cold be a pain.

In my opinion the drawer modules on the workbench are not cut out for holding actual "tools". If I didn't already have a toolbox I'd be disappointed with these drawers. Just no way these drawers/slides are as tough as the ones on the toolbox. I use the drawer modules for storage of light weight stuff that is infrequently used. If the shelf modules had an option for double doors instead of a single door I'd probably have gotten shelf modules.

I read many reviews of this equipment before buying and geeezzz, some of them just got it wrong. Like all things made of sheet metal, it's a little flimsy until you get it together so you have to be careful with it. There were lots of negative reviews about the cabinets being out of square and/or the doors not working properly. Dang, even my little sister could tell you to assemble the cabinet, place it on the counter top, place a framing square on the top corner of the cabinet, adjust nuts/bolts until square and voilà the doors/locks work perfectly.

If you hang the cabinets from VersaTrack Trackwall you need to pay attention to where you place the connectors. I discovered that the hanger on the back of the cabinet isn't 100% compatible with the VersaTrack Trackwall connector; however, a certain amount of persuasion and finesse was applied and a suitable mating was eventually effected.
 
Last edited:

kfainf

Well-known member
Joined
Jul 28, 2007
Messages
300
Looks great! I am partial to the Craftsman red and black color scheme myself.:rocker:
 
OP
R

radrush

Well-known member
Joined
Oct 30, 2010
Messages
828
Location
Atlanta, GA
Built a matching rolling platform out of some scrap wood for the air compressor.

And the mechanic's stool was a must have for the repurposed Captain's chair as I think it has great potential as a foot stool.
 

Attachments

  • P1040170.JPG
    P1040170.JPG
    138 KB · Views: 332
  • P1040167.JPG
    P1040167.JPG
    144.5 KB · Views: 312
  • P1040166.JPG
    P1040166.JPG
    143.5 KB · Views: 348
Last edited:
OP
R

radrush

Well-known member
Joined
Oct 30, 2010
Messages
828
Location
Atlanta, GA
Who makes those sheds you have?

Who makes them as in who manufactures them? Not sure on that.

Picked up the sheds at Sears; they are badged Craftsman.

The smaller of the two sheds I placed on an existing concrete pad. It was a breeze to snap it together and just place on the concrete slab.

The larger of the two was on the gravel area and that was a problem. Just no way to get the gravel level enough to make the doors open/close properly. So off to HD to get some PT lumber and spent a Saturday afternoon making a 4'x10' deck to place it on. They work great for their intended purpose.
 

Attachments

  • craftsman logo art 8.jpg
    craftsman logo art 8.jpg
    33.7 KB · Views: 83
  • craftsman_12dr_breaker_h_circle_logo_w450.jpg
    craftsman_12dr_breaker_h_circle_logo_w450.jpg
    10.7 KB · Views: 84
  • craftsman logo art 7.jpg
    craftsman logo art 7.jpg
    47.5 KB · Views: 78
  • craftsman logo art 6.jpg
    craftsman logo art 6.jpg
    87.2 KB · Views: 82
  • craftsman logo art 5.jpg
    craftsman logo art 5.jpg
    19.6 KB · Views: 78
  • craftsman logo art 4.jpg
    craftsman logo art 4.jpg
    31.2 KB · Views: 83
Last edited:

aps63

Well-known member
Joined
Dec 3, 2012
Messages
371
Location
New Jersey
Awesome job on your Craftsman garage. I have the same stainless steel workbenches. I love them too. Great job on the lighting, better to have too much light than not enough.
 
To avoid these ads, REGISTER NOW!

1clean4runner

Well-known member
Joined
Feb 17, 2012
Messages
117
Well obviously I like this one! :)

Looks great. Clever idea for hanging those shop lights!

I also really the screen door and the side-hang-on tool chests.

What's next?!
 

USAF_TRobertson

New member
Joined
May 5, 2012
Messages
4
Hey just wanted to say your garage looks great. I am doing the exact same thing only on a bit smaller scale (only one workbench). Would you mind taking a measurement to let me know how high off the floor the backwall sits while installed on the work bench? I am not putting together all my stuff until I do the floors this spring but wanted to hang some versatrack and the wall mounted cabinets. If you wouldn't mind also measuring how high off the floor your versa track is (to the top of the track from the floor) I would really appreciate it!! Looks like you got it perfect as your cabinet sits just off the top of the backwall.
 

taumac

Well-known member
Joined
Aug 30, 2011
Messages
8,104
Location
Brooksville, Fl
Great place and attention to detail. Its funny more ppl don't have those screens. There are so common in Fl wonder why don't offer in other states. Keep up the good work.
 

larry4406

Well-known member
Joined
Jan 27, 2006
Messages
18,966
Location
Northern Virginia
Nice garage.

Using the link provided, I watched the install video on the garage screen door and observed the bottom track is anchored to the concrete. Is the bottom track rated for vehicle drive over? The "fins" of the track look like they would bend over.
 

kfainf

Well-known member
Joined
Jul 28, 2007
Messages
300
What paint did you use on the tool box light mount? It looks like a perfect match for the Craftsman red.
 
OP
R

radrush

Well-known member
Joined
Oct 30, 2010
Messages
828
Location
Atlanta, GA
Nice garage.

Using the link provided, I watched the install video on the garage screen door and observed the bottom track is anchored to the concrete. Is the bottom track rated for vehicle drive over? The "fins" of the track look like they would bend over.

Yes it is rated for vehicle traffic. We drive Ford E350 super-duty van and a 4x4 Chevy Tahoe in/out with no problems.

What they may not show in the install vid is that two aluminum ramps (one for each side of the bottom track) are also provided. So the truck tires don't really ride on the fins from the side.

After a year of use update: (5-17-15) I can not longer recommend this type of screen. The threshold & track that the screen slides back & forth in was crushed under the weight of the vehicles. It was huge PITA fixing it and it's a huge PITA keeping it from being damaged. again. If had to do it over again, I'd figure out how to make a trackless screen work.

If your floor is not level in the doorway install of these ramps can be a hassle. My bottom track and inside ramp are mounted on the garage floor but the outside ramp is (will be) on the driveway and it's a little sloped at one end. I have some non-shirk grout and some bonding agent but it's been too cold to finish it up. In the meantime I'm using a piece of 1x4 as a ramp.
 
Last edited:
OP
R

radrush

Well-known member
Joined
Oct 30, 2010
Messages
828
Location
Atlanta, GA
What paint did you use on the tool box light mount? It looks like a perfect match for the Craftsman red.

Rust-oleum Protective Enamel Spray
Sunrise Red 7762830 - Spray
 

Attachments

  • SRGpsSrdSpL.jpg
    SRGpsSrdSpL.jpg
    25.5 KB · Views: 106
Last edited:
OP
R

radrush

Well-known member
Joined
Oct 30, 2010
Messages
828
Location
Atlanta, GA
Here's my garage dog. The floor is apparently too cold for Liberty so she is taking over my newly repurposed captain's chair. That reminds me that I need to move that chair a couple inches to the right and a couple inches forward on the platform.

When it's raining she likes to run on one of the electric treadmills or on one of the slat-mills. Yesterday she ran 4.75 miles in 65 minutes. All 5 of y dogs are trained to run on the mills.

I built the slat-mills.
 

Attachments

  • P1040216.jpg
    P1040216.jpg
    28.4 KB · Views: 321
  • P1040220.JPG
    P1040220.JPG
    142.5 KB · Views: 271
  • P1040228.JPG
    P1040228.JPG
    138 KB · Views: 280
  • P1040217.JPG
    P1040217.JPG
    139.5 KB · Views: 388
  • P1040218.JPG
    P1040218.JPG
    142 KB · Views: 430
  • P1040227.jpg
    P1040227.jpg
    48.5 KB · Views: 311
  • P1040219.JPG
    P1040219.JPG
    143 KB · Views: 345
Last edited:
OP
R

radrush

Well-known member
Joined
Oct 30, 2010
Messages
828
Location
Atlanta, GA
Finished up painting the garage door rails to match the theme. Painted them outside and hung them up inside to dry overnight.

Also finished up some high storage over the garage door. If it ever warms up I need to paint that trim board above the door.

Going to make a couple of additional ceiling hung storage racks to park a number empty airline type dog kennels. And still need to cut that last piece of red tool-foam up for the work bench drawers.
 

Attachments

  • P1040226.JPG
    P1040226.JPG
    144 KB · Views: 247
  • P1040222.JPG
    P1040222.JPG
    145.5 KB · Views: 303
  • P1040223.JPG
    P1040223.JPG
    137.5 KB · Views: 302
  • P1040224.JPG
    P1040224.JPG
    143 KB · Views: 287
Last edited:
OP
R

radrush

Well-known member
Joined
Oct 30, 2010
Messages
828
Location
Atlanta, GA
Some tool drawers shots...


I've collected up a number of Craftsman chrome sockets:
 

Attachments

  • P1040073.jpg
    P1040073.jpg
    54.2 KB · Views: 283
  • P1040079.jpg
    P1040079.jpg
    51.4 KB · Views: 258
  • P1040078.jpg
    P1040078.jpg
    53.8 KB · Views: 267
  • P1040076.jpg
    P1040076.jpg
    56.8 KB · Views: 280
  • P1040074.jpg
    P1040074.jpg
    54.7 KB · Views: 282
  • P1040075.jpg
    P1040075.jpg
    48.4 KB · Views: 282
Last edited:
OP
R

radrush

Well-known member
Joined
Oct 30, 2010
Messages
828
Location
Atlanta, GA
A couple more tool shots...

Got a few Klein and Knipex tools infiltrating the Craftsman space. Wish I had acquired the Craftsman professional pliers back when they were available.
 

Attachments

  • P1040081.jpg
    P1040081.jpg
    50.8 KB · Views: 225
  • P1040083.jpg
    P1040083.jpg
    49.6 KB · Views: 178
  • P1040087.jpg
    P1040087.jpg
    61 KB · Views: 200
  • P1040090.jpg
    P1040090.jpg
    58.1 KB · Views: 192
  • P1040082.JPG
    P1040082.JPG
    142 KB · Views: 194
Last edited:
OP
R

radrush

Well-known member
Joined
Oct 30, 2010
Messages
828
Location
Atlanta, GA
Hey just wanted to say your garage looks great. I am doing the exact same thing only on a bit smaller scale (only one workbench). Would you mind taking a measurement to let me know how high off the floor the backwall sits while installed on the work bench? I am not putting together all my stuff until I do the floors this spring but wanted to hang some VersaTrack and the wall mounted cabinets. If you wouldn't mind also measuring how high off the floor your VersaTrack is (to the top of the track from the floor) I would really appreciate it!! Looks like you got it perfect as your cabinet sits just off the top of the backwall.

That was tricky. From the high end got 91" from floor to bottom of VersaTrack that the cabinets are hanging on. The work-bench on the high end (left end)has the leg levelers screwed all the way up. I advise NOT to mount the VersaTrack without first having assembled the work-bench with back-wall, leveled the table, and then test fit.

Reasons:
1. Residential concrete floors can be wildly out-of-level. (Frickin' concrete finishers :mad:) Mine appears to be more than 1" out of level in the 12' run of the table. So if I had measured up from the floor to place the VersaTrack and I had picked the low end to measure from I would have been screwed.

You could use a laser and yard-stick to figure out your floor's levelness and measure up 91" from the highest end.

2. The lights are attached to the underside of the back-wall hood with tiny acorn nuts that stick up about 1/4".
 

Attachments

  • P1040242.jpg
    P1040242.jpg
    29.9 KB · Views: 98
  • P1040243.jpg
    P1040243.jpg
    29.1 KB · Views: 94
  • P1040240.jpg
    P1040240.jpg
    28.8 KB · Views: 103
  • P1040239.jpg
    P1040239.jpg
    28.9 KB · Views: 104
  • P1040236.jpg
    P1040236.jpg
    29.1 KB · Views: 112
  • P1040235.jpg
    P1040235.jpg
    25.6 KB · Views: 118
  • P1040244.jpg
    P1040244.jpg
    22 KB · Views: 118
Last edited:

metal1313

Well-known member
Joined
Apr 28, 2009
Messages
3,416
Location
clinton NJ
any more info on the slat mill? i think it would be good for my guys and a family members beagle/boxer mix who needs more time to run than he'll ever get with them
 
OP
R

radrush

Well-known member
Joined
Oct 30, 2010
Messages
828
Location
Atlanta, GA
K
any more info on the slat mill? i think it would be good for my guys and a family members beagle/boxer mix who needs more time to run than he'll ever get with them

There are some guys around that manufacture slat-mills. They mostly work at or own welding shops, they own pit-bulls, and they build on their own schedule.

I built 6 and sold off 4 to various friends. Getting all those wood slats to go in the same direction in a perfect line was tough. I screwed the wood slats to rubber belts that have a V-guide on the back. I built a full length jig to lay out the belts and slats in.

Don't waste your time effort on a carpet-mill.

We have this place called Play It Again Sports in town where used/discontinued sports equipment is sold. This is good place to get electric treadmills. Just look for the longest human treadmill you can find.

Jog-A-Dog makes treadmills specifically for dogs but the last I read they don't have any electronics for time/distance etc. The Jog-A-Dog faces uphill and I don't prefer this.

I heard that slat-mills were illegal in CA, but I'm not sure how what amounts to short conveyor belt can be illegal.
 
Last edited:
OP
R

radrush

Well-known member
Joined
Oct 30, 2010
Messages
828
Location
Atlanta, GA
Great place and attention to detail. Its funny more ppl don't have those screens. There are so common in Fl wonder why don't offer in other states. Keep up the good work.

They are in fact so common in FL that you can get one installed in under 24-hours. I called all over Atlanta and NO ONE could/would do it. So those guys in FL made one and shipped it up.
 
Last edited:
To avoid these ads, REGISTER NOW!
Top Bottom